-
Method 1: Using OpenStack Horizon
-
Method 2: Using OpenStackClient
-
Method 3: OpenStack Agentless Backup Solution
-
Takeaway
OpenStack is an open-source cloud computing platform that pools resources to be deployed as IaaS in public and private clouds. It is managed by the Open Infrastructure Foundation.
Over 500 companies had joined the project and among them were NASA, Oracle, HP, UK’s Government Digital Service, and more.
Creating a copy of data for recovery in case of disasters or failures is not only important but indispensable. The backup of OpenStack instances and volumes is no exception. In this post, I’ll introduce 3 methods to backup OpenStack.
Method 1: Using OpenStack Horizon
Create OpenStack Instance Backups
1. Start OpenStack Horizon, go to Project> Compute> Instances to select the target instance.
2. Click Create Snapshot.
3. Navigate to Project> Compute> Images to find the snapshot.
Create OpenStack Volume Backups
1. Start OpenStack Horizon, go to Project> Volumes> Volumes to choose the volume that you want to backup.
2. From the drop down on the right, click Create Backup.
3. Enter required information like Backup Name for the backup job in the window.
4. Navigate to Project> Volumes> Backups to locate the backups. In the Status column, they are Available.
Method 2: Using OpenStackClient
The method for creating a backup will depend on how the instance was launched. You must back up the volume if the instance is volume-backed. If the instance is image-backed, you can backup the instance by itself, which will produce an image backup.
Volume-Backed Instance Snapshots
1. List volumes.
$ openstack volume list
ID | Name | Status | Size | Attached to |
|associated-volume-1 | | in-use | x | Attached to xxxx on /dev/vda
|associated-volume-2| | in-use | x | Attached to xxxx on /dev/vda
2. Create backup of the volume. Note that the backup id will then be applied to ascertain the backup status.
$ openstack volume backup create associated-volume-1 --force
| Field | Value |
| id | xxxxxxxx|
| name| None |
3. Check the backup status.
$ openstack volume backup show the-actual-UUID-of-the-volume-backup
| Field | Value |
| availability_zone | None |
| container | backups |
| created_at | 2022-12-19T10:33:50.000000 |
| data_timestamp | 2022-12-19T10:33:50.000000 |
| description | None |
| fail_reason | None |
| has_dependent_backups | False |
| id | xxxx |
| is_incremental | False|
| name | None|
| object_count | 0|
| size |x |
| snapshot_id | None |
| status| available|
| updated_at | 2022-12-19T10:33:50.000000|
| volume_id | xxxxxxxx|
Image-Backed Instance Snapshots
1. List instances to get the UUID.
$ openstack server list
| ID | Name | Status | Networks Image| Flavor |
| xxxx| image-backed | ACTIVE | network-1=xxx.xxx.x.xxx | CentOS x Stream (el8-x86_64) | c1.micro |
2. Create a backup of the instance.
$ openstack server backup create image-backed
|Field | Value |
|container_format |bare|
|created_at |2022-12-19T11:35:50|
|disk_format |qcow2|
|file | /v2/images/xxxx/file|
|id | xxxxxxx|
|min_disk |xx |
|min_ram |0 |
|name | image-backed |
3. Confirm the backup status.
$ openstack volume backup show the-actual-UUID-of-the-backup --fit-width
| Field | Value |
| container_format| bare |
| created_at | 2022-12-19T12:03:56.000000 |
disk_format | raw |
|file | /v2/images/xxxxxxx/file |
|id | xxxxxxxx|
|min_disk |x |
|min_ram |0 |
|name | image-backed |
|owner |xxxxxxxxxx |
|properties | [truncated] |
|protected |False |
|schema /v2/schemas/image |
|size | xxxxxxx|
|status | active |
|tags|
|updated_at 2022-12-19T13:03:45Z|
| visibility | private
Create OpenStack Volume Backups
1. List current volumes.
$ openstack volume list
| ID | Name | Status |Size | Attached to |
|xxxxx | xxxxx | available | xx | |
|xxxxx | xxxxx | in-use | xx | Attached to instance-x-volume on /dev/vda |
2. Create a volume backup of the volume.
$ openstack volume backup create xxxxx
| Field | Value |
| id | xxxxxxxxxx|
| name | None |
3. Confirm volume backup status.
$ openstack volume backup list
| ID | Name | Description | Status | Size |
| xxxxx| None | None | available | x |
Method 3: OpenStack Agentless Backup Solution
You can also use an agentless OpenStack backup solution for complete and safe data backup and recovery. Vinchin Backup & Recovery is a professional VM and database backup software that delivers services for 10+ virtualizations (VMware, Xen, Hyper-V, oVirt, OpenStack, etc.), NAS, physical servers, and 6 databases (Oracle Database, MySQL, SQL Server, PostgreSQL, Postgres Pro, and MariaDB).

With the solution, you can get features as follows:
Automatic backup: free up labor by automating backup under repeated schedules and email notifications for job status.
Fast backup technologies: unique SpeedKit (CBT alternative)-enabled incremental backup and multithread lines for a single task boot backup speed tremendously.
Cross-platform V2V migration: move OpenStack instances to another host or vice versa across 10+ platforms (like VMware to OpenStack) effortlessly without extra tools or agents.
Anti-ransomware protection: secure all backups and the Vinchin backup server with backup storage protection that rejects any unauthorized visit attempts, and besides that, you can encrypt your backups that demand a password for data recovery.
More insurance: send an offsite backup copy to another location or archive backups to public clouds for safety.
60-day full-featured free trial of the Enterprise version: you can get a free trial now to test these features.
Here’s the OpenStack backup process with Vinchin Backup & Recovery:
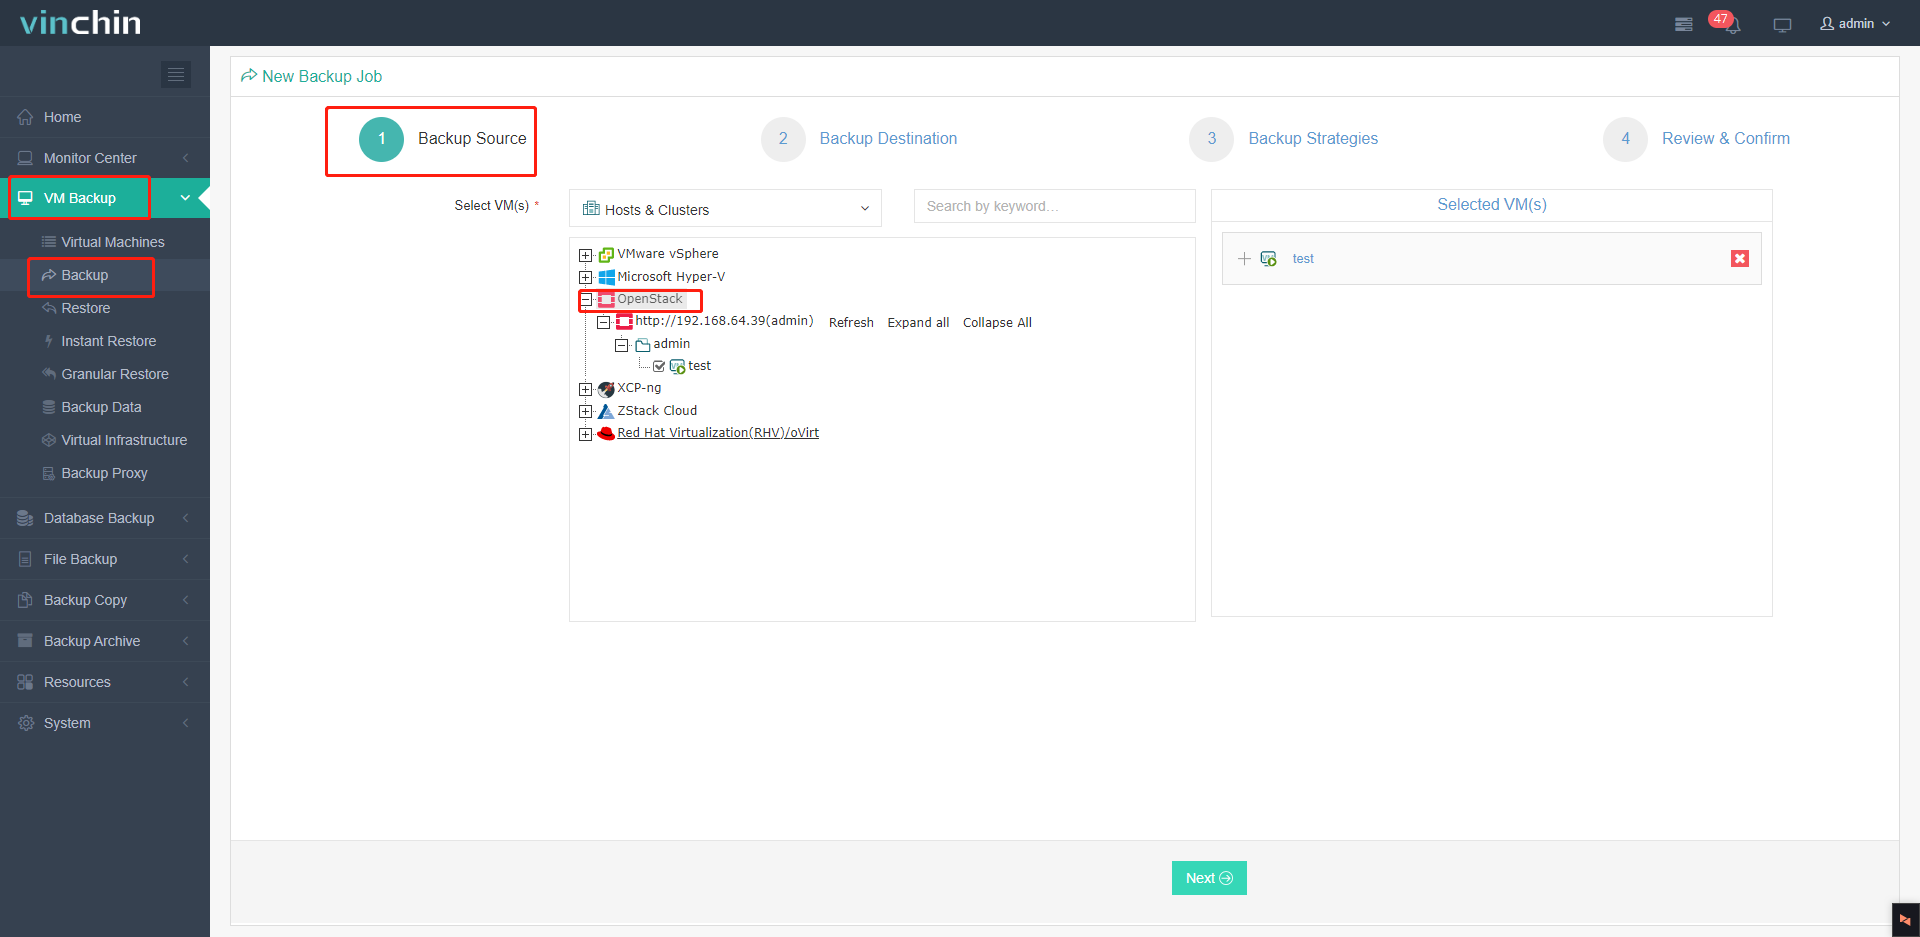
1. Navigate to VM Backup> Backup, and expand the OpenStack instances under Hosts & Clusters to choose the backup resource.
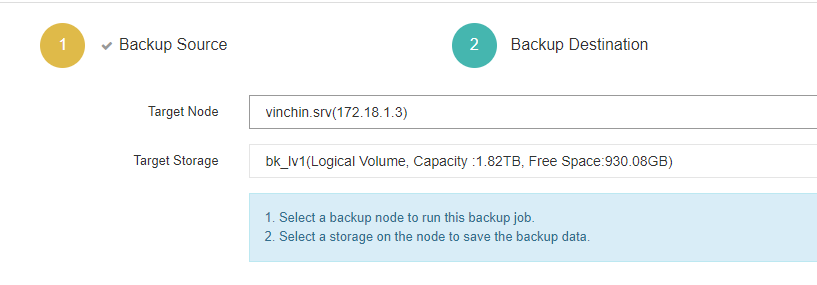
2. Specify the target node and storage for the backup.
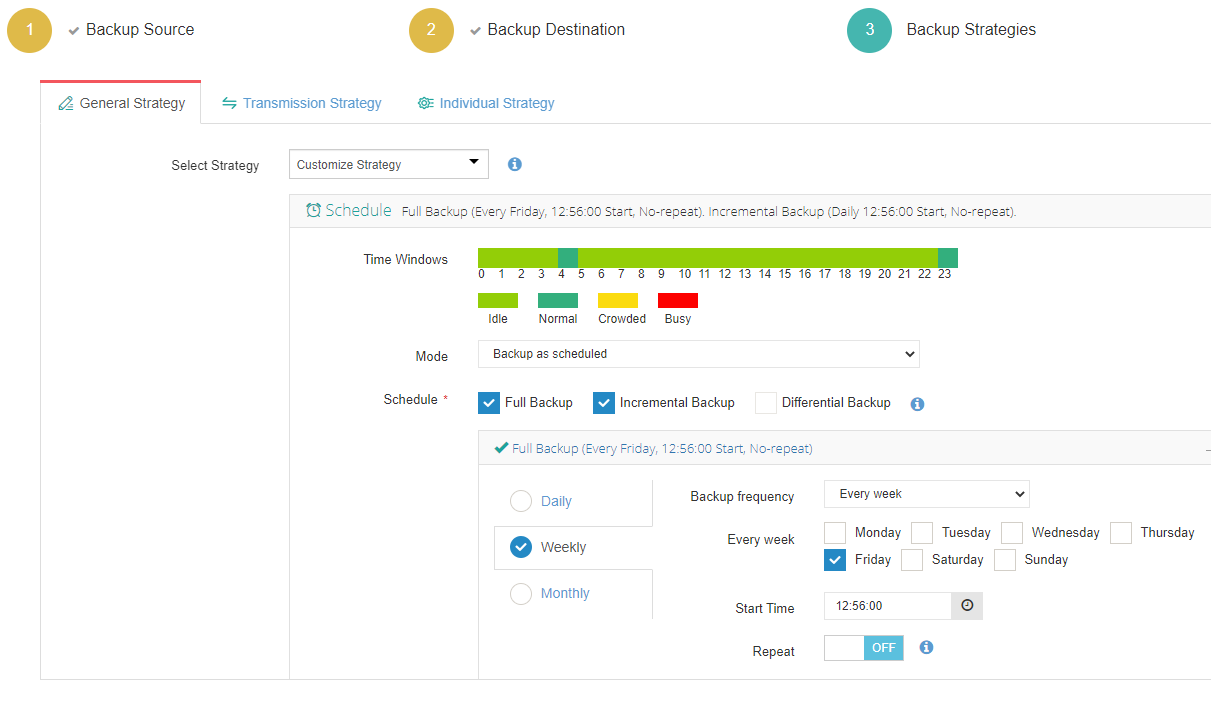
3. Configure backup strategies.
General Strategy:
Schedule: choose either Backup as Scheduled or Once-off Backup, and select the backup types and schedules.
Speed Controller: put a limit on the speed for less impact on the bandwidth.
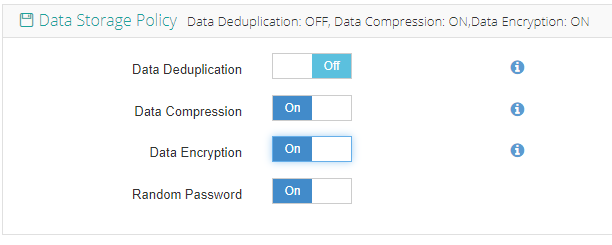
Data Storage Policy: cut down at least 50% of the data size here and enable data encryption.
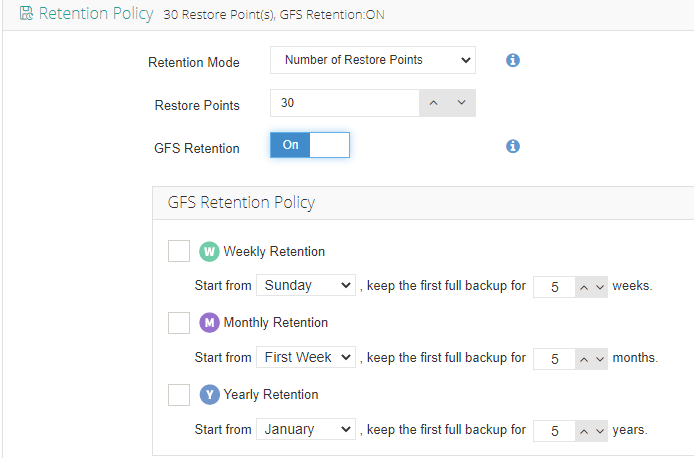
Retention Policy: keep data per day/restore points or under the GFS (Grand-Father-Son) policy.
Advanced Strategy: select snapshot types and add multithreaded lines here for efficiency. Further reduce data size with BitDetector excludes swap files, partition gaps, etc.

Transmission Strategy: Transfer via LAN/SAN/Backup Proxy based on your needs.

Individual Strategy: enable SpeedKit here for speedy incremental backup.

Lastly, review all settings and Submit.
Takeaway
You can backup OpenStack instances and volumes via OpenStack Horizon, OpenStackClient, or the next-generation backup software Vinchin Backup & Recovery with more advanced functions.
Share on:


