-
Method 1: Connecting via SSH (Using OpenSSH Client)
-
Method 2: Using PuTTY
-
Method 3: Using AWS Systems Manager Session Manager
-
AWS EC2 Instance connection FAQs
-
Conclusion
Amazon EC2 is a core service provided by AWS, enabling users to rent virtual computers on which to run their applications. Connecting to your EC2 instances is a crucial step in managing and deploying applications or services. This blog will walk you through the detailed process of connecting to an AWS EC2 instance from a Windows Command Prompt.
Method 1: Connecting via SSH (Using OpenSSH Client)
Prerequisites:
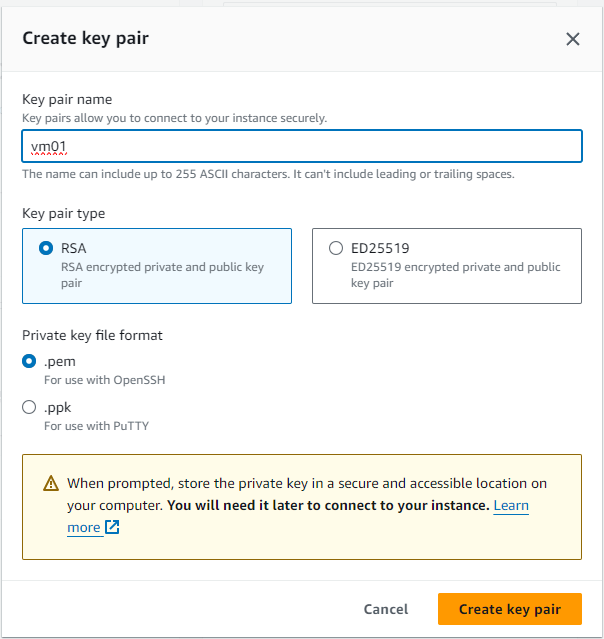
You have created an EC2 instance and downloaded the key file (.pem file).
Windows 10 or later (as Windows 10 includes an OpenSSH client).
Steps:
1. Download the Key File:
When creating an EC2 instance, you generate a key pair (.pem file). Download and save this key file in a secure location, e.g., “C:\Users\YourUsername\Downloads\my-key.pem”.

2. Set Key File Permissions:
Open Command Prompt (CMD). Press Win + R, type cmd, and press Enter.
Run the following commands to set the key file permissions to read-only (replace the path with your .pem file path):
icacls C:\Users\YourUsername\Downloads\my-key.pem /inheritance:r
icacls C:\Users\YourUsername\Downloads\my-key.pem /grant:r "%username%:R"
3. Get the Instance's Public DNS:
Log in to the AWS Management Console and Navigate to the “EC2 Dashboard” and select your instance.
In the instance description page, find the Public IPv4 DNS. Copy this value.
4. Connect to the EC2 Instance:
In CMD, run the following command (replace “my-key.pem” with your key file name, “ec2-user” with your instance username (e.g., “ec2-user” for Amazon Linux, “ubuntu” for Ubuntu), and “your-instance-public-dns” with your instance’s public DNS):
ssh -i C:\Users\YourUsername\Downloads\my-key.pem ec2-user@your-instance-public-dns
If prompted to continue connecting, type yes and press Enter.

Method 2: Using PuTTY
Prerequisites:
You have created an EC2 instance and downloaded the key file (.pem file).
PuTTY and PuTTYgen are installed.
Steps:
1. Download and Install PuTTY and PuTTYgen:
Visit the PuTTY website to download and install PuTTY and PuTTYgen.
2. Convert .pem File to .ppk File:
Open PuTTYgen. Click the Load button and select your .pem file.

After successfully loading the file, click the Save private key button. When prompted about not using a passphrase, click Yes.
Save the key as a .ppk file, e.g., “my-key.ppk”.
3. Get the Instance's Public DNS and Copy this value.
4. Connect to the EC2 Instance Using PuTTY:
Open PuTTY. In the Host Name (or IP address) field, enter your instance’s public DNS, e.g., “ec2-xx-xx-xx-xx.compute-1.amazonaws.com”.
Ensure Connection type is set to SSH.
In the left menu, expand SSH and select Auth > Credentials.
In the Private key file for authentication field, click Browse and select your .ppk file.
Return to the Session category and click the Open button.
If a security alert dialog box appears, click Yes.
Upon successful connection, you will see the command prompt, indicating that you have connected to the EC2 instance.
Method 3: Using AWS Systems Manager Session Manager
Prerequisites:
Your EC2 instance has the SSM Agent installed and registered with AWS Systems Manager.
You have the appropriate IAM role and permissions.
AWS CLI is installed.
Steps:
1. Install AWS CLI:
Visit the AWS CLI download page to download and install the AWS CLI for Windows.
2. Configure AWS CLI:
Open CMD and run the following command and enter your AWS Access Key ID, Secret Access Key, default region name, and default output format to connect to your EC2 server:
aws configure
3. Get the Instance ID and copy this value.
4. Start a Session Manager Session:
In CMD, run the following command (replace “instance-id” with your EC2 instance ID):
aws ssm start-session --target instance-id
Upon successful connection, you will enter an interactive shell, indicating that you have connected to the EC2 instance.
AWS EC2 Instance connection FAQs
1. Q: What if I forgot to assign a key pair during EC2 instance creation?
A: You'll need to create a new key pair, update the instance’s key pair settings in the AWS Management Console, and then restart the instance.
2. Q: How do I connect to a Windows EC2 instance?
A: Use Remote Desktop Protocol (RDP). Download the RDP file from the EC2 instance console, open it with the Remote Desktop client, and log in with the instance's username and password.
Conclusion
Connecting to an AWS EC2 instance from a Windows machine is a straightforward process once you’ve set up the necessary tools and configurations. Whether you opt for PuTTY’s graphical interface or leverage the built-in OpenSSH capabilities of newer Windows versions, the steps outlined above will guide you through establishing a secure connection to manage and interact with your EC2 instances seamlessly. Remember to follow best security practices to safeguard your AWS resources.
Vinchin Backup & Recovery will soon expand its powerful functions to the Amazon EC2 platform to provide solid protection for cloud instances. You can contact us for the latest news.
Share on:


