-
Why need auto-backup?
-
How to schedule a backup using the Proxmox web interface?
-
How to schedule a backup using the command line?
-
How to schedule backups with Vinchin Backup & Recovery?
-
Proxmox auto backup FAQs
-
Conclusion
In Proxmox VE, backup jobs can be scheduled so that they are executed automatically on specific days and times. To set up a scheduled backup in Proxmox, you can use the web interface, which is the most common method, or you can set it up via the command line.
Why need auto-backup?
Auto backup is a critical process that ensures data security by automatically saving copies of files, databases, or entire systems at regular intervals. This practice guards against data loss due to hardware failures, software malfunctions, accidental deletions, cyber attacks, or catastrophic events. By having auto backups, users and organizations can quickly recover important information, maintain business continuity, and reduce the risk of significant downtime or data-related crises. The automation aspect removes the reliance on human intervention, which can be prone to error or neglect, and ensures that backups are performed consistently and reliably.
How to schedule a backup using the Proxmox web interface?
1. Access Proxmox Web Interface > Select the Datacenter > Backup > Click on "Add" to create a new backup job.

A new window will appear where you can configure the backup job.
2. Configure the backup job.
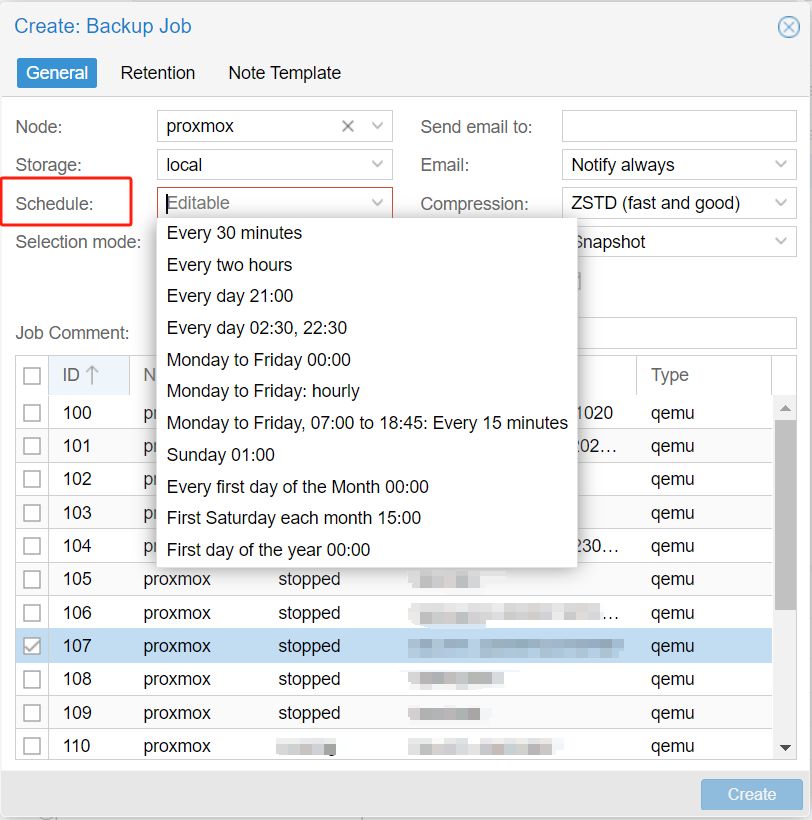
Node: Select the node where the VMs or containers you want to back up are located.
Storage: Choose the storage where the backup files will be saved.
Schedule: Define the schedule for the backup job. You can choose to backup from every minutes, hours to every month or even every year.
VMs/CTs: Select the VMs or containers you wish to include in the backup job.
Mode: Choose the backup mode (snapshot, suspend, or stop).
Compression: Select the compression algorithm (gzip, lzo, zstd, etc.).
Email notification: If you want to receive an email notification after the backup job completes, enter your email address here.
3. Save the backup job.
Once you have configured all the settings, click “Create” to save the backup job.
4. Verify the backup job.
The new backup job will now be listed under the “Backup” tab.
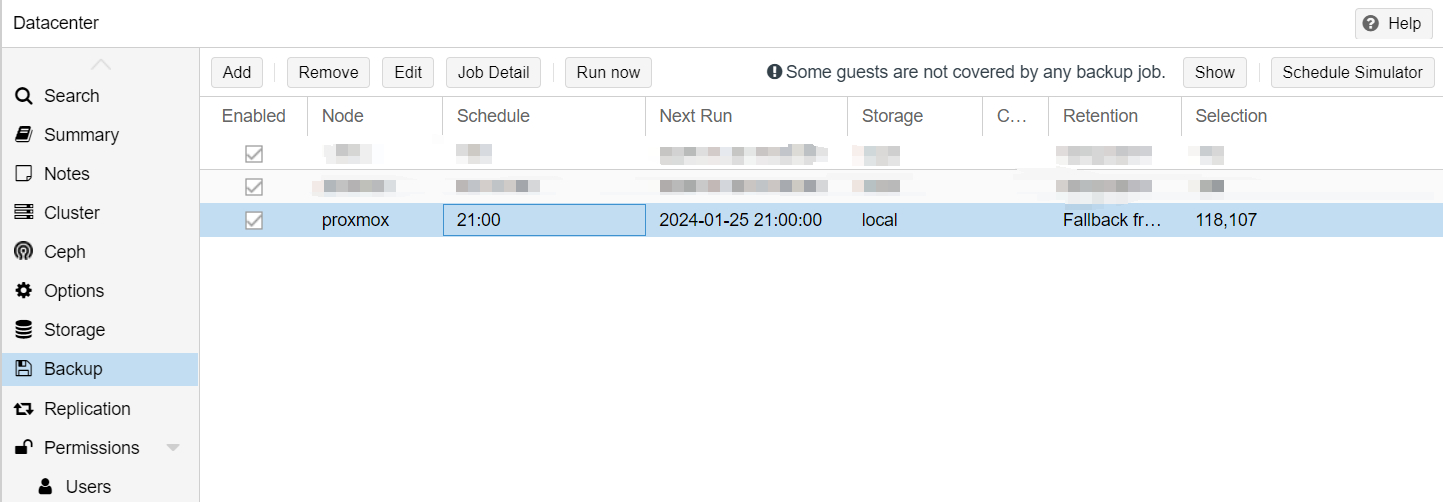
You can edit or remove the job anytime by selecting it and clicking “Edit” or “Remove”.
How to schedule a backup using the command line?
Proxmox VE uses the vzdump tool to perform backup tasks. You can automate the backup process by creating a cron job.
1. Determine backup parameters
First, you need to determine the ID of the virtual machine or container you want to back up, the backup mode, storage location, backup frequency, etc.
2. Create a backup task
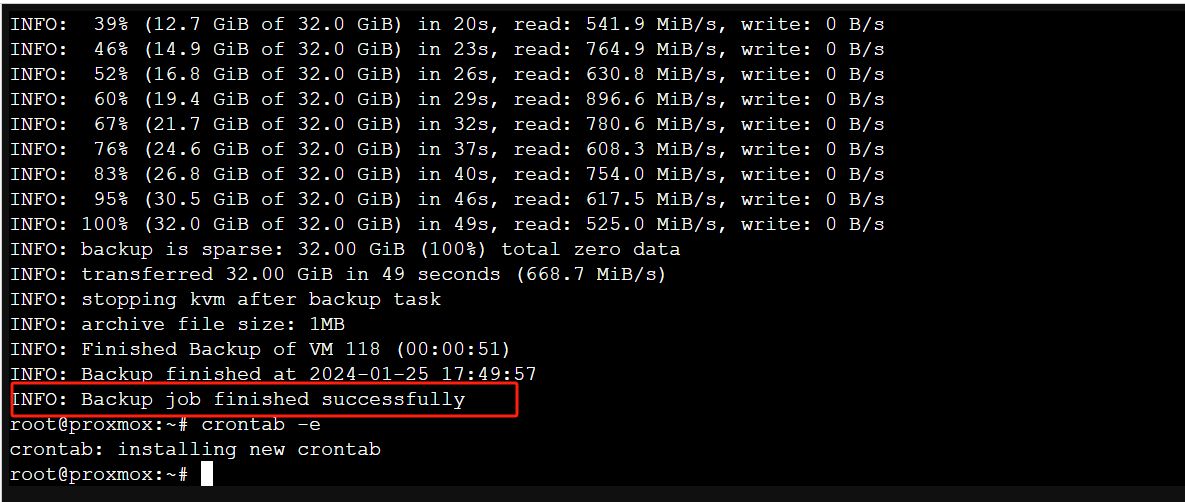
Use the vzdump command to create a backup task. For example, to back up a task with VM/CT ID 118:
vzdump 118 --storage local --mode snapshot --compress zstd
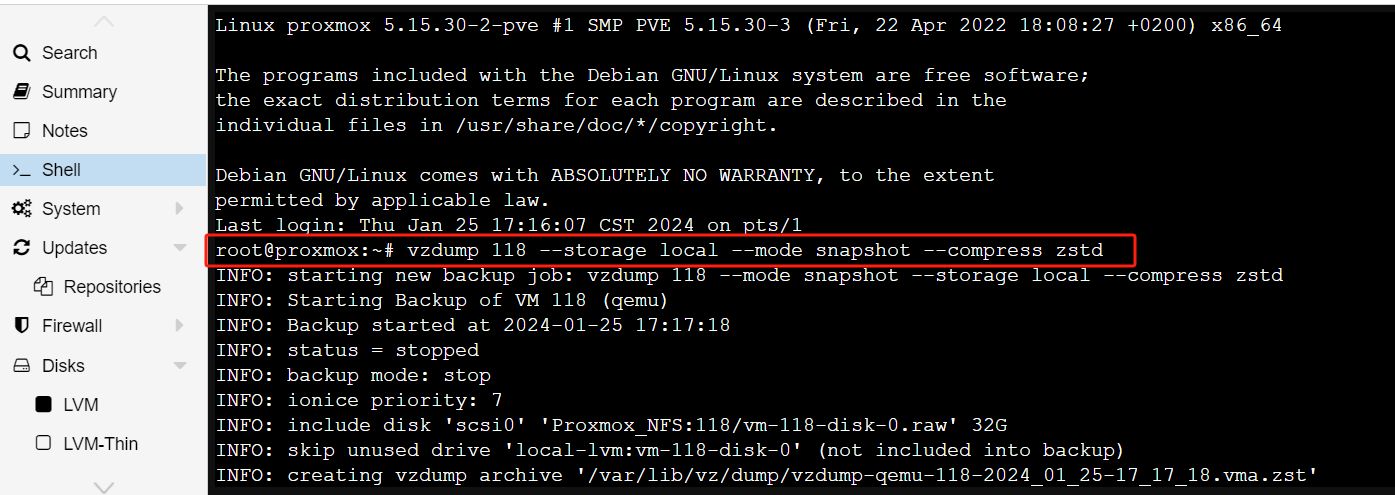
This command will create a snapshot mode backup of the instance with VM/CT ID 118 and store it on local storage using ZSTD compression.
3. Set up cron tasks
Open the crontab configuration file to add your backup tasks.
crontab -e
In the editor that opens, add a line to define your backup plan. For example, if you wanted to perform a backup every day at 2 AM, you could add a line like this:
0 2 * * * /usr/sbin/vzdump 118 --storage local --mode snapshot --compress zstd
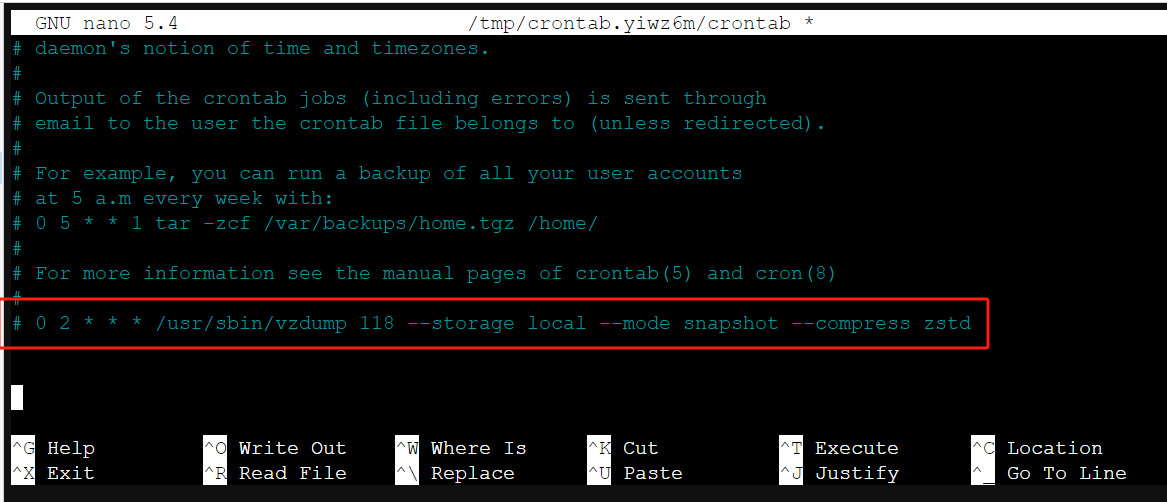
This cron job will execute the vzdump command above at 2:00 AM every day.
4. Save and exit
Save the changes you made in the crontab file and exit the editor. The cron service will automatically read these changes and execute tasks as scheduled.
If using nano editor:
Press Ctrl + O (write to save).
Press the Enter key to confirm the file name.
Press Ctrl + X to exit the editor
5. Check cron service status
Make sure the cron service is running:
systemctl status cron
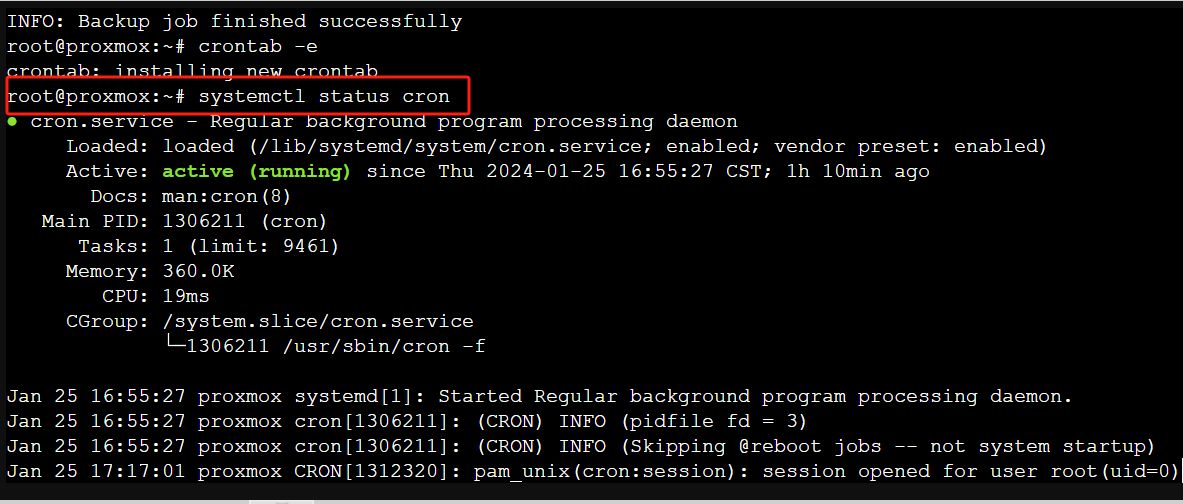
Or on some systems it might be called crond:
systemctl status crond
If the service is not running, you can start it using the following command:
systemctl start cron
or:
systemctl start crond
Keep in mind that the commands and paths may differ slightly depending on your Proxmox VE version and configuration.
After setting up your scheduled backup jobs, it's important to monitor them to make sure they are running as expected and to verify that your backups are valid and can be restored in case of an emergency.
How to schedule backups with Vinchin Backup & Recovery?
Vinchin Backup & Recovery is a robust virtualization environment protection solution including Proxmox, VMware, Hyper-V, XenServer, etc., which provides advanced backup features, including automatic VM backup, agentless backup, LAN/LAN-Free backup, offsite copy, instant recovery, effective data reduction, cloud archive and etc., strictly following 3-2-1 golden backup architecture to comprehensively secure your data security and integrity.
Besides, data encryption and anti-ransomware protection offer you dual insurance to protect your Proxmox VE VM backups. You can also simply migrate data from a Proxmox host to another virtual platform and vice versa.
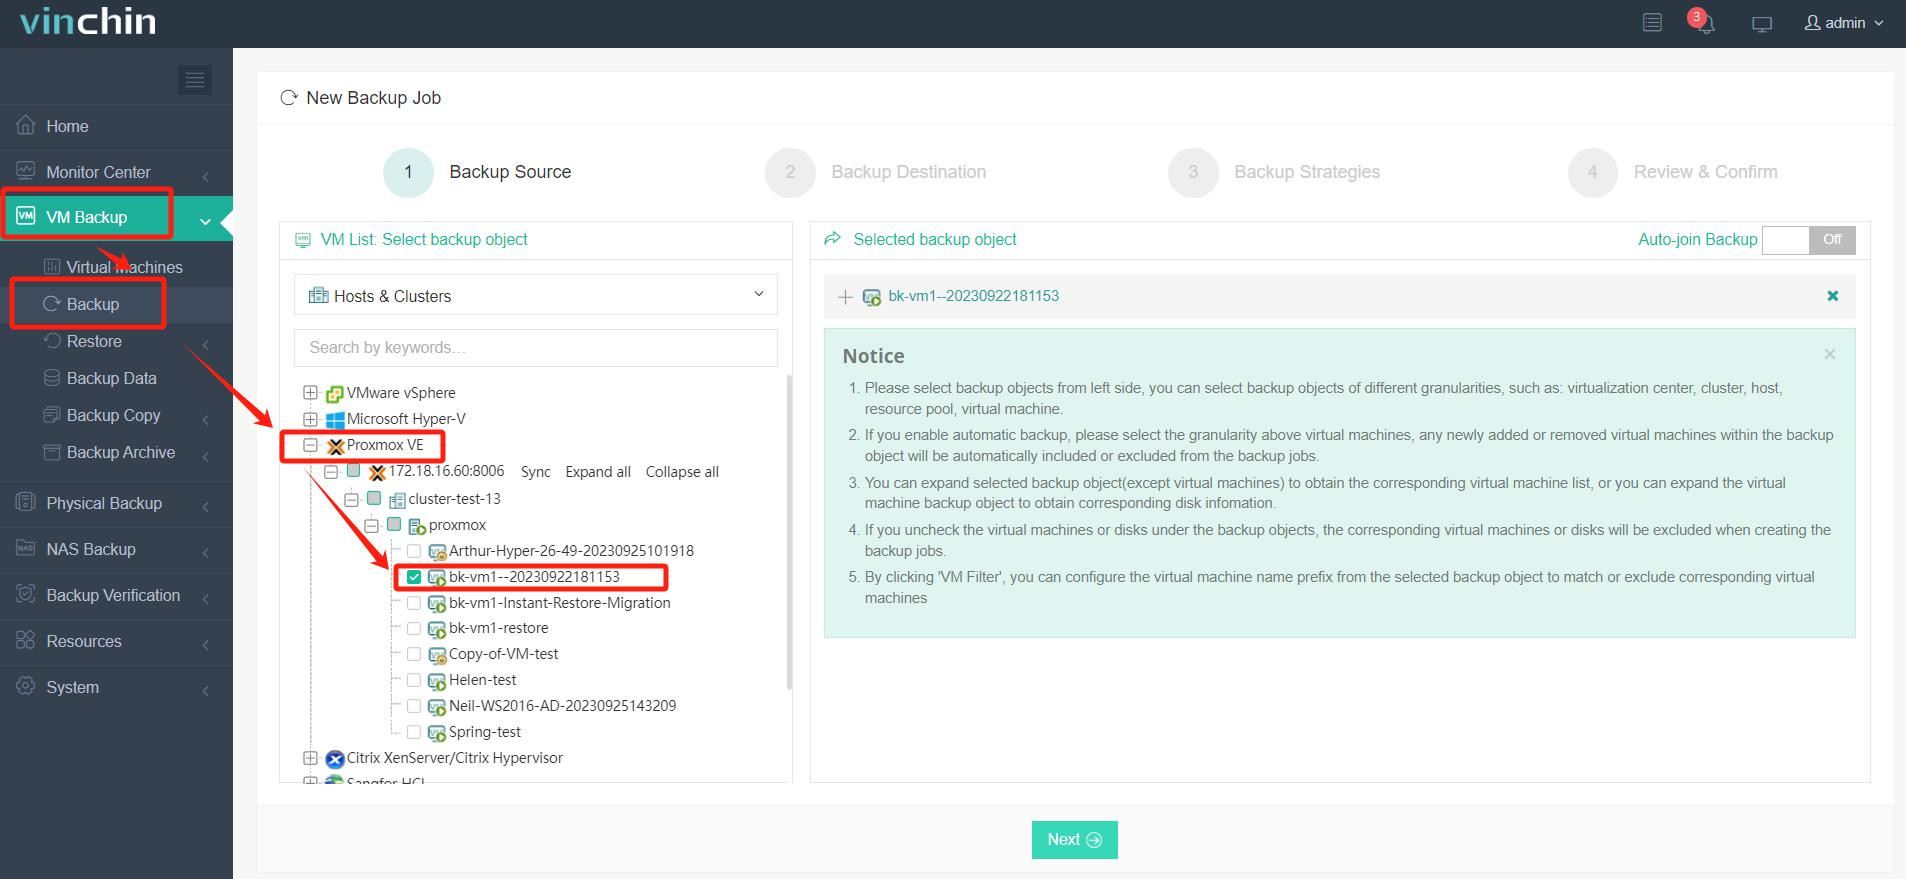
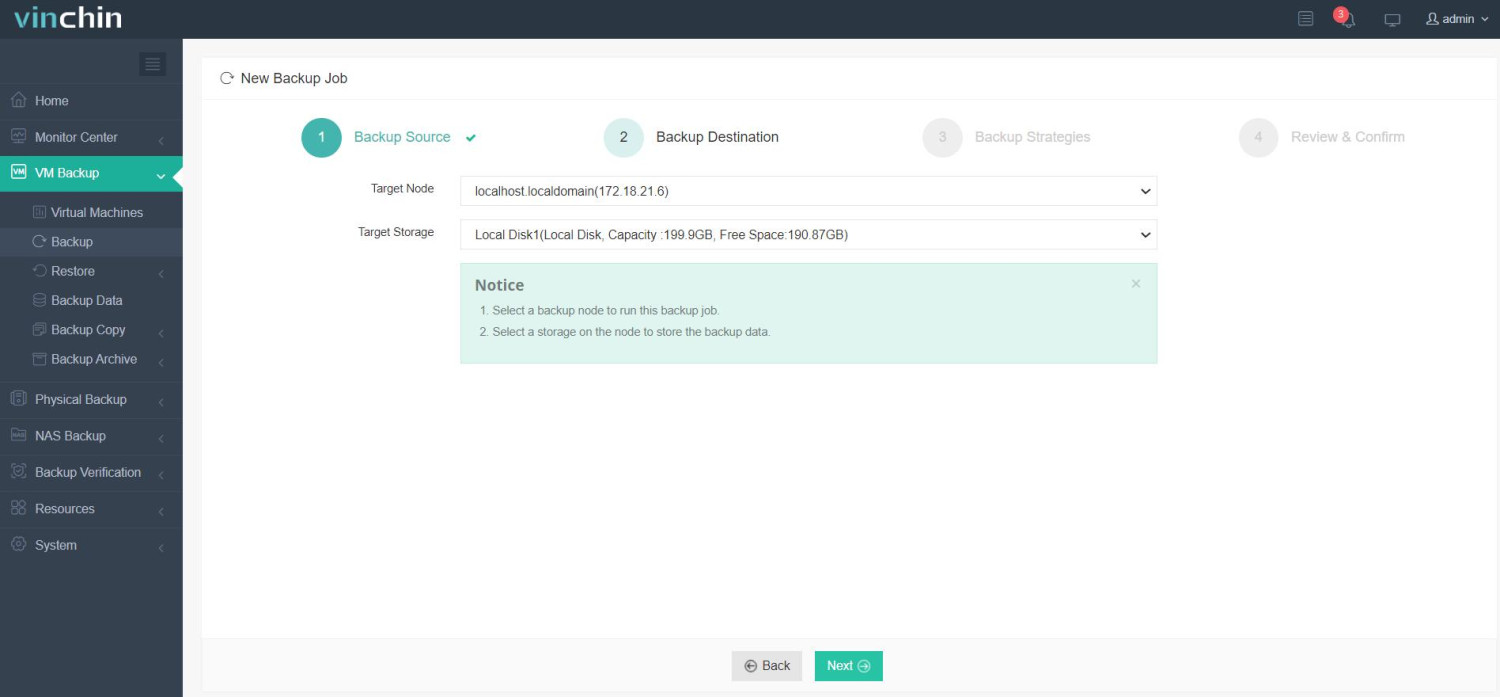
It only takes 4 steps for you to backup Proxmox VE VMs:
1. Select the backup object.
2. Select backup destination.
3. Select backup strategies.
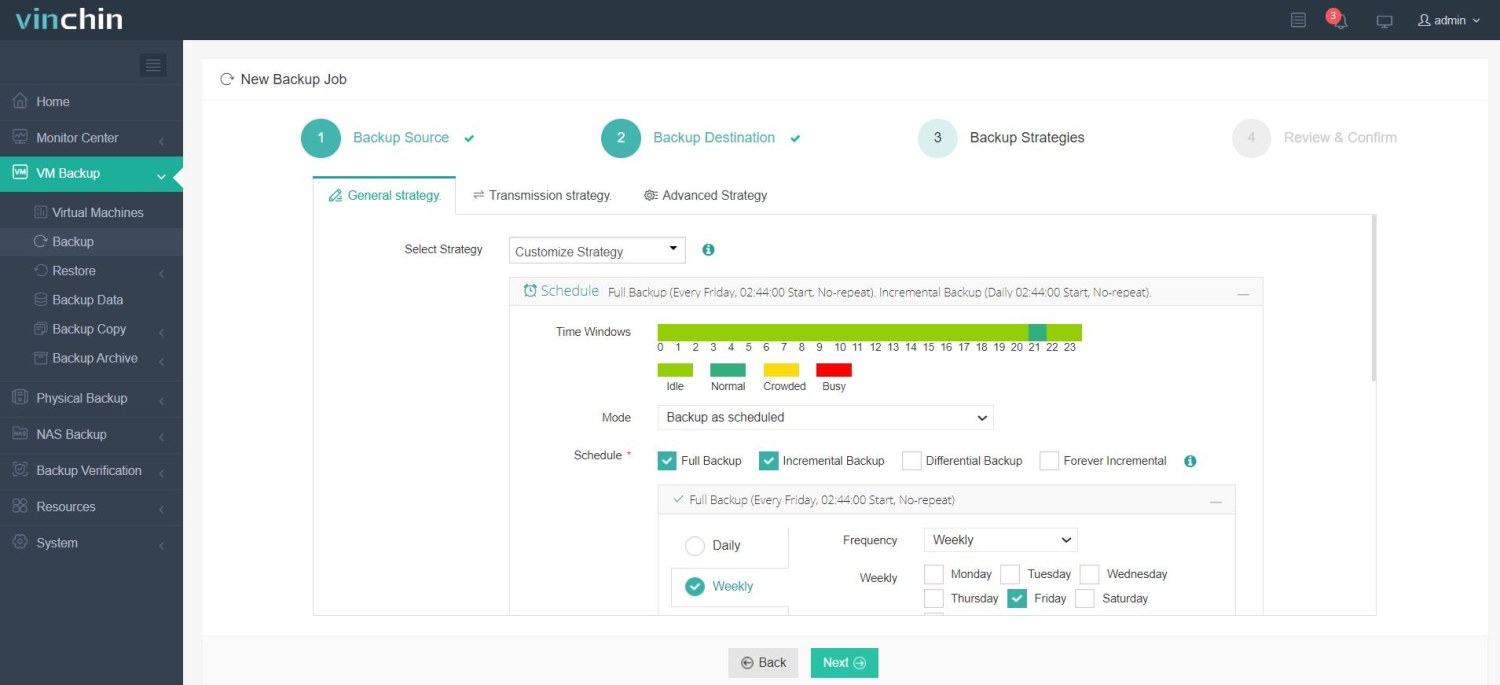
Here, you can setup schedules for your backup jobs. You can perform full backups weekly or monthly and perform incremental backups on daily basis.
4. Review and submit the job.
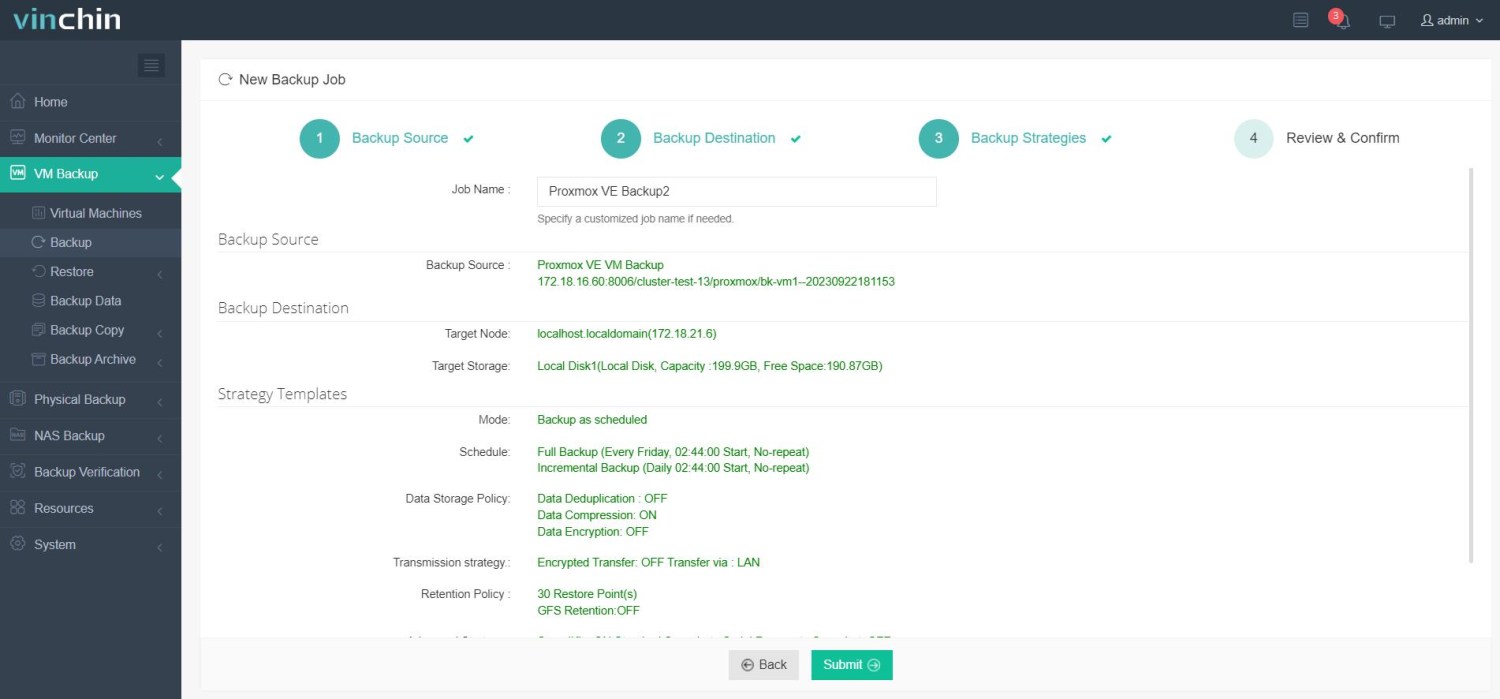
Vinchin Backup & Recovery has been chosen by thousands of companies worldwide. You too can start leveraging this powerful system with a 60-day full-featured trial! Reach out to us with your specific Proxmox VE environment needs, and we will provide a tailored solution that aligns with your IT infrastructure. Our expertise in Proxmox VE ensures that you receive the most effective and reliable backup and recovery strategy for your virtual machines.
Proxmox auto backup FAQs
1.Q: How to restore the backups in Proxmox?
A: Proxmox VE also offers built-in restore capabilities, allowing you to restore backups from GUI or using command line. If you prefer using the command, you can use the qmrestore command, which is part of the Proxmox VE’ s suite of tools. With this command, you can specify the backup file and the VM ID that you want to restore.
2.Q: Is it possible to restore individual files from a Proxmox VE automated backup?
A: Backups of Proxmox VE are usually for the entire virtual machine or container. To restore a single file, you need to first restore the entire backup to a temporary virtual machine or container and then extract the required files from it. Or, you can use Vinchin Backup & Recovery, which offers granular restore feature to help you extract specific folders easily.
Conclusion
Scheduled backups are an essential component of a robust data protection strategy, ensuring that critical data is preserved without the need for manual intervention. In Proxmox VE, setting up automatic backups can be accomplished with ease through the web interface and command-line, providing a powerful method to automate and fine-tune backup operations.
Share on:


