-
Migrate Oracle to MySQL with Oracle SQL Developer
-
Migrate Oracle to MySQL Manually
-
Be Prepared with Database Backup
-
Conclusion
Oracle database and MySQL are both popular relational database management systems among global users and they are products of Oracle Corporation. Some Oracle database users may want to migrate to MySQL for system compatibility, data types support, or a smaller deployment scale.
It is widely assumed that a commercial Oracle database is better for enterprise deployments, while MySQL suits SMEs. Oracle easily functions on more than 100 hardware platforms and 20 networking protocols. It also provides point-in-time recovery, the great speed with large databases, and control over multiple databases within the same transaction.
However, Oracle database can be complicated for users that are not technically sound, and the price is huge compared to MySQL which is totally free of charge. For businesses using small databases and preferring user-friendless, the best option would be MySQL.
Two Oracle database to MySQL migration methods are given in this article for your reference.
Migrate Oracle to MySQL with Oracle SQL Developer
The Oracle SQL Developer tool allows users to export data from Oracle tables in a wide range of forms, including Excel, SQL insert instructions, SQL loader format, HTML, XML, PDF, TEXT, Fixed text, and many others.
1. Start SQL Developer and right-click Tools to choose Database Export…
2. An Export Wizard shows, on the Source/Destination page, choose the Oracle connection and options (Export DDL, terminator, Add Force to Views, Export Data) under the connection, and select insert from the drop-down for Format. Then Save As Single File and select the file name. Click Next.
3. On the Types to Export page, select the types of objects (Tables, Views, Indexes, Constraints) and click Next.
4. Choose target columns and specify where conditions to filter rows optionally. Just click Next if you are migrating all columns.
5. Click Finish on the summary page to start the task. The SQL dump file will be generated after this.
6. Change data types.
| Oracle Datatype | Compatible MySQL datatype |
| BFILE | LongBLOB |
| BINDOUBLE | Double |
| BINFLOAT | Integer |
| BLOB | LongBLOB |
| CHAR | Varchar |
| CLOB | LongText |
| DATE | DateTime |
| FLOAT | Double |
| INTDAYTOSECOND | Varchar |
| INTYEARTOMONTH | Varchar |
| LONG | LongText |
| NCHAR | NChar |
| NCLOB | LongText |
| NUMBER | Decimal |
| NUMBERP | Decimal |
| NVARCHAR2 | NVarchar |
| RAW | LongBlob |
| ROWID | Varchar |
| TIMESTAMP | DateTime |
| TIMESTAMPWITHLTZ | DateTime |
| TIMESTAMPWITHTZ | DateTime |
| UROWID | Varchar |
| VARCHAR2 | Varchar |
7. Replace " with `, remove COMMENT ON statements and they are only defined in the Create Table statements, and place comment lines beginning with --- characters inside of the /*, */ symbols.
8. Remove Insert statements on Joined View, Enable keywords after constraints statement, and Organization Index clause.
9. Change Alter constraints statement.
Change (erase constraint name and add the column datatype and width), for example:
ALTER TABLE "NAME" MODIFY ("NAME_ID" CONSTRAINT "NAME_ID_NN" NOT NULL ENABLE);
ALTER TABLE `NAME` ADD CONSTRAINT `NAME` PRIMARY KEY (`NAME_ID`) USING INDEX ENABLE;
To
ALTER TABLE `NAME` MODIFY ` NAME` VARCHAR(30) NOT NULL;
ALTER TABLE `NAME` ADD CONSTRAINT `NAME` PRIMARY KEY (`NAME_ID`);
Then again, convert TO_TIMESTAMP function to STR_TO_DATE function.
to_timestamp('6-FEB-01','DD-MON-RR HH.MI.SSXFF AM') to STR_TO_DATE('17-FEB-04','%d-%b-%y')
Make these changes with any text editor.
10. Create an empty MySQL database to execute the modified file that is compatible with MySQL.
Migrate Oracle to MySQL Manually
1. Log in to MySQL and start ODBC Connector data source.
2. Connect the ODBC Data Source to MySQL.
3. Enter the necessary information to connect the database, user, and password for the Oracle Server. Give an appropriate ODBC connection name. To check the connection, click the Test button.
4. Locate the listener.ora file in the $ORACLE HOME/NETWORK/ADMIN directory of the Oracle installation directory and add the details as follows:
SID_LIST_LISTENER =
<Space>(SID_LIST=
<Space>(SID_DESC=
<Space>(SID_NAME=test)
<Space>(ORACLE_HOME=C:oracleproduct11.2.0dbhome_1)
<Space>(PROGRAM=dg4odbc)
)
)
If the path specified isn’t your installation path, change the location of ORACLE HOME.
If you have any problems, type dg4odbc to see if the software is present or not. If you encounter a "Program not recognized" problem, make sure your path variable includes $ORACLE HOME/bin and restart the command line to verify.
5. The file of inittest.ora generates automatically when a new SID is created. To change its name, use init + SID name. Set up the data source and SID for dg4odbc program. Add the commands to the inittest.ora file.
HS_FDS_CONNECT_INFO = test
6. Configure tnsnames.ora file (in the $ORACLE_HOME/NETWORK/ADMIN/TNSNAMES.ora.) by adding the statements.
TSLINK =
(DESCRIPTION=
(ADDRESS=
(PROTOCOL=TCP)
(HOST=localhost)
(PORT=)
)
(CONNECT_DATA=
(SID=the one created on the listener.ora file)
)
(HS=OK)
)
7. Reboot the Oracle Service and TNS Listener Service.
8. Log in to the Oracle database with credentials and create the database link:
create public database link link2mysqltest connect to "oracle" identified by "oracle" using 'TSTLINK';
9. Test the link and click Finish.
10. Log in to MySQL and run the command.
select * from "xx_table"@link2mysqltest
Be Prepared with Database Backup
Database migrations are pricey, time-consuming, resource intensive, and often fraught with risk. In case the data loss event occurs when you migrate the Oracle database to MySQL, it’s recommended to make database backups for data recovery before and after the conversion.
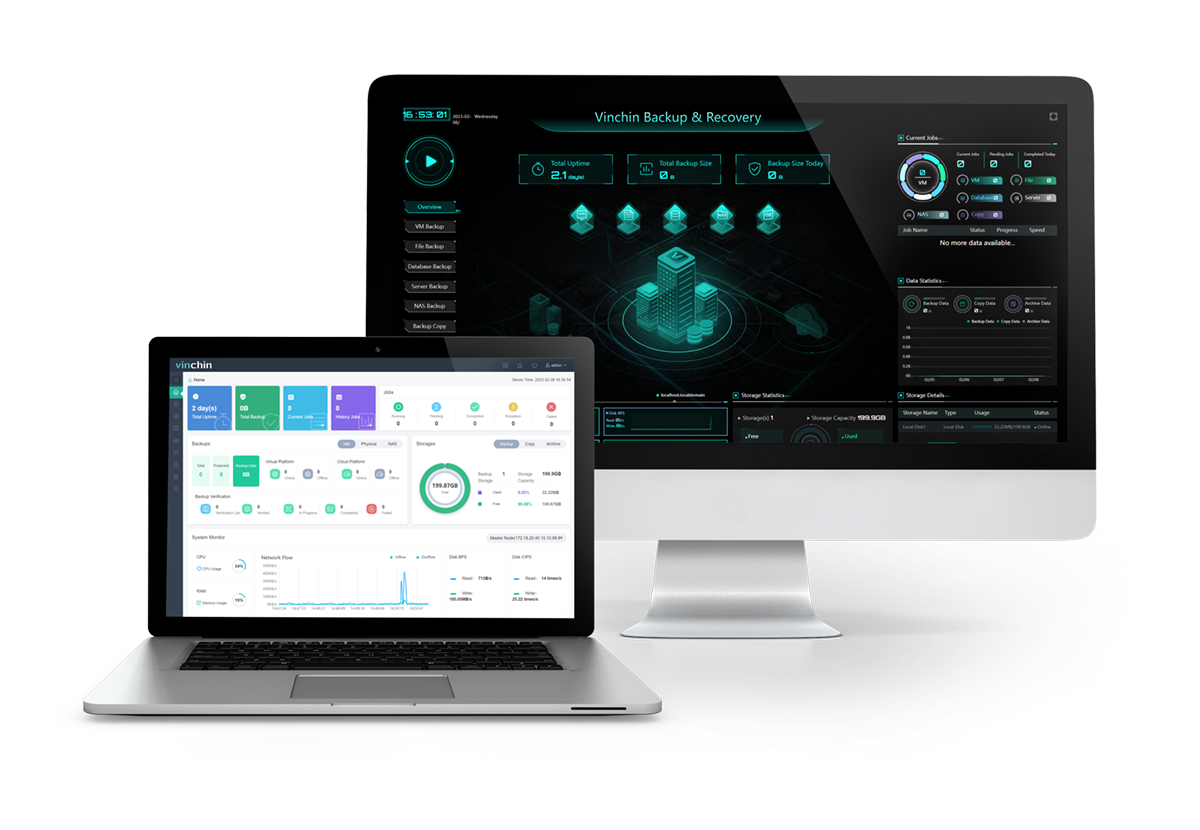
Vinchin Backup & Recovery automates backup for Oracle Database, MySQL, SQL Server, PostgreSQL, Postgres Pro, MariaDB, NAS, Linux & Windows Servers, and 10+ virtualization platforms like VMware, Hyper-V, Xen, oVirt, Oracle OLVM, Sangfor HCI, OpenStack, and more.

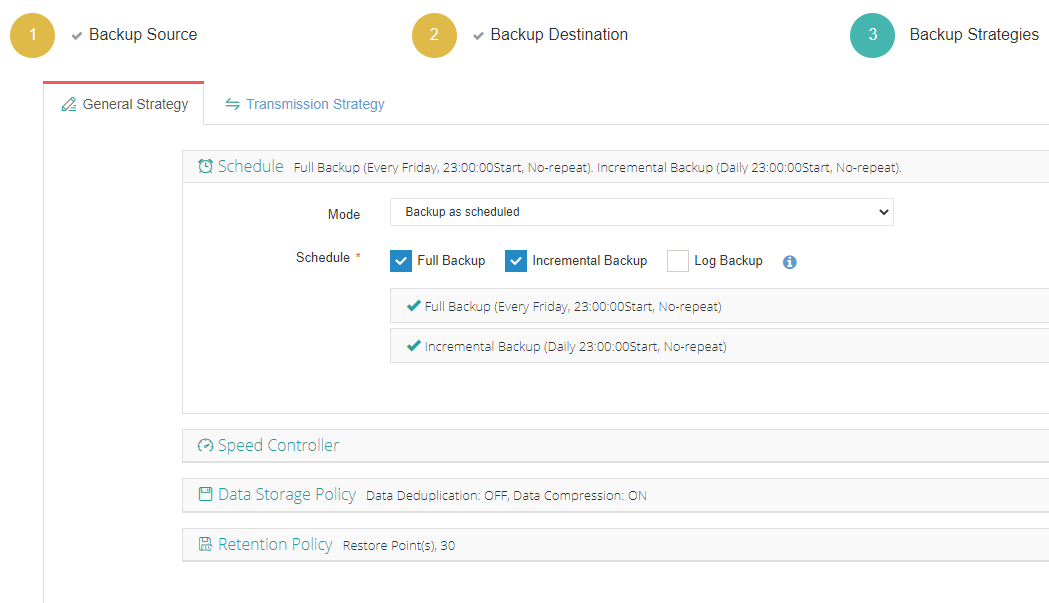
With the backup solution, you can choose from full, differential, incremental, and log backup for different databases without any command under a repeatable schedule.
The database size can be deduplicated and compressed to 50% for storage saving, and the backups are auto-managed through the retention policy.
Other advanced features such as Oracle RAC backup node authorization, multi-threading transmission, or data consistency check for SQL Server are available in the backup strategies.
Users can also manage a heterogeneous VM and database environment from a web console.
Get the 60-day full-featured free trial of the Enterprise version to explore more.
Database backup:
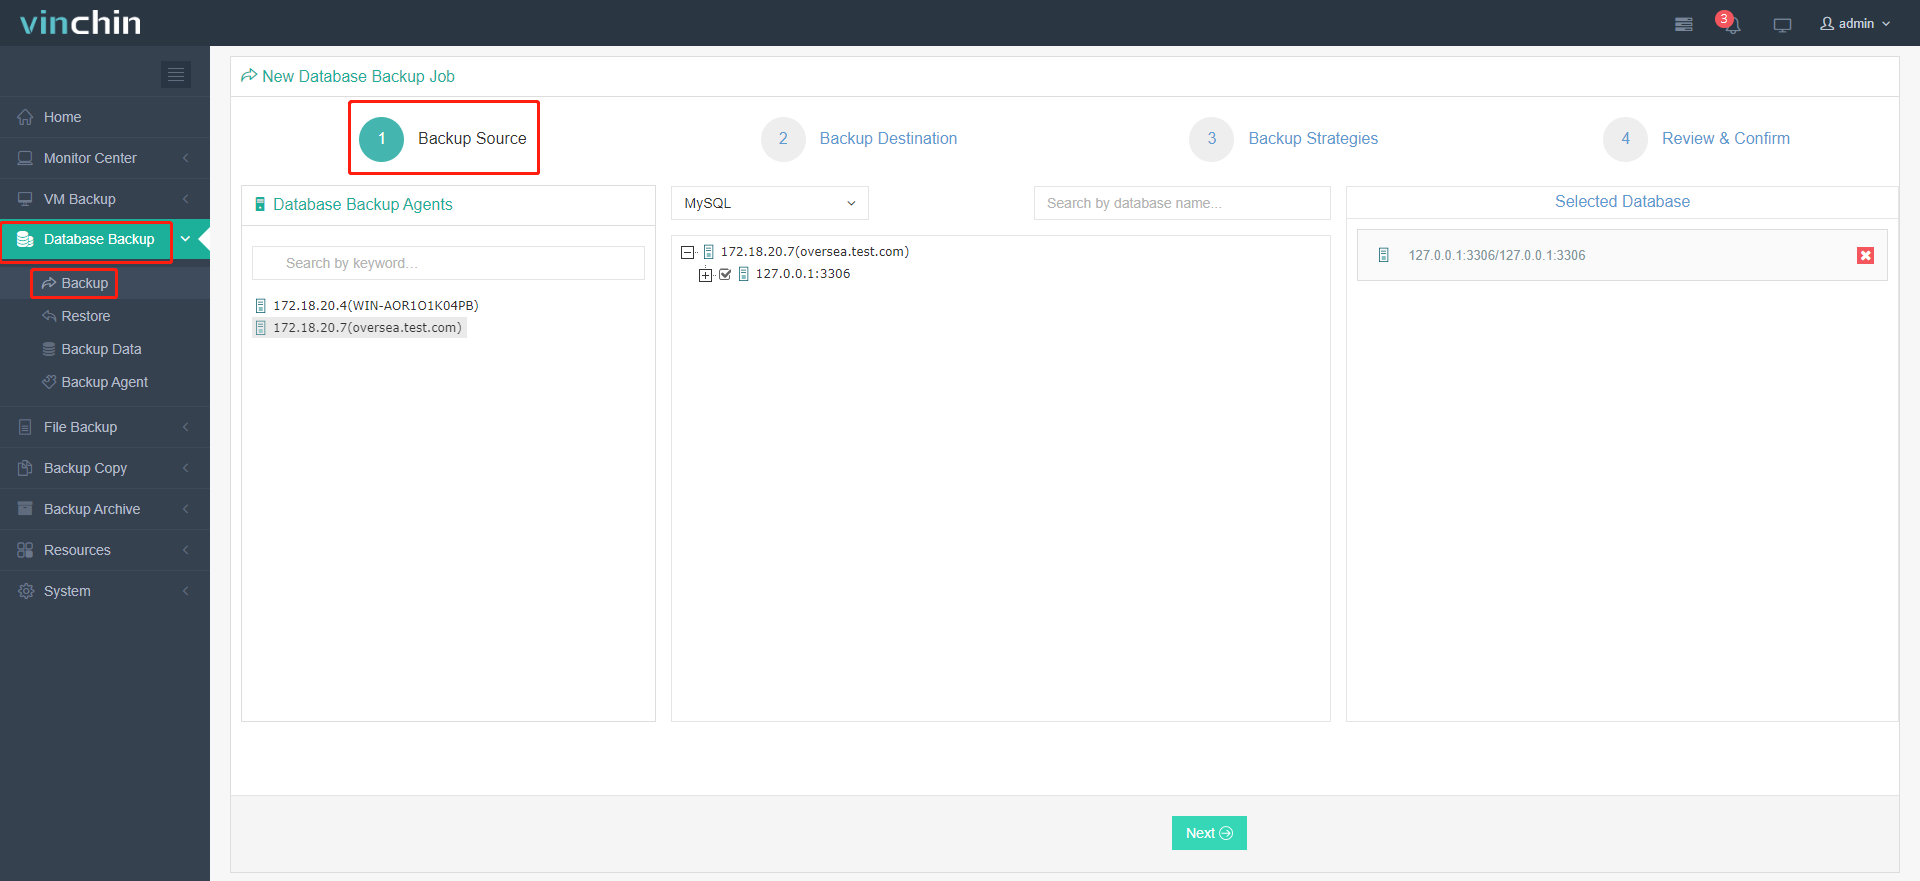
1. Go to Database Backup> Backup, and select a backup resource from the licensed database list.

2. Select the backup destination node and storage.

3. Set up backup strategies.


4. Review and submit.
Database recovery:
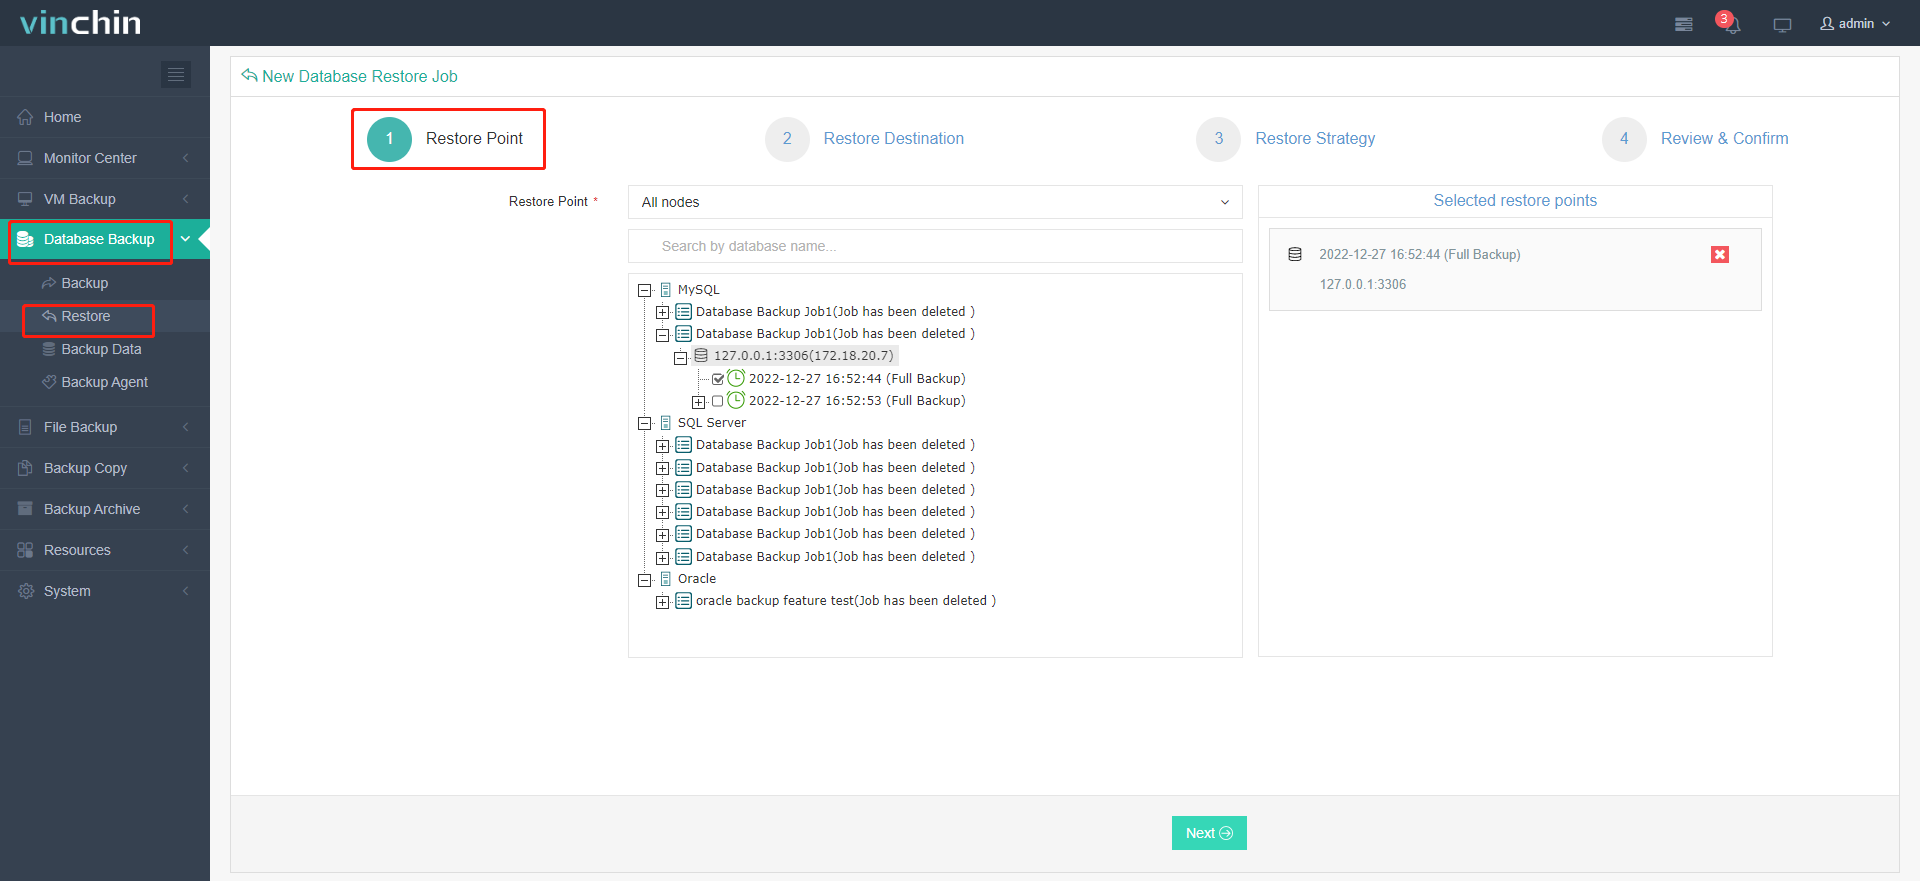
1. Navigate to Database Backup> Restore, and choose a restore point.

2. Choose the target instance.

3. Choose to restore to the original or a new database.

4. Review and submit.
Conclusion
This blog introduces two methods for Oracle database to MySQL migration using SQL Developer (see how to migrate MySQL to Oracle with it) and a manual way. It should be noted that database backup and recovery are necessary in case of data failure or other accidents. Use Vinchin Backup & Recovery for simplified database backup and recovery in 4 steps.
Share on:


