-
How to backup Exchange Server in Vinchin Backup & Recovery?
In this post, you will learn how to backup Exchange Server with Vinchin Backup & Recovery in 5 steps. Vinchin supports Exchange Server 2013, 2016, 2019, and Exchange Online. This powerful enterprise backup solution offers a tailored set of features specifically designed to protect Microsoft Exchange, whether it's deployed on virtual or physical servers.
How to backup Exchange Server in Vinchin Backup & Recovery?
First, Let's open a browser and log in Vinchin Backup server web console. Go to Resources > M365 Organizations.
Step 1. Add the Organization First
Before backing up the Exchange Server using the agent-based method, you need to add the Organization first.To do so, click on the Add button, select the Authentication Method, enter the Authentication Parameters of the Organization, then click OK followed by Synchronize to complete the process.
Step 2. Select Backup Source
Go to Application Backup > M365 Backup > Backup
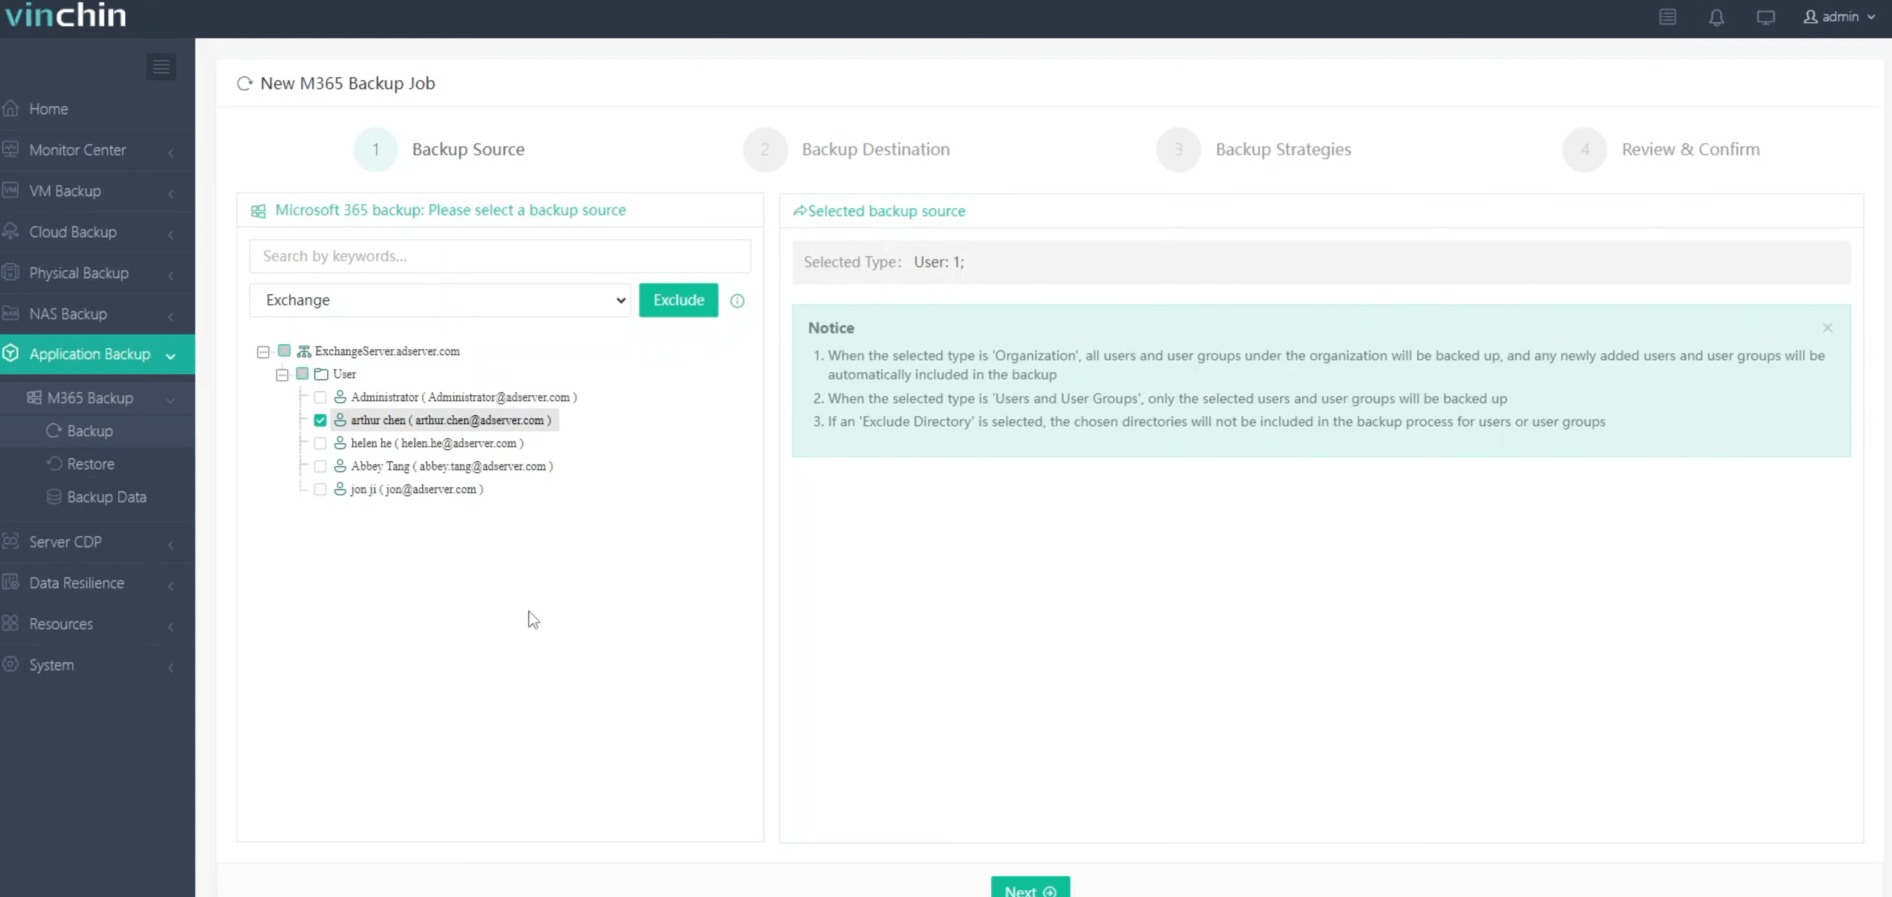
Here you can click an Exchange Server and select the User to backup. When the selected type is Organization, all users and user groups under the organization will be backed up. When the selected type is ‘Users and User Groups’, only the selected users and user groups will be backed up. After adding the Users which you want to backup, click Next.
Step 3. Select Backup Destination
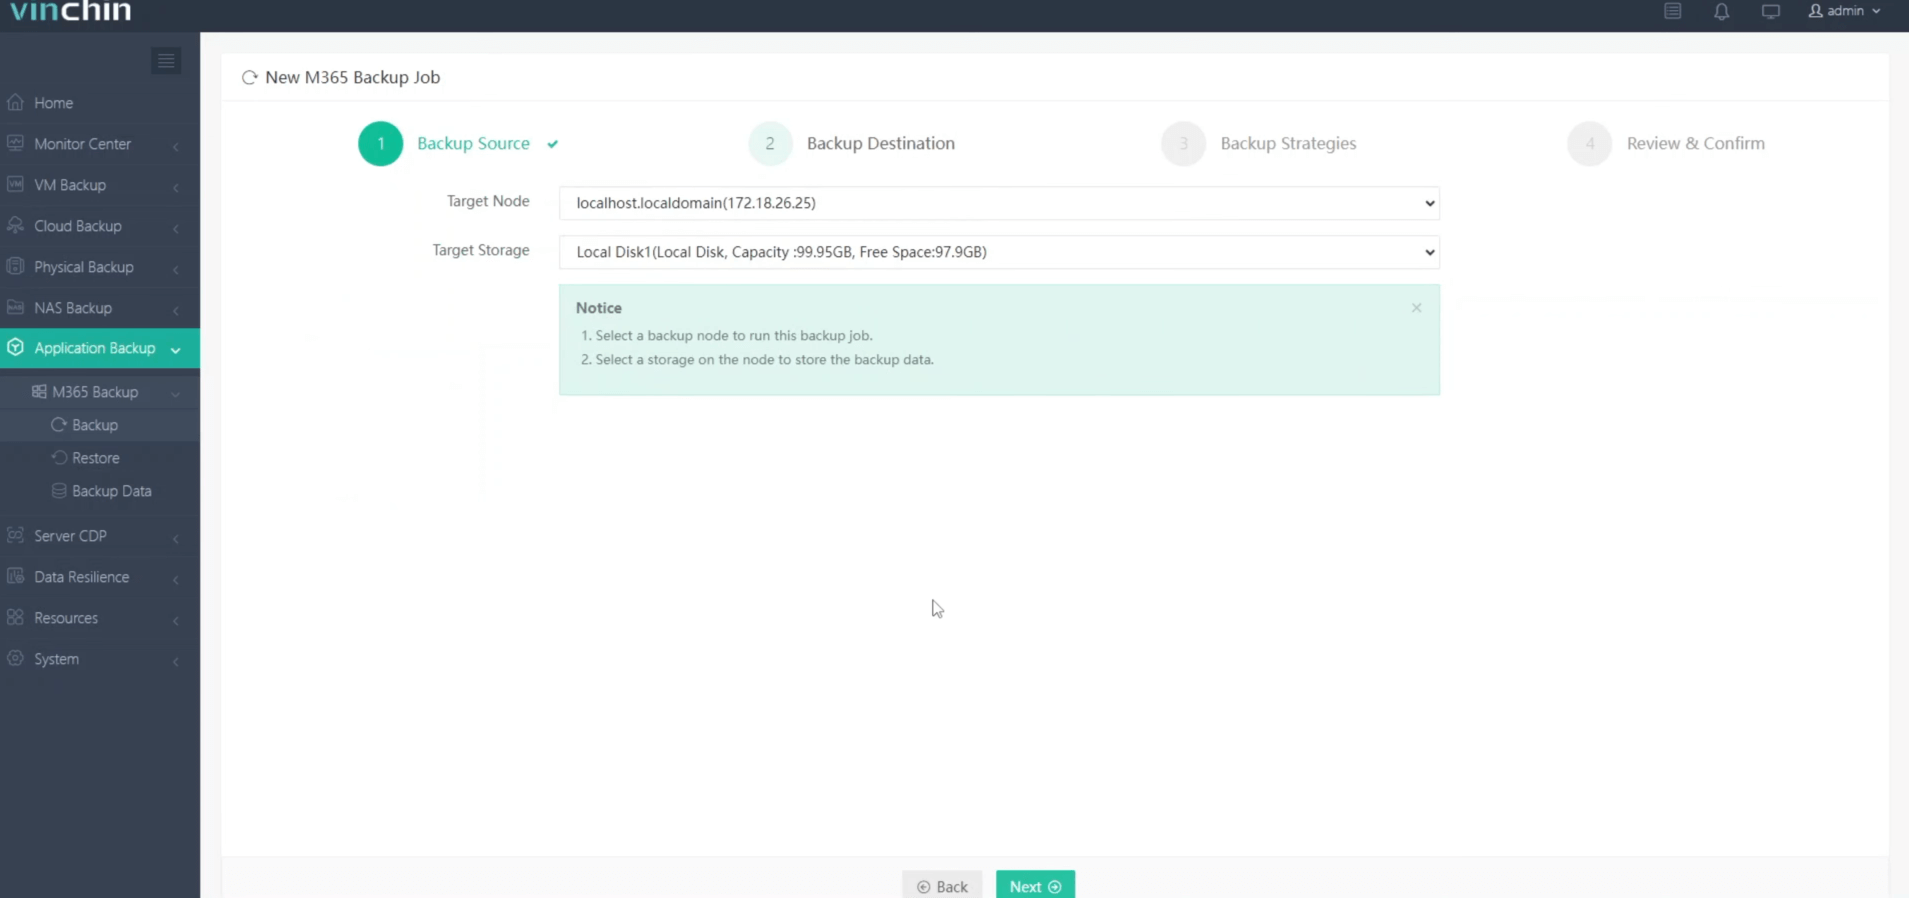
Select the Target Node and then select the Target Storage for the it. Click Next.
Step 4. Select Backup Strategies
In Schedule, you can choose Backup as scheduled or Once-off backup. Backup as scheduled will automatically backup the selected Exchange Server at a specific time, and Once-off backup will backup the Exchange Server only once.
For Scheduled backup job, you can schedule Full Backup with Incremental Backup combination, Full Backup with Differential backup combination. After that, you can select to trigger the backup job daily, weekly, or monthly at a specific time.
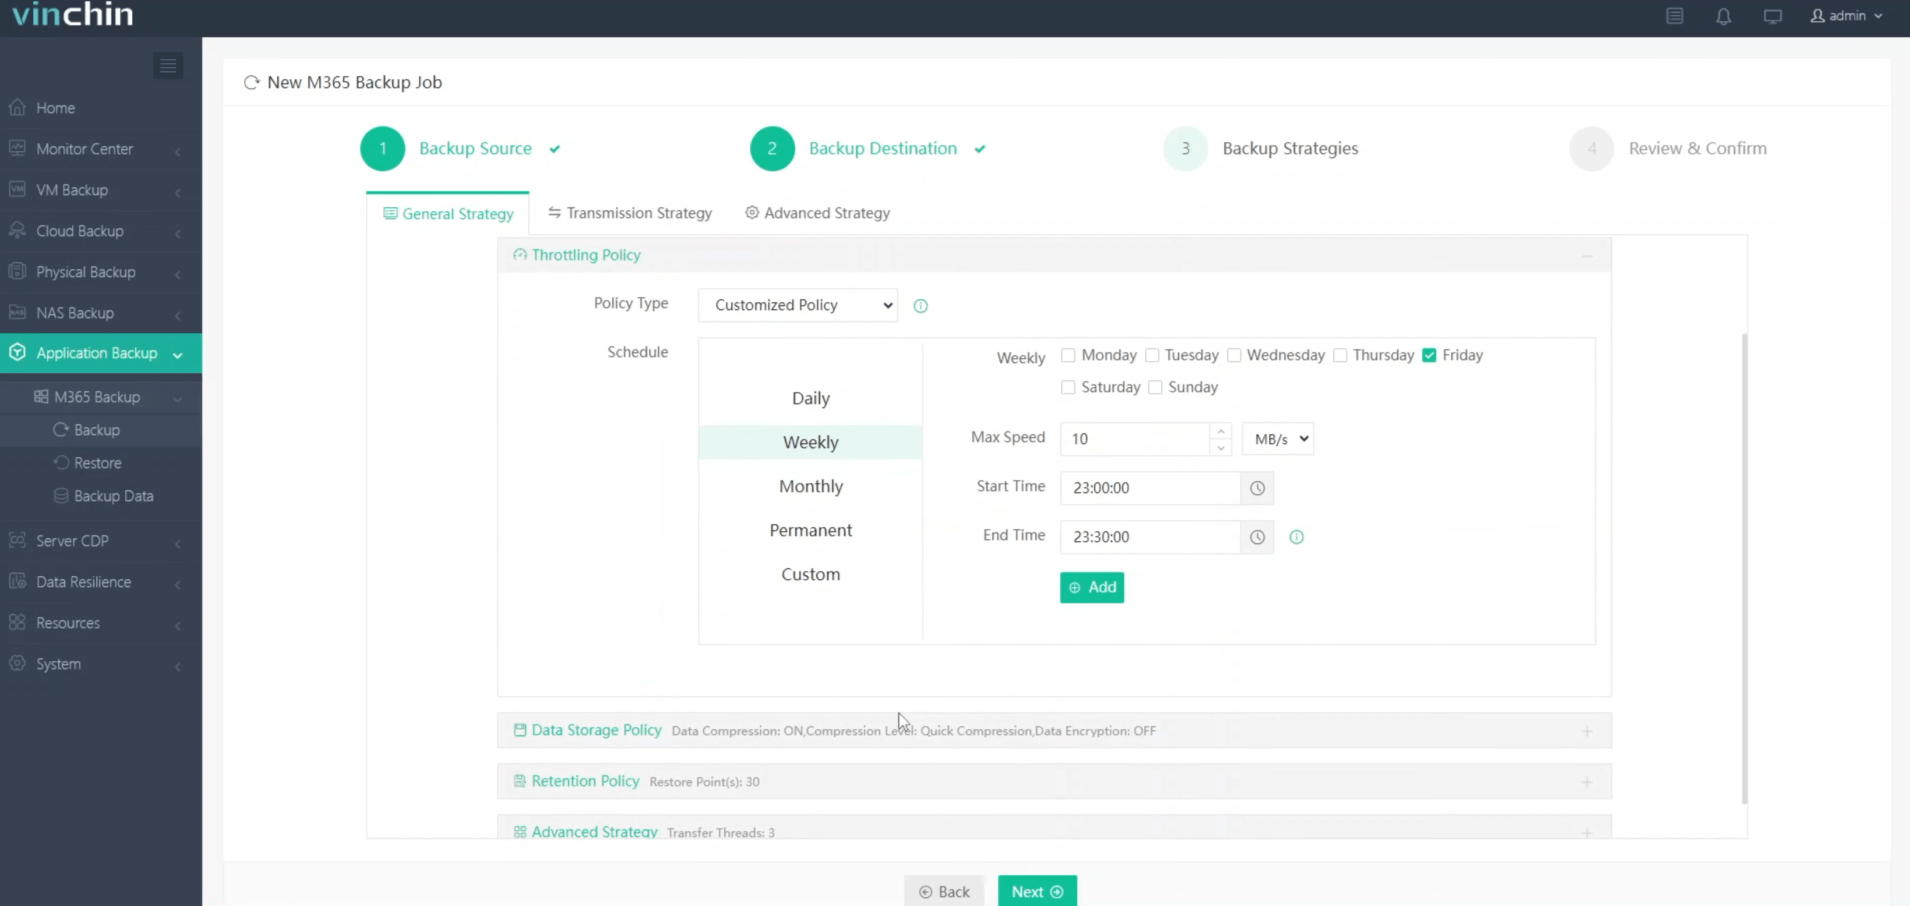
In the Data Storage Policy, you have the option to enable Data Compression and select the Compression Level to reduce the size of backup files.
In Retention Policy, Vinchin allows you to retain backup files by the Number of Restore Points or the Number of Days.
Within the Transmission Strategy settings, you'll find configurations for network retry attempts and interval settings, allowing you to fine-tune how the system handles retries in case of network issues.
Additionally, under Advanced Strategy, Vinchin offers an Auto-Retry feature that allows you to configure retry settings tailored specifically for backup jobs. This functionality provides enhanced customization options, ensuring the reliability of your backup processes by automatically retrying failed tasks according to your specified parameters.
After configuring all the backup strategies, click Next.
Step 5. Give a Name to the Job
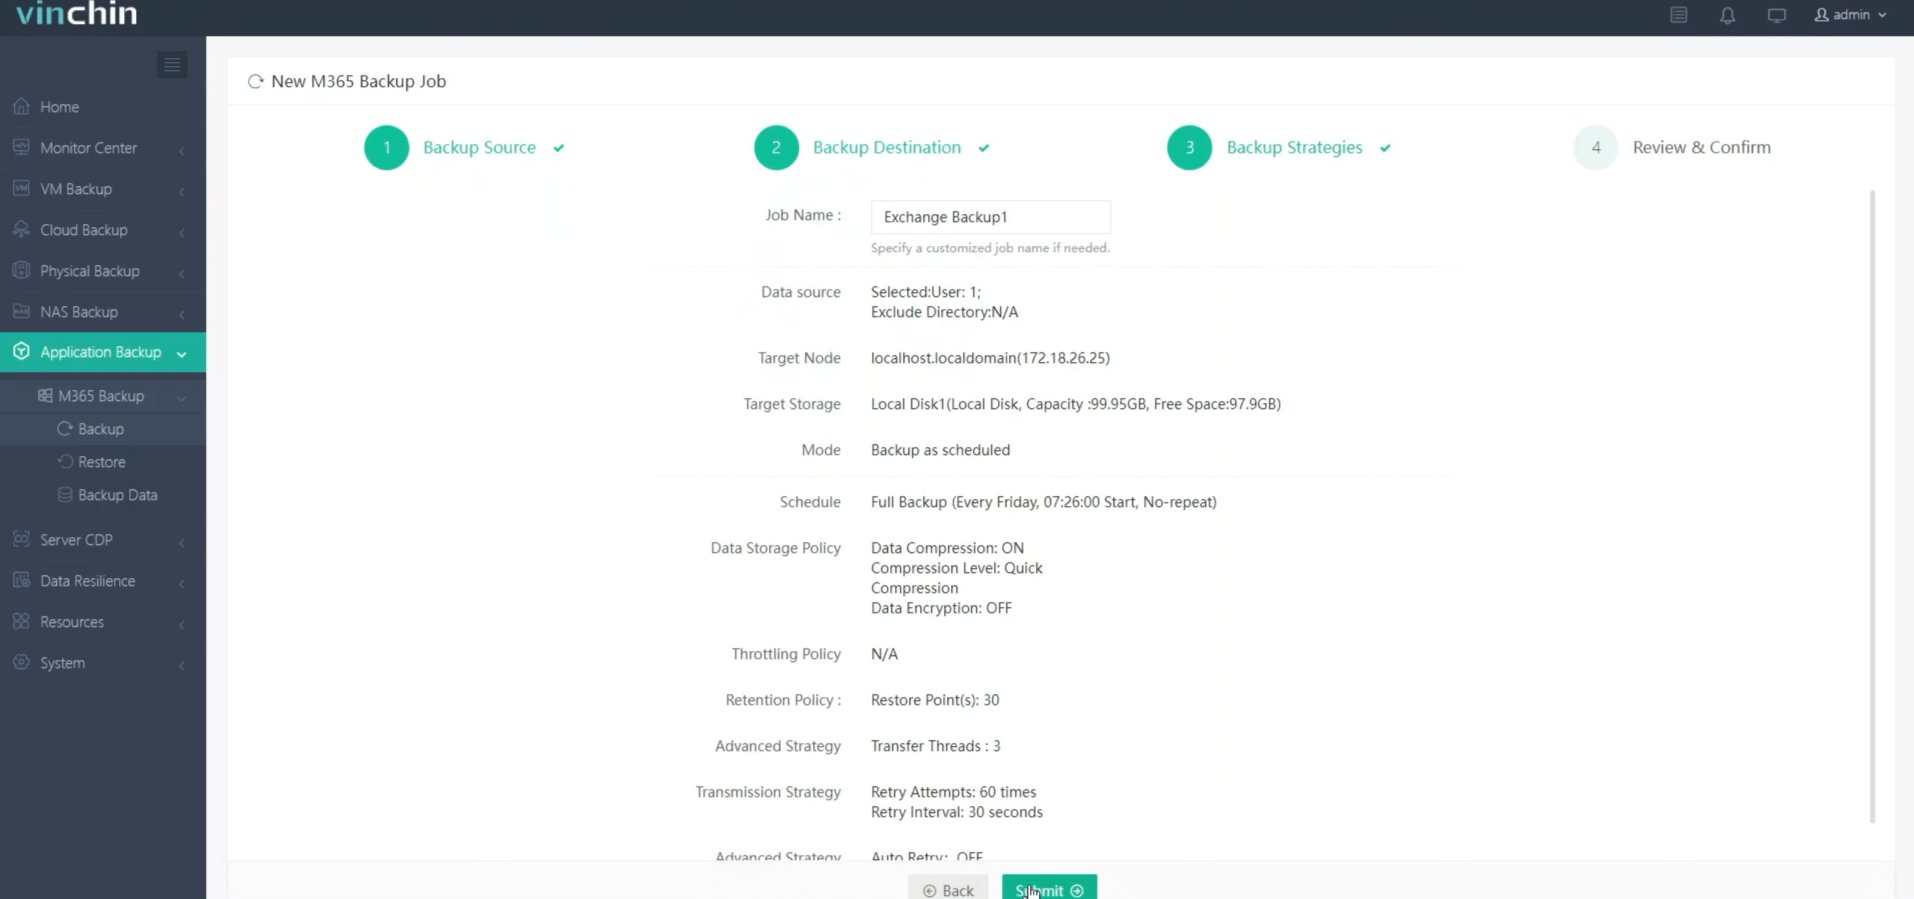
Give a name to the job, review the details of the job, and submit it.
You will be redirected to the Jobs page of Monitor Center. The created backup job will be listed here and you can start job manually, then click job name to monitor the job in real time.
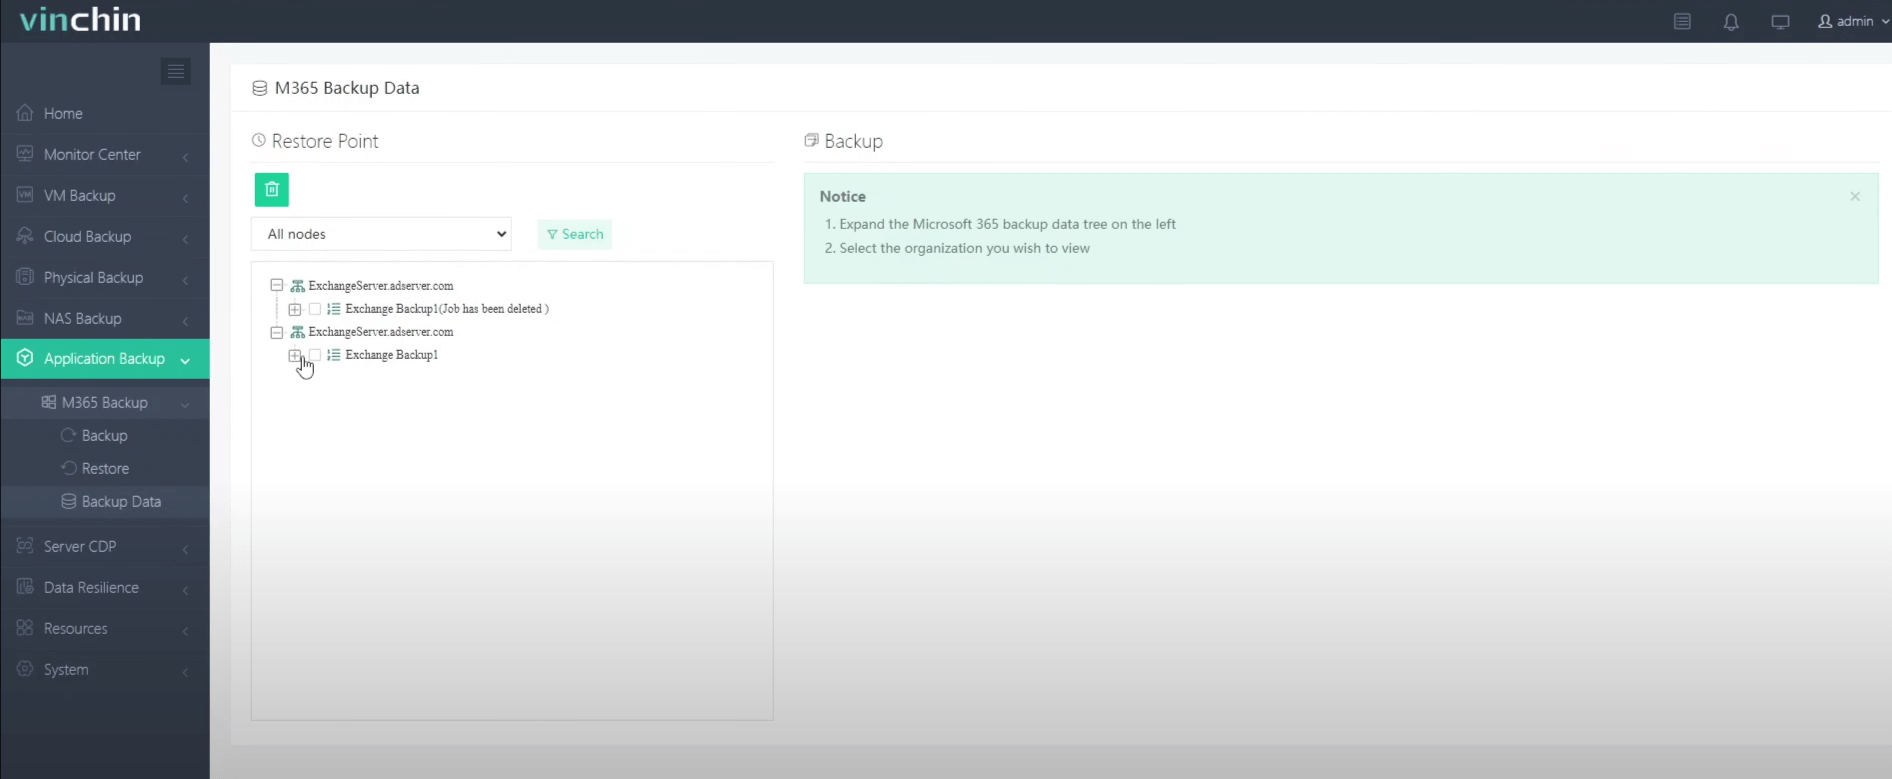
Here, you can see the Exchange Server has been successfully backed up.
When you need to recover data, you can restore the Exchange Server from that backup.
You can start to protect your Exchange Server environment with a free 60-day trial to fully experience all the features of Vinchin Backup & Recovery in a real-world environment. For more information, please contact Vinchin directly or contact our local partners.
Share on:


