You will learn how to perform granular restore of Hyper-V VM backups with Vinchin Backup & Recovery in 3 steps here. Vinchin supports Microsoft Hyper-V on Windows Server 2012, 2012 R2, 2016, 2019 as well as Microsoft Hyper-V 2012, 2012 R2, 2016, 2019 and Windows 10 (Desktop OS), providing various built-in user-friendly backup and restore functionalities to fully guarantee data security for your mission-critical business running in Hyper-V virtualization environment.
Vinchin Backup & Recovery is also able to perform Hyper-V data recovery at file level. You can restore specific folders or files saved in a restore point to the production host using Vinchin Granular Restore. In case you mistakenly delete some files, this feature will help quickly retrieve certain files you want without needing to recover the whole virtual machine.
Before that, you should have a Hyper-V VM backup created by Vinchin Backup & Recovery.
let’t open a browser and log in Vinchin Backup & Recovery server web console.
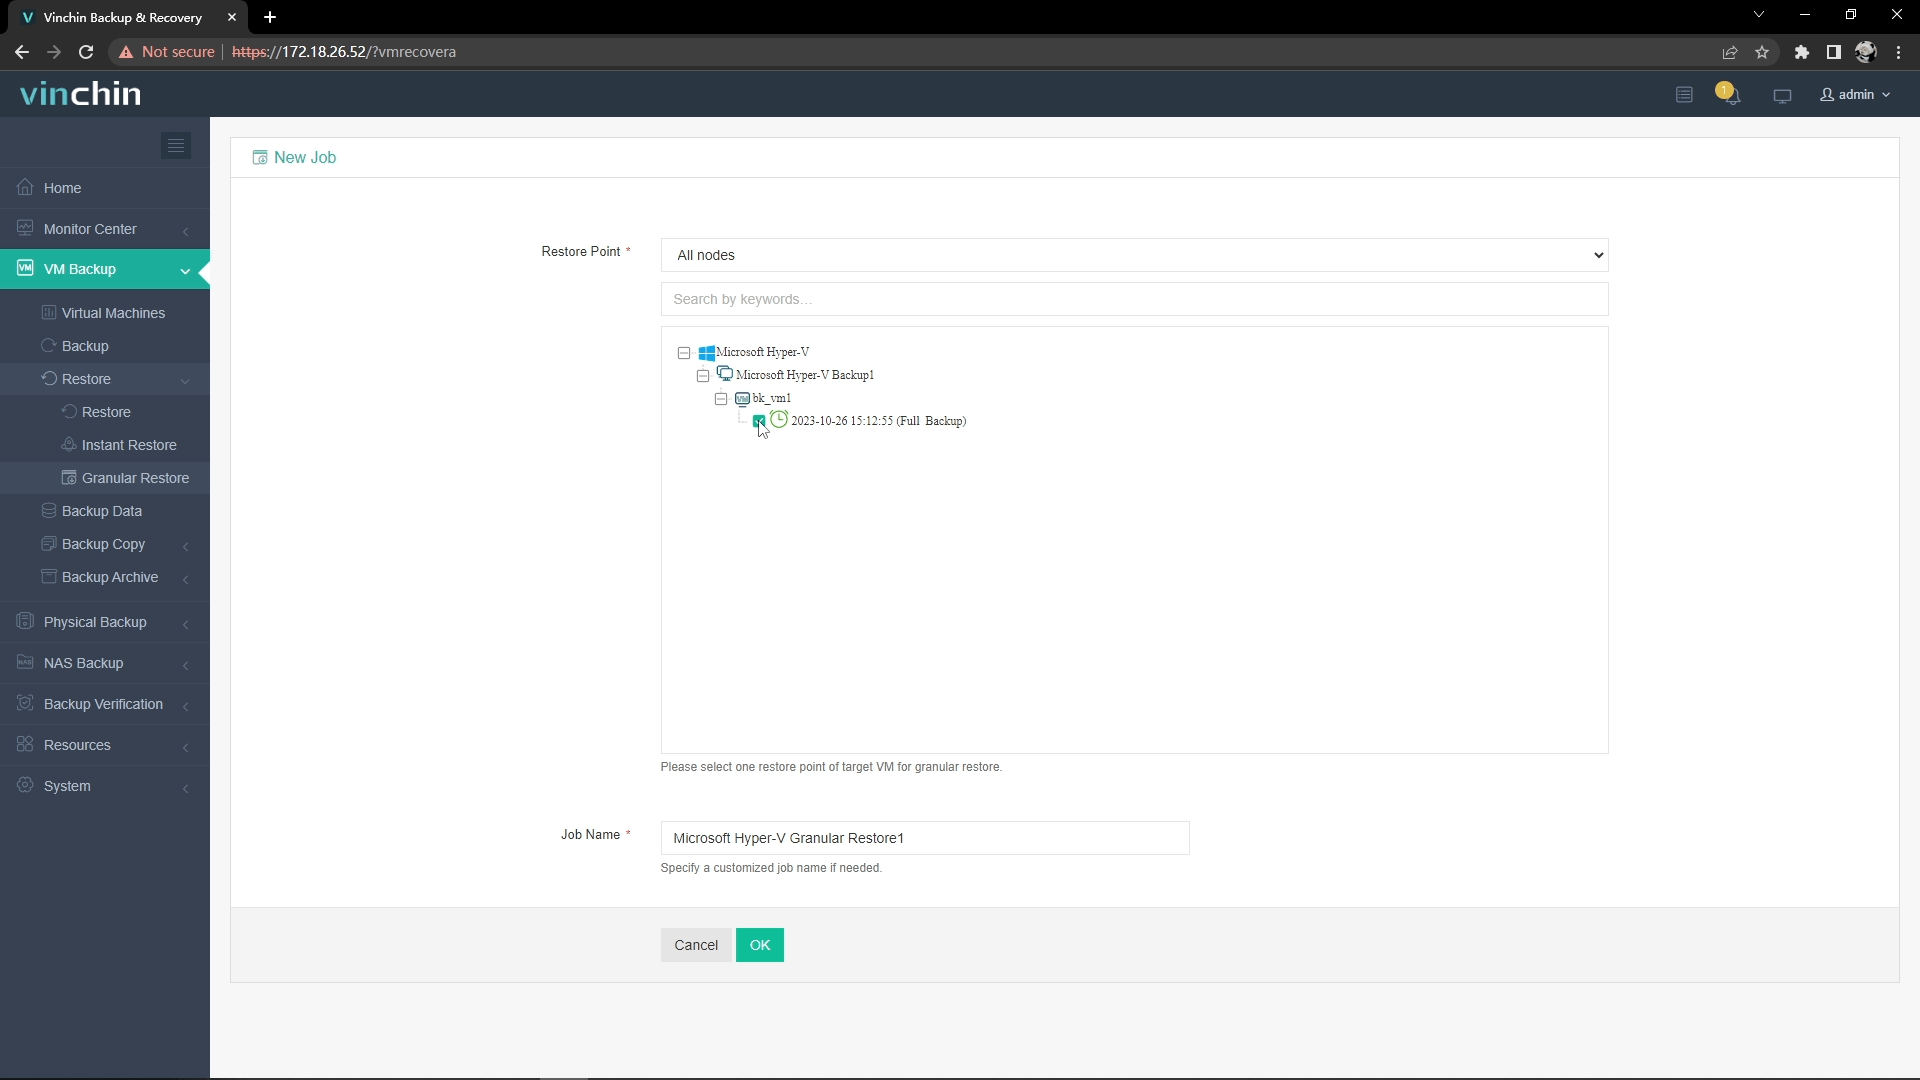
1. Go to VM Backup > Restore > Granular Restore. Select one restore point of Hyper-V VM for granular restore. Here you can specify a customized job name if needed.

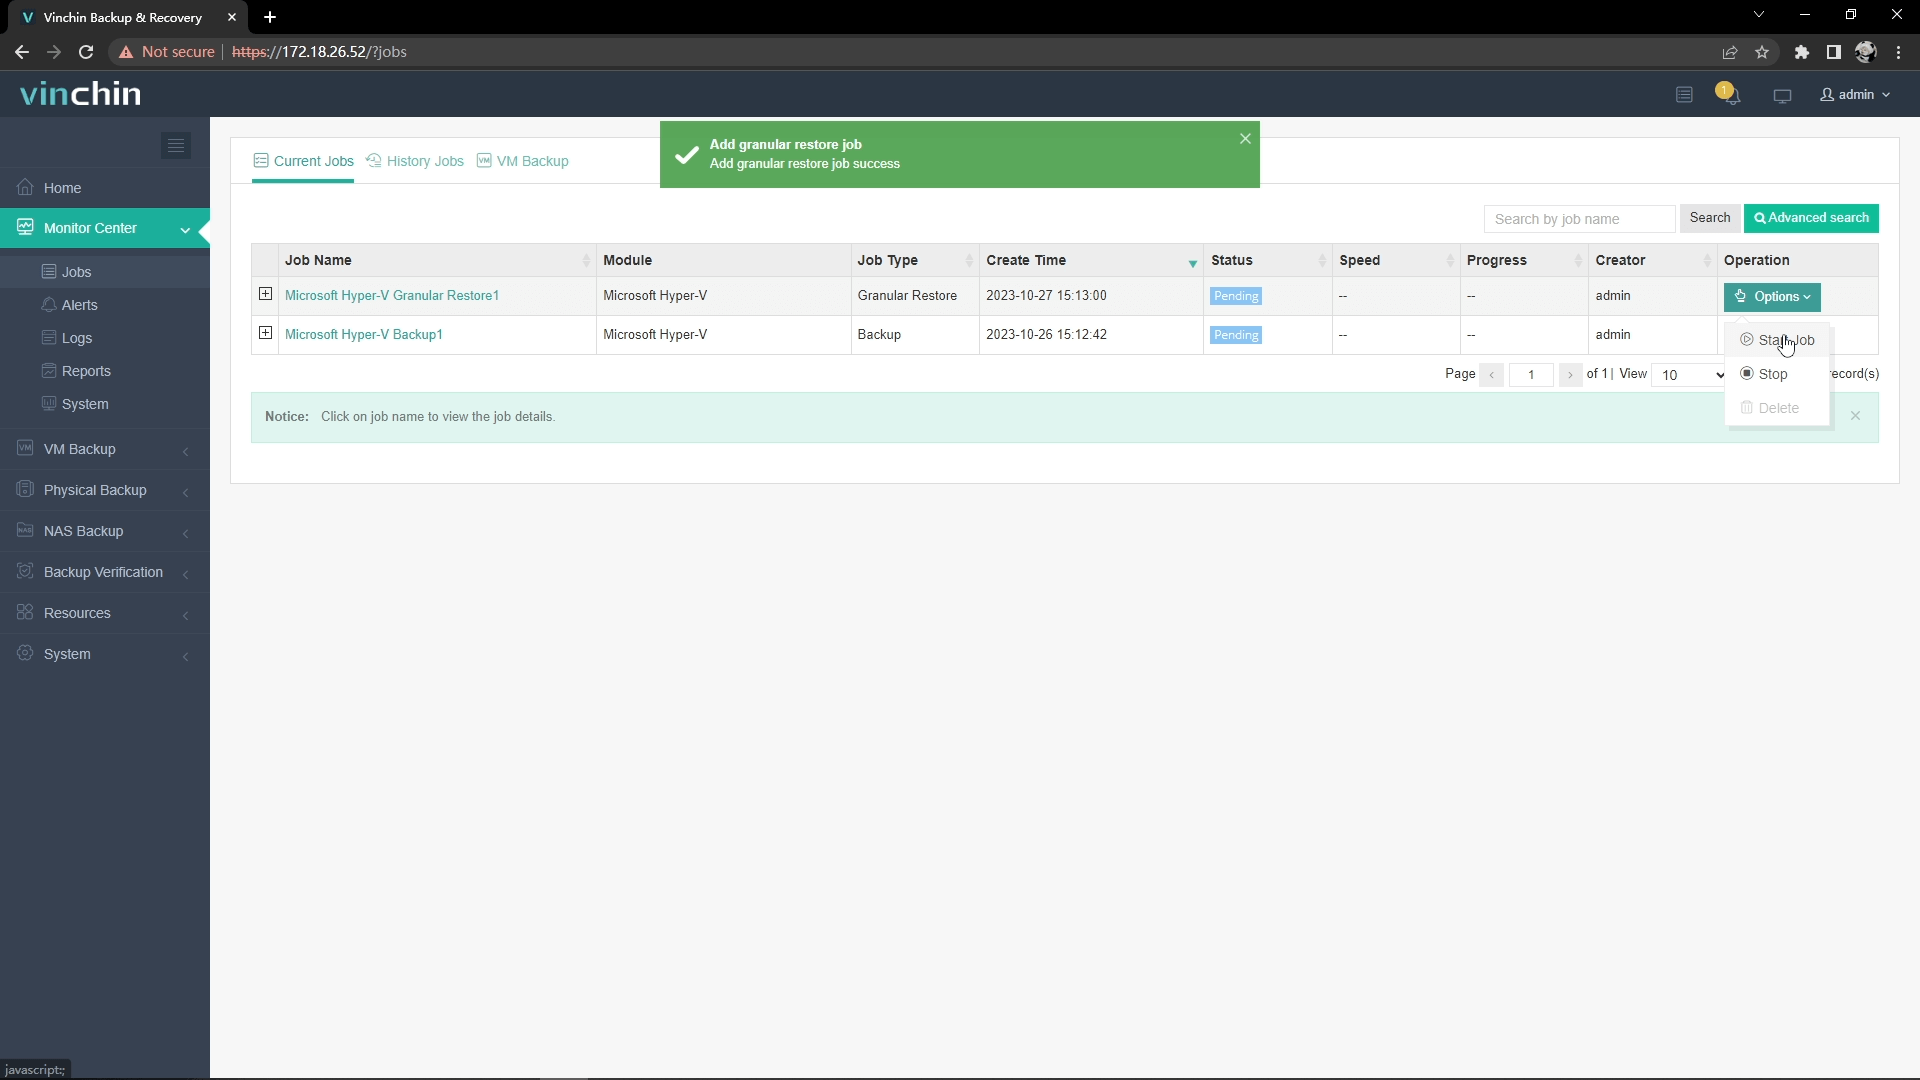
2. Click on Options and Start Job to run this job.

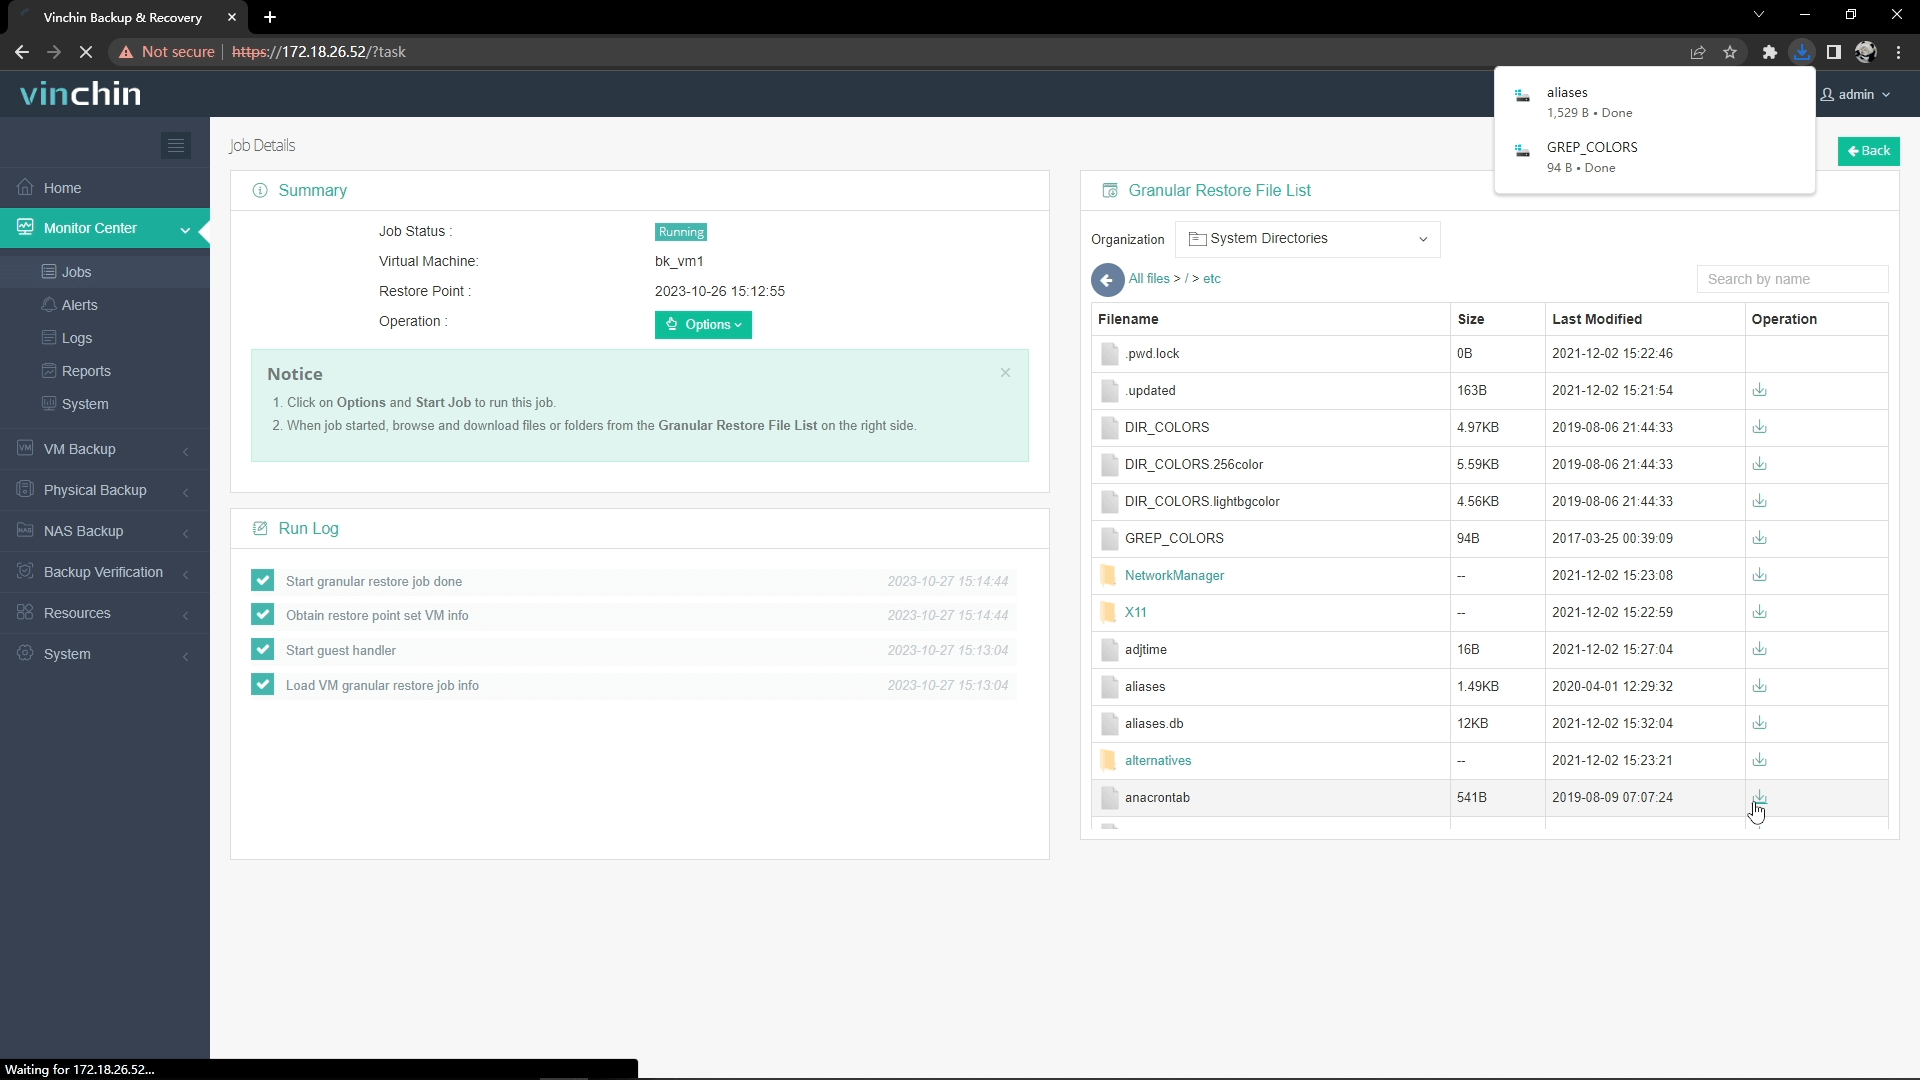
Wait for a while, You will see it’s finished. Now you can preview the files on the right side of the screen and get the ones you need.
3. Just click the download button on the right side to download the files or folders to the local machine.
And you will got these files on your computer.

After that, just stop this job to avoid wasting resources.
Want to experience this efficient feature of Vinchin Backup & Recovery in your Hyper-V environment? you can also start to use this powerful system with a 60-day full-featured trial! Get the journey started today!
Share on:


