-
1. Exporting the Hyper-V Virtual Machine
-
2. Transferring the File to the Proxmox Host
-
3. Validating the File on Proxmox VE
-
4. Converting the VHDX virtual hard disk image file to the QCOW2 format
-
5. Recognizing your newly converted QCOW2 file
-
6. Employing the “ qm set ” command to add the new QCOW2 file to your new created virtual machine.
-
Simplify VM migration with Vinchin solution
-
Conclusion
The previous article provided a detailed overview of the features of Proxmox VE and Hyper-V as virtualization platforms, as well as how to migrate virtual machines from Proxmox VE to Hyper-V. This article will now guide you on the process of migrating virtual machines from Hyper-V to Proxmox VE.
Hyper-V and Proxmox VE are both popular virtualization platforms, but they utilize different virtual machine formats. Hyper-V uses VHD or VHDX formats, whereas Proxmox VE uses QEMU and typically employs QCOW2 or raw formats. Therefore, to migrate Hyper-V virtual machines to Proxmox VE, certain conversion steps need to be taken.
1. Exporting the Hyper-V Virtual Machine
Launch the Hyper-V Manager, right-click on the selected virtual machine you wish to migrate and choose "Export".
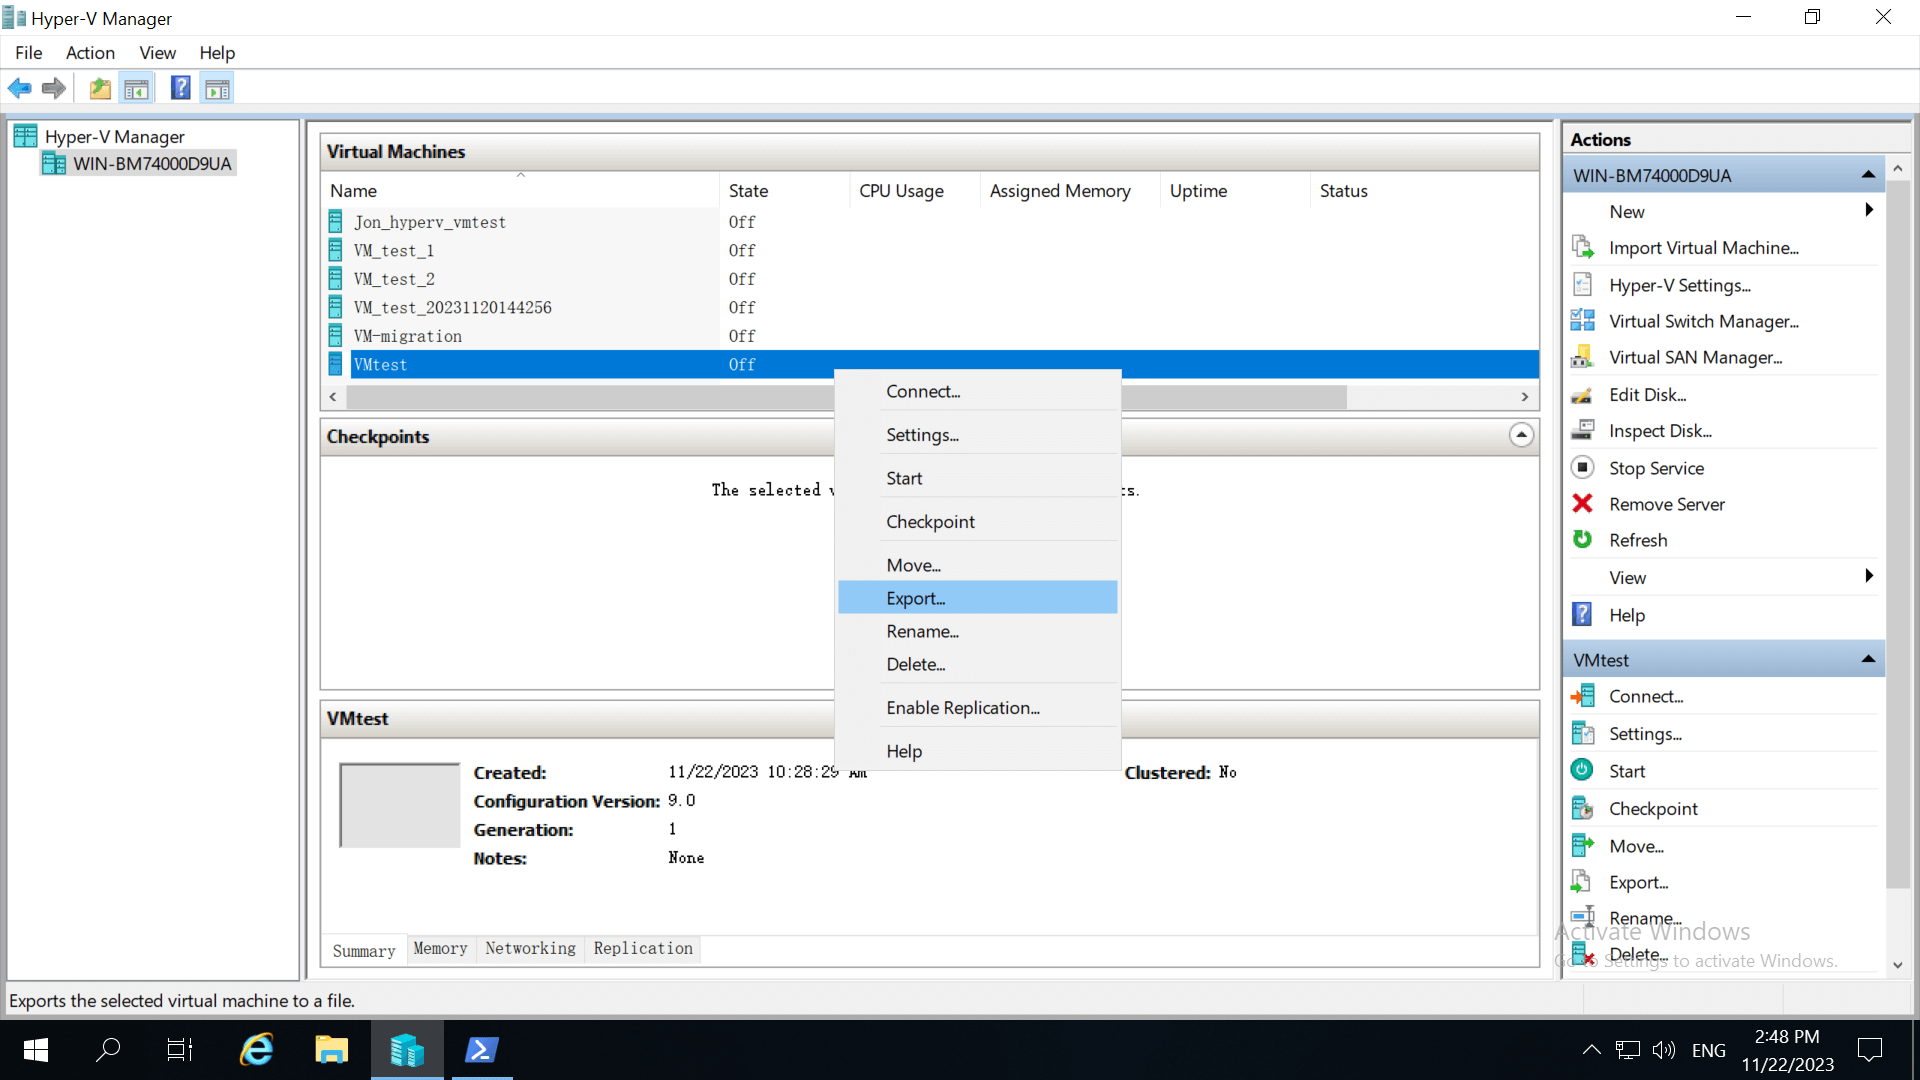
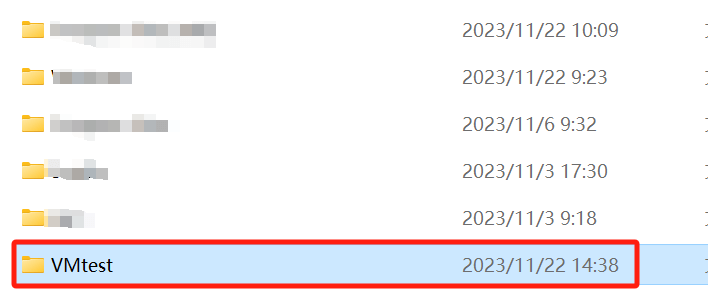
The disk image file for the virtual machine can be found in the "Virtual Hard Disks" folder.


2. Transferring the File to the Proxmox Host
To transfer this file to the Proxmox host, you can utilize the WinSCP tool if remote transfer is required.
3. Validating the File on Proxmox VE
Once the file is transferred to the Proxmox host, you can use the following command in the Proxmox VE Shell page to check the file’s integrity:
qemu-img check -r all "/root/VMtest/Virtual Hard Disks/Hyper-v-proxmox.vhdx"
Please ensure to replace the file path with the actual file path on your Proxmox host.

4. Converting the VHDX virtual hard disk image file to the QCOW2 format
Create a new virtual machine in Proxmox VE and convert the VHDX virtual hard disk image file to the QCOW2 format using the following command:
qemu-img convert -O qcow2 "/root/VMtest/Virtual Hard Disks/Hyper-v-proxmox.vhdx" /mnt/pve/NFS-test/images/107/vm-107-disk-1.qcow2
![]()

5. Recognizing your newly converted QCOW2 file
Utilize the “qm rescan” command to refresh the storage scanning in Proxmox, allowing it to recognize your newly converted QCOW2 file.

6. Employing the “qm set” command to add the new QCOW2 file to your new created virtual machine.
For instance, if you have created a virtual machine with the ID 109, you can use the "pvesm" command to locate the disk file for that particular virtual machine.

Enter the following command:
qm set 109 -scsi0 NFS-test:107/vm-107-disk-1.qcow2

Then, you will notice that the Hard Disk of this virtual machine has been altered at this moment.
And you can attempt to start the virtual machine and see if it functions properly.
Simplify VM migration with Vinchin solution
There is a solution to help you easily migrate VM from Hyper-V to Proxmox VE---using Vinchin Backup & Recovery.
Vinchin Backup & Recovery is a professional solution which supports data backup of VM like VMware vSphere, Hyper-V, Proxmox VE, XenServer, XCP-ng, oVirt, RHV, OpenStack, etc. and other data like database, NAS, file server, Linux & Windows Server, etc.
It performs robust backup and recovery functionality including fast incremental backup, image-based, agentless backup, LAN-Free backup and recovery, offsite backup copy, multithreading transmission, ransomware protection and more, to comprehensively secure your critical data. Instant Restore will allowing restarting a failed VM in 15 seconds, greatly reducing RTO.
You can also simply migrate data from a Proxmox VE host to another virtual platform and vice versa.
To migrate Hyper-V VMs to Proxmox VE, follow these steps:
1.Backup your Hyper-V VM, choose the backup destination and Backup strategies, then Submit it.
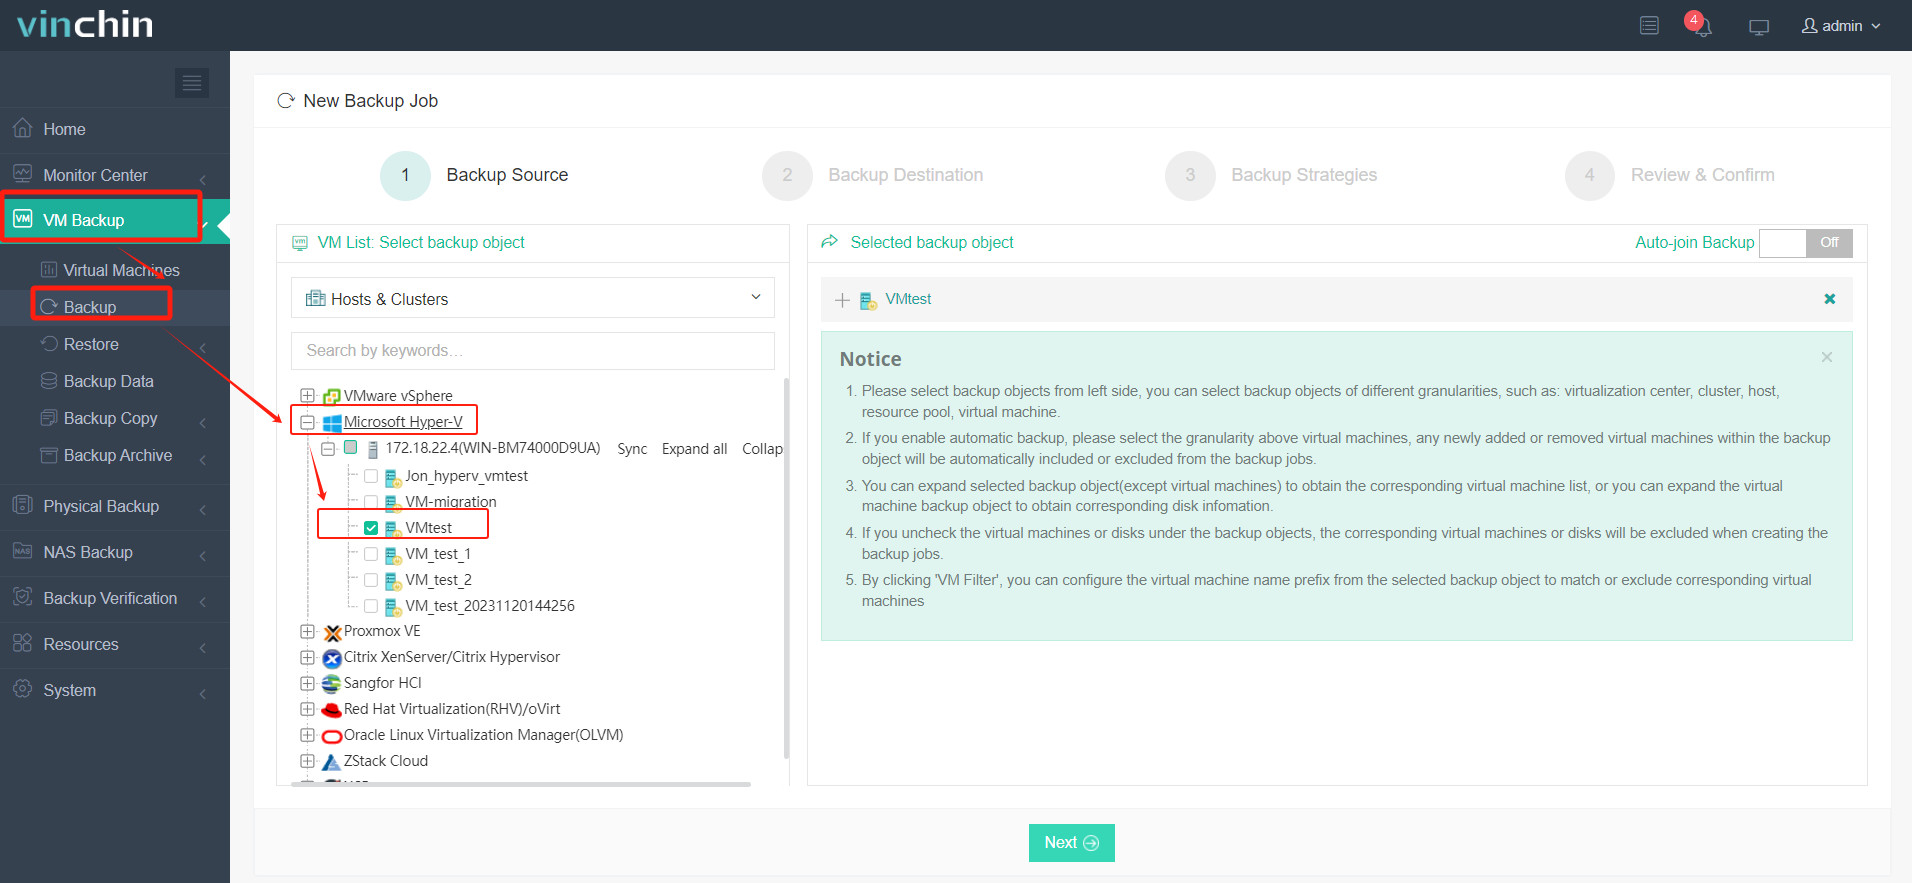
2.Choose the VM you want to restore.
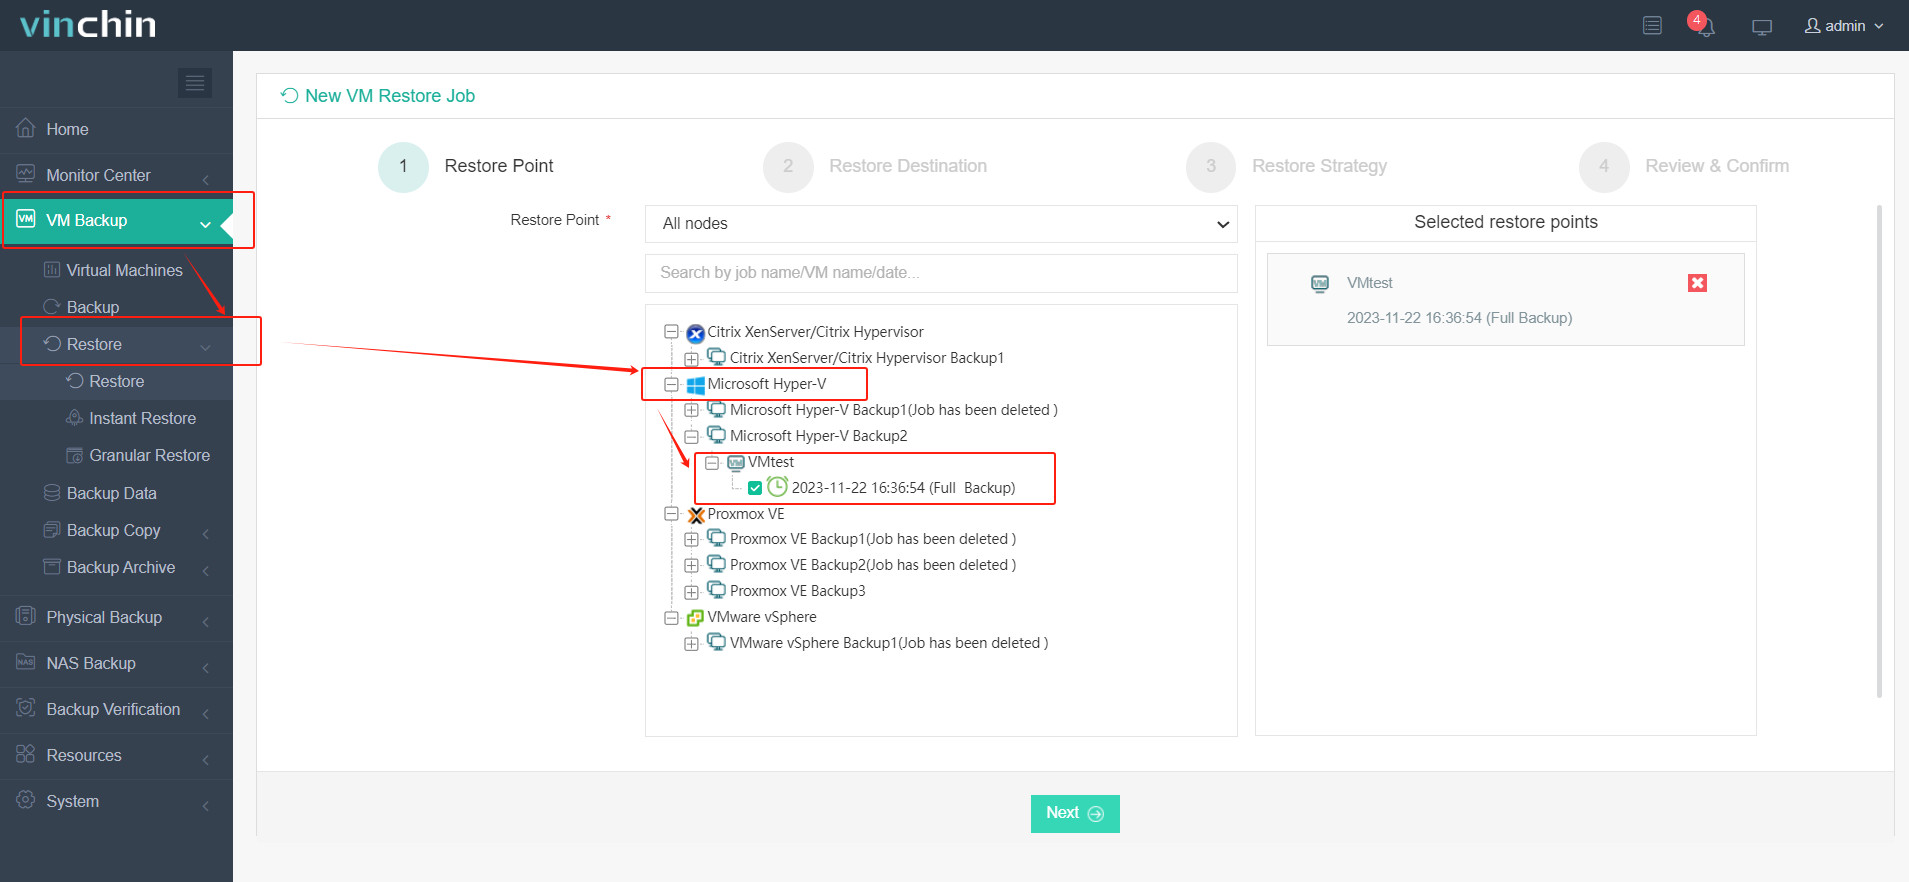
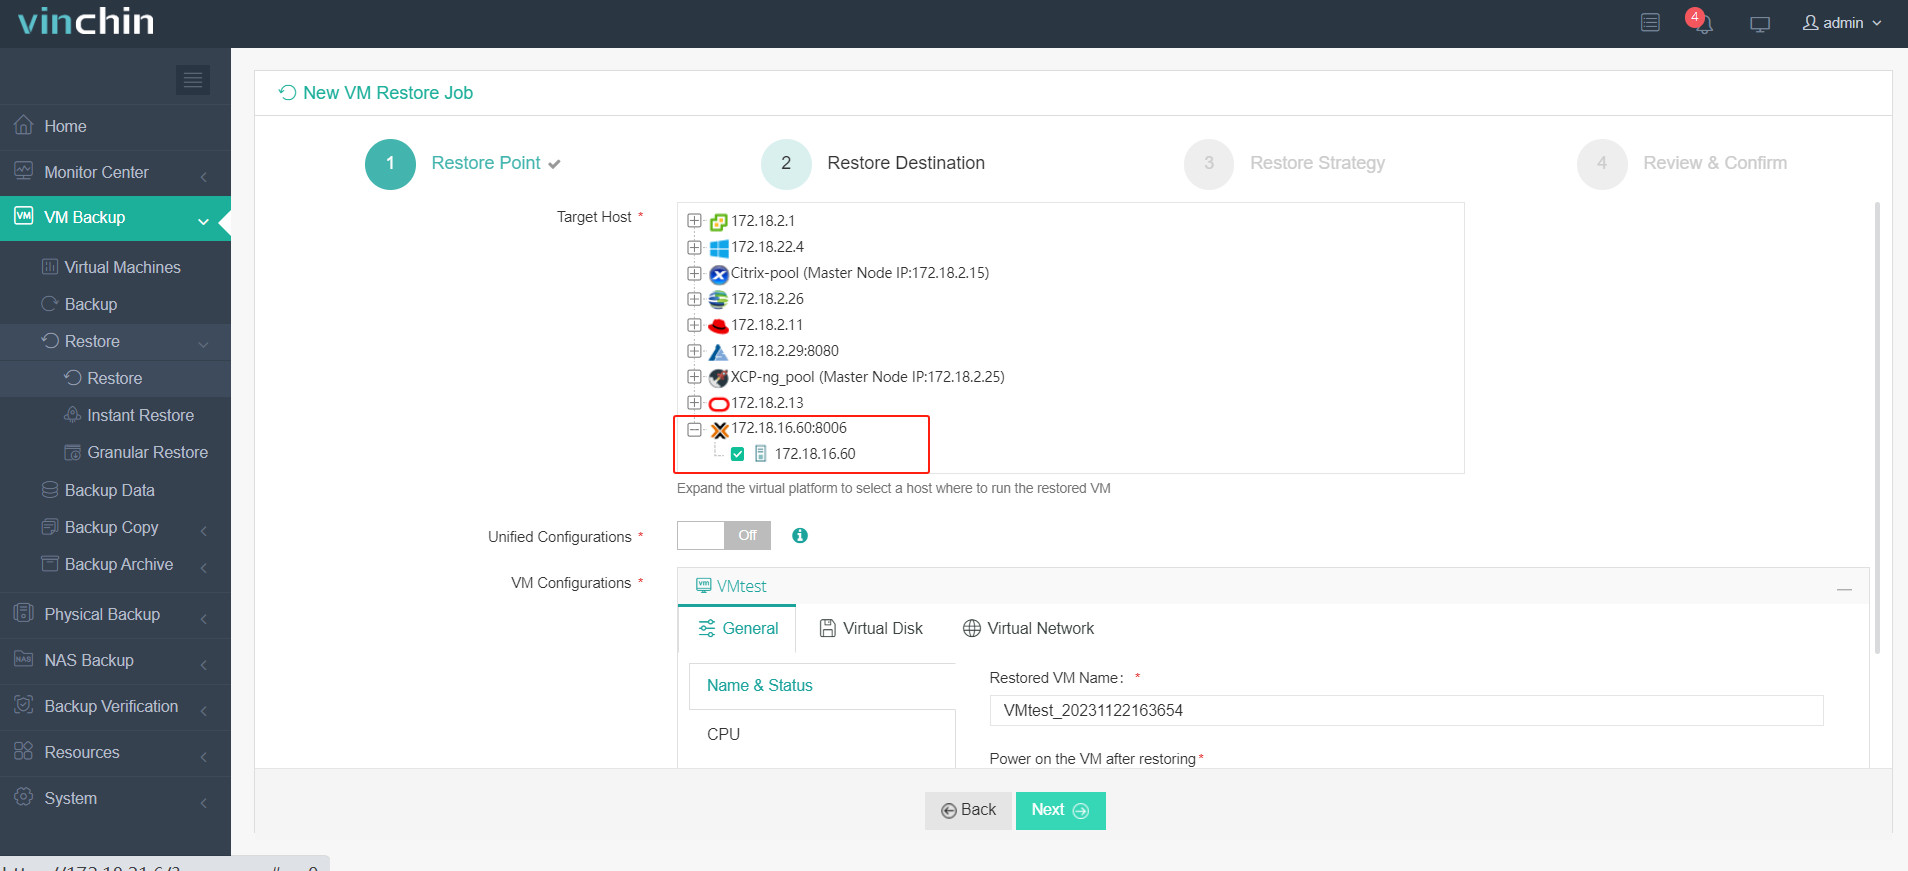
3.Select the Proxmox VE host to run the restored VM
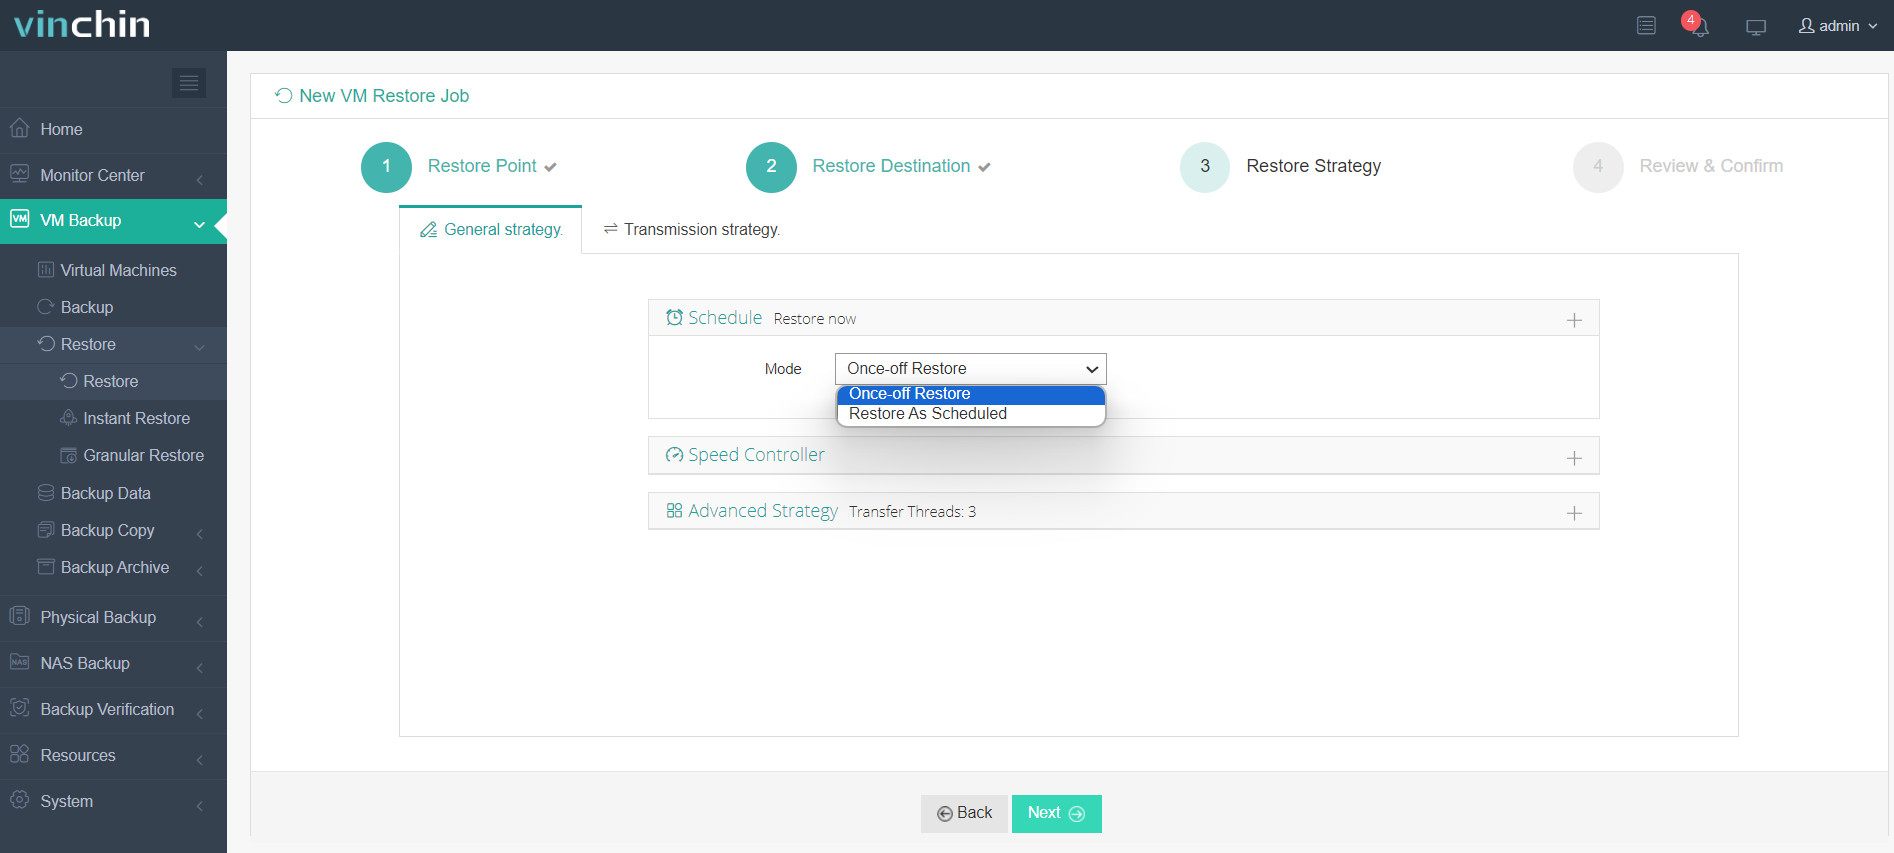
4.Select the restore strategy
5.Review and submit the job.
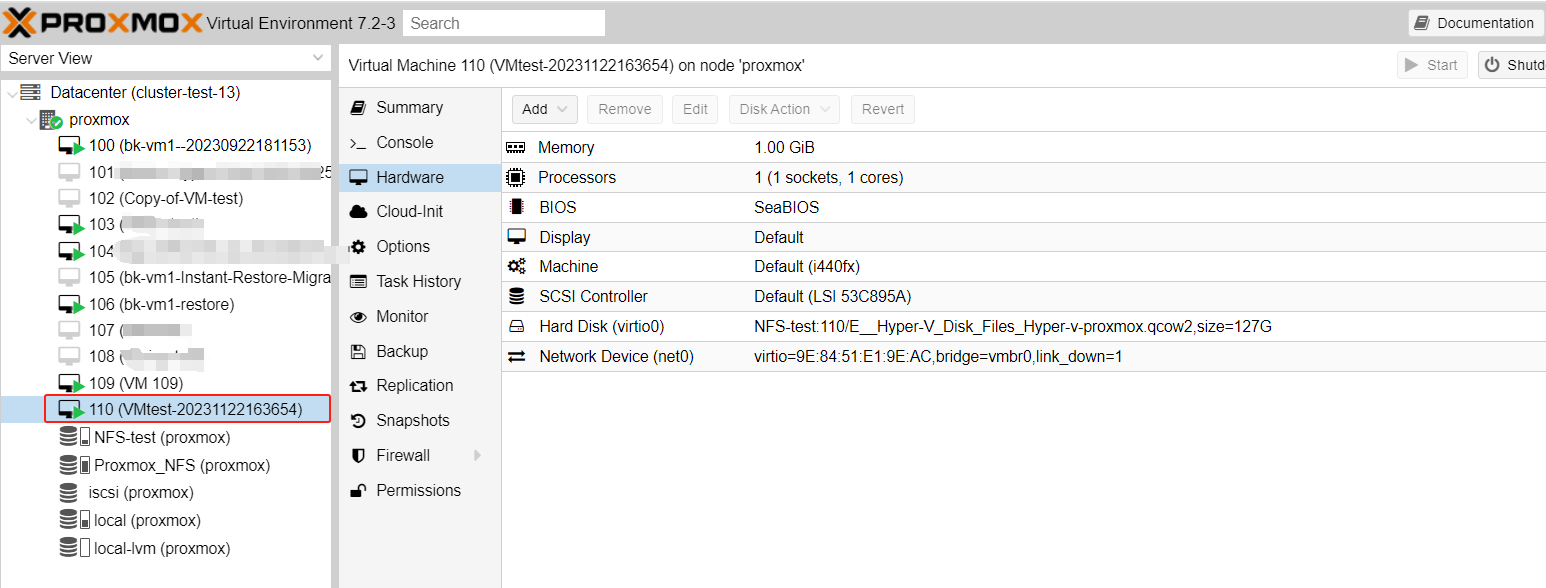
Start the job and then you can check the Proxmox VE web console and find that the VM has been restored and running.
Vinchin Backup & Recovery has been selected by thousands of companies and you can also start to use this powerful system with a 60-day full-featured trial! Also, contact us and leave your needs, and then you will receive a solution according to your IT environment.
Conclusion
Migrating VMs from Hyper-V to Proxmox VE allows you to take advantage of the features and benefits of Proxmox VE, such as its open-source nature, flexibility, and robustness. It's important to note that while this guide provides the basic steps for migration, the process might vary depending on the specific configurations of your virtual machines and host systems. Always ensure to back up your data and thoroughly test your configurations to ensure a successful migration.
You can choose Vinchin Backup & Recovery to easily backup and migrate VMs from Hyper-V to Proxmox VE. Don’t miss the free trial!
Share on:


