-
Method 1. Recover deleted VM with VG information backup
-
Method 2. Recover deleted VM without backing up VG information
-
Protect your XenServer VMs with Vinchin Backup & Recovery
-
Conclusion
XenServer is a virtualization platform that allows you to run multiple virtual machines (VMs) on a single physical server. It provides features such as live migration, high availability, and resource pooling, making it a popular choice for virtualization.
However, Citrix technical support does not provide data recovery services for mistakenly deleted virtual machines from the perspective of XenServer. However, it is not impossible to recover the data, although the process can be complex. This article provides instructions on how to recover mistakenly deleted virtual machine data.
Method 1. Recover deleted VM with VG information backup
To demonstrate, first create a test storage and a test VM.
For example, the UUID of the SR is 4ec639db-6c87-b775-73d1-b54e21b3a31a.
Open the XenServer command line and enter "pvsan" to find the VG and PV information for this storage.
By default, the VG information is saved in /etc/lvm/backup.
#dir
To test, enter the command to backup the original VG information to the /root directory.
#cp VG_XenStorage-4ec639db-6c87-b775-73d1-b54e21b3a31a /root
Now, how to recover the virtual disk if it is deleted?
1. After deletion, it can be seen that the data is no longer present on the storage. However, since we previously backed up the VG, we can directly restore the VG information using the command:
#vgcfgrestore VG_XenStorage-4ec639db-6c87-b775-73d1-b54e21b3a31a -f /root/ VG_XenStorage-4ec639db-6c87-b775-73d1-b54e21b3a31a
2. After the restore is complete, use the command to check if the restoration was successful:
#lvscan |grep 4ec6
3. It can be seen that the VHD-306128a9-7138-4611-a2c6-b79823e1e58b has been recovered, but this logical volume is inactive. Activate it first using the following command:
#lvchange –ay /dev/ VG_XenStorage-4ec639db-6c87-b775-73d1-b54e21b3a31a/VHD-306128a9-7138-4611-a2c6-b79823e1e58b
4. After activation, please note that the VHD has the "hidden" attribute. If you run sr-scan at this point, you will find that the logical volume disappears again. To check the attributes of the VHD, you can use the following command:
#vhd-util read –n /dev/ VG_XenStorage-4ec639db-6c87-b775-73d1-b54e21b3a31a/VHD-306128a9-7138-4611-a2c6-b79823e1e58b –p
5. To change the attribute to not hidden, use the following command:
#vhd-util set -n /dev/ VG_XenStorage-4ec639db-6c87-b775-73d1-b54e21b3a31a/VHD-306128a9-7138-4611-a2c6-b79823e1e58b –f hidden –v 0
Afterwards, you can create a new VM and attach the corresponding disk to complete the recovery process.
Method 2. Recover deleted VM without backing up VG information
Usually, it is impossible for customers to manually back up VG information. When the customer deletes the VM, the VG information in the /etc/lvm/backup directory on xenserver is also updated accordingly, so recovery in this case is more difficult. But there is the way.
1. First find the information of the pv corresponding to the VG
#pvscan
Here we see that the pv information corresponding to this VG is /dev/sdj
2. Using the command to find the information of the deleted VHD:
#dd if=/dev/sdj count=100 |strings
(Please note that if you have a lot of vhds on your storage, you must check them one by one). Record the above information.
3. Open the backup information of the corresponding VG in the /etc/lvm/backup directory
#cat VG_XenStorage-4ec639db-6c87-b775-73d1-b54e21b3a31a |more
You can see the format of normal VHD information in the VG backup information.
4. Insert the VHD informationin to the corresponding VG information according to the above format and save and exit.
#vi VG_XenStorage-4ec639db-6c87-b775-73d1-b54e21b3a31a
5. Continue to execute vgcfgrestore
#vgcfgrestore VG_XenStorage-4ec639db-6c87-b775-73d1-b54e21b3a31a –f VG_XenStorage-4ec639db-6c87-b775-73d1-b54e21b3a31a
It can be restored now. The rest is to activate the logical volume, change the vhd attribute hidden to 0, create a new VM, and attach the disk, and finally the data recovery can be completed.
Protect your XenServer VMs with Vinchin Backup & Recovery
Vinchin Backup & Recovery is a professional solution which supports data backup of VM like VMware vSphere, Hyper-V, XenServer, XCP-ng, oVirt, RHV, OpenStack, etc. and other data like database, NAS, file server, etc.
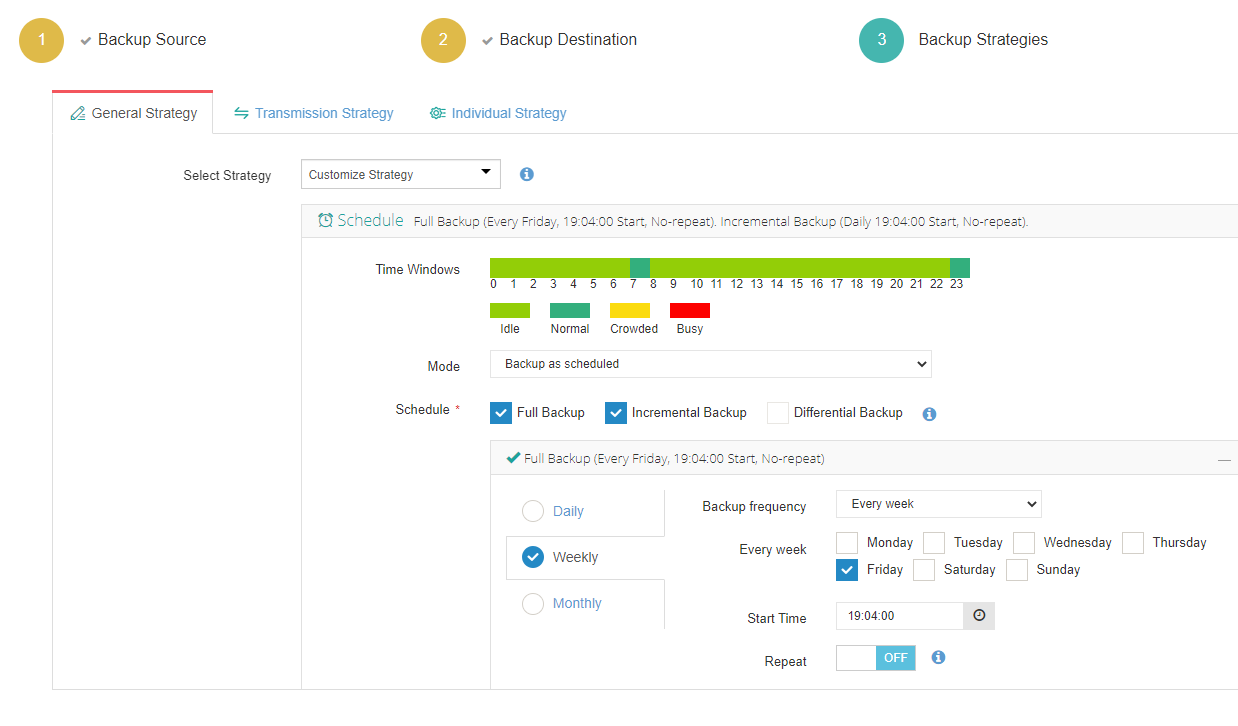
Vinchin Backup & Recovery offers flexible backup scheduling options for users to set full backup, incremental backup, and differential backup jobs to automatically run at daily, weekly and monthly basis, realizing smart XenServer backup process to minimize manual backup configuration workloads for users. With Vinchin Backup & Recovery, you can easily recover an entire XenServer VM in a straightforward way.
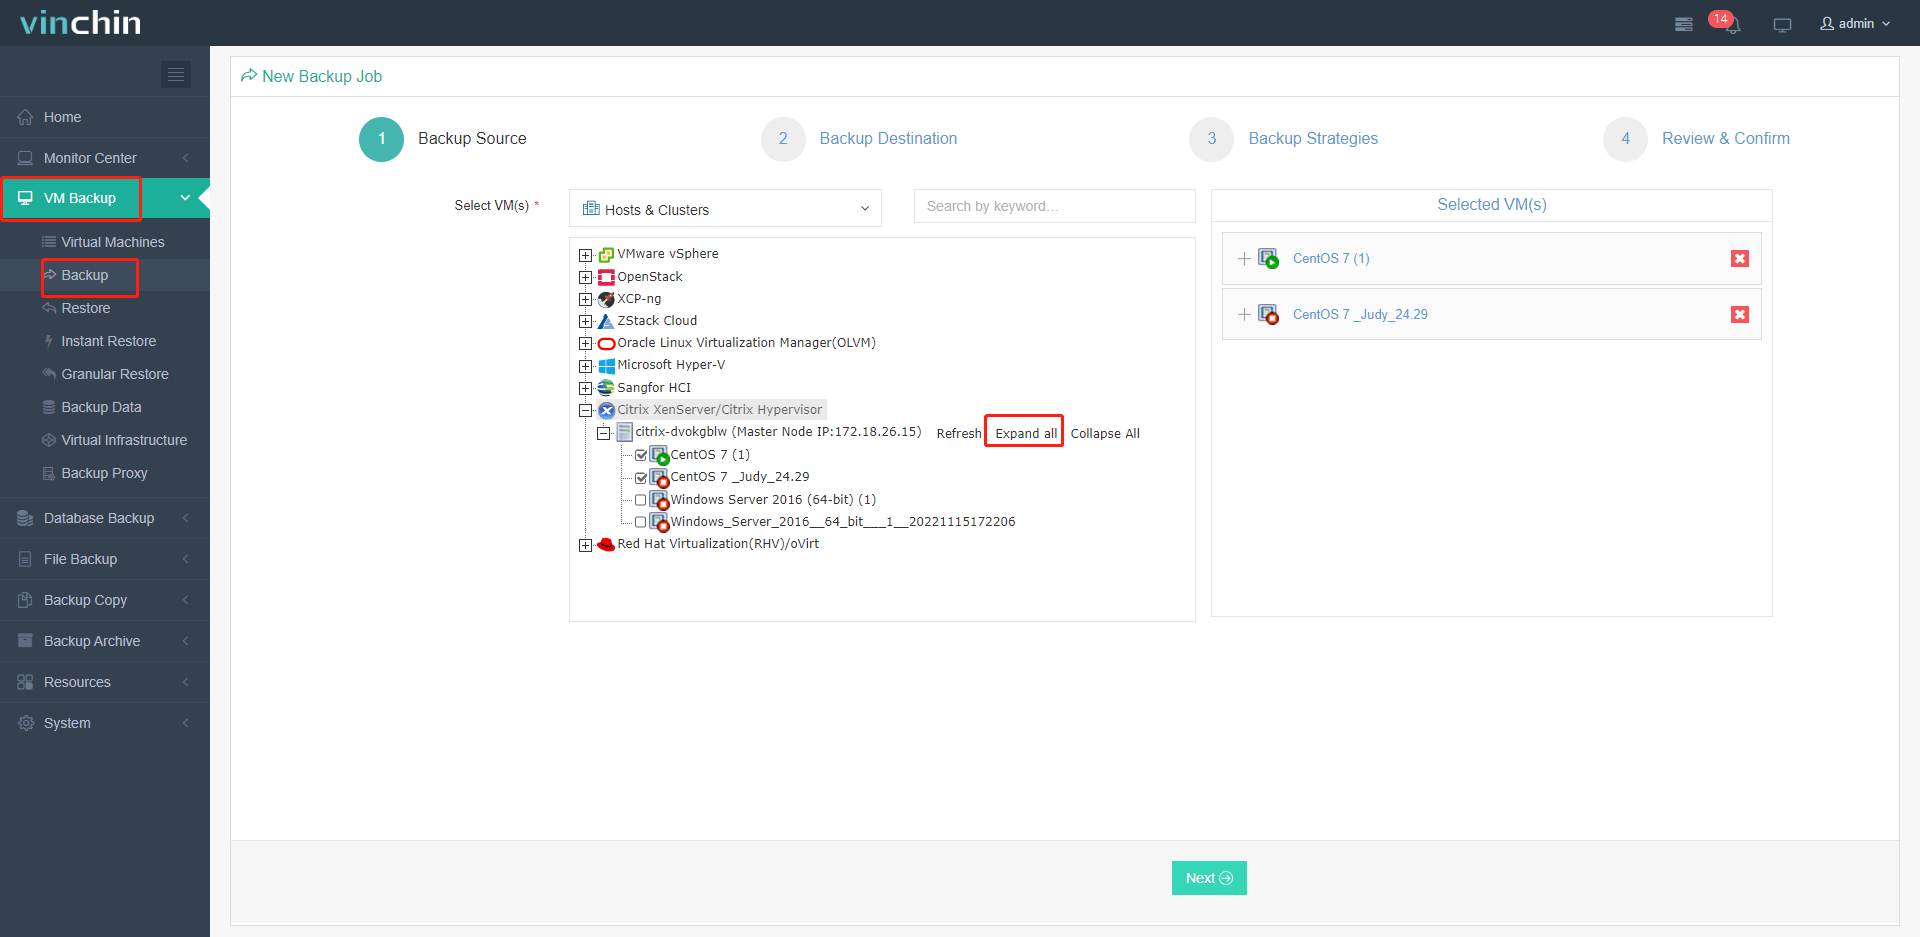
A users-friendly web console will help easily create the backup job.
1. Select the XenServer VM

2. Select the backup storage

3. Select needed backup strategies

4. Submit the job
You can start to use this powerful system with a 60-day full-featured free trial. Just click the button to get the installation package.
Conclusion
XenServer VMs are important for organizations looking to optimize their server infrastructure, improve resource utilization, and achieve higher levels of flexibility, scalability, and reliability in their IT operations.
Recovering a deleted VM from XenServer can be complex and requires careful attention to detail. It is essential to have proper backup and recovery solutions like Vinchin Backup & Recovery and to exercise caution when performing administrative tasks to avoid such incidents.
Share on:


