Compared to an external hard drive, NAS is a better backup device that offers centralized storage, data backup options, and a range of features for multiple users to access and share data over a network. Lots of NAS brands like Synology, QNAP, Asustor, TerraMaster, etc. are on the market. The former two are the most popular ones and the choice between Synology vs QNAP NAS is a matter of opinion.
But some prefer Synology because of its ample storage capacity, ease of use, data backup capabilities, and wide range of apps to meet various needs. Its file sharing, collaboration features, and simple management, such as user permissions, file locking, versioning, and Synology Drive Client, make it an ideal storage solution for both home and business users.
In this article, we are going to dive deep into its management interface, Synology Drive Client, about its features, pros and cons, and how to configure and use it to backup and restore Synology NAS in detail.
What is Synology Drive Client?
Synology Drive Client is a software for desktops that facilitates file synchronization, computer backup services, and data management for multiple client computers to a centralized server, Synology Drive Server.
With Synology Drive Client, you can schedule backup tasks to transfer your computer files to a Synology Drive server and generate versions of these files that can be retrieved or downloaded as required.

Compatibility:
Features
File synchronization: Allows users to access, synchronize, and share files across multiple client computers and the Synology Drive server via file browser. This ensures that all the latest updates are available on all devices.
Backup tasks: Provides users with scheduled backup tasks to automate backups of important files and data to a Synology Drive server.
Versioning: Creates versions of backed-up files to retrieve and restore earlier versions of files.
Cross-platform support: Works with Windows, macOS, and Linux operating systems.
Customizable settings: Customizes backup modes in a continuous, manual, or scheduled way.
Pros
User-friendly interface: Has an intuitive interface that makes it easy to set up and manage backup tasks and file synchronization.
File sync: Creates up to 64 sync tasks for Windows to ensure that important data is available when needed with synchronization with My Drive, Team Folder, and Shared with me folders on Synology Drive Server and on-demand sync to reduce overhead.
Security: Blacklists file names, extensions, and maximum file sizes for each sync task while monitoring and logging file manipulations to identify potential security breaches and take corrective actions before any damage is done.
Flexible backup: Provides multiple backup modes to meet different business needs.
Cons
Requires a Synology Drive server: To use Synology Drive Client, users must have access to a Synology Drive server, which can be a limitation for some users.
Limited sync files and drive types: Syncs a maximum of 500,000 files and degrades performance if exceeds. And do not support certain file and drive types like .pst.
Limited backup and sync: One account can only have a single backup task, and you cannot select already synced folders or their parent/child folders for a sync task. Files within a mount point located in a local folder that is mounted via other file protocols may not be synced.
On-demand Sync: Cannot be used to sync local folders that have already been synced with Synology Drive's On-demand Sync, OneDrive's File On-Demand, or iCloud Drive, including their child folders. Similarly, root drive directories (e.g., C: and D:) and home directories (e.g., C:Users<username>) cannot be used as On-demand Sync folders.
How to Download and Install Synology Drive Client on Windows, Ubuntu, and Mac?
On Windows:
1. Download: log in to the Synology Drive web> click your account name> Client> Download client> For PC> select the Windows version> Save File.
2. Run the installer and click Yes> select a language and click OK> Next on the setup page.
3. Click I Agree on the license terms page and wait for the installation.
4. Select Run Synology Drive Client and click Finish.
On Ubuntu:
1. Download Synology Drive Client for Ubuntu on the download page and click Save File> OK.
2. Close the tabs and run the installation file.
3. Click Install and enter your user password.
4. Search the client in the application menu and click the icon.
Or after the package is downloaded, it resides in the ~/Downloads directory.
1. Update the cache for the APT package repository.
$ sudo apt update
2. Install the Synology Drive Client installer package.
$ sudo apt install ./Downloads/synology-drive-client-*.deb
3. Find the client in the application menu and click the icon to start it.
On Mac:
1. Visit the Synology download center and select the product type as NAS and choose your Synology product edition.
2. Click Desktop Utilities> Drive> Mac (dmg).
3. Double-click the installation file to open it and double-click the icon again.
4. Click Continue until it prompts for your username and password to install the software.
5. Click Close.
How to Set up Synology Drive Client?
1. Open the client and click Start Now.
2. Input the IP address, DNS name, or QuickConnect ID, your username, and password.
3. Check Enable SSL data transmission encryption optionally> Next.
4. Click Not Now if asked to switch to QuickConnect> Proceed Anyway.
5. Click Next on the synchronization page.
6. Choose to enable syncing files shared by others to your PC and edit them directly or Maybe later> Done.
7. Click Next to walk through the feature introduction.
How to Backup, Sync, and Restore Synology NAS with Drive Client?
Backup
1. Click Backup Task and Create Backup Task.
2. Select the Connected Synology NAS or input another QuickConnect ID, username, and password and click Next.
3. Choose the backup folders and destination. Click Select to change your backup destination and click Next. You can choose a folder from Synology Drive or click + to create a new one for backup and click OK.
4. Click Backup Rules in the bottom left to configure the task.
5. Exclude files with exceeding size or extensions from backup optionally and tick the desired backup options. Click Apply> Next.
6. Select the backup mode from continuous, manual, or scheduled backup and click Next.
7. See the summary and click Done.
Sync
1. Click Sync Task and click Next.
2. Choose your sync folders and location on your PC and click Change to select other folders.
3. Tick Enable On-demand Sync to save disk space on your computer optionally and click Done.
4. Click Advanced in the bottom left for further settings.
Specify the folders with max size, names, or designated extensions to not sync and choose the sync mode from two-way sync or one-way download/upload (deselect Keep locally deleted files on the server if you want to delete them on the server).
Choose Enable On-demand Sync to save disk space and Enable advanced consistency check to save time and resources in file comparison optionally.
5. Click Apply> Done.
Restore
1. Click Backup Task> Restore.
2. Choose the file to restore. Click Browse Previous Versions to see the historical file versions.
3. Click Time on top and choose a particular file version to Restore.
4. Download the file to a specific destination as needed.
Synology Drive Client Alternative
Synology Drive Client is a built-in backup and management utility for Synology users, however, it doesn’t contain more advanced backup features like incremental backup or data reduction techniques.
Vinchin Backup & Recovery is an ideal NAS backup alternative to Synology Drive Client. For one, it supports all NAS devices under NFS/CIFS protocols regardless of the brands like Synology, WD, Seagate, or QNAP; for another, it comes with various smart backup strategies as follows:
Wildcard filter to include or exclude backup files.
Full, Incremental, and Differential Backup.
Compress data without suffering its integrity.
Encrypt data transmission with SSL.
Multiple transfer and scan threads for speed.
Restore to the original or new path of NAS Share/File Server as needed.
Anti-ransomware backup encryption with AES-256 algorithm.
An offsite backup copy to save the day.
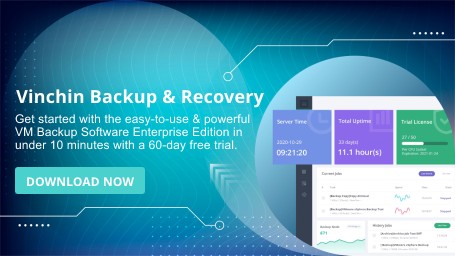
Besides that, the solution is also compatible with 12 virtualizations like VMware, Hyper-V, Xen, 6 databases, Linux & Windows files, and servers and manages all backups and jobs in a central console, download the 60-day free trial to explore more features.
NAS Backup
1. Go to NAS Backup> Backup to select the source files/folders and add a filter under Advanced.
2. Select the backup node and storage.
3. Configure the NAS backup strategies.
4. View the summary and submit the job, which will run based on the time set in the schedule.

In short
The blog covered different aspects of Synology Drive Client quite thoroughly including its features, advantages, flaws, uses, and a comprehensive backup alternative Vinchin Backup & Recovery that offers Synology users a smoother backup experience.