-
How to migrate VM from Proxmox to XCP-ng?
-
How to move VM from Proxmox to XCP-ng with Vinchin Backup & Recovery?
-
Proxmox to XCPng migration FAQs
-
Conclusion
Migrating virtual machines is a common task in computer virtualization environments. Proxmox is a virtualization platform based on open source technology that provides powerful virtual machine management and cluster management features, enabling users to easily manage and deploy virtualized environments.
In contrast, XCP-ng is an open source platform based on Xen virtualization technology that focuses on providing high-performance, reliable, and secure virtualization solutions for a variety of workloads and application scenarios. This guide will detail how to move virtual machines from Proxmox to XCP-ng, helping you achieve a smooth transition and accomplish a smooth platform migration.
How to migrate VM from Proxmox to XCP-ng?
Before starting the migration, it's essential to stop the virtual machine to be migrated and create a backup file on Proxmox. Next, download and extract the backup file, then convert its disk image to the OVF (Open Virtualization Format) format for import on the target platform. Finally, use the XenCenter tool to import the converted virtual machine file into XCP-ng.
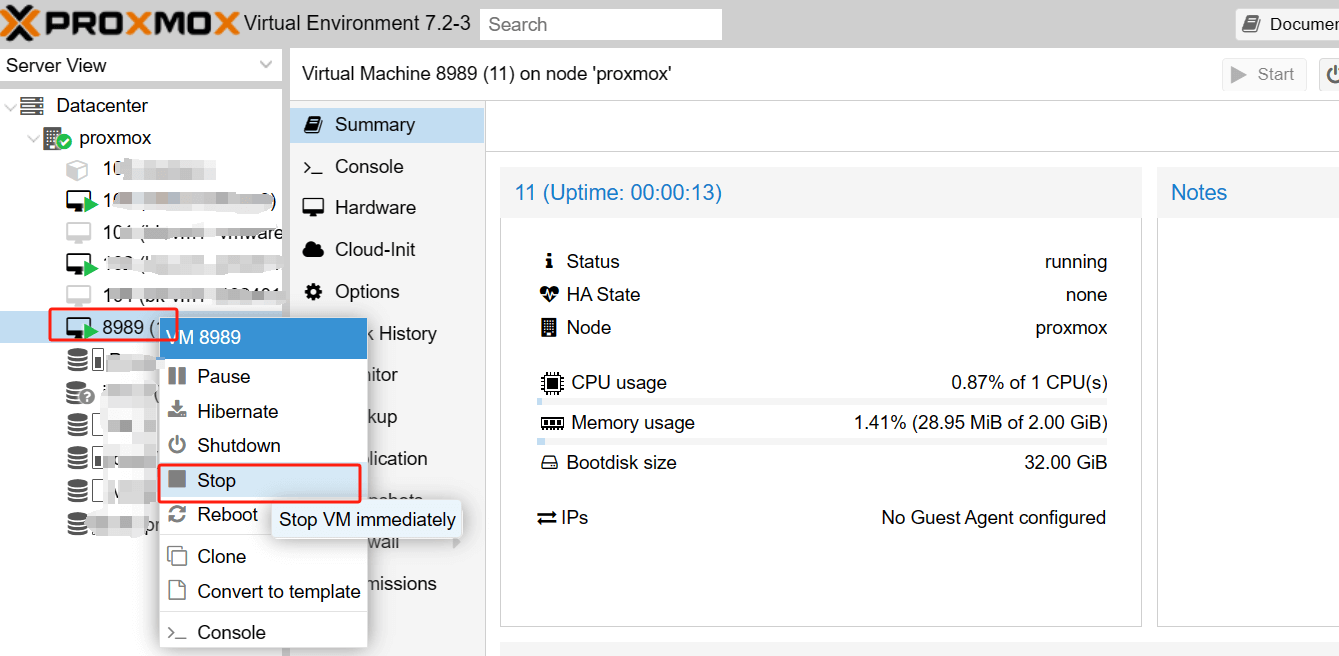
Step1. Stop the virtual machine
Stop the virtual machine to be migrated in Proxmox. Right-click the VM > Stop > Yes
Step2. Create a backup on Proxmox
In Proxmox, hit SSH > type the following command to create a backup file
vzdump vmuuid --compress zstd
vzdump 8989 --compress zstd

After executing this command, the backup file will be automatically saved to the default backup directory of Proxmox, usually the /var/lib/vz/dump/ directory.
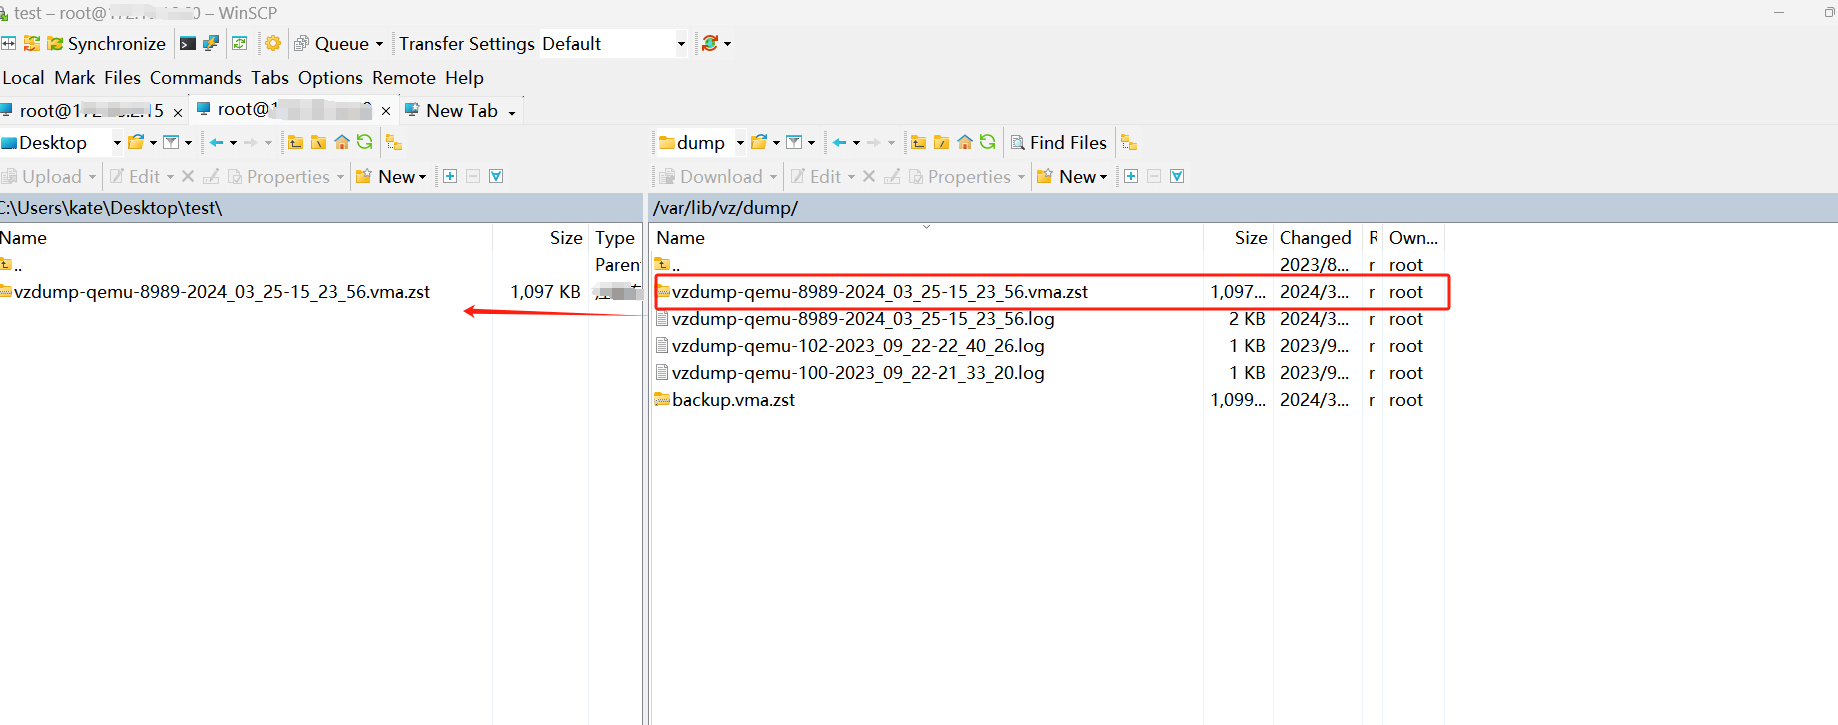
Step3. Download and unzip Proxmox VE backup
1. Link Proxmox in WinSCP, find the backup file and drag it to the left desktop test file.
2. Unzip the backup file on the desktop.
Step4. Convert disk image to OVF format
Since XCP-ng does not support virtual machine disk images in VMA format, you need to convert them to OVF format to ensure a successful migration. OVF is a cross-platform virtual machine description file format that can be imported and exported between different virtualization platforms. You can use VirtualBox for disk image conversion.
In VirtualBox, select Import Virtual Appliance, then select the files to be converted and define the settings to complete the import. After the conversion process, you will obtain a virtual machine file saved in OVF format, which will be imported into XenCenter later.

Step5. Import the virtual machine in XenCenter
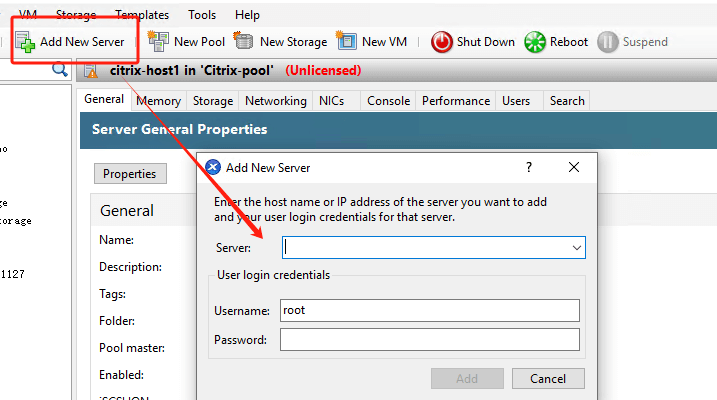
1. In XenCenter, link to XCP-ng,Add New Server > enter the host IP, Username, Password
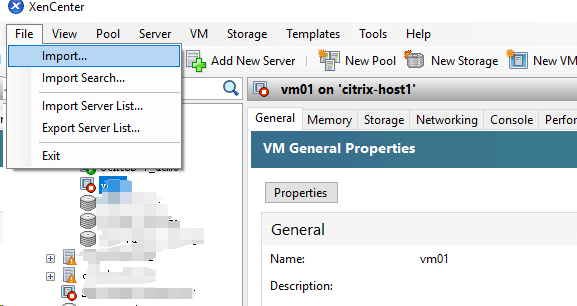
2. Hit File > Import
3. Select the OVF file that has just been successfully converted > configure the imported VM settings, including Location, Storage, Networking > Finish
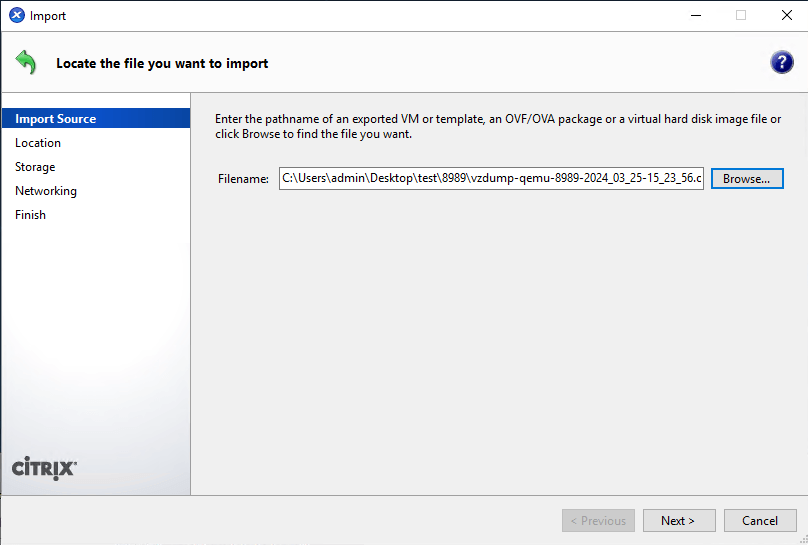
Here you can see that the migration from Proxmox to XCP-ng has been successfully completed.

How to move VM from Proxmox to XCP-ng with Vinchin Backup & Recovery?
Vinchin Backup & Recovery is a comprehensive data protection solution designed for virtualized environments. It supports various virtualization platforms including Proxmox, XCP-ng, VMware, Hyper-V, XenServer, XCP-ng, oVirt, RHV, and is designed to provide efficient backup, replication, recovery, and management of VMs.
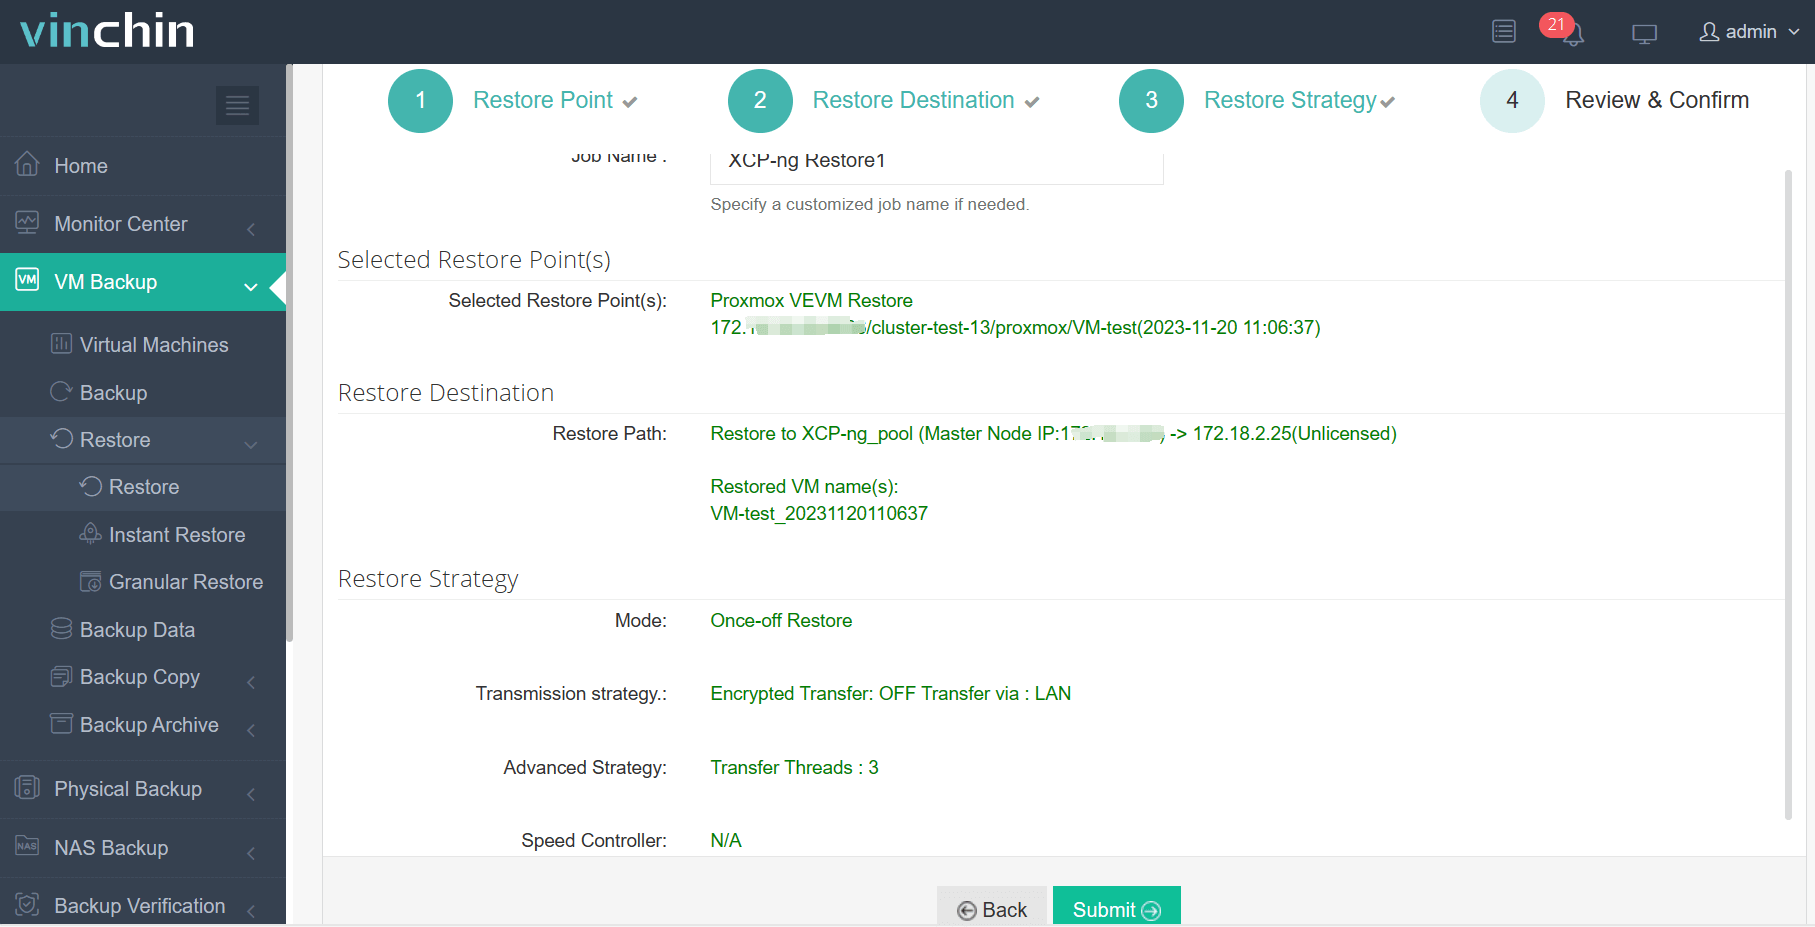
Vinchin Backup & Recovery simplifies data protection and migration tasks. Even for beginners, you can quickly get started with backup, recovery and management operations. Here's how to effortlessly transform VMs from Proxmox to XCP-ng:
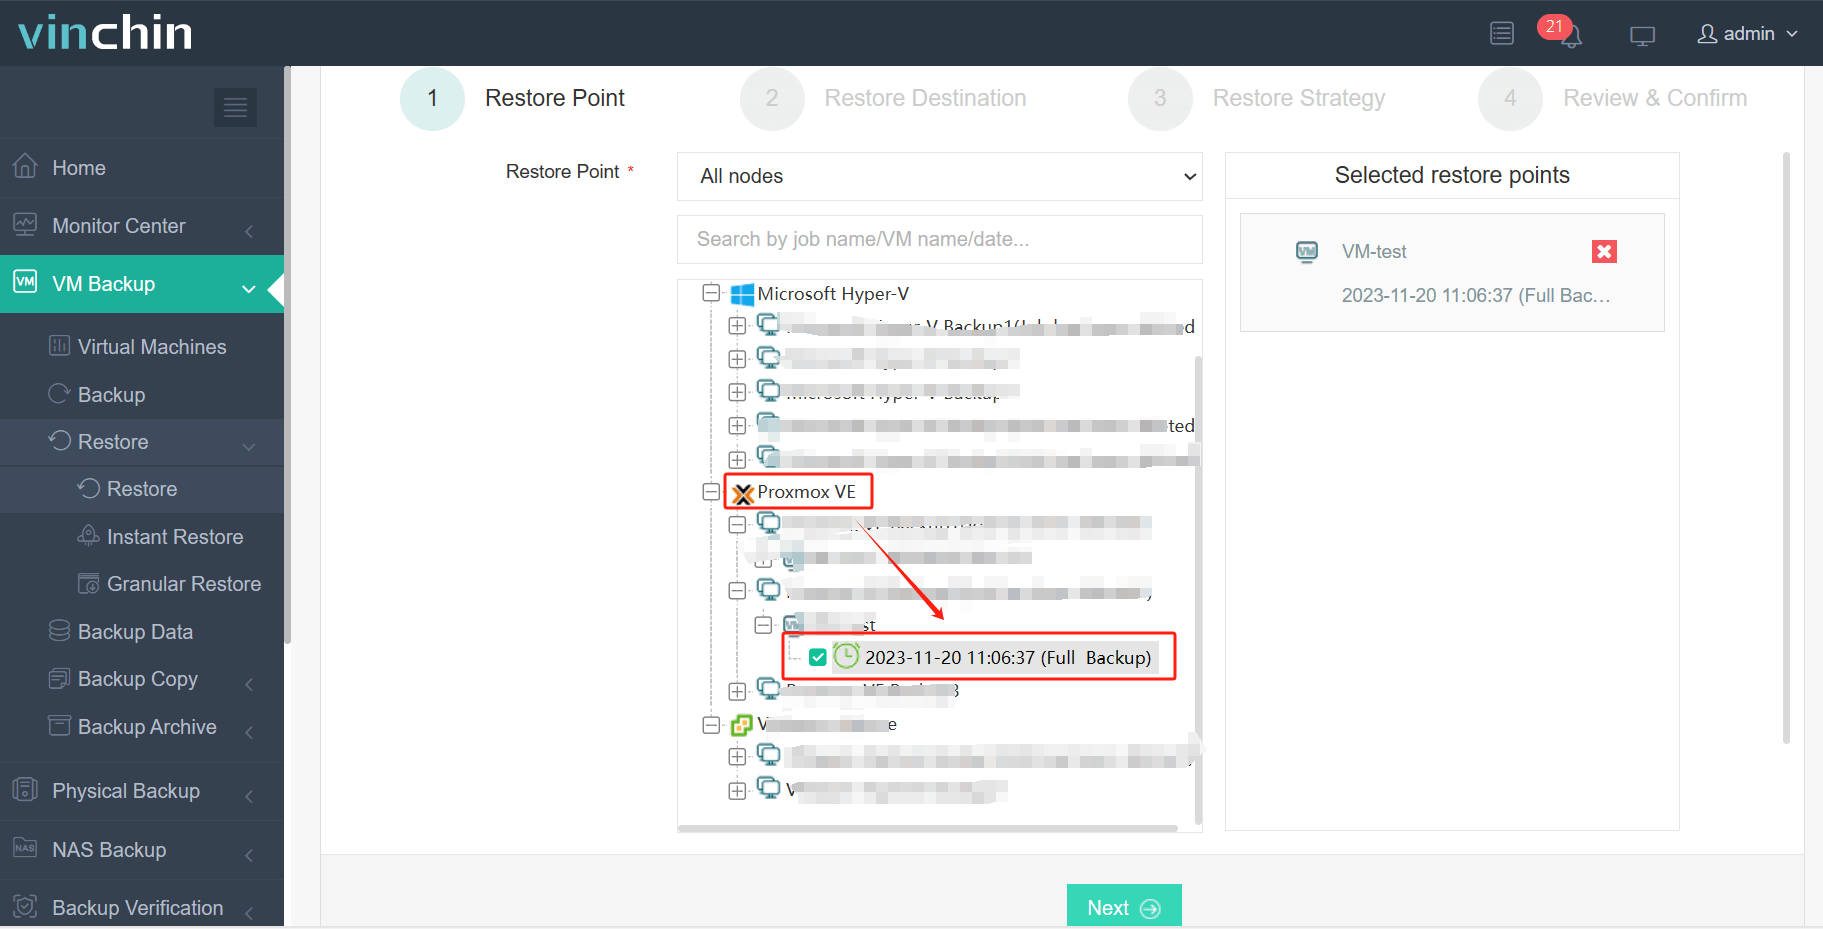
1. Select the backup of Proxmox VM > click Next
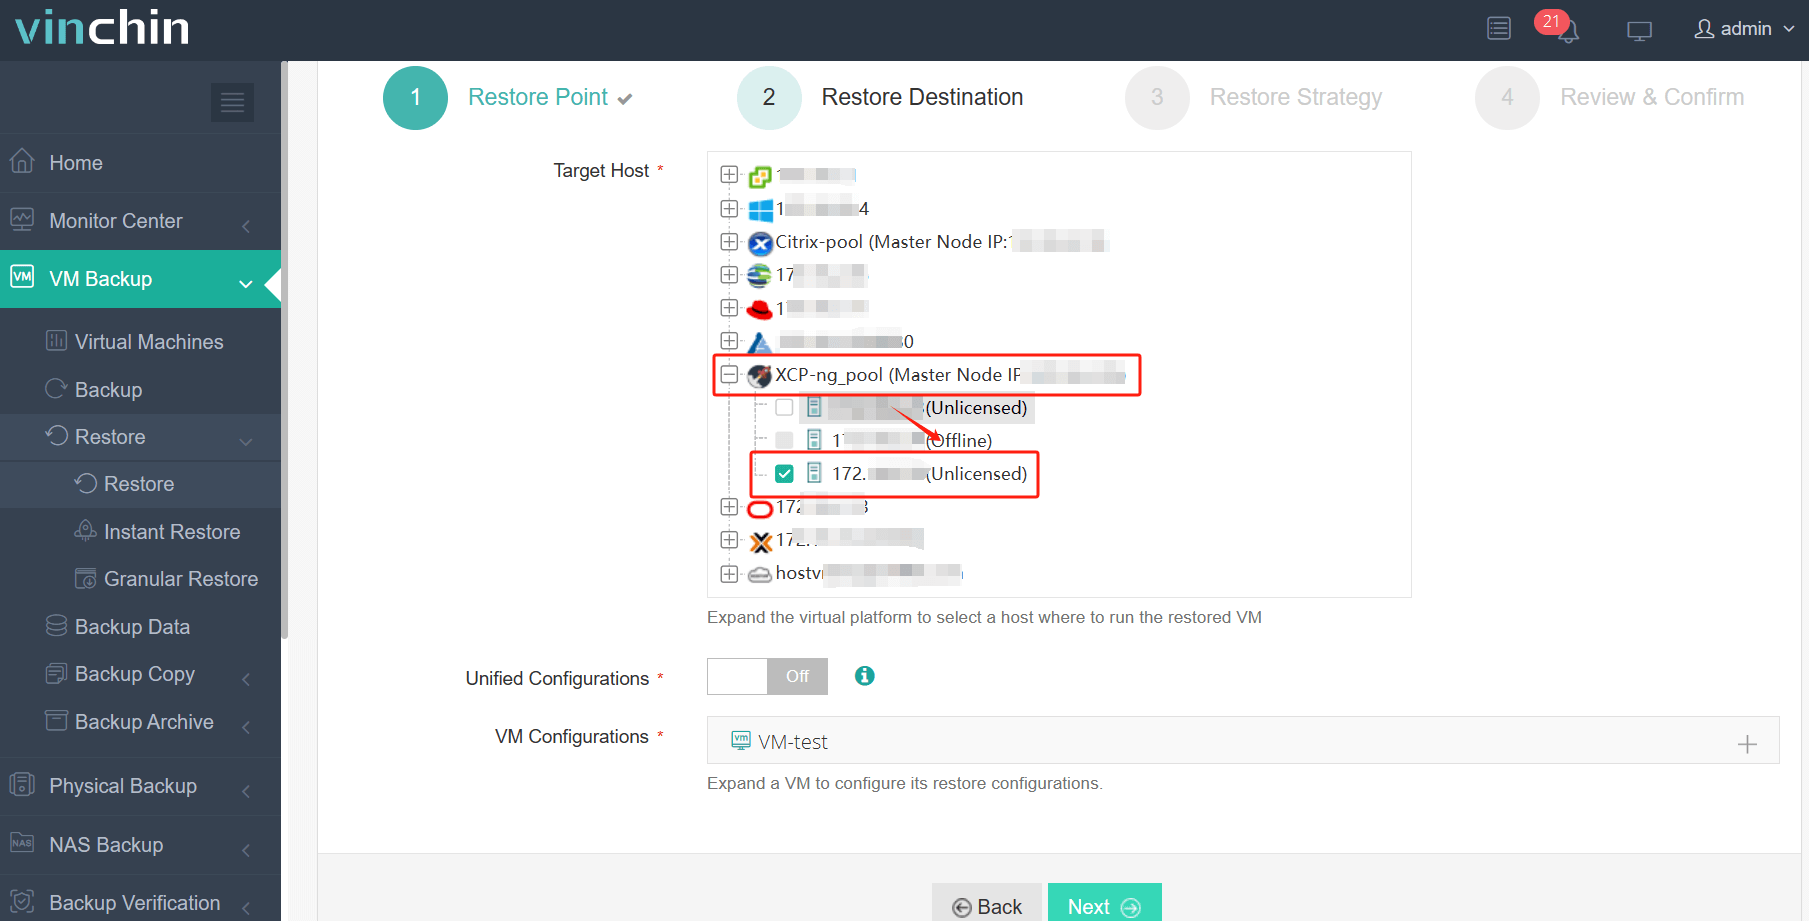
2. Select the XCP-ng host as the target host > click Next
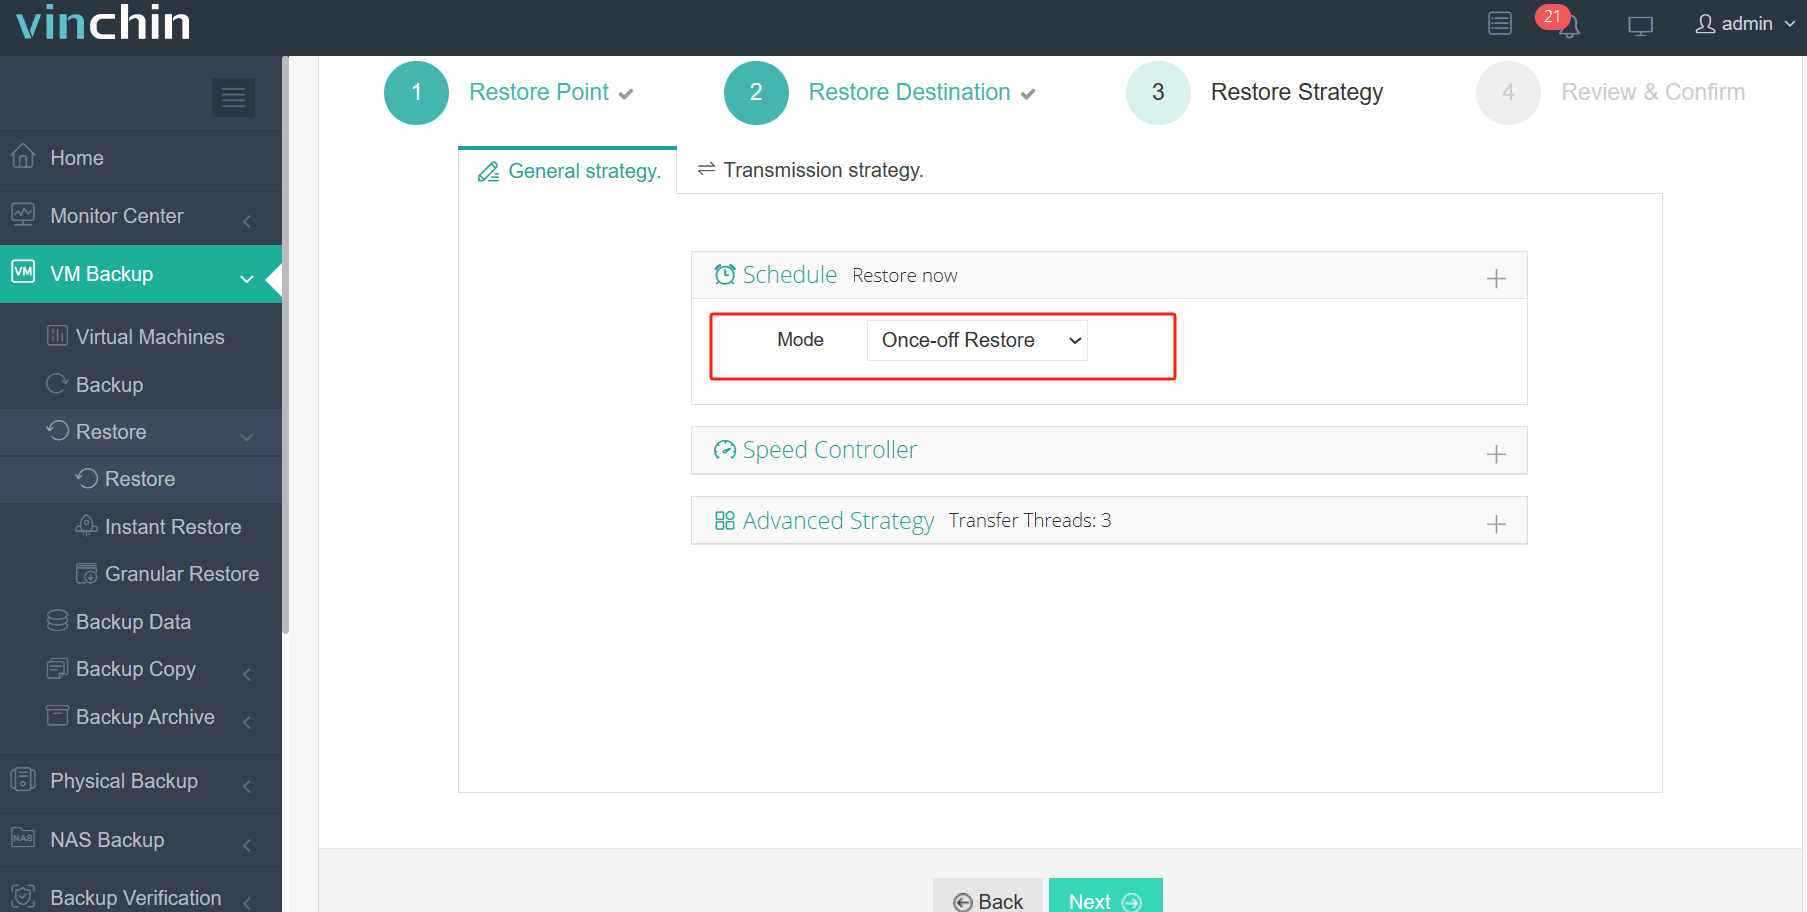
3. Select Once-off Restore > click Next
4. Submit the job
Vinchin ensures real-time protection by backing up VM data at regular intervals, reducing the risk of data loss. Moreover, it facilitates fast recovery to restore VMs promptly to their latest states.
Countless companies have trusted Vinchin Backup & Recovery for their needs. You too can experience its capabilities with a 60-day full-featured trial! Reach out to us or our local partner to discuss your requirements. We'll provide a tailored solution for your IT environment.
Proxmox to XCPng migration FAQs
Q1: How do you handle failures during the migration from Proxmox to XCP-ng?
A1: Failures may be encountered during the migration process, which may be due to various reasons. In this case, make sure you have backups and prepare a recovery plan to restore your business as soon as possible.
Q2: Is it possible to migrate VMs of VMware and Proxmox platforms to each other?
A2: Yes, it is possible to migrate VMs from VMware to Proxmox and from Proxmox to VMware. Migrating VMs requires paying attention to the differences and limitations between the different virtualization platforms and using the appropriate tools or features to import or convert the VM image files and disk formats. Before proceeding with the migration, make sure you back up your data and understand the relevant documentation and guidelines to ensure a smooth migration process.
Conclusion
Transporting virtual machines from Proxmox to XCP-ng involves stopping the VM, creating a backup, converting the disk image to OVF format, and importing it into XCP-ng. Vinchin Backup & Recovery simplifies this process with efficient backup, replication, and recovery solutions, ensuring data integrity and streamlined management.
Share on:


