-
What is VMware EVC Mode ?
-
How to Enable VMware EVC Mode for VMs?
-
How to Change EVC Mode?
-
VMware Backup in Advance
-
Conclusion
vMotion is the VMware data migrator that moves multiple running VMs across vSphere-supported hardware and storage from one server to another, with it, you can automate migrations from one physical server to another without downtime. To use this tool, it’s best that you use the same processors by the same vendors (either Intel or AMD) for VMs in the cluster. Or you get an error message when employing it.
To deal with those problems rising from processor compatibilities, VMware EVC Mode is created to ensure that workloads running different CPU generations can be migrated smoothly. It is generally advised to enable EVC because it will be useful for scaling your clusters in the future with additional hosts that may contain new CPU models. But you may need to know the mode before enabling it.
What is VMware EVC Mode?
VMware EVC (Enhanced vMotion Compatibility) Mode is a cluster-specific function of the vCenter Server that enables vMotion or migration of virtual machines between ESXi hosts with various CPU processors within the same cluster.
EVC works by masking different CPUID/instruction sets (old and new) that each generation of processors contains and presenting the same CPU instructions to the virtual machines on the ESXi hosts, thus ensuring every VM in the cluster is using the same instructions for live migration between the ESXi hosts.
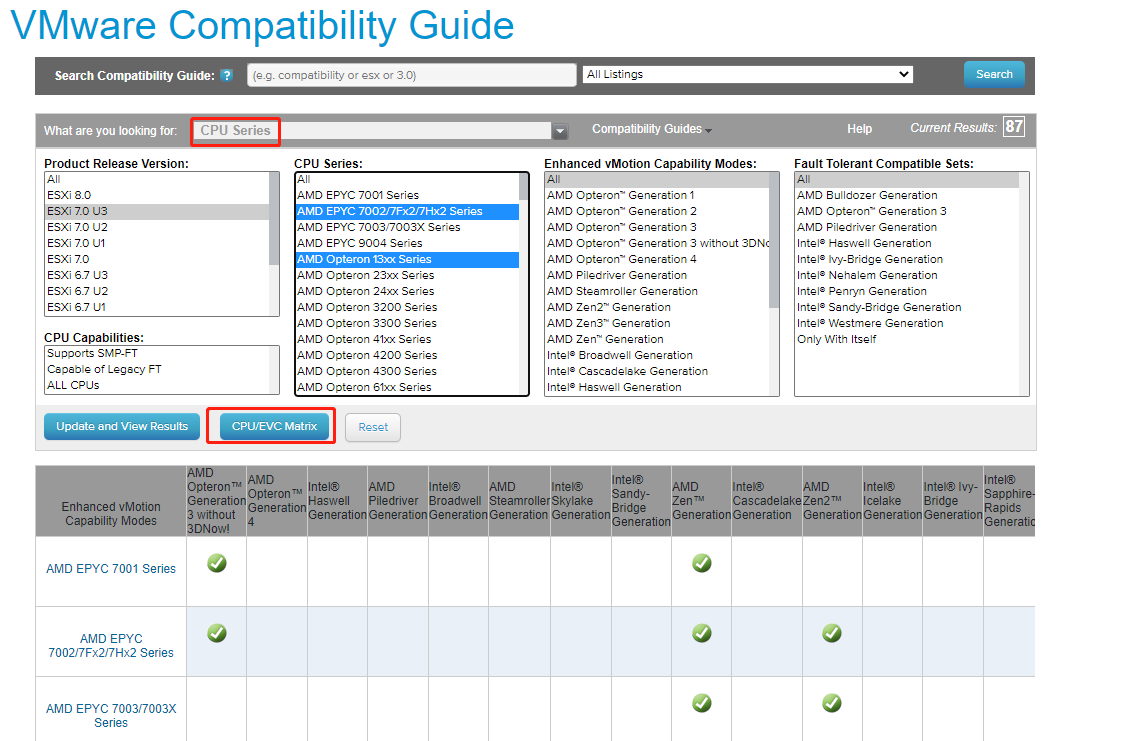
Check your processor compatibility and EVC mode for your vCenter server:
1. Go to VMware Compatibility Guide and select CPU Series from the What are you looking for drop-down.
2. Select your ESXi version under Product Release Version.
3. Hold Ctrl to choose the CPU Series in your hosts> choose the subsequent parameters> click CPU/EVC Matrix.

The newest ESXi 8.0 supports the following modes:
AMD Opteron Generation 1, 2 (Rev. E)
AMD Opteron Generation 3 (Greyhound)
AMD Opteron Generation 3 (no 3Dnow!) (Greyhound)
AMD Opteron Generation 4 (Bulldozer)
AMD Opteron "Piledriver" Generation
AMD Opteron "Steamroller" Generation
AMD "Zen", "Zen 2", Zen 3" Generation
Intel "Merom" Generation (Intel Xeon Core 2)
Intel "Penryn" Generation (Intel Xeon 45nm Core2)
Intel "Nehalem" Generation (Intel Xeon Core i7)
Intel "Westmere" Generation (Intel Xeon 32nm Core i7)
Intel "Sandy Bridge" Generation
Intel "Ivy Bridge" Generation
Intel "Haswell" Generation
Intel "Broadwell" Generation
Intel "Skylake" Generation
Intel "Cascade Lake" Generation
Intel "Ice Lake" Generation
Pros
Mix different generations of servers in the same cluster and migrate VMs between hosts using vMotion.
Scale new hardware into the current infrastructure more easily.
Save costs on the CPU and additional hardware.
Upgrade the whole cluster without VM downtime.
Cons
VMs must be powered off for it takes effect.
VMs may get stuck if you do not upgrade the EVC cluster settings.
EVC mode is determined by the oldest processor and compromises the performance of the new processor.
How to Enable VMware EVC Mode for VMs?
Prerequisites:
ESXi 6.5 or later versions.
All ESXi hosts must only use AMD or Intel processors.
ESXi hosts are managed by the same vCenter Server and configured for vMotion.
The UEFI/BIOS of ESXi hosts must be configured to enable processor virtualization technologies like Intel VT-x or AMD-V.
Shut down VMs on the ESXi hosts.
1. In the vSphere Web Client, navigate to vCenter> Hosts and clusters to check out the processor type on each ESXi host for later use.
2. Select the cluster> choose Manage to open Settings> select Configuration> click VMware EVC> click Edit… at the upper right.
3. Select EVC Mode (look it up in the VMware Compatibility Guide as shown above if you don’t know). Proceed to click OK after you see the Validation succeeded sign.
4. Back to the VMware EVC section, VMware EVC is Enabled shows, then click Mode and Current CPUID Details to expand the related information.
5. You can manually customize the CPUID flags for a VM except for the above unified configurations if you are familiar with VMware knowledge or support instructions. Choose the VM and Edit Settings> in the Edit Settings window, click Virtual Hardware> CPU> CPUID mask> Advanced.
In the CPU Identification Mask window, select the required register string and click the value to change the mask at the bit level. Click Legend… to see the meanings of characters.
6. You can also enable a per-VM EVC Mode for granularity. vSphere 6.7 and higher, and VM hardware 14 or above versions are required. This mode can be the same as or lower than the global EVC mode, so they might be enabled at the same time.
In the vSphere Client, navigate to Hosts and Clusters for the VM> click Configure tab> More> VMware EVC> Edit…
Note: Enabling the EVC mode without any downtime is possible in the following situations:
Running VMs locate on the host with the oldest processor;
The EVC mode is configured to use the same CPU instruction sets as the oldest processor.
How to Change EVC Mode?
1. Choose the cluster in the client> select the Configure tab> Configuration> VMware EVC> Edit…
2. Change or disable the EVC mode on the Change EVC Mode page.
3. Activate the desired baseline CPU feature set from the CPU Mode drop-down.
4. Choose a baseline graphics feature set from the Graphics Mode (vSGA) pull-down menu optionally.
5. Hit OK.
VMware Backup in Advance
VMware EVC Mode works with vMotion to migrate VMs between ESXi hosts with dissimilar processor versions, thus making your cluster scalable. But it’s best to back up all VMs in the cluster in case of revert failures or data loss accidents.
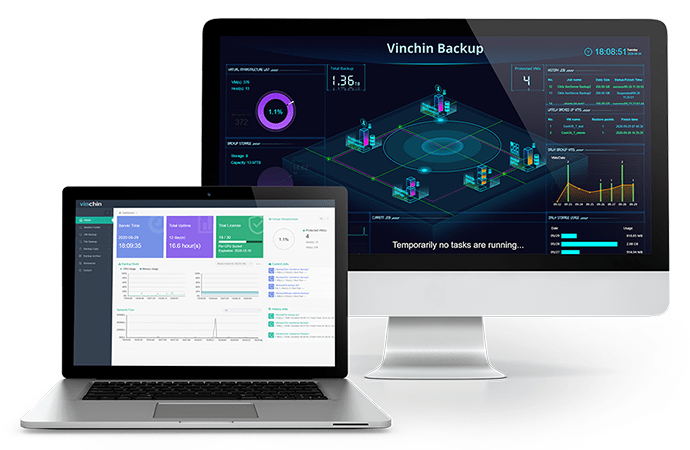
Vinchin Backup & Recovery is a virtualization backup software approved by VMware Ready for the backup, recovery, multi-hypervisor management, and V2V migration for 10+ platforms like VMware, XenServer, XCP-ng, oVirt, Red Hat Virtualization, Oracle OLVM, Sangfor HCI, OpenStack, etc.

You can enable scheduled VM and database backup automatically while reducing their 50% of backup size after data deduplication and compression. Backup speed is lifted greatly via SAN/HotAdd, multithreaded transmission, CBT/SpeedKit, and other techniques.
You can choose from full, fil-level, and instant recovery for different uses. Instant recovery brings back a VM in 15 seconds and cuts down the RTO and RPO. File-level recovery targets specific files/folders to save resources and time.
Rest assured that all data backups kept in the Vinchin Server are safeguarded with AES-256 encryption standard and an offsite backup copy is ready to be useful when a remote DR center is needed.
If you are looking for a reliable backup solution, why not download the 60-day free trial of its Enterprise version and give it a try?
Conclusion
VMware EVC Mode is a cluster-centric feature that fixes the compatibility issues of different CPU processors from different generations on the ESXi hosts in a cluster, which extends scalability and streamlines VM live migration with vMotion.
Although it is not perfect and has its flaws, it’s recommended to open the feature, otherwise, the DRS operations and vMotion will be prevented once the VM is power cycled.
Remember to back up VMware VMs prior to the risky operations. Vinchin Backup & Recovery is an affordable, flexible, and go-to choice for businesses of all sizes.
Share on:


