-
How to convert raw disk to qcow2 format in Proxmox?
-
Using Vinchin for VM Backup in Proxmox VE
-
Switch raw disk to qcow2 FAQs
-
Conclusion
In virtualized environments, the choice of disk image format has a significant impact on performance, storage efficiency, and management convenience. Proxmox VE supports a variety of disk image formats, with raw and qcow2 being the two most commonly used. raw is the most basic disk image format, which usually takes up a large amount of storage space and does not offer advanced features such as snapshots or compression. The qcow2 format provides more efficient storage management, supporting compression, snapshots, and dynamic scaling for scenarios with better performance and flexibility.
This article describes how to transform raw disk to qcow2 format in the Proxmox VE environment. By doing this, you can take full advantage of the qcow2 format while maintaining the flexibility and efficiency of your system.
How to convert raw disk to qcow2 format in Proxmox?
Verify that the VM is configured with disks
In Proxmox VE, to check the configuration of a virtual machine:
Use the command to view the configuration
qm config <VMID>
Using the VM ID 11111 as an example, check the configuration to verify that disks are assigned to the virtual machine.
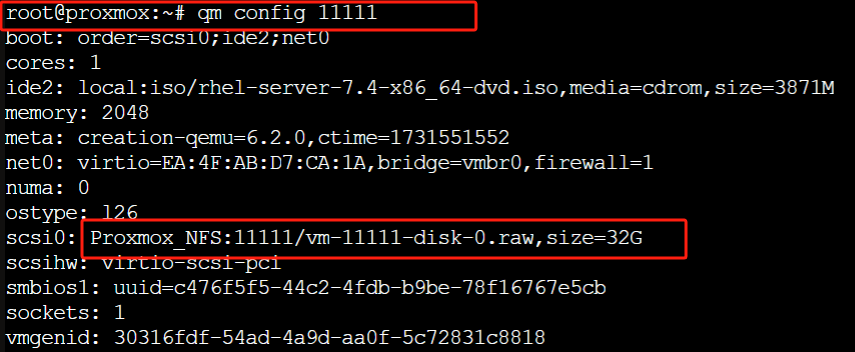
You can see
- Disk type: scsi0, the disk is located on Proxmox_NFS storage.
- Disk file: vm-1111111-disk-0.raw, format is raw, size is 32G.
View the path contents
Run the following command to view the path contents:
ls /mnt/pve/Proxmox_NFS/images/11111/
If the mount is correct and the file exists, you should see the vm-11111-disk-0.raw

Switch raw disk to qcow2
This will generate a new file called vm-11111-disk-0.qcow2, stored in the same directory.
qemu-img convert -f raw -O qcow2 /mnt/pve/Proxmox_NFS/images/11111/vm-11111-disk-0.raw /mnt/pve/Proxmox_NFS/images/11111/vm-11111-disk-0.qcow2
![]()
Confirm that the conversion was successful
Click on the target storage (Proxmox_NFS) > select VM Disks. Here, you should see vm-1111-disk-0.qcow2, indicating that the .raw file has been successfully converted to .qcow2 format.

Using Vinchin for VM Backup in Proxmox VE
Once your virtual machine's disk format has been successfully converted from raw to qcow2, it's essential to ensure regular backups to protect your data and maintain system reliability. Vinchin Backup & Recovery is an efficient solution for backing up virtual machines in Proxmox VE environments. It supports full, incremental, and differential backups, and integrates seamlessly with Proxmox VE.
Vinchin offers features like data compression, deduplication, and snapshot-based backups, which help optimize storage usage. With flexible scheduling options and fast recovery times, Vinchin ensures minimal downtime and a reliable disaster recovery strategy for your virtual machines.
Vinchin Backup & Recovery's operation is very simple, just a few simple steps.
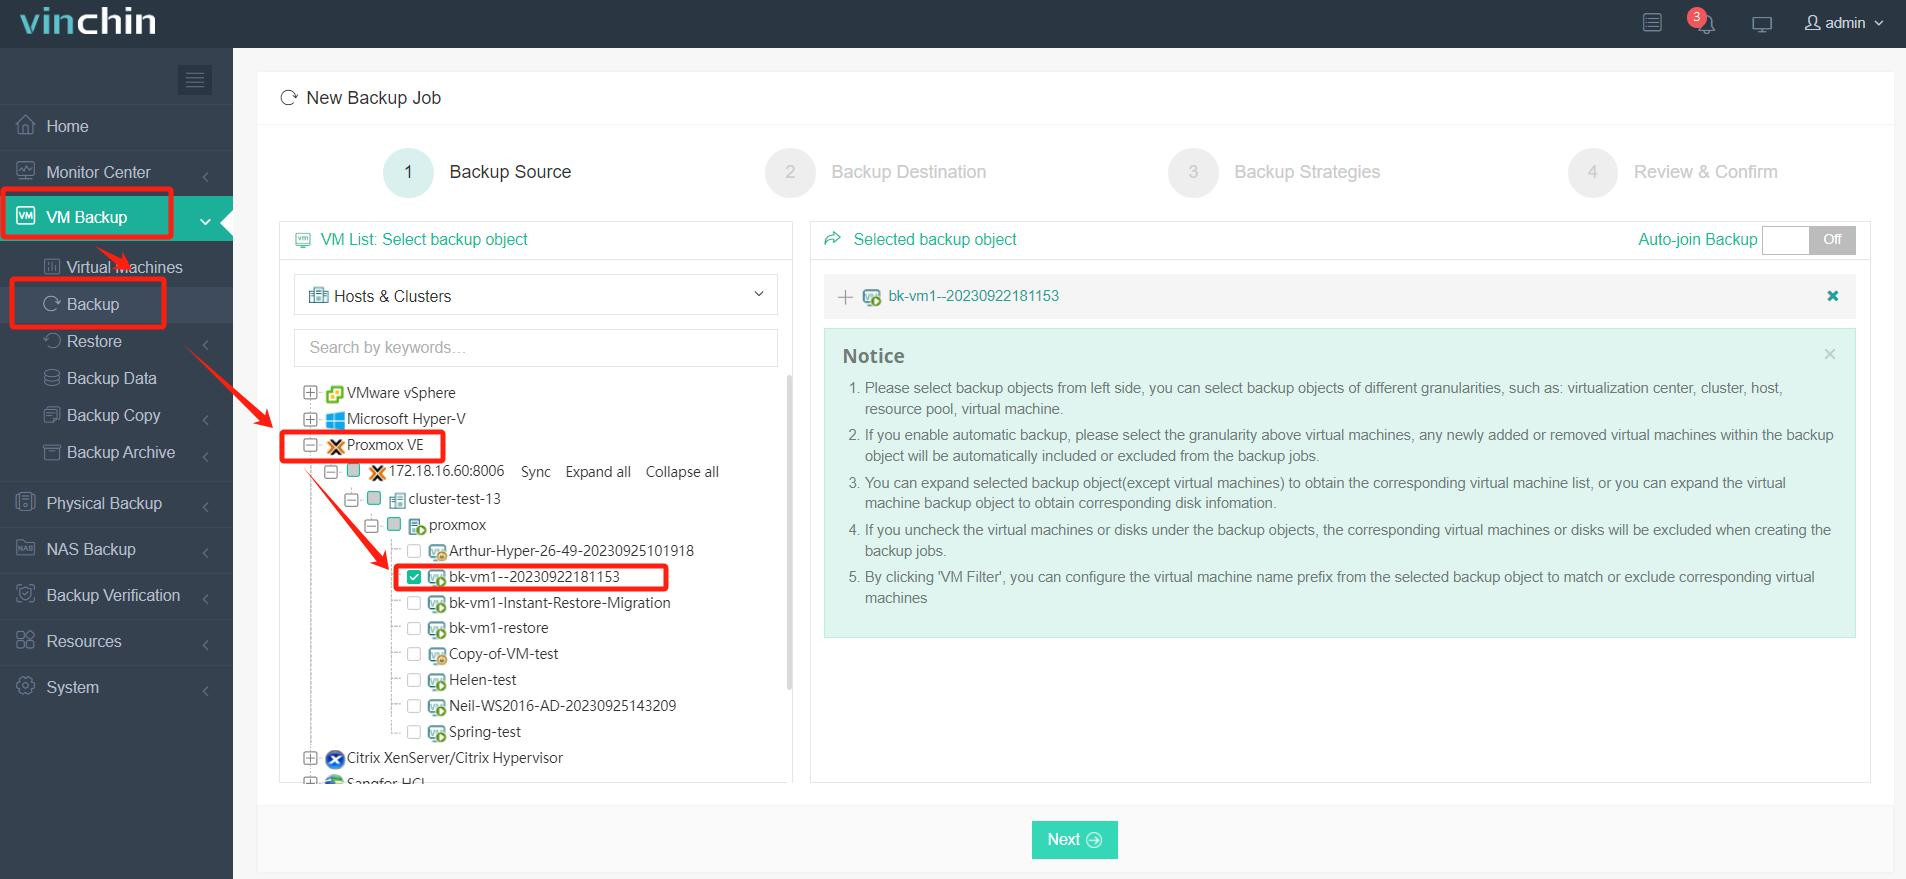
1.Just select VMs on the host
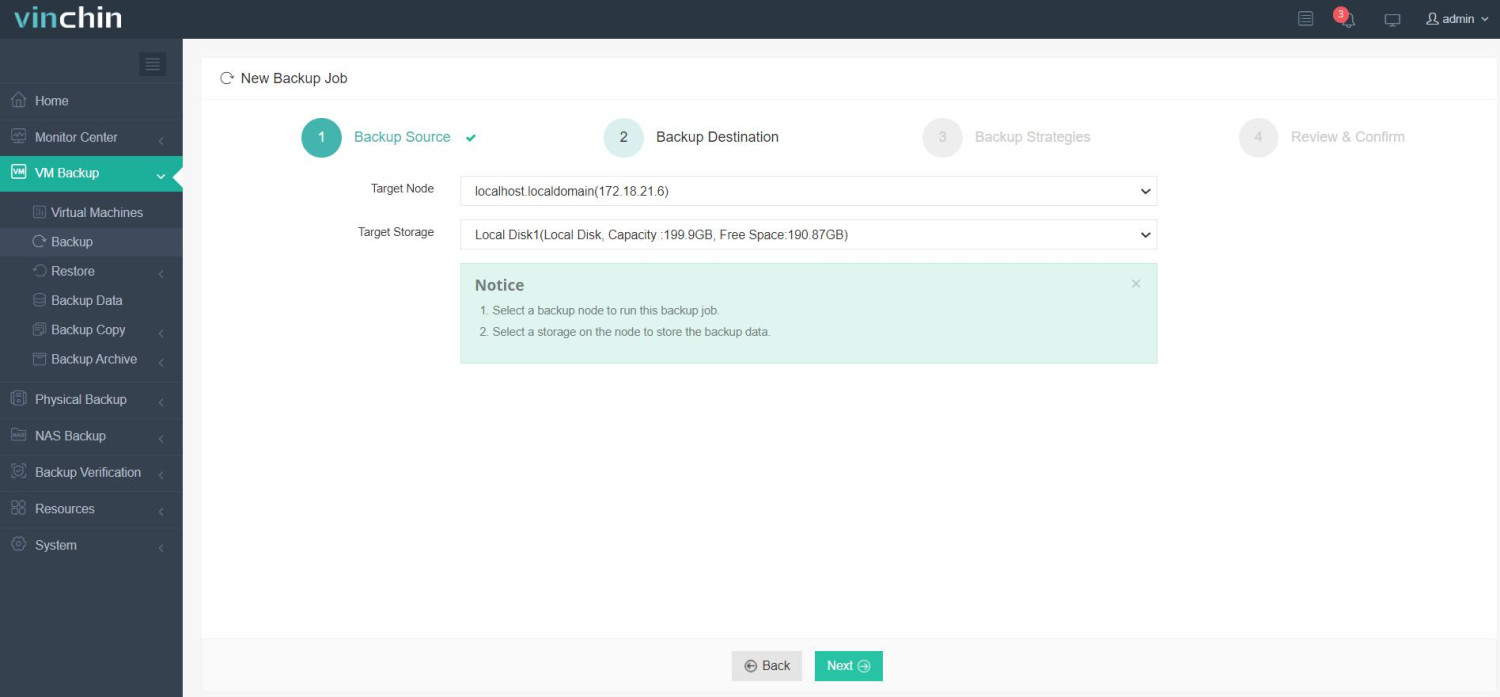
2.Then select backup destination
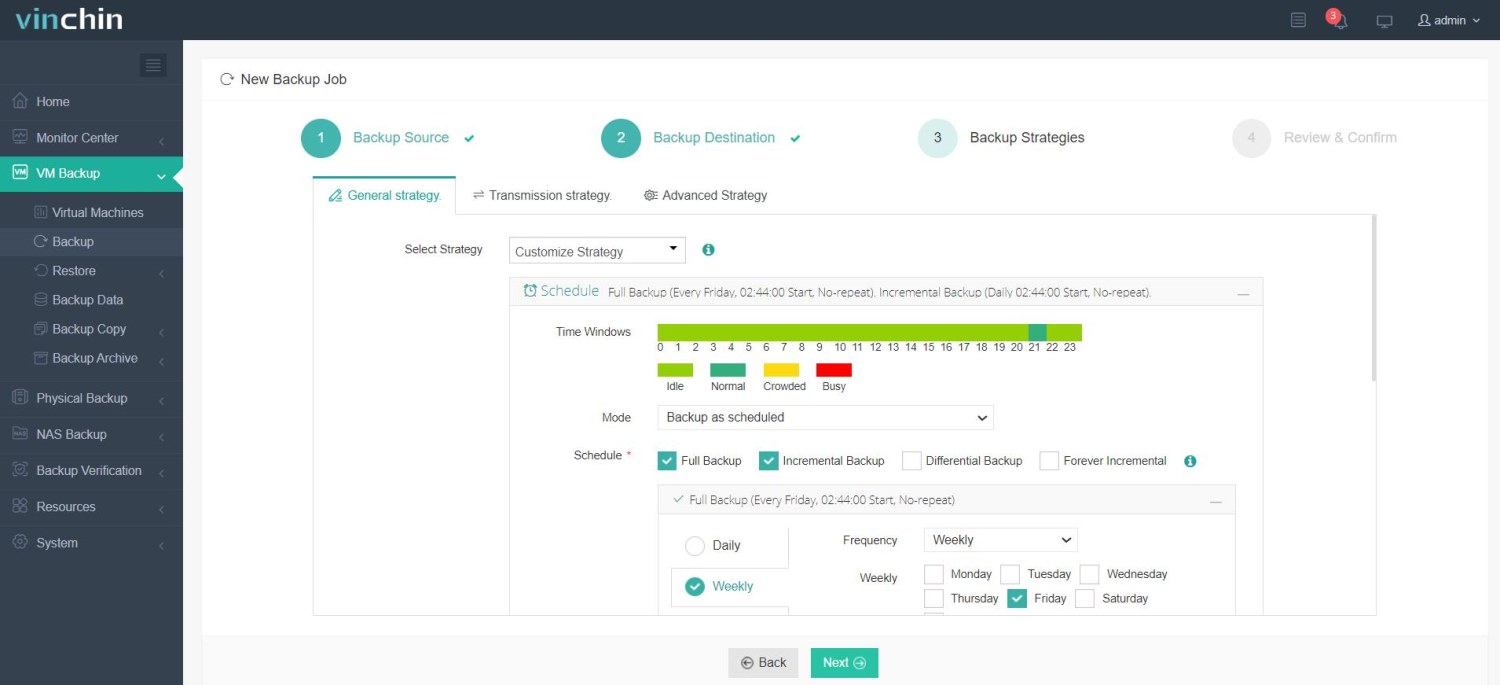
3.Select strategies
4.Finally submit the job
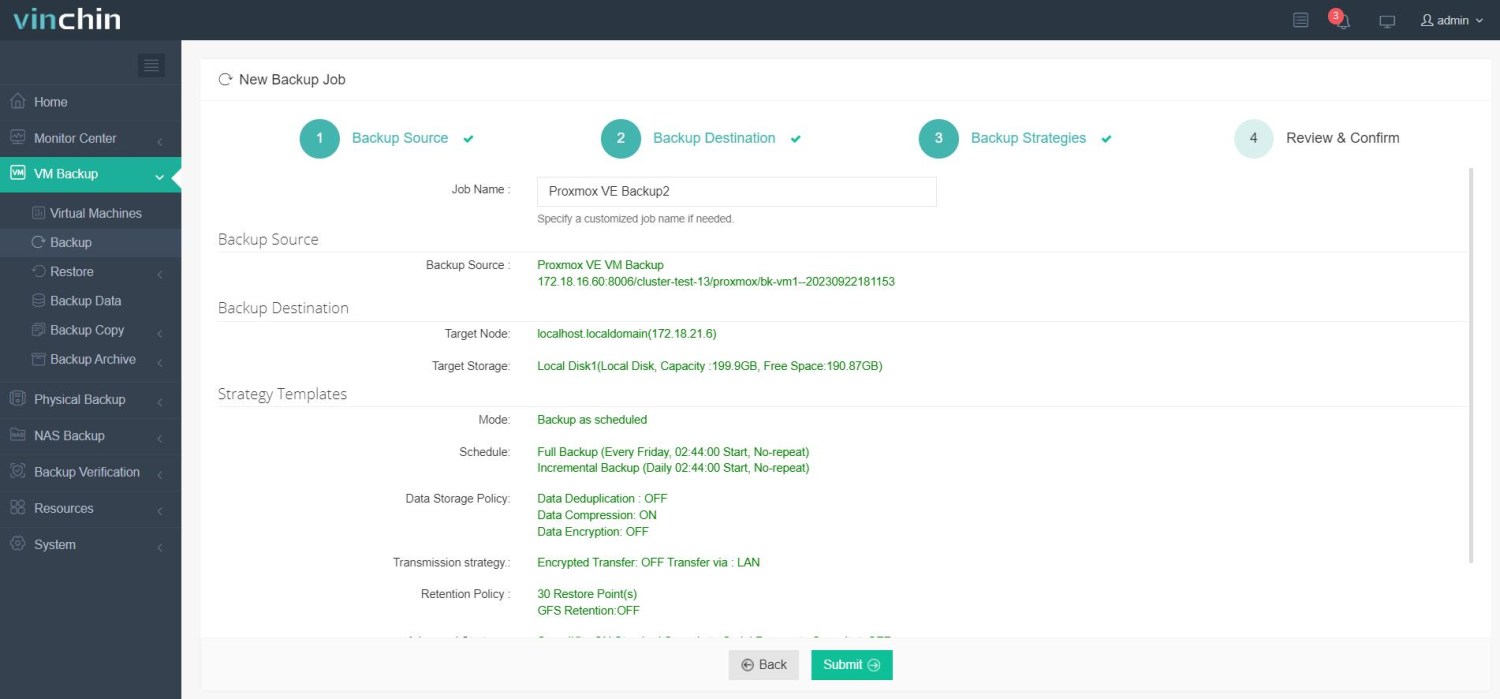
Vinchin offers a free 60-day trial for users to experience its full functionality in a real-world environment. For more information, please contact us for assistance.
Switch raw disk to qcow2 FAQs
Q1: Are there any limitations when using QCOW2?
A1: Performance: In certain use cases, QCOW2 may have slightly lower performance compared to RAW, especially if using advanced features like snapshots.
Compatibility: Some virtualization platforms or applications may not fully support all the features of QCOW2, though this is becoming less common.
Q2: Can I add a virtual machine to a QCOW2 disk image after conversion?
A2: Yes, after converting a RAW image to QCOW2, you can use it as a virtual disk in a virtual machine (VM). If the image is used by a hypervisor like QEMU or KVM, the conversion allows you to take advantage of features like snapshots, dynamic disk expansion, and more.
Conclusion
Switching raw disk to qcow2 in Proxmox VE enhances storage efficiency and flexibility, enabling features like compression, snapshots, and dynamic scaling. This process improves VM management, and coupled with Vinchin Backup, ensures reliable data protection and minimal downtime.
Share on:


