-
Benefits of exporting and importing VM in Proxmox
-
How to export and import a Proxmox VM?
-
How to backup and restore Proxmox VMs with Vinchin?
-
Proxmox export and import FAQs
-
Conclusion
In Proxmox, export and import of virtual machines is one of the key tasks in managing a virtualized environment. Whether you are backing up VMs, migrating to a different node, or sharing VM images, it is crucial to perform export and import operations correctly.
Benefits of exporting and importing VM in Proxmox
Here are four of the main advantages when performing exporting and importing VM in Proxmox:
Flexibility: Proxmox provides great flexibility by allowing you to easily migrate virtual machines between different Proxmox hosts. You can reallocate and manage VM resources as needed.
Simplicity: Proxmox offers an intuitive user interface and command-line tools, making the operations of exporting and importing Proxmox VMs easy to use. You can easily export VMs from one Proxmox environment to another and quickly import VMs from exported VM files.
Data Security: By exporting Proxmox VMs, you can create reliable backups to ensure that important data in VMs is effectively protected. When needed, the import proxmox VM operation allows for fast and controlled recovery.
Node Migration and Load Balancing: By exporting Proxmox VMs, you can easily migrate nodes in a Proxmox cluster. This is useful for load balancing, resource optimization, maintenance and upgrades. You can export Proxmox VMs to other nodes and import Proxmox VMs to the target node when needed for better resource allocation and management.
How to export and import a Proxmox VM?
WinSCP is a powerful graphical file transfer tool that simplifies the process of exporting and importing virtual machines in Proxmox Virtual Environment (Proxmox VE). The entire process involves backing up the Proxmox VM, exporting the VM backup for future use, and then importing the VM when needed.
Below are the detailed steps:
Backup Virtual Machines
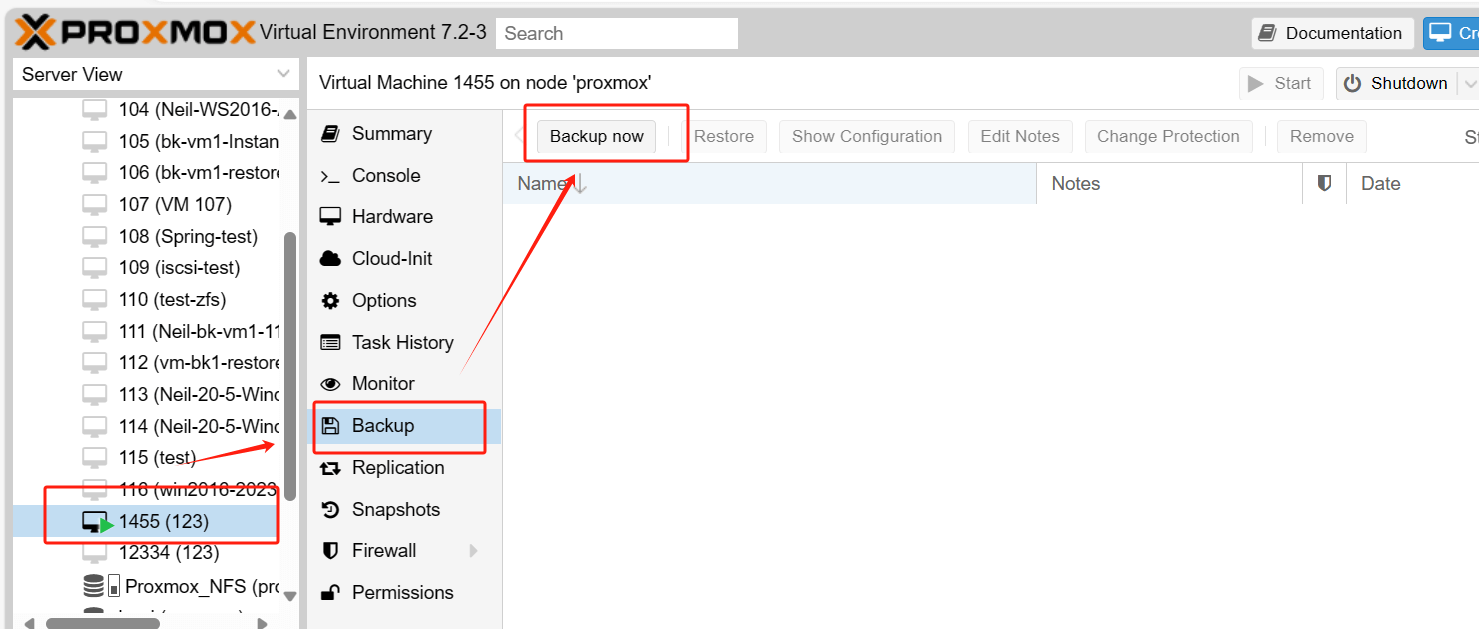
1. Choose the VM > click Backup > hit Backup now
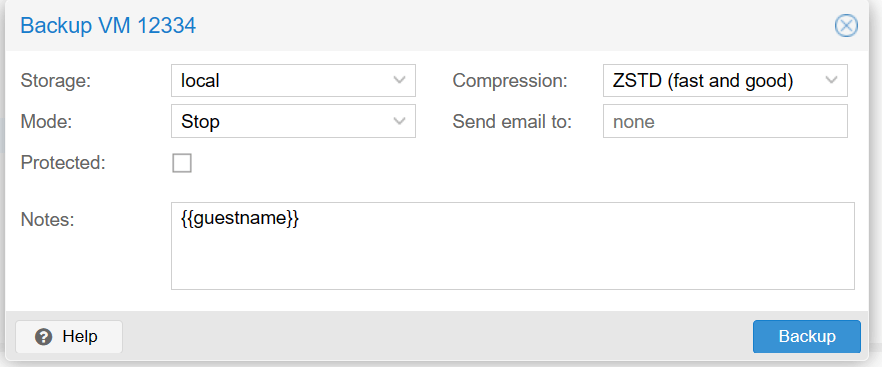
2. Design your backup > click Backup
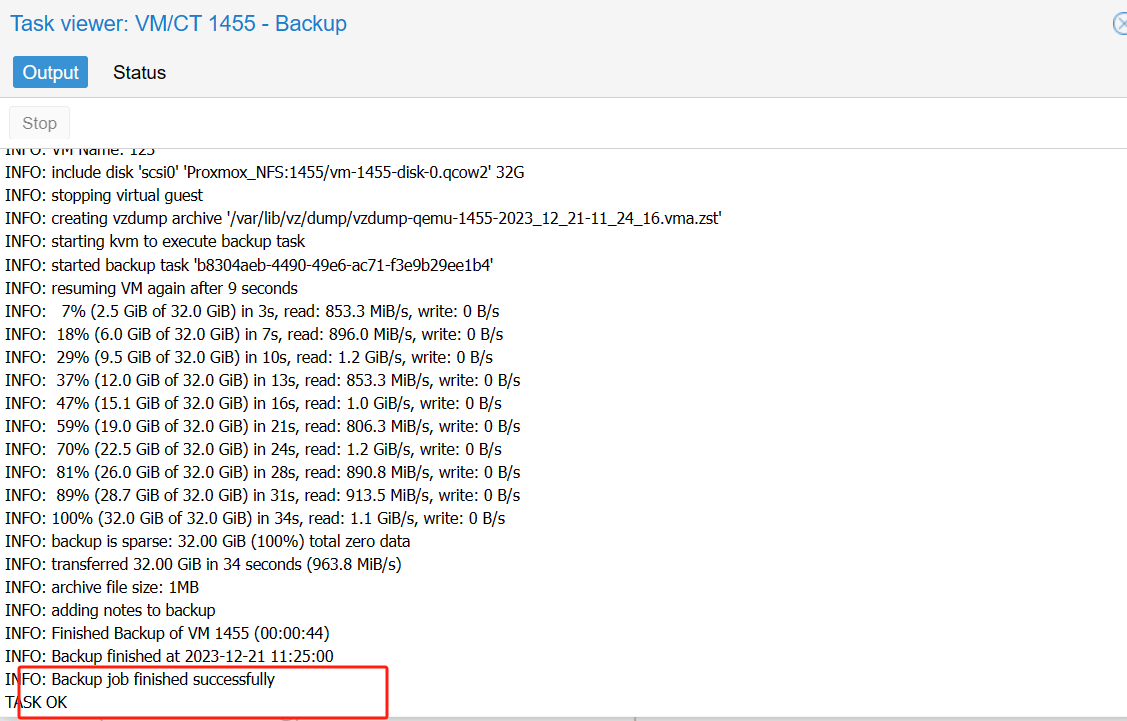
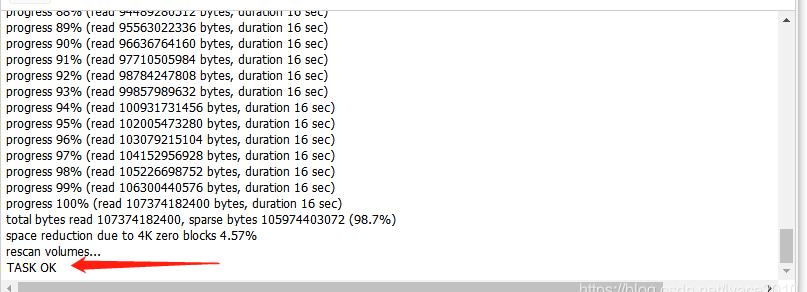
When TASK OK appears, the backup task is complete.
Downloading backups using WinSCP
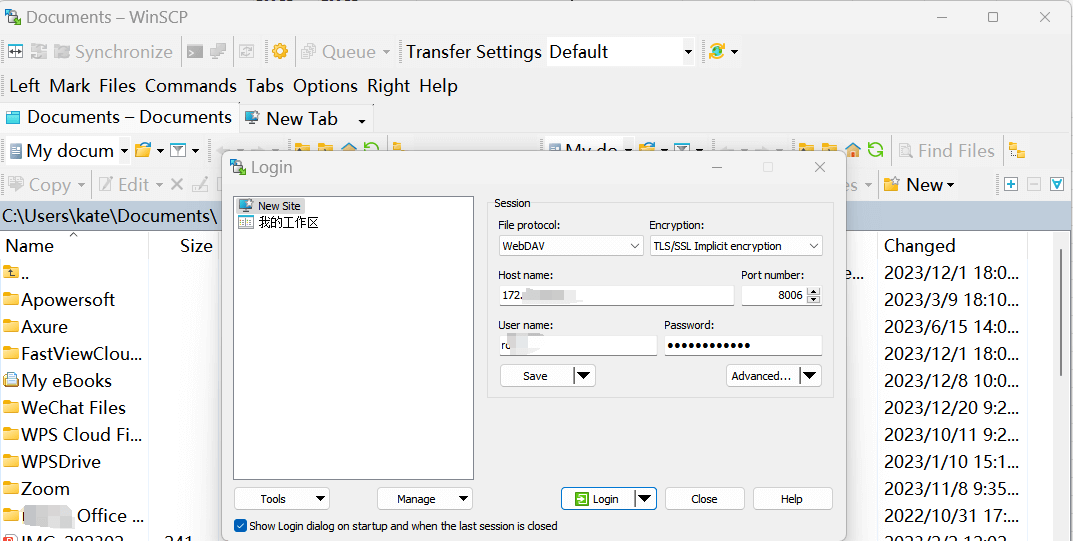
1. Double-click WinSCP, enter the Host name, User name, password in pop-page > click Login
2. Switch the remote directory to the backup directory (the backup directory for local storage is: /var/lib/vz/dump) > locate the VM backup file > right-click to download it
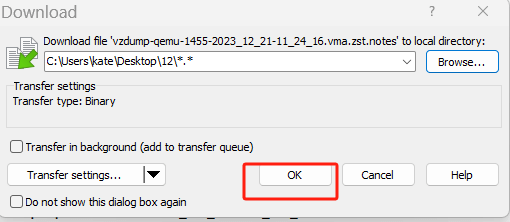
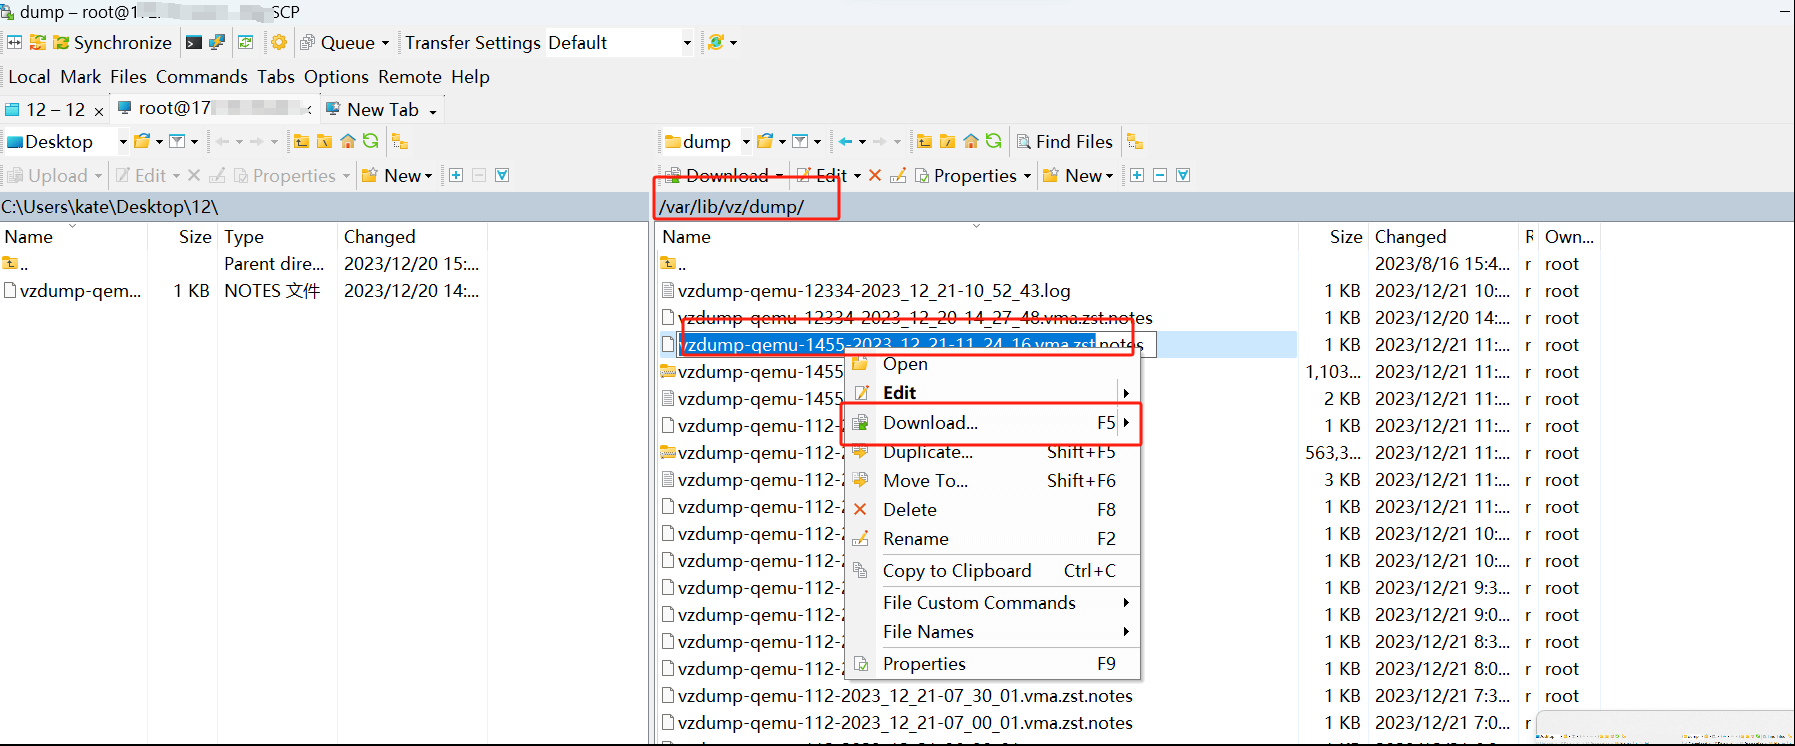 3. Download the vma backup file to a local directory > hit OK
Upload Backup
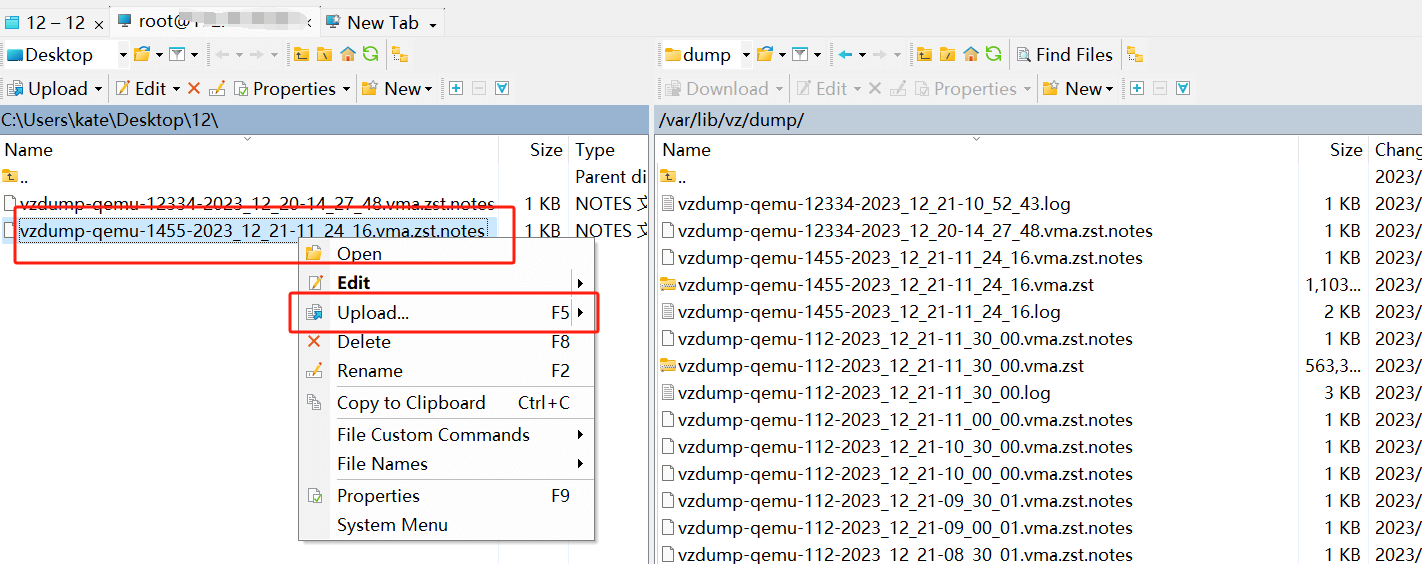
1. Click New Tab > repeat the above login steps to log in to another node

2. Local directory switch to the directory you just downloaded and backed up > right-click the VM > choose Upload
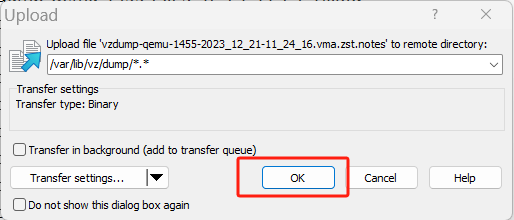
 3. Enter the upload path: /var/lib/vz/dump/.(The backup directory for local storage is:/var/lib/vz/dump)> click OK
We can see in WinSCP that the backup has been successfully uploaded

Recovering a Virtual Machine
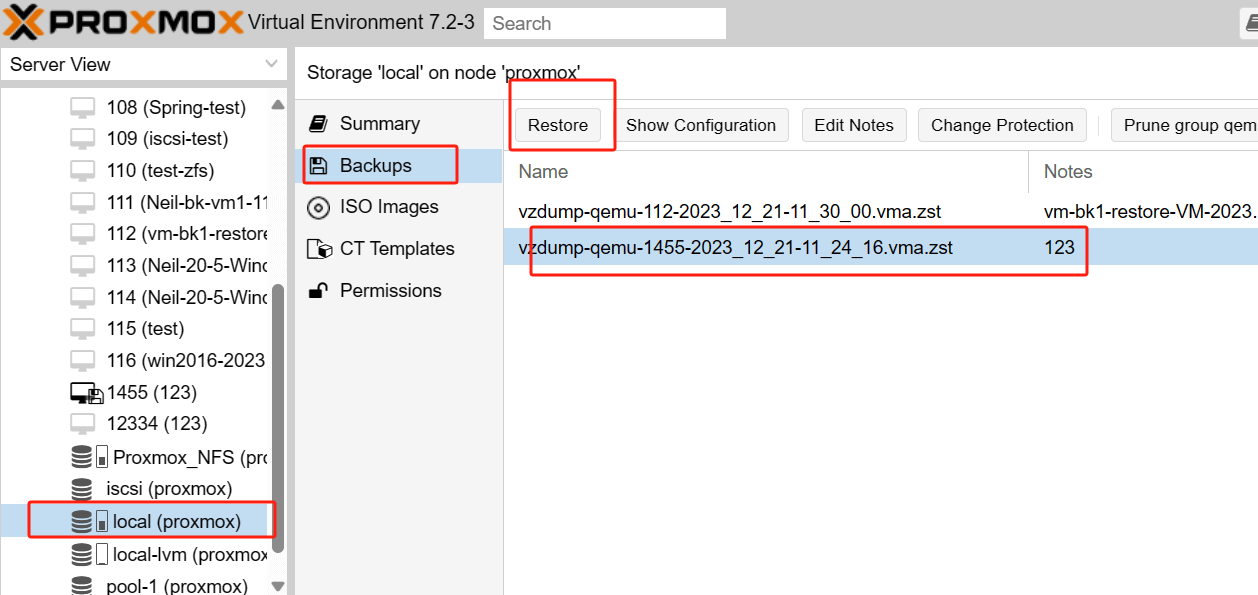
1. In Proxmox VE, logging into another node > Switch to the appropriate upload storage (local)
2. Select the vma backup file you just uploaded > click Restore > configure the relevant restoration parameters > hit Restore button
Here you can see that the recovery has been successful
How to backup and restore Proxmox VMs with Vinchin?
Although importing and exporting Proxmox VMs using WinSCP is a simple method. However, in business-critical environments, a professional backup solution is recommended to ensure data integrity and reliability.
Whether you need a data backup solution or a virtual machine migration solution, Vinchin Backup & Recovery is the ideal choice for you. As a professional backup and migration solution, it is widely applicable to a wide range of virtual environments, including Proxmox, VMware, Hyper-V, XenServer, XCP-ng, oVirt, RHV and other VM platforms.
With agentless backup technology, instant recovery and V2V migration support, Vinchin Backup & Recovery is dedicated to the comprehensive protection and efficient management of critical data in virtualized environments.
Vinchin Backup & Recovery’s operation is very simple, just a few simple steps.
To backup VM in Vinchin Backup & Recovery
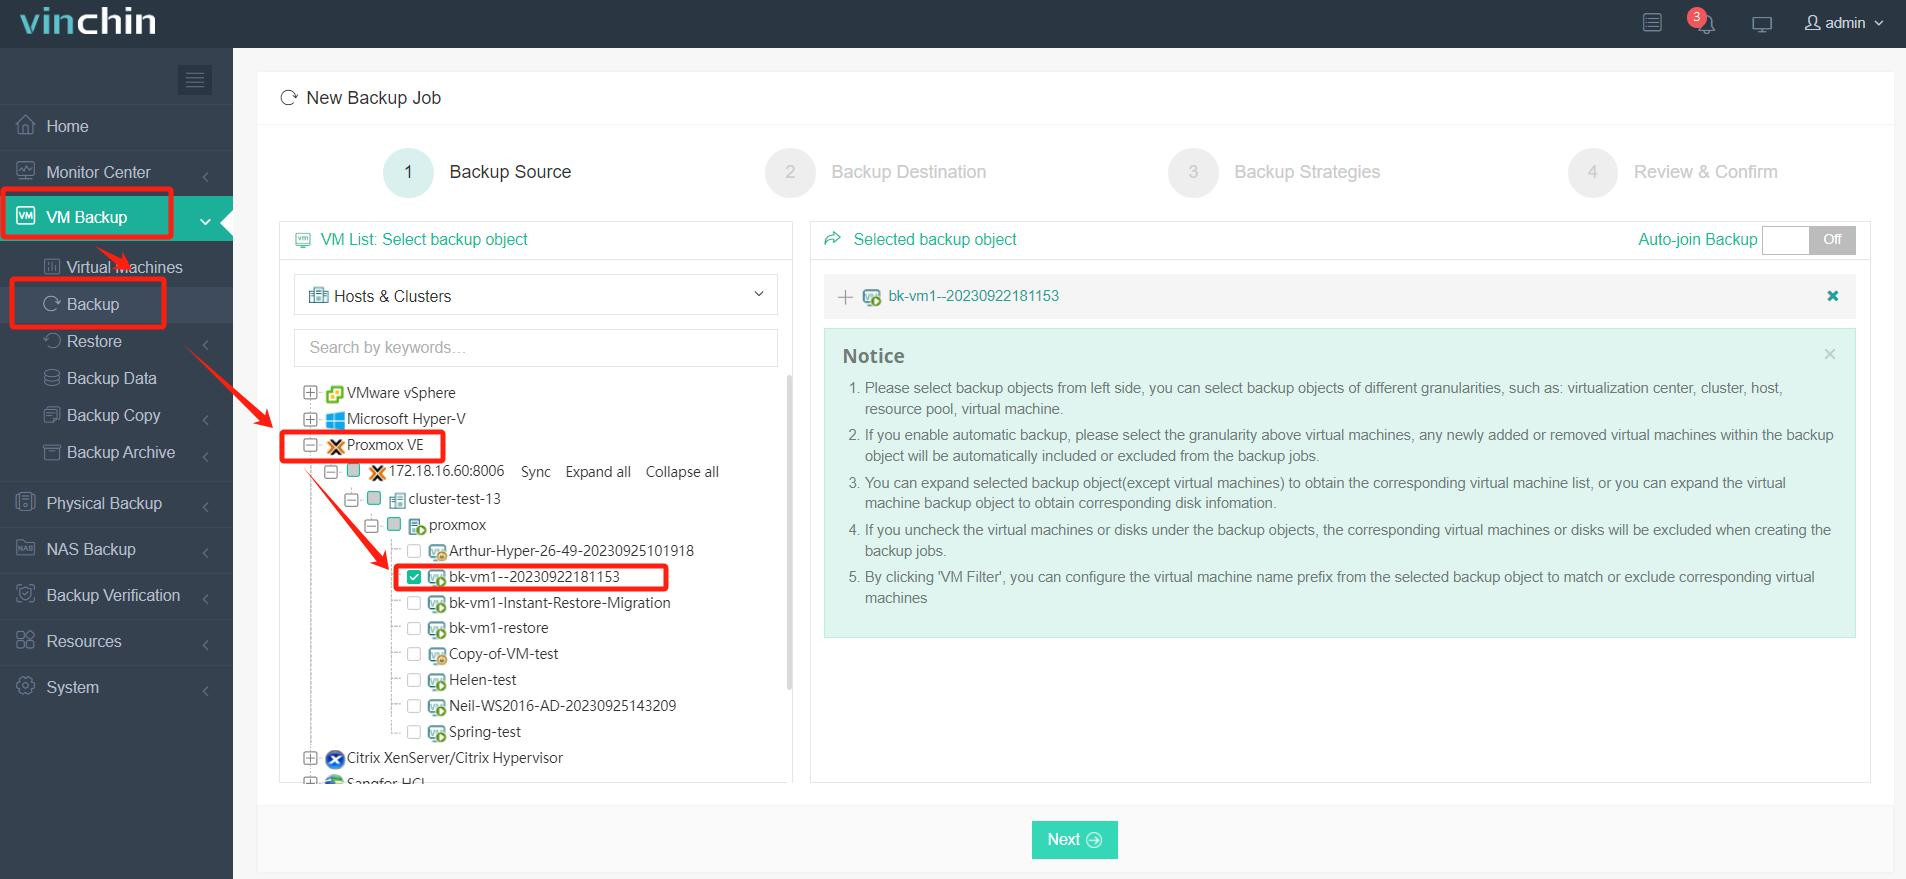
1. Just select VMs on the host
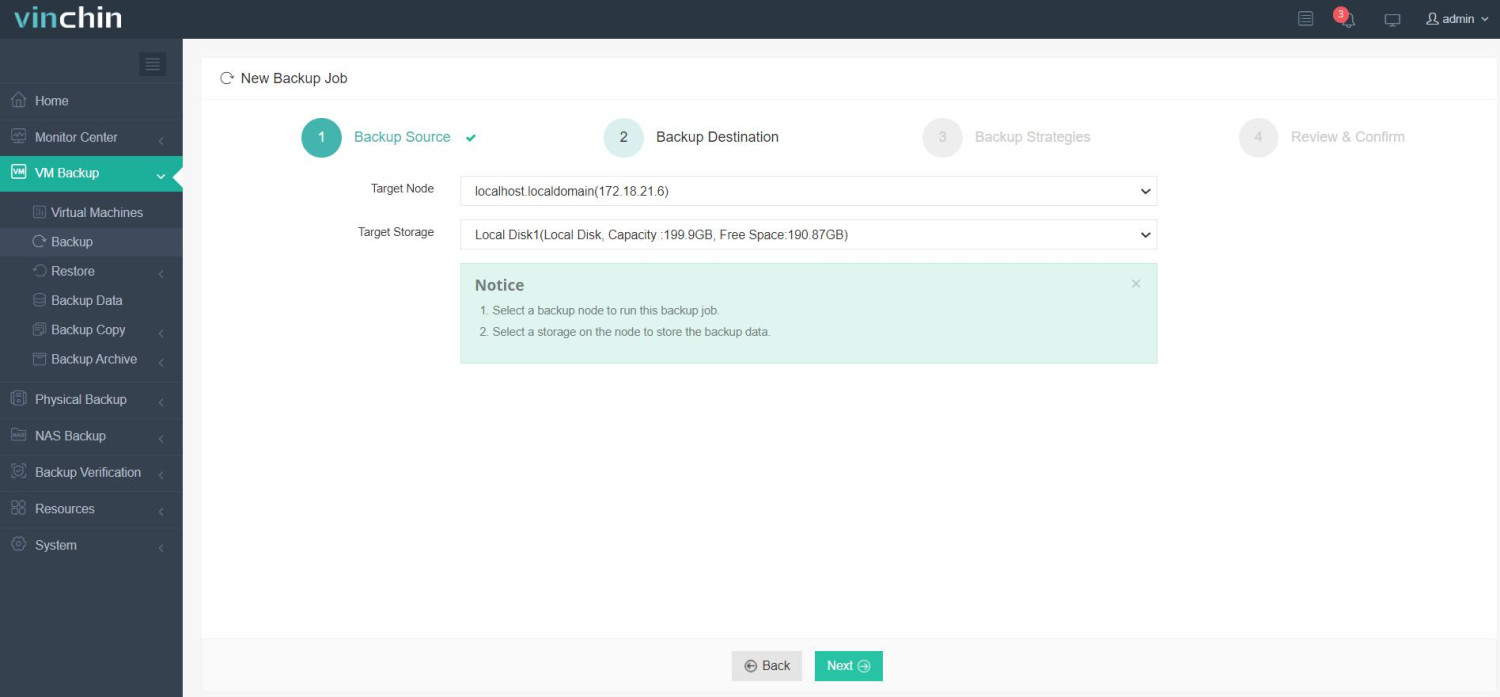
2.Then select backup destination
3.Select strategies
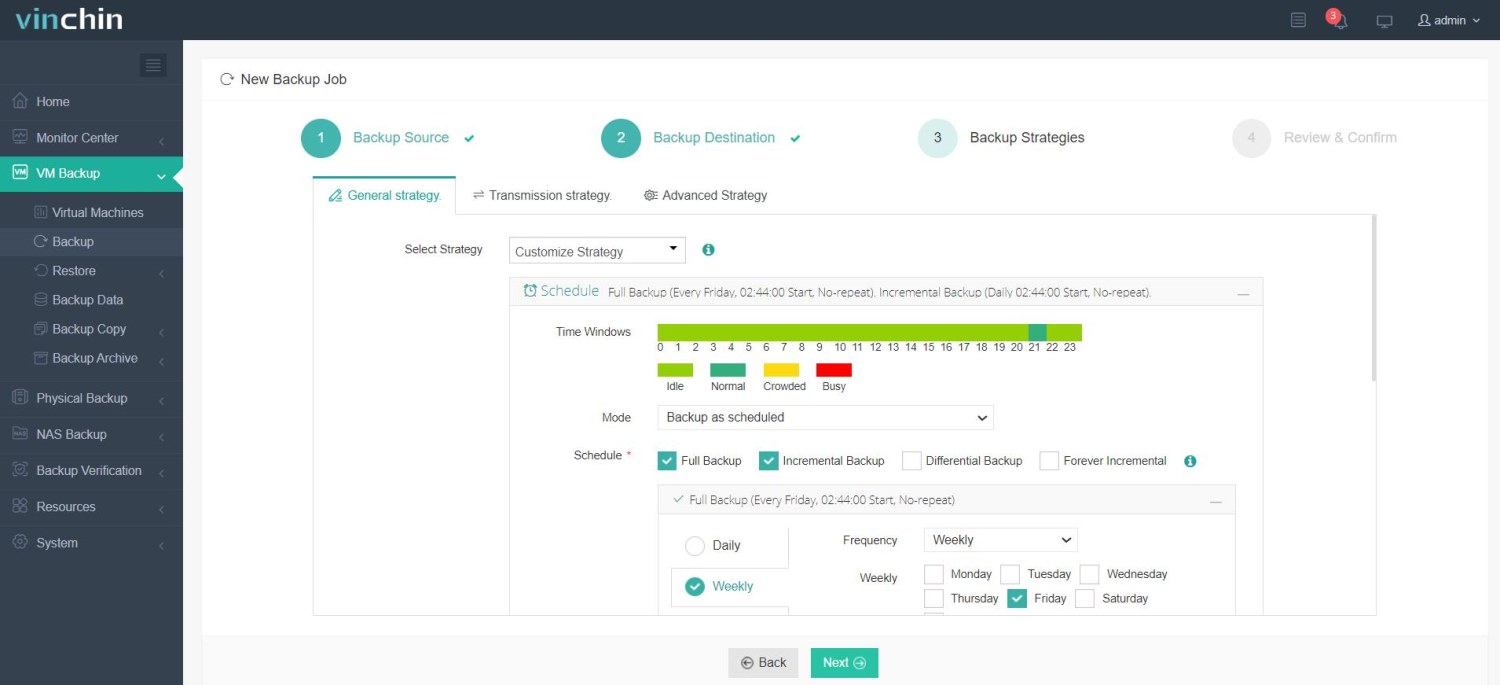
4.Finally submit the job
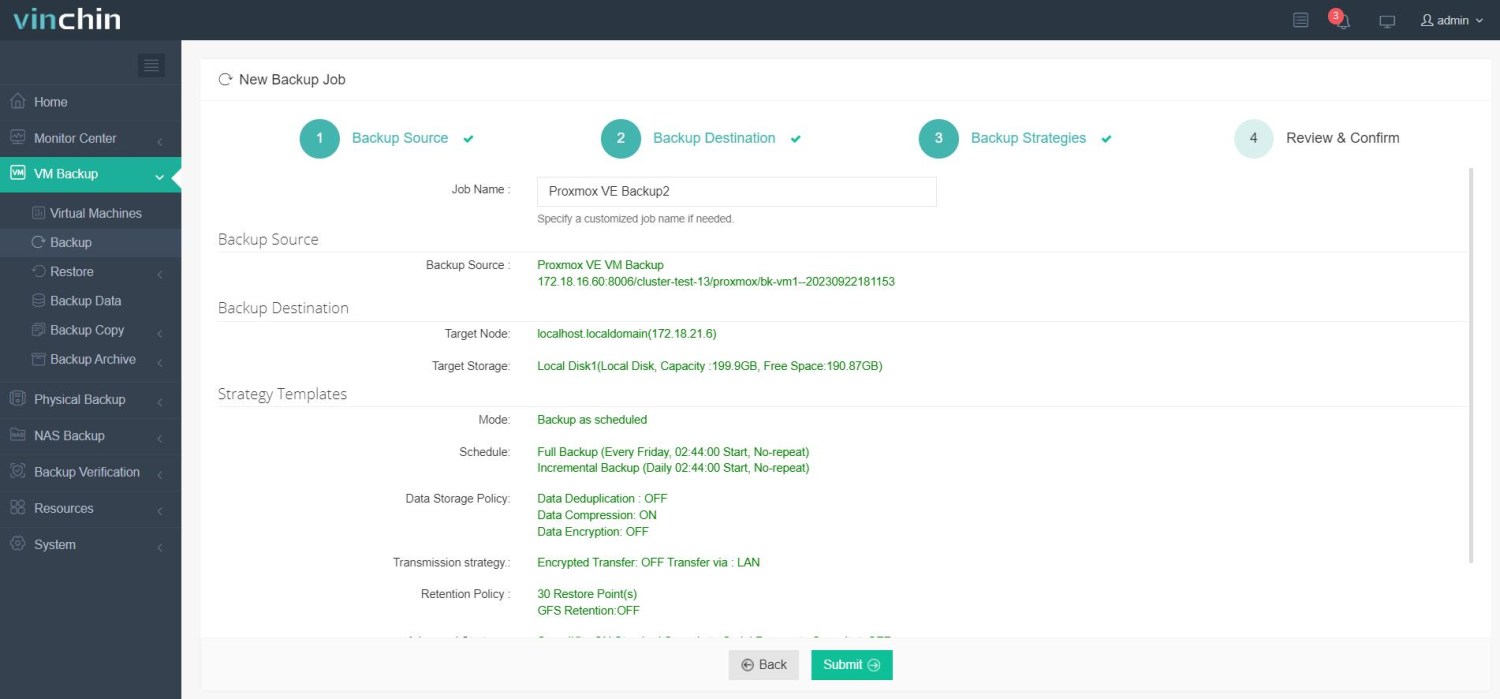
To restore VM in Vinchin Backup & Recovery
1. Select Restore Point
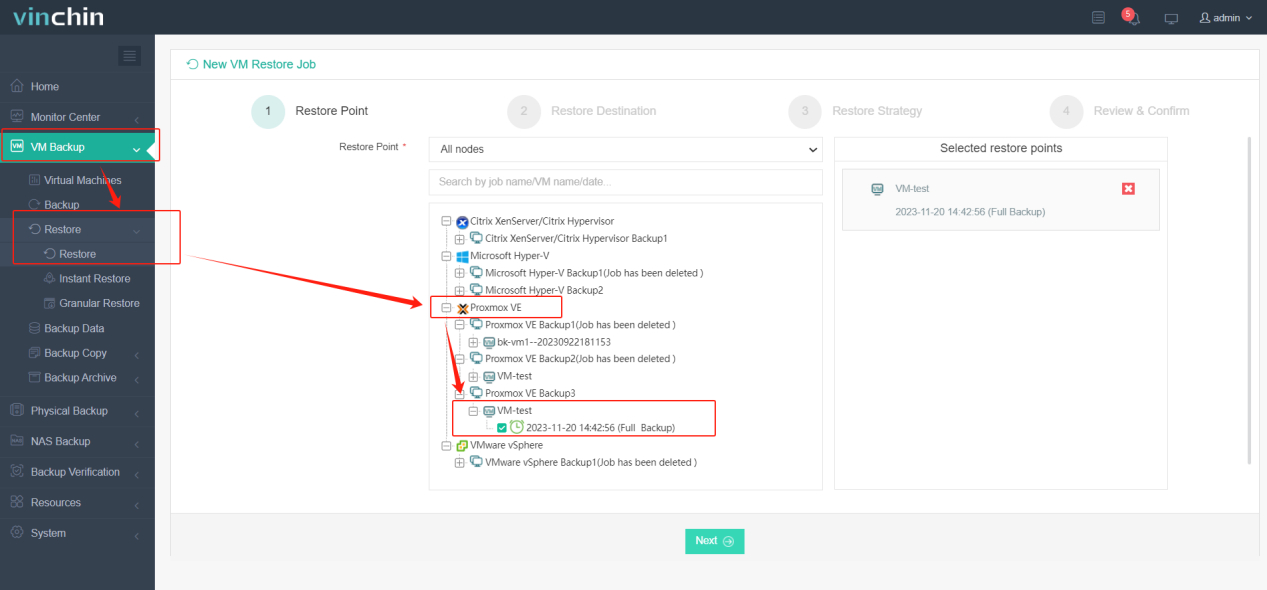
2. Select Restore Destination
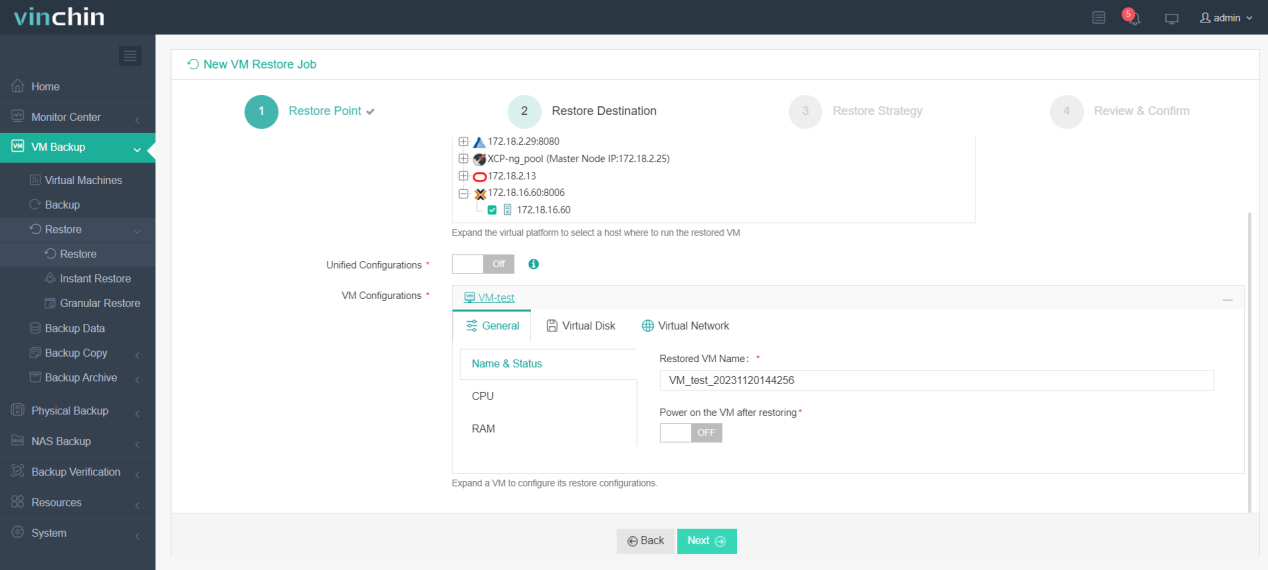
3. Select Restore Strategies
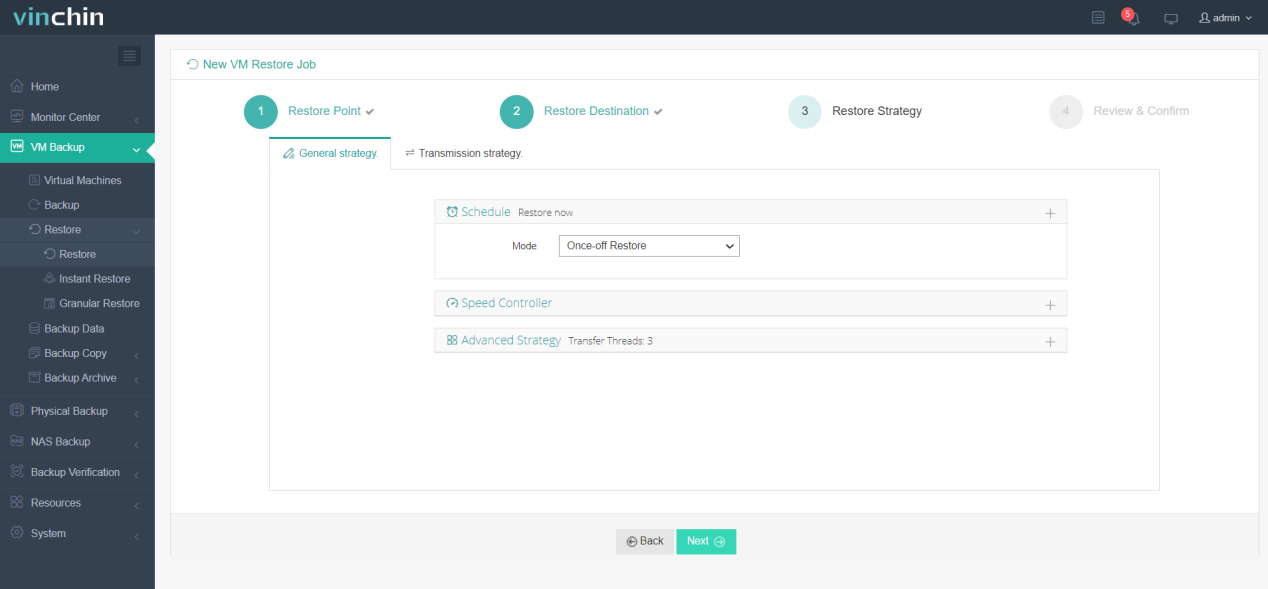
4. Finally submit the job
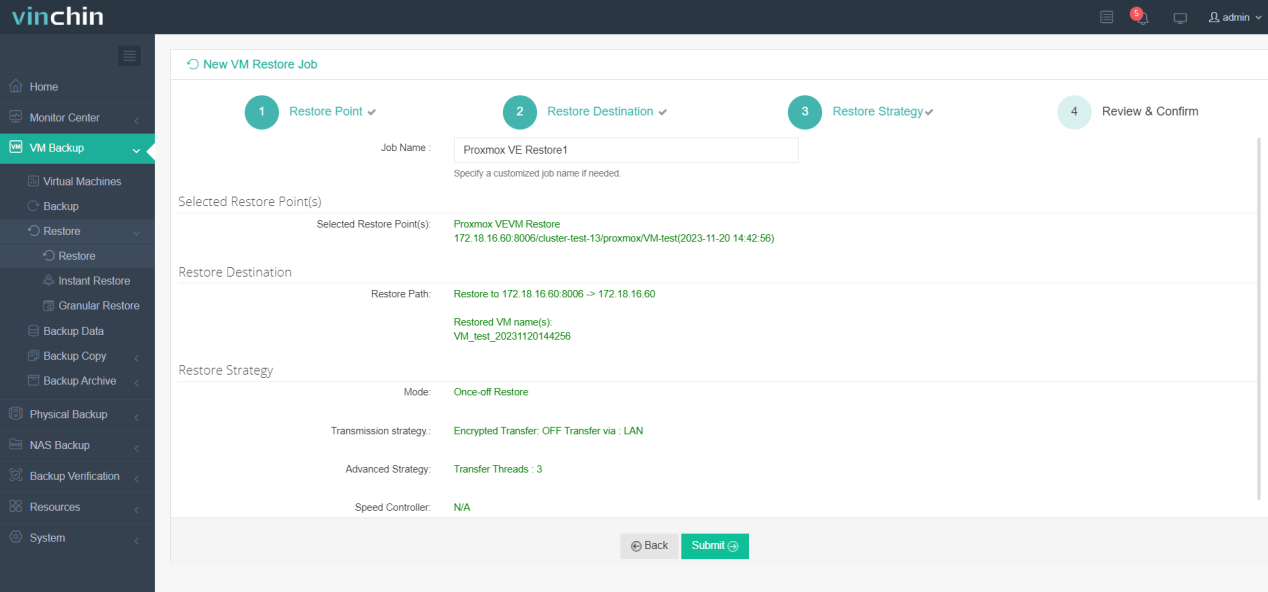
If you are not sure about any of the steps above, there are video tutorials to show you how to backup Proxmox VM and restore the VM on a target host. Also, Vinchin offers a free 60-day trial to allow users to fully experience its backup and migration capabilities in a real-world environment. For more information, please contact Vinchin directly or contact one of our local partners.
Proxmox export and import FAQs
1. Can you export virtual machines to different formats?
A: Yes, different virtualization platforms support different export formats. Common formats include OVF (Open Virtualization Format) and VMDK (VMware Virtual Disk Format). You can choose the appropriate export format according to the target platform you plan to import.
2. Are imported and exported virtual machines compatible with different virtualization platforms?
A: Importing and exporting virtual machines is usually specific to the virtualization platform. Different virtualization platforms use different VM configurations and disk formats. Therefore, directly importing VMs from one platform to another may require format conversion or other compatibility adjustments.
Conclusion
Understanding the export and import of virtual machines in Proxmox is key to effectively managing a virtualized environment. While WinSCP offers ease of operation, when it comes to critical business needs, Vinchin Backup & Recovery provides a professional-grade solution to ensure data integrity and reliability.
Share on:


