Citrix XenServer is an open-source server virtualization platform powered by Xen hypervisor for virtualized servers and guest operating systems that allows users to host and manage multiple virtual machines. XenServer is designed to ease virtualization management, such as the VM template creation from snapshots and XenMotion’s ability to live migrate VMs between hosts.
XenServer provides a management console XenCenter, also a Windows-based client, that enables users to install, provision, and manage VMs running on various hosts in a resource pool and set up a remote storage repository. XenServer backup and recovery are also simple with the help of VM templates and snapshots.
Install XenServer (Citrix Hypervisor)
System requirements:
At least two x86 computers for Citrix Hypervisor server and XenCenter/ Command-Line Interface (CLI);
CPUs: One or more Intel VT or AMD-V 64-bit x86 CPUs, at least 1.5 GHz;
RAM: at least 2GB;
Disk space: 46 GB minimum for local storage and installation with multipath boot from SAN via HBA;
Network: at least 100 Mbit/s NIC.
1. Download XenServer ISO from the Citrix download website.
2. Backup data on the installation device you want to keep.
3. Place the bootable media with XenServer installed into the system to open the splash screen and hit enter.
From a bootable USB: use the tool to create a bootable USB with the installation ISO> insert the drive into the target system> reboot the system> change to boot from the USB in the BIOS.
From a CD: burn the installation file to a CD> insert it into the target’s CD/DVD drive> reboot the system> change to boot from the CD in the BIOS.
From virtual media: navigate to the system’s virtual console> insert the ISO file as virtual media> reboot the system> change to boot from the virtual media in the BIOS.
You can also boot from network or SAN.
4. Select the language and load special drivers that may be needed for XenServer installation, and click Ok.
5. Accept the EULA agreement and move forward.
6. Choose to install, upgrade from the previous installation version, or restore from a previously created backup XenServer installation, and click Ok.
7. Choose a primary local hard disk for the installation, and hit Ok.
8. Choose disks for VM storage, and press F5 to view the information about a disk. Enable thin provisioning for users of Virtual Desktops and DaaS for local caching.
9. Select the installation source (USB or CD for Local media and network for HTTP or FTP or NFS) and click Ok.
Multiple NICs: choose one to access the installation files and click Ok> choose Automatic configuration (DHCP) or Static configuration> enter VLAN ID if the media is in a VLAN network.
HTTP or FTP: input the URL for its repository, user name, and password.
NFS: input the server and path of NFS.
10. Test the integrity of the installation source optionally and click Ok.
11. After the verification, set up system information like user password.
12. Configure the management network interface that connects to XenCenter. Choose one NIC for management if your system has multiple NICs. Click Ok.
13. Choose Automatic configuration (DHCP) or Static configuration to configure the management NIC IP address> enter VLAN ID if the management interface is in a VLAN network.
14. Configure the DNS manually or automatically using DHCP, and specify the hostname.
In the Hostname Configuration pane, choose Automatically set via DHCP to provide the hostname and IP address by the DHCP server, or Manually specify the hostname (short name rather than FQDN).
In the DNS Configuration pane, choose Automatically set via DHCP to provide the name service configuration by the DHCP, or enter the primary IP addresses to Manually specify.
15. Set time zone and how the server determines local time using NTP (Network Time Protocol) or manual time entry. Choose Ok.
16. Click Install Citrix Hypervisor and note that this will erase all data on the target disks.
17. Choose to install supplemental packs or not. If you choose yes, eject the installation media> insert the supplemental pack media> click Ok> choose Use media to continue with the installation.
18. Eject the installation media (if using a CD or USB drive) from the Installation Complete screen, then choose OK to restart the server.
19. Press Alt+F3 to launch a local shell from xsconsole and Alt+F1 to return after the reboot.
Install XenCenter
Make sure you have .NET framework version 4.6 or later installed on the system.
1. Download the latest XenCenter from Citrix Hypervisor.
2. Start the .msi file.
3. Follow the setup wizard.
Backup Citrix Hypervisor (XenServer) Reliably
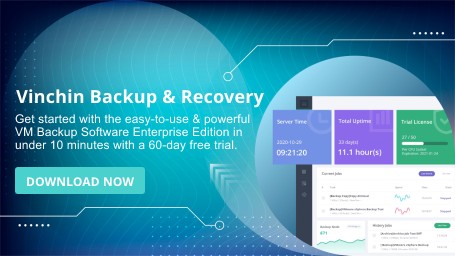
Vinchin Backup & Recovery is a professional backup solution for 10+ virtualizations including Citrix Hypervisor (XenServer) with multiple smart strategies and protection mechanisms.

You can perform a full, CBT-enabled forever incremental, incremental, and differential backup on schedules automatically according to your specific backup needs while keeping the data size down to 50% of the original volume for storage availability.
You could also perform a full, instant, or granular recovery that depends on the circumstances. Instant recovery can bring the crashed system backup in seconds for business continuity and if you are just looking for certain folders or files, you can use granular recovery to do so.
Vinchin Backup & Recovery also supports seamless V2V migration across 10+ virtualization, like VMware to XenServer.
Feel free to download the 60-day full-featured free trial to explore more:
Conclusion
Citrix Hypervisor (formerly XenServer) is the leading open-source server virtualization platform that runs on Windows, Linux, and other major operating systems. This article introduces how to install XenServer and its management interface XenCenter step by step.
Also, keep in mind that VM backup and recovery are extremely important for data security. Vinchin Backup & Recovery adopts cutting-edge backup and recovery techniques for the full protection of XenServer VM data.