-
What is Proxmox High Availability?
-
Requirements
-
Creating 3 nodes cluster
-
Configuring high availability
-
Adding resources to the HA configuration
-
Verifying the HA feature
-
Simplify your Proxmox VE protection
-
Conclusion
Proxmox Virtual Environment (Proxmox VE or PVE) is an open-source virtualization platform based on Debian. It offers robust performance and reliability for managing virtual machines and containers. With its user-friendly web interface, Proxmox simplifies the management of your virtualized infrastructure, empowering your IT operations with improved efficiency. It supports cluster management and high availability (HA). In terms of storage, Proxmox not only supports common options like LVM, NFS, and iSCSI but also provides support for cluster storage solutions like GlusterFS and Ceph.
What is Proxmox High Availability?
High Availability (HA) in Proxmox is a feature that allows you to run your virtual machines (VMs) or containers on multiple nodes within a Proxmox cluster. This is done to ensure that if one node fails, the VMs or containers running on that node can be automatically moved to another node and continue running with minimal downtime.
Requirements
Proxmox VE offers built-in high availability (HA) capabilities, but enabling HA requires satisfying the following prerequisites:
A functioning cluster consisting of at least three nodes (to meet the voting mechanism and prevent split-brain scenarios).
Usage of shared storage.
Redundant server hardware, such as dual power supplies, ECC memory, RAID, etc.
Reliance on reliable server hardware from reputable brands.
Watchdog: Hardware watchdog if available; alternatively, Linux kernel’s software watchdog can be used as a fallback.
Optional hardware fencing devices.
Creating 3 nodes cluster
1. Login to Proxmox VE and navigate to Datacenter > Cluster > Create Cluster.

2.Set the name and specify the network, then click Create.
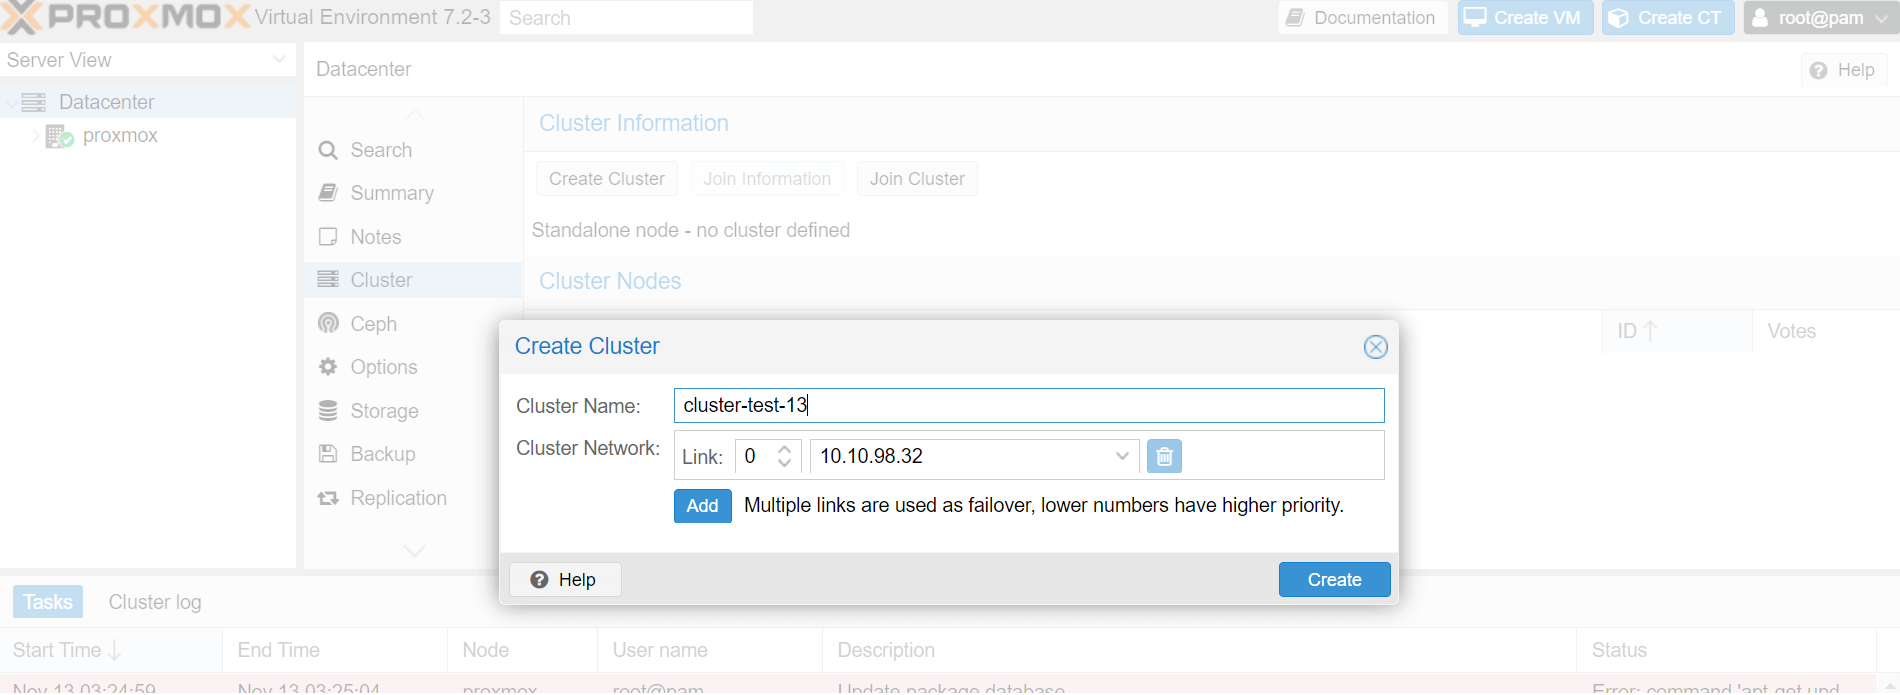
Cluster Name: Set the name for the cluster, note that it cannot be changed after creation.
Cluster Network: Specify the network for the cluster, which by default is the IP address resolved from the hostname.
3. Wait for the completion of the Create Cluster task, and you will see the first cluster created. You can check that the Cluster Nodes section now includes the first node named “proxmox.”
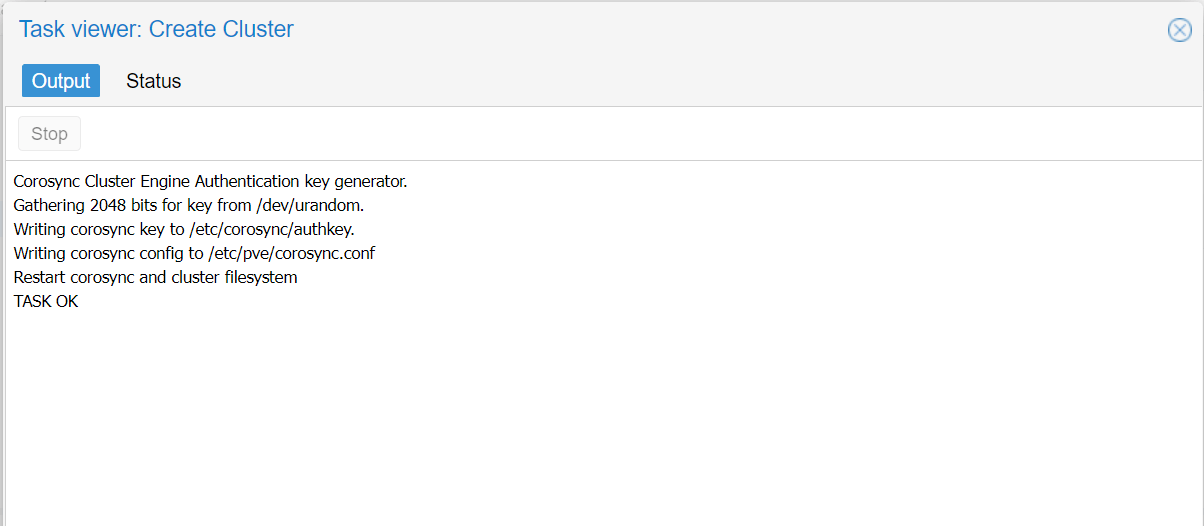

4.After the cluster has been created, you can add other nodes to the cluster. Navigate to Datacenter > Cluster > Join Information.

5. Click on “Copy Information” to copy the details for later use when adding additional nodes to the cluster.
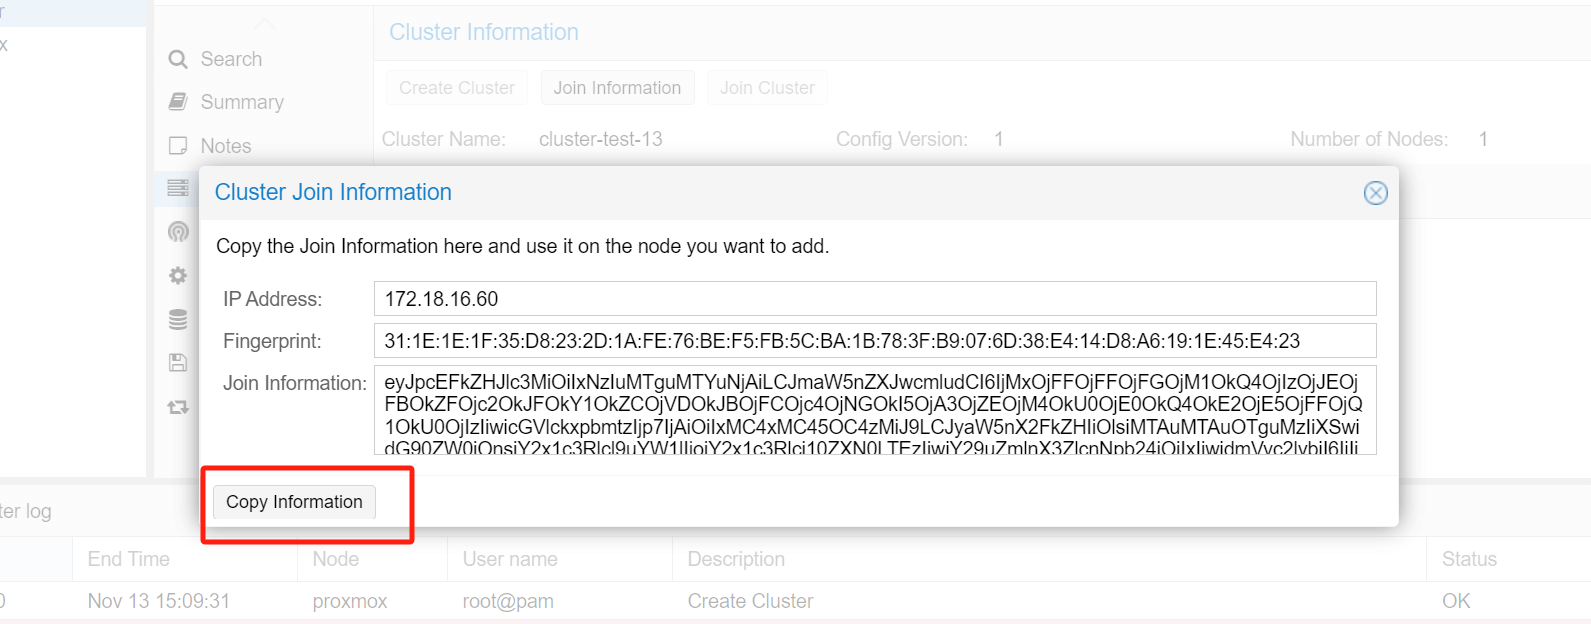
6. To proceed with your second node, navigate to Datacenter > Cluster > Join Cluster. Then, paste the previously copied information into the designated field.
Information: Paste the information previously copied.
Peer Address: IP address of the other node in the cluster will be automatically filled.
Password: Enter the root password for the node that has already joined the cluster.
Fingerprint: Automatically populated.
Cluster Network: The default value is the IP address resolved from the hostname, representing the cluster network.
Please note that joining the cluster involves updating the CA information and restarting the pve-cluster service, which may temporarily render the page unresponsive. Don't worry, simply wait for a moment, then refresh your browser and log in again.
To view the cluster information, navigate to Cluster Nodes. You will find that there are already two nodes listed.
If you have additional nodes to add to the cluster, repeat the steps mentioned above.
Configuring high availability
1.In the Datacenter section, go to HA > Groups > Create to create a high availability (HA) group.

2.Enter the configuration interface for the HA Group:
ID: Assign a name to the HA Group.
Restricted: Limit the resources to run only on nodes belonging to this HA Group.
Nofailback: If a node currently running the resources fails, HA will migrate those resources to other healthy nodes. Choose whether to migrate the resources back to the original node once it recovers. It is generally recommended to enable this option to avoid triggering excessive resource migrations, which could cause network bandwidth and disk IO pressure.
Comment: Add any additional remarks or information.
Node List: Specify which PVE nodes should be included in this HA Group. For each node, you can assign a priority level. Higher priority levels indicate a preference for running resources on that node. Consider the performance characteristics of each node when determining the priority.
3.Once the setup is complete, you can view the created HA Groups in the list.
Adding resources to the HA configuration
1. Go to Datacenter > HA > Resources > Add and select the type of resource (VM/CT).
2. Enter the resource addition interface:
VM: Select the desired CT or VM resource from the dropdown list.
Max Restart: Specify the maximum number of restart attempts in case of resource startup failure.
Max Relocate: Specify the maximum number of relocations to the next node after reaching the Max Restart limit.
Group: Choose the HA group in which the resource should run from the dropdown list.
Request State: Select the desired running state for the resource, which can be one of the following:
Started: HA ensures that the resource remains in the started state.
Stopped: HA ensures that the resource remains in the stopped state.
Ignored: HA ignores this resource and performs no actions on it.
Disabled: HA ensures that the resource remains in the stopped state and does not attempt migration to other nodes.
Comment: Additional remarks or notes for the resource.
3. After adding the resource, you will notice a change in the HA status, indicating that the resource has been added.
Verifying the HA feature
To verify the functioning of the HA feature, you can simulate a node failure. Shut down the node running the virtual machine, and you will observe the watchdog mechanism triggering a reboot. After a short wait, you will see the virtual machine migrated to another node and running there.
Simplify your Proxmox VE protection
Although Proxmox High Availability allows automatic failover of virtual machines to other nodes, you’d better choose a professional Proxmox backup and disaster recovery solution for dual insurance.
Vinchin Backup & Recovery is a robust Proxmox VE environment protection solution, which provides advanced backup features, including automatic VM backup, agentless backup, LAN/LAN-Free backup, offsite copy, effective data reduction, cloud archive and etc., strictly following 3-2-1 golden backup architecture to comprehensively secure your data security and integrity.
For recovery, Vinchin Backup & Recovery provides instant VM recovery, which could shorten RTO to 15 seconds by running the VM directly through its backup. You can also choose file-level granular restore to extract specifical files from Proxmox VE VM backup.
Besides, data encryption and anti-ransomware protection offer you dual insurance to protect your Proxmox VE VM backups. You can also simply migrate data from a Proxmox host to another virtual platform and vice versa.
Just following these 4 steps to backup your Proxmox VMs:
1.Select the backup object.
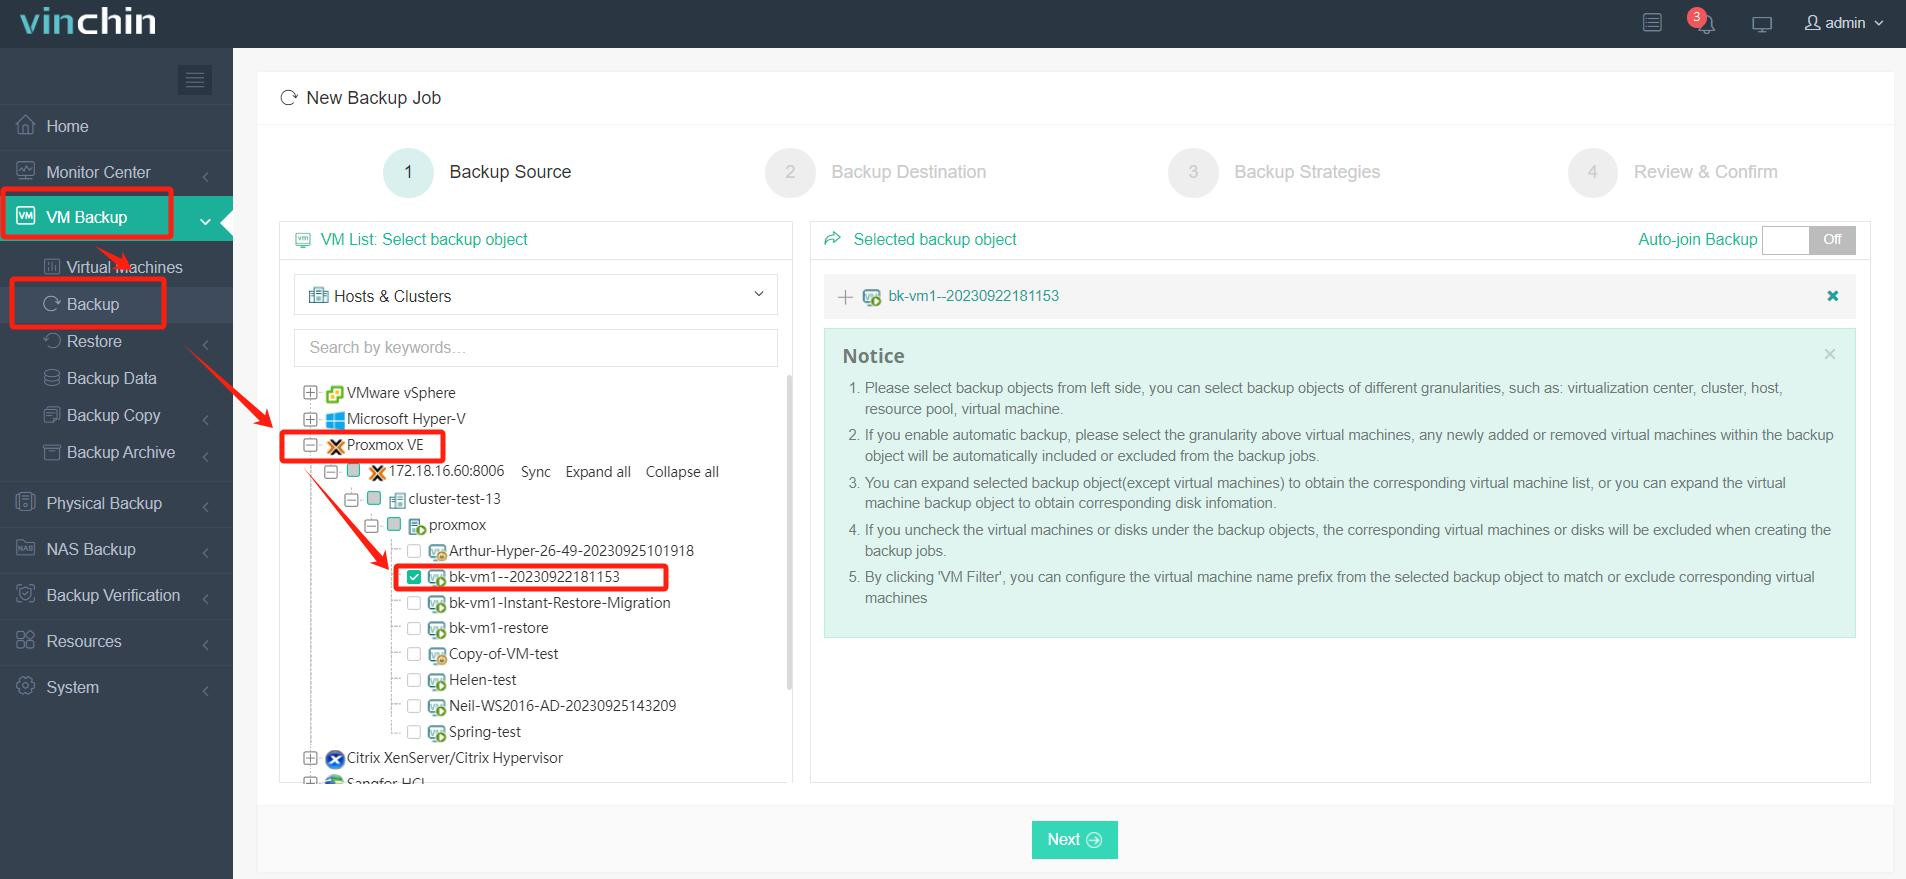
2.Select backup destination.
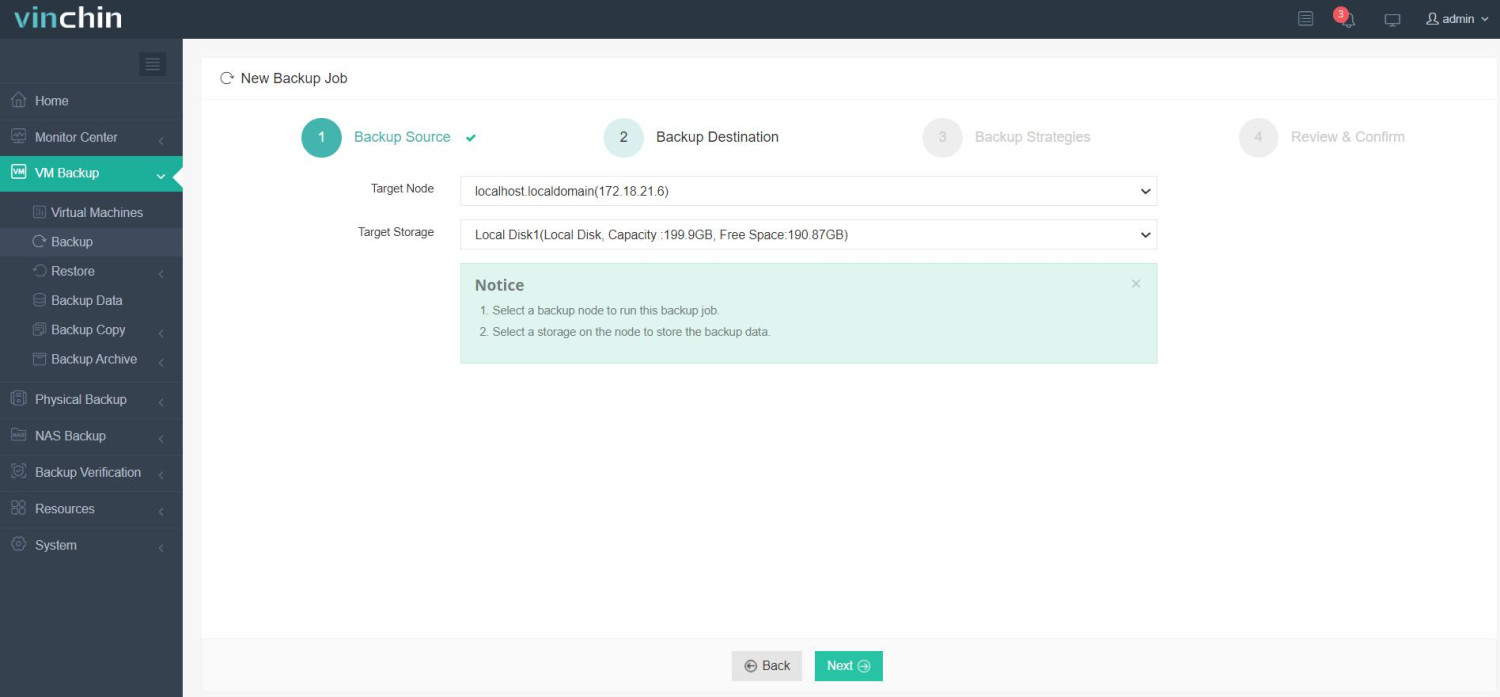
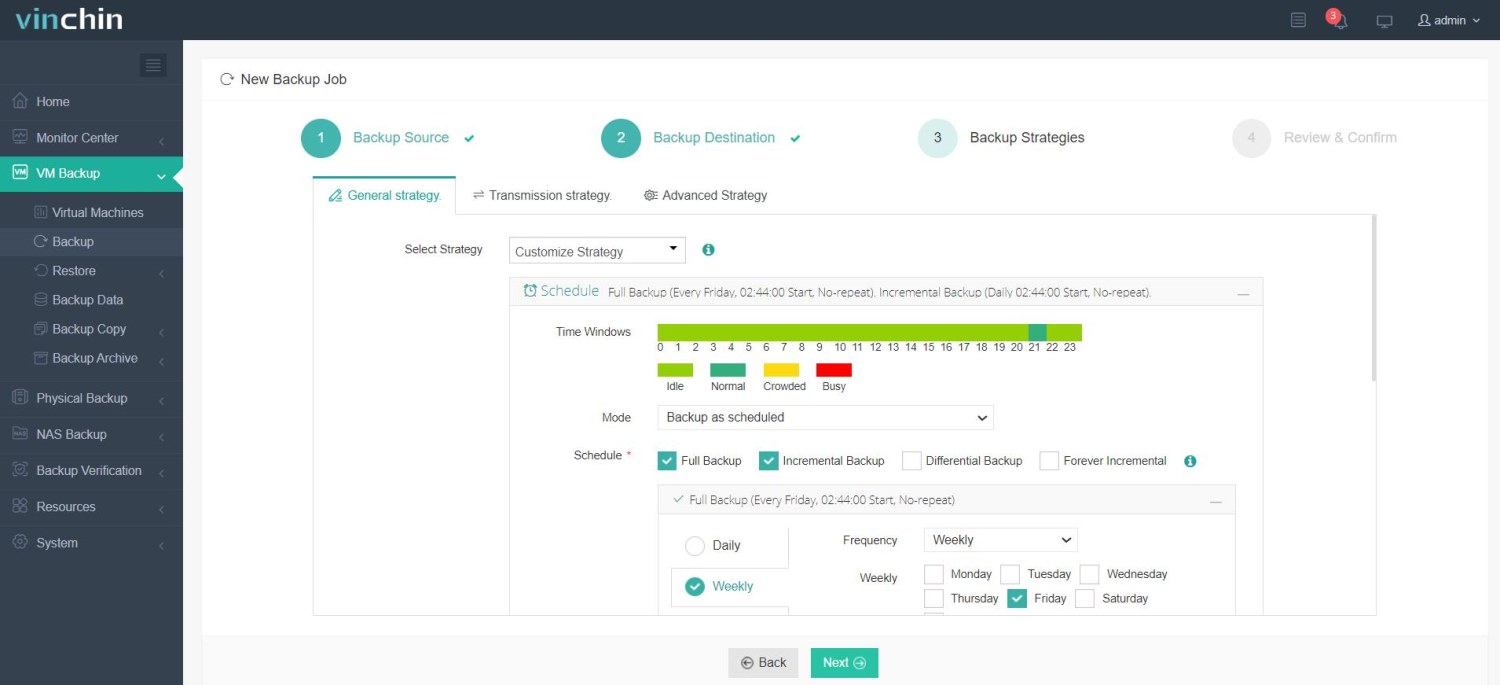
3.configure backup strategies.
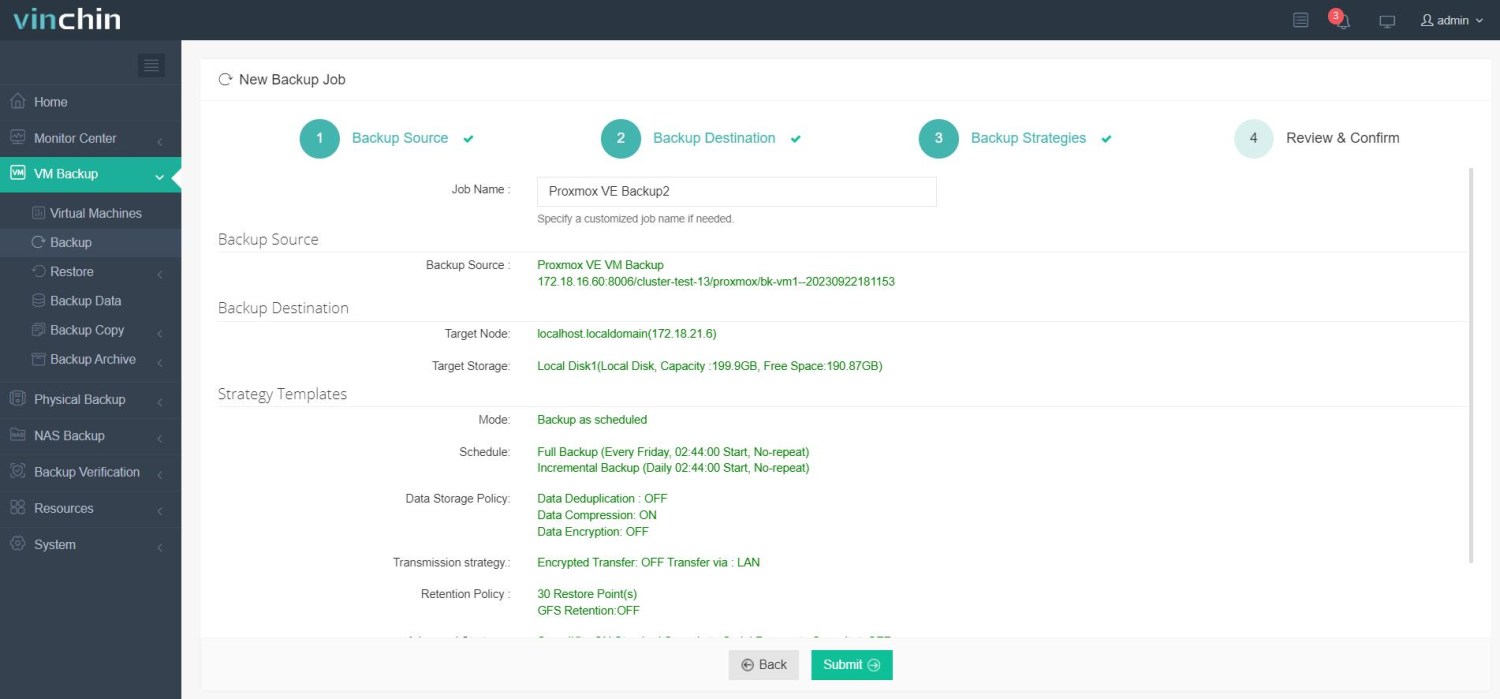
4.Review and submit the job.
Vinchin Backup & Recovery has been selected by thousands of companies and you can also start to use this powerful system with a 60-day full-featured trial! Also, contact us and leave your needs, and then you will receive a solution according to your IT environment.
Conclusion
High Availability is a key feature of Proxmox VE. It allows for the automatic failover of virtual machines and containers to other nodes in the cluster in case of hardware failure. This is crucial for maintaining uptime and ensuring that critical services are always available.
You can choose Vinchin Backup & Recovery to easily backup and recover your Proxmox VE VMs. Don’t miss the free trial!
Share on:


