-
The supported migration types are as follows:
-
How to perform a P2V conversion with XenServer Converter?
-
How to migrate Xen VM to VMware?
-
Streamlined cross-platform VM migration solutions
-
XenServer Converter FAQs
-
Conclusion
Citrix XenConvert is a tool for physical-to-virtual (P2V) conversion. Workloads can be converted from servers or desktop computers running Windows to VMs, virtual appliances, virtual disks in XenServer, or virtual disks connected to Provisioning Services. Workloads can contain Windows operating systems, applications, and data. XenServer Converter generates a virtual appliance in Open Virtualization Format (OVF) that XenCenter can import into XenServer.
The supported migration types are as follows:
1. This Computer -> XenServer, VHD, OVF, PVS vDisk: Converts a computer running Windows into a VM in XenServer or generates a virtual device in VHD, OVF or PVS vDisk format.
2. Volume -> Volume: Save or image a volume from one host to another volume.
3. This Computer -> Connected XenServer Host: Convert workloads from one host to XenServer or Provisioning Services virtual disks.
4. Hosts Unreachable by XenServer -> Virtual Device or Provisioning Services Virtual Disk: Move workloads from hosts that cannot connect to XenServer to virtual appliances or Provisioning Services virtual disks.
How to perform a P2V conversion with XenServer Converter?
Use the XenServer Converter tool to convert a physical server or desktop computer running Windows to a virtual machine in XenServer:
Prepare a Windows Server 2012 host named Xenconvert.
Install the XenConvert 2.5.1 program on the XenConvert host.
Perform a P2V conversion
Use the XenConvert software to migrate this computer (i.e., the XenConvert host) to a XenServer.
1. Select the conversion source as This Computer and the target as XenServer.
2. Select the partitions to be converted and set the free space size or unallocated space size of the target volume.
3. Enter the name or IP of the target XenServer host, along with user credentials, and specify the temporary directory for the conversion.
4. Enter the name and storage location of the converted VM.
5. After the setup is complete, start the conversion.
6. After the conversion is complete, observe whether a new VM is created on the XenServer.
How to migrate Xen VM to VMware?
However, many users wish to migrate Xen VMs to VMware, but it is important to note that XenServer Converter does not support this direct migration. The main purpose of this tool is to convert existing VMs or physical servers to VMs on the XenServer virtualization platform.
The following are the steps to export an OVF/OVA template from XenServer and import it into an ESXi environment:
Export the virtual machine
1. Log in to XenCenter and select the VM you want to migrate.
2. Export the virtual machine as an OVF or OVA template. Save the file to a local or network share location and make sure that the ESXi host can access the file.
Import the OVF/OVA template into ESXi
1. Log in to the vSphere Client that manages the ESXi hosts. And select the target ESXi host or cluster.
2. Go to the Import OVF/OVA Templates section.
3. Specify the path to the previously exported OVF/OVA file.
4. Follow the import wizard to configure the properties of the VM, such as name, resource allocation, network connection, and so on.
5. Specify the target datastore location where the imported VMs will be stored.
Complete the import wizard
1. After completing the import wizard, ESXi creates a new virtual machine with the same configuration as the VM on the original XenServer.
2. The newly imported VM can now be used in an ESXi environment, retaining the configuration and data from the original XenServer instance
Streamlined cross-platform VM migration solutions
XenServer Converter only supports P2V conversion and is limited to converting virtual machines to XenServer VMs, without the ability to perform cross-platform V2V conversions. In contrast, Vinchin Backup & Recovery offers comprehensive virtual machine backup functionality, supporting not only P2V and V2V conversions, but also facilitating migration across 10+ different platforms including VMware, Proxmox, Hyper-V, XenServer, XCP-ng, oVirt, RHV, and others. This makes it an excellent choice for migrating workloads between different virtualization platforms.
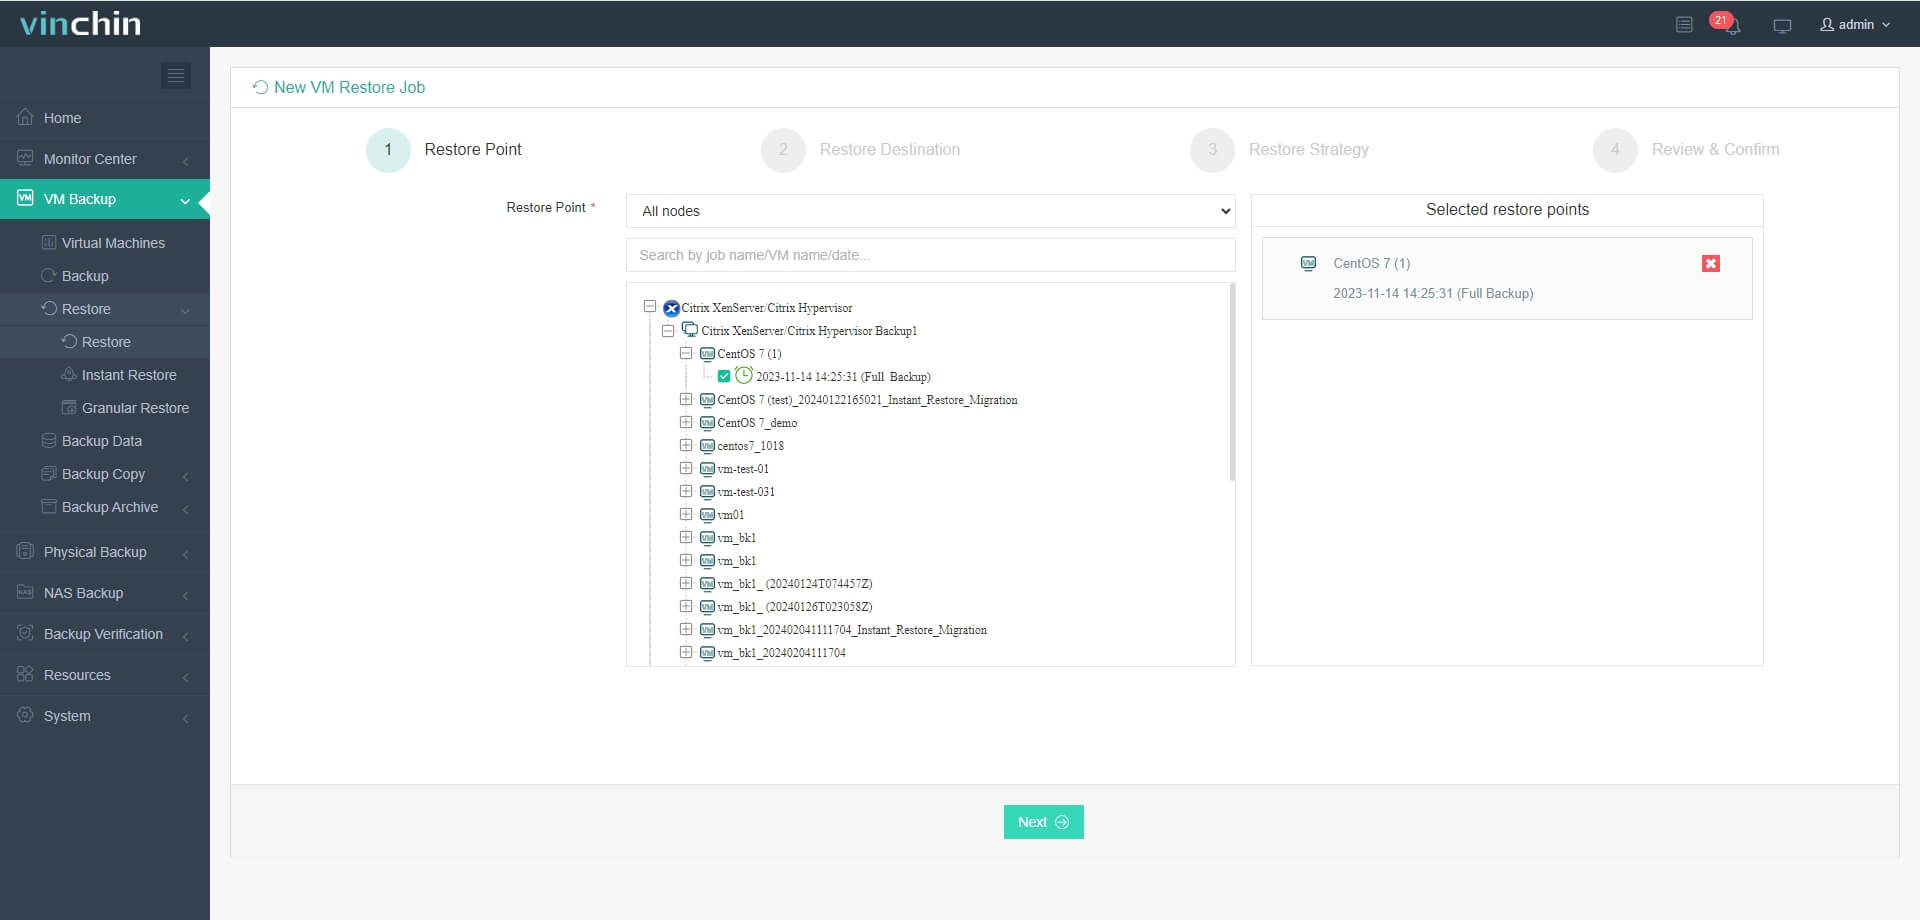
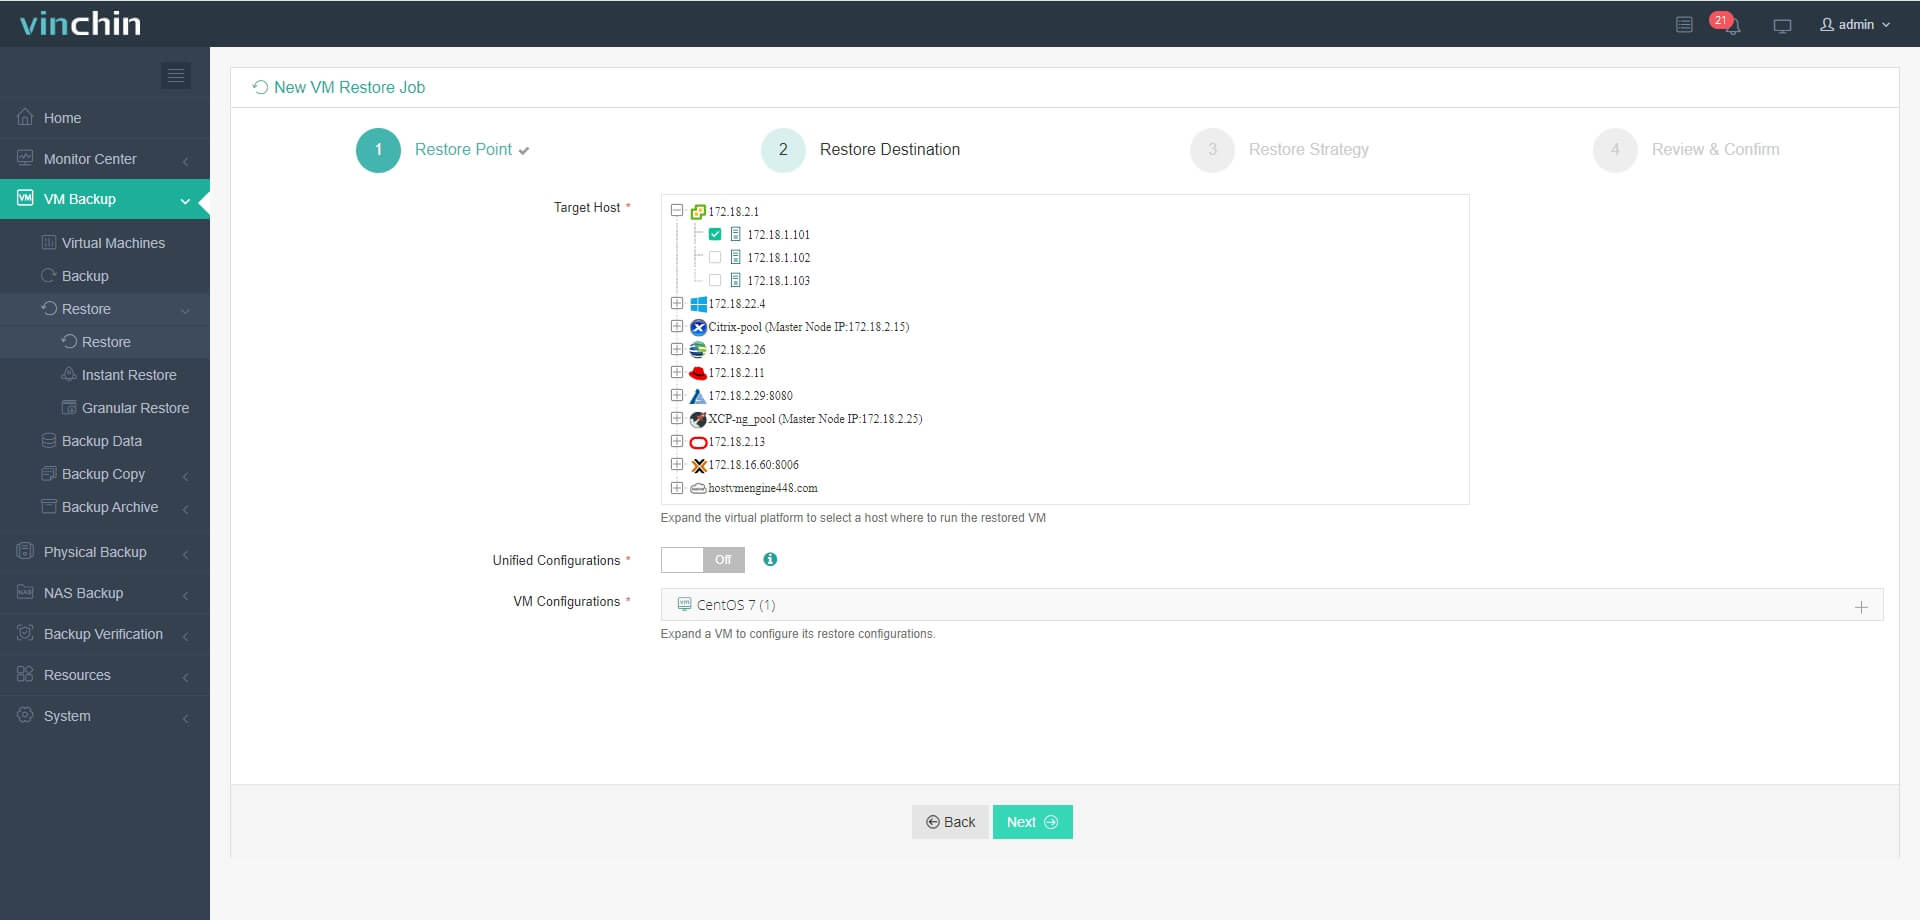
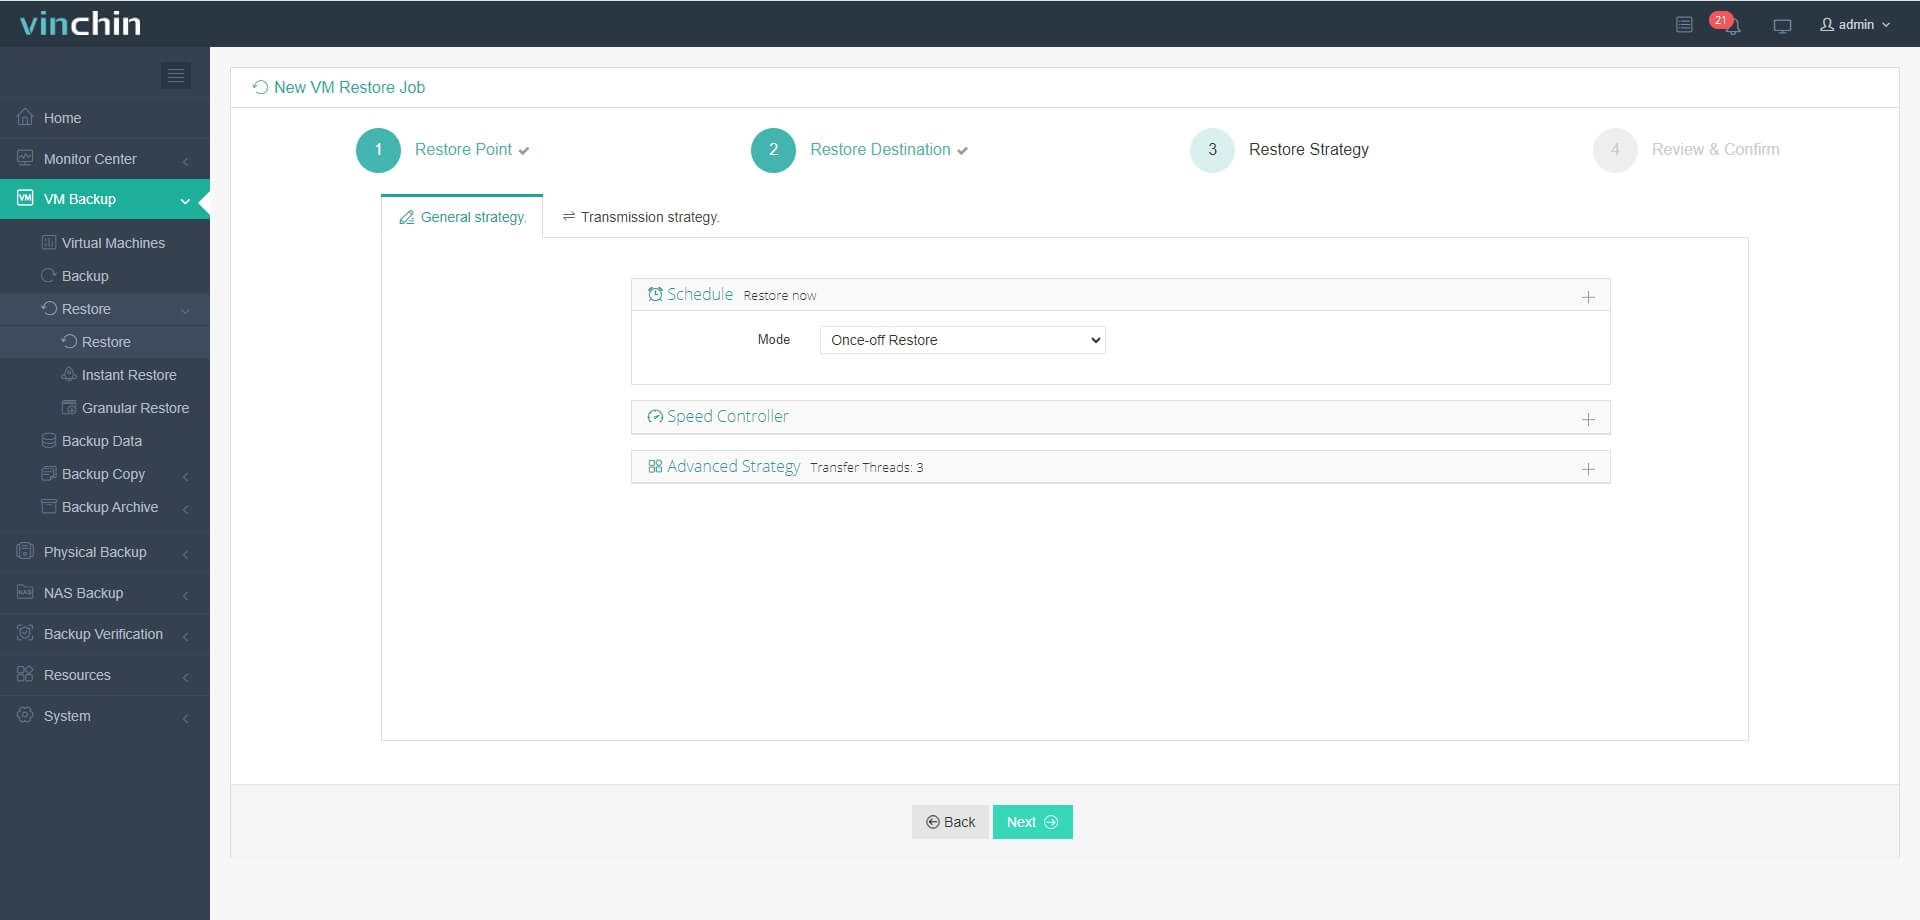
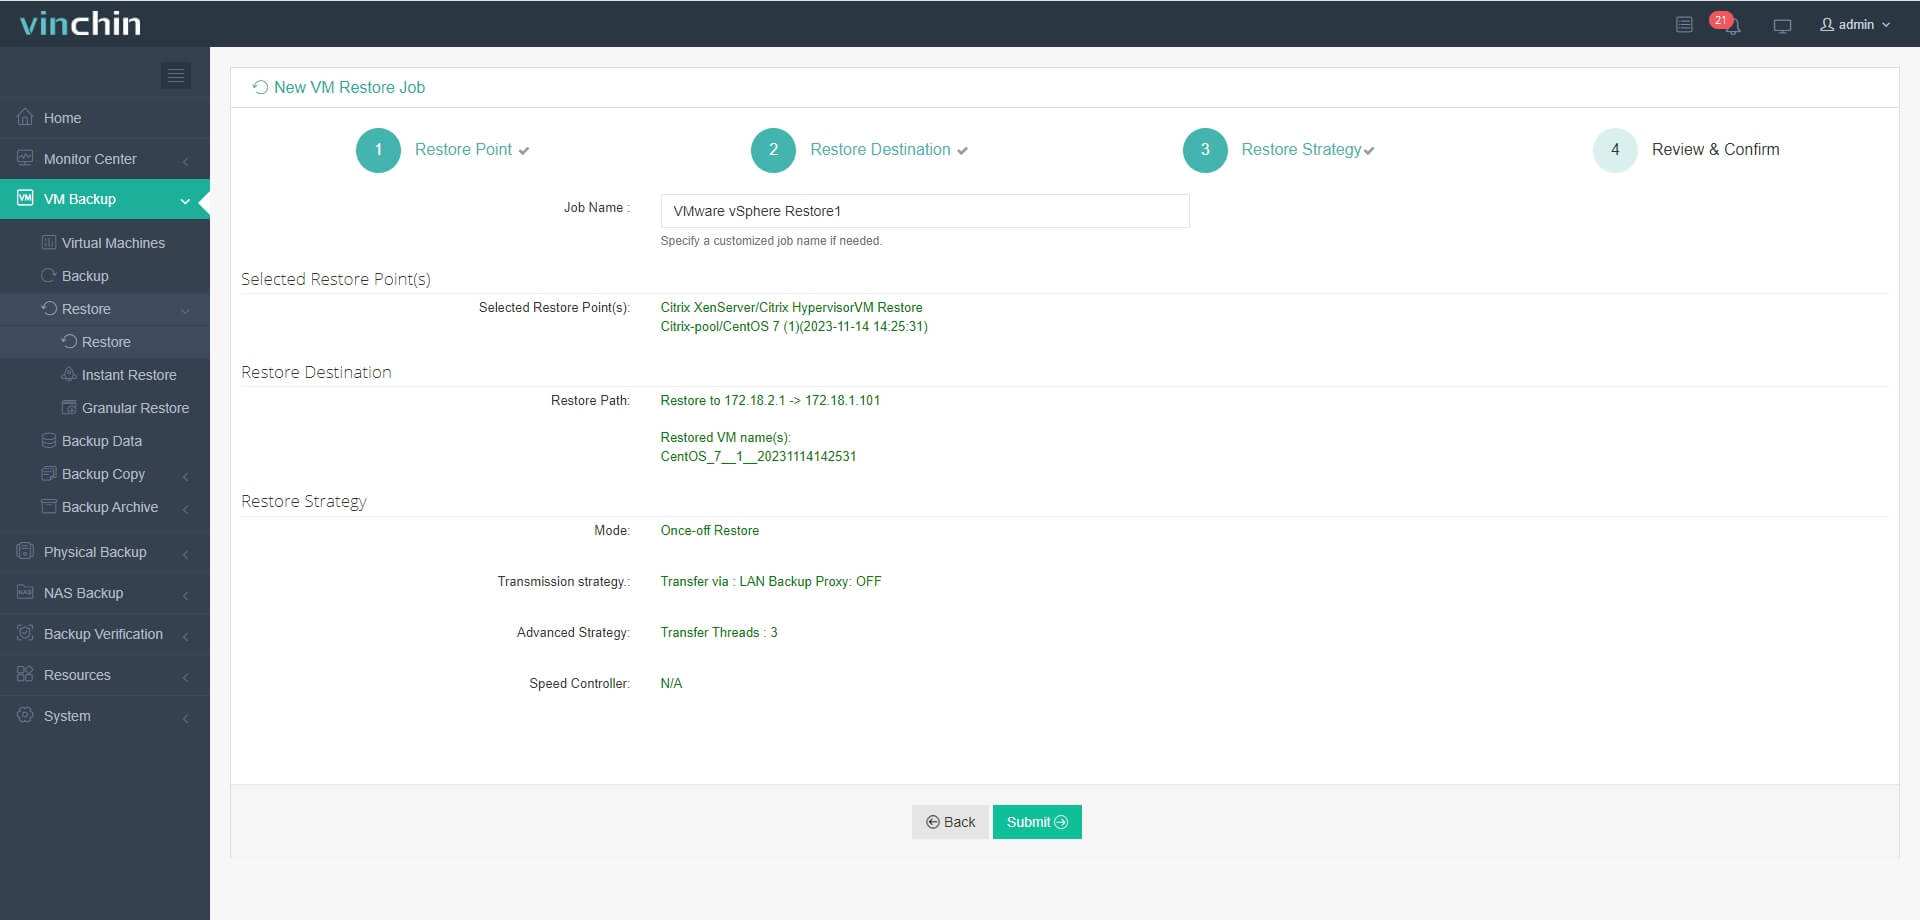
Here, it will demonstrate how to migrate Xen VMs to VMware using Vinchin Backup & Recovery.
1. Choose the VM you want to restore
2. Select the VMware host to run the restored VM
3. Select the restore strategy
4. Review and submit the job
Vinchin offers comprehensive and powerful features such as agentless backup and instant recovery, designed to protect and manage critical data in virtualized environments. Vinchin provides users with a 60-day free trial to experience its functionality in real-world scenarios. For more information, please reach out to Vinchin directly or contact our local partners.
XenServer Converter FAQs
A1: Is XenServer Converter a free tool?
Q1: Yes, XenServer Converter is typically provided as a free tool by Citrix for users who utilize XenServer as their virtualization platform.
Q2: What operating systems are supported by XenServer Converter?
A2: XenServer Converter supports Windows operating systems, including various editions such as Windows Server and Windows Desktop versions.
Conclusion
In conclusion, Citrix XenConvert facilitates physical-to-virtual conversions for Windows-based workloads, primarily targeting XenServer environments. However, for cross-platform VM migration, Vinchin Backup & Recovery offers a robust solution, making it suitable for varied migration needs.
Share on:


