-
Method 1: Windows Files Backup and Restore with Windows Backup and Restore
-
Method 2: Windows Files Backup and Restore with File History
-
Method 3: Windows Files Backup and Restore with Vinchin Backup & Recovery
-
Conclusion

Backing up the data on Windows is undoubtedly a decisive factor in data loss prevention in the event of a system failure or hard drive crash. You can back up Windows Server including all the server data and configurations to prevent the failure of the physical system or save data to various destinations such as NAS or external hard drives for multiplied security. But the files on the machine deserve your attention as well.
Many organizations rely on various files on the system to run different business operations such as payroll, human resources, sales, and more. If they cannot access those files due to data corruption or malicious attacks, they are unable to continue operating.
Therefore, it’s extremely important that companies run periodic file backups on Windows to ensure that there are always extra copies of critical data for data recovery. 3 ways to back up and restore files on Windows 10/11 will be given in this post for your reference.
Method 1: Windows Files Backup and Restore with Windows Backup and Restore
Window Backup and Restore is a backup feature since Windows 7 and is included in Windows 10/11, which can backup system files, files, apps, and other data.
File Backup:
1. Access Windows Backup and Restore.
In Windows 10:
Click Start> Settings> Update & Security> Backup> Backup and Restore (Windows 7).
Or press Windows key +Q> type backup> turn to Backup and Restore (Windows 7).
In Windows 11:
Open Control Panel> System and Security> Backup and Restore (Windows 7).
Or go to Settings> System> Storage> Advanced Storage options> Backup options> scroll down to look for a previous backup> Go to Backup and Restore (Windows 7).
2. Click Set up backup on the right of the panel. Input your admin password if prompted.
3. Choose your desired backup drive and click Next.
4. Select Let Windows choose to backup data files saved in libraries, on the desktop, and default Window folders and click Next.
Or Let me choose for libraries and folders backup and whether to include a system image in the backup.
5. Click Change schedule> check Run backup on a schedule> set the schedule. The default setting is every Sunday 7:00 pm.
6. Click Save settings and run backup.
File Recovery:
1. Connect to the external storage device with your backups included if you are using it.
2. Access the Windows Backup and Restore> Restore my files.
3. Browse and select backup files to restore, and choose the location of your storage device or other destinations.
4. Click Restore.
Method 2: Windows Files Backup and Restore with File History
File History is a feature in the Windows operating system that allows users to automatically back up their files and folders.
In Windows 10 Backup:
1. Connect to the external drive if you are using it as the backup destination.
2. Click Start> Settings> Update & Security> Backup> More options. Or press Windows key +Q> type backup> More options.
3. Click Add a drive and choose a drive for the job.
4. Enable Automatically back up my files and click More options for advanced settings.
5. Set the backup frequency (Back up my files) and the retention policy (Keep my backups).
6. Select Add a folder to add more backup sources (Back up these folders). You can also exclude specific folders to back up in the step.
7. Click Back up now.
In Windows 10 Recovery:
1. Click Start> Settings> Update & Security> Backup> More options> scroll down and choose Restore files from a current backup.
2. Select one or more files/folders from the backups and click the Restore icon to start the task.
3. Click the left and right arrow icons to see different file versions by date.
In Windows 11 Backup:
1. Click Settings> type File History in the search box.
2. Click Select drive on the left pane> choose a drive>OK.
3. Open File Explore> right-click the folder> Show more options> Include in library> add other folders to the current folder/create it as a new library for the backup. By default, it backs up all folders under the libraries.
4. Select Exclude folders if you don’t want to backup some folders> Add>Save changes.
5. Choose the Advanced settings on the left pane to configure the intervals and time to keep saved versions optionally. Click Save changes.
In Windows 11 Recovery:
1. Access the File History and choose Restore person files from the left pane.
2. Choose one or more files/folders from the backups and click the Restore icon.
3. Click the left and right arrow icons to see different file versions by date.
Method 3: Windows Files Backup and Restore with Vinchin Backup & Recovery
File backup and recovery in Windows using its internal tools are easy but lack more flexible settings to meet complicated needs. Vinchin Backup & Recovery is a powerful and user-friendly backup solution for 12 virtualizations, 6 mainstream databases, NAS, massive files, and Linux & Windows operating systems.

You can backup and restore individual files, folders, and the subfolders and files inside the folders in Windows (7/8/10/XP), Windows Server (7/8/10/11), and most Linux distributions (CentOS, Debian, Ubuntu, and RHEL).
You can perform automatic file backup under customized schedules and select from Full, Incremental, Differential, and Forever Incremental backups. Reduce most of the size with data deduplication and compression and valid data extraction. And ensure data consistency with snapshots.
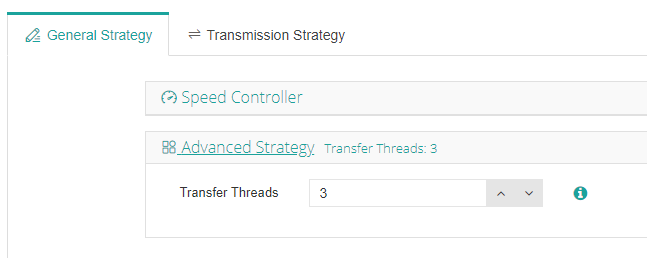
You can also restore files to the original or a new destination via multiple threads and encrypted transmission.
You can encrypt backups with AES-256 standard and prepare an offsite backup copy to prevent malware attacks.
File Backup
1. Download the 60-day free trial and launch the software.
2. Download, install, add, and license the physical backup agent.
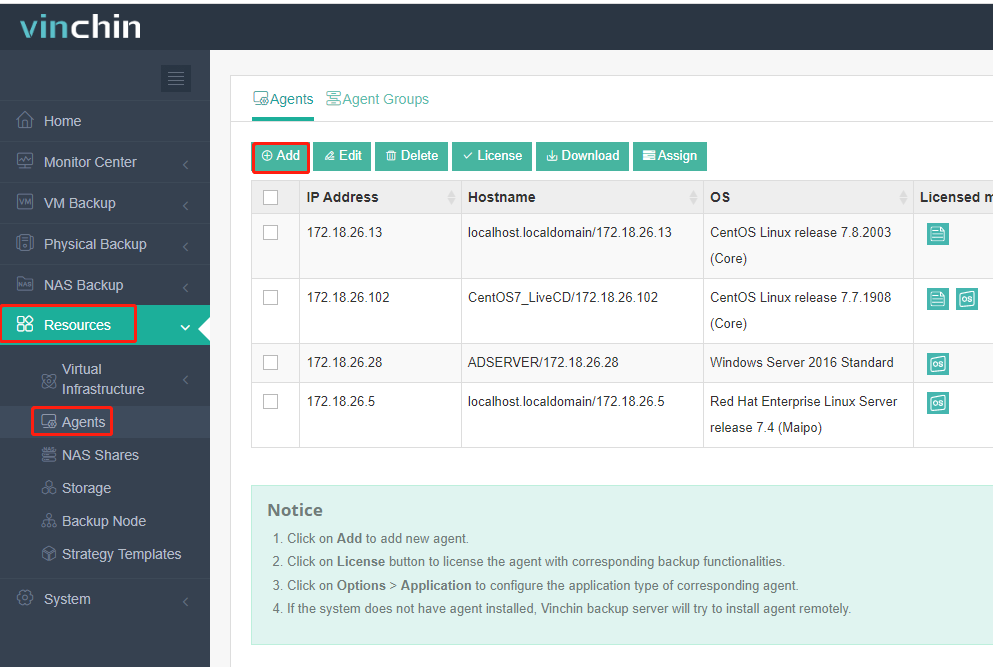
3. Go to Physical Backup> File Backup> Backup and select one or more file backup agents for the job.
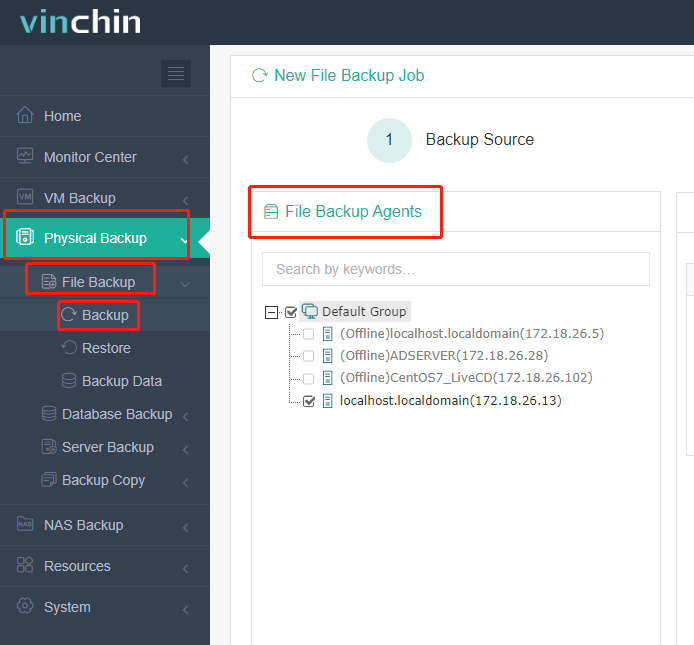
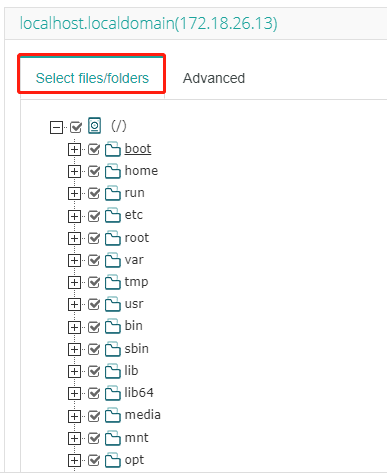
4. Click + to select the backup files/folders and select Advanced to include/exclude files with the wildcard filter, such as *.docx.
Click Apply to Other Agent(s) to use the wildcard filter for other agents optionally.

5. Select the backup storage and node for the job.

6. Configure desired backup strategies.
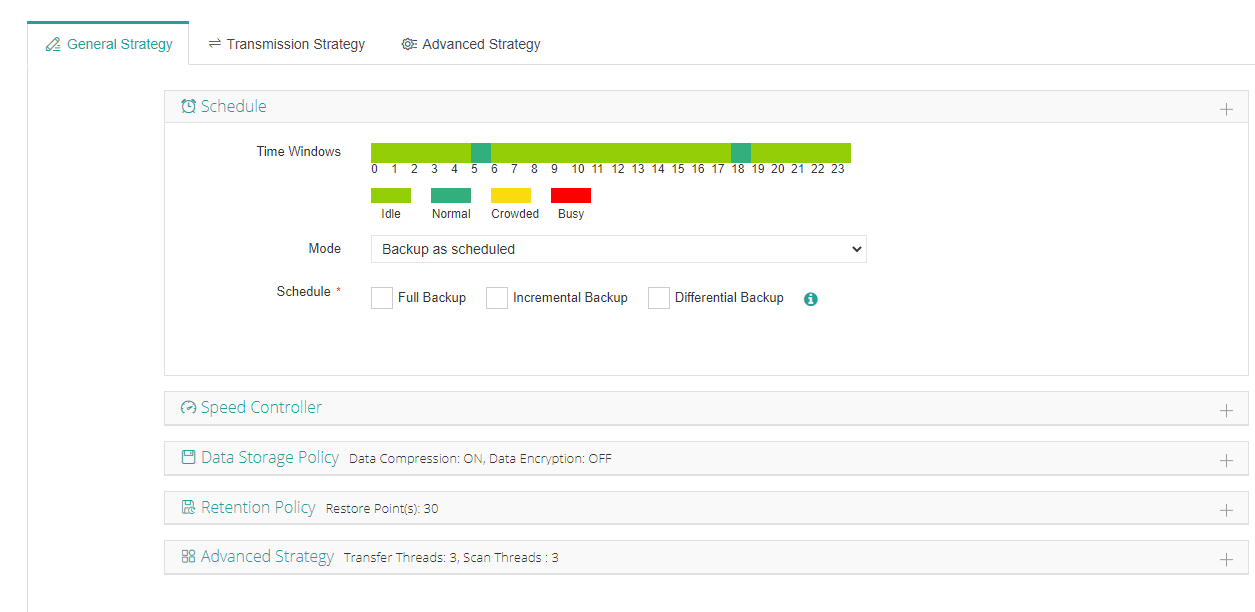


7. Review and confirm. The job will run on schedule or you can start it immediately in the Options> Start Full.
File Recovery:
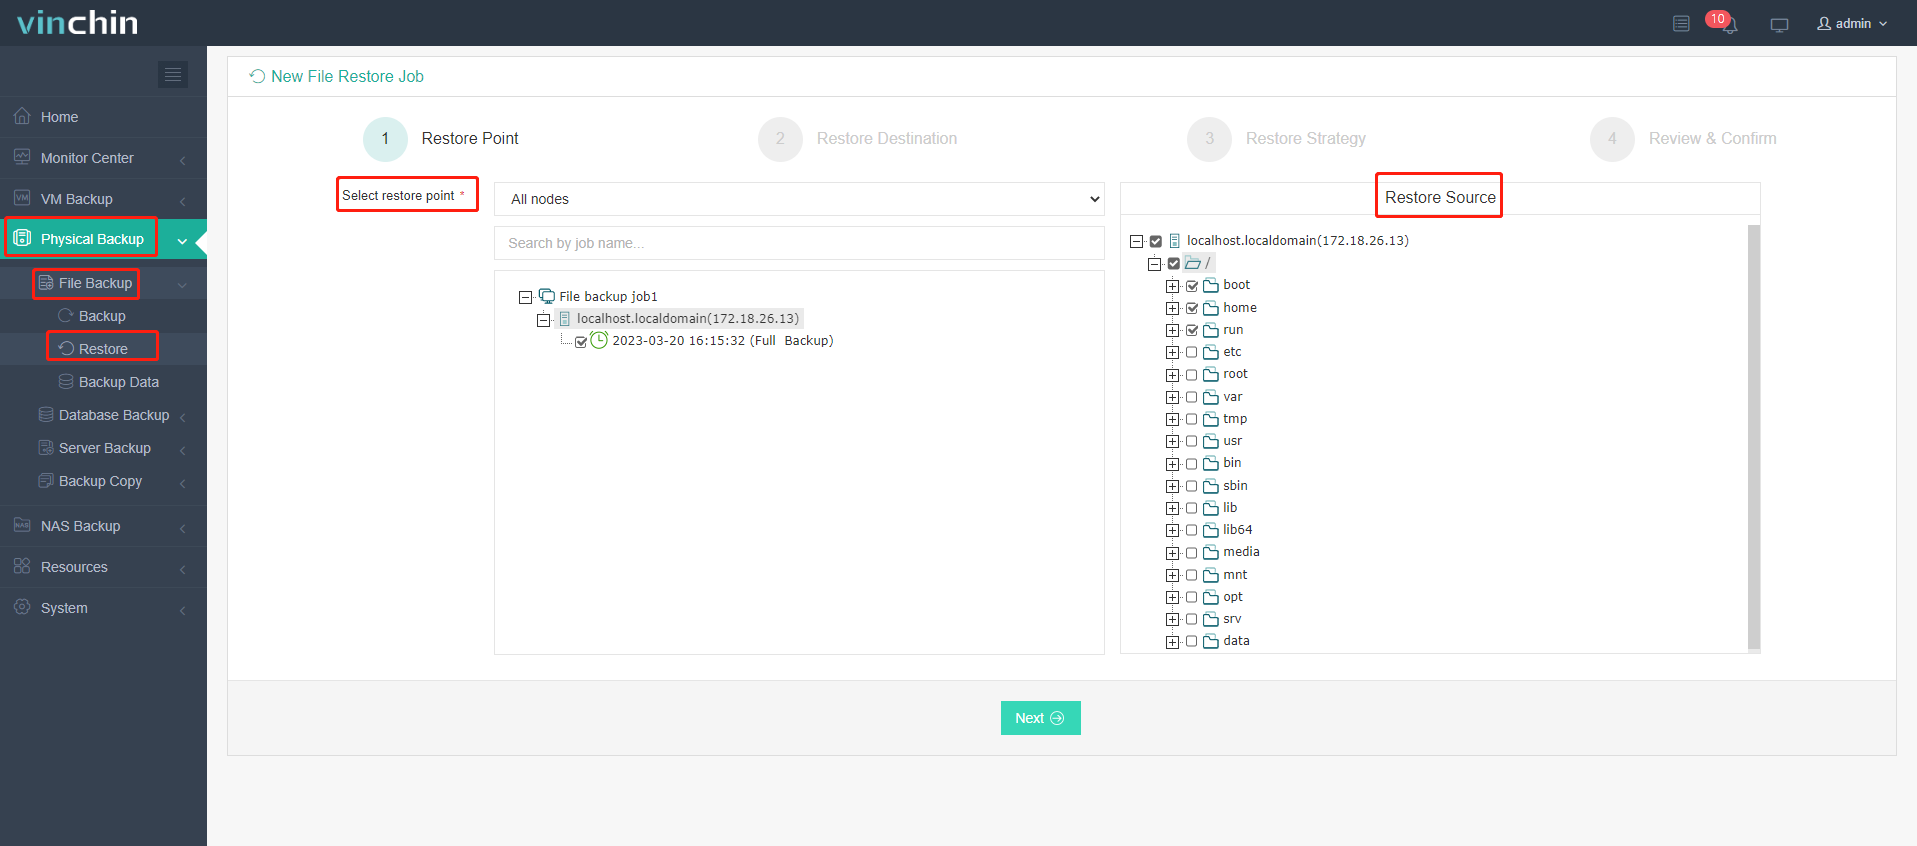
1. Select a restore point, then select the specific files/folders from the Restore Source column.
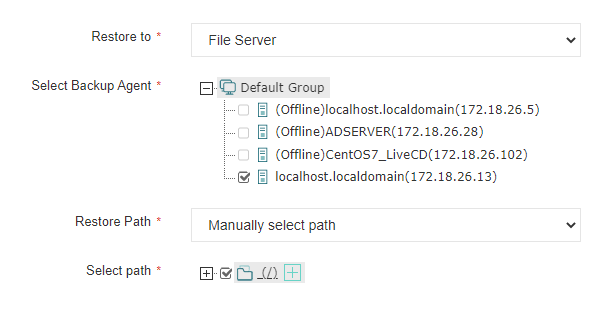
2. Specify the backup destination (file server or NAS share), select the backup agent, and select to restore to the path manually or to the original path. Choose the disk/folder manually and you can create a new folder by clicking the + on the right of the folder.
3. Configure restore strategies.

4. Review and confirm all the settings.
Conclusion
File backup and recovery in Windows can be completed with Windows Backup and Restore, and File History. But both of them only provide basic backup and recovery features. If you are looking for a professional backup solution with various technologies for efficient file protection, you can opt for Vinchin Backup & Recovery to automate the process.
Share on:


