-
How to backup Windows Server to azure?
-
Azure backup Windows Server FAQs
-
Conclusion
In modern IT environments, backing up Windows Server data to the cloud is key to enhancing data security and resilience. Azure is Microsoft's cloud computing platform that provides reliable backup solutions. With the Microsoft Azure Recovery Services (MARS) agent, users can easily back up Windows Server files, folders, and system state to the Azure cloud. This cloud-based backup method not only prevents accidental data corruption or loss, but also provides additional safeguards against natural disasters and cyberattacks. By following the steps below, you will learn how to perform Windows Server backup to azure to ensure data security and continuity.
How to backup Windows Server to azure?
Step 1: Sign in to your Azure account
First, visit the Azure Portal and sign in to your Azure account.
Step 2: Create a Recovery Services Vault
To back up your Windows Server data to Azure, you first need to create a Recovery Services Vault. This vault in Azure acts as a secure, centralized storage location specifically designed for backup and recovery operations. By using an RSV, you can store backup points, perform data recovery, and configure backup policies. This provides a reliable environment to keep your Windows Server files, folders, and system states safe, and ensures long-term data retention and resilience against data loss.
After logging in to the Azure portal, search for Backup Center at the top > click on it
In Backup Center, click Vault > Recovery Services Vault > Continue
In Recovery Services Vault, fill in the following information:
· Subscription: Select the subscription you want to use.
· Resource Group: Select an existing resource group or create a new one.
· Vault Name: Specify a unique name for the vault (up to 50 characters).
· Region: Select a geographic location in the same region as the data source.
Once configured, click Review + create > hit Create to complete the creation.
Step 3: Download and Install the MARS Agent
The MARS Agent is a tool that connects Windows Server to the Recovery Services Repository.
1. At Recovery Services Vault, choose myRecoveryServicesVault
2. Hit +Backup, in Backup Goal:
Where is your workload running? Choose On-premises。
What do you want to back up? Choose Files and folders & System State。
3. In Prepare Infrastructure, choose Download Agent for Windows Server or Windows Client to download MARSAgentInstaller.exe
Return to Prepare Infrastructure, click Download > save Vault Credentials. This file is used to connect the MARS agent to the Recovery Services vault.
Step 4: Install and Register MARS Agent
In the process of azure backup Windows Server, the MARS Agent plays a crucial role. After creating a RSV in Azure, the next step is to download and install the MARS Agent. The MARS Agent is the tool that establishes the connection between your on-premises Windows Server and the Recovery Services Vault, enabling data backup and recovery operations.
1. Double-click to run the downloaded MARSAgentInstaller.exe
2. Follow the prompts to complete the installation, setting the proxy cache directory and proxy server information (if using a proxy to connect to the Internet).
3. Once the installation is complete, click Register and provide the Vault Credentials file you downloaded earlier.
4. Set an encryption password to protect the backup data. Ensure that you keep the passwords properly, as they cannot be recovered by Microsoft if they are lost.
Step 5: Configure Backup Plans and Retention Policies
1. Use the MARS agent to configure backup plans and retention policies for Windows Server.
2. Open the installed Microsoft Azure Recovery Services Agent.
3. In the console, select Schedule Backup to configure a backup plan.
4. On the Select Items to Back up page, select the files, folders that you want to back up.
5. Set the backup time and retention policy (e.g., backup daily, weekly).
6. On the Choose Initial Backup Type page, select Automatically over the network.
7. When the configuration is complete, click Finish to finish setting up the backup plan.
Step 6: Run a Manual Backup
Although you have set up a backup schedule, it is recommended that you perform a manual backup to ensure that the system has been properly backed up.
In the MARS Agent console, click Back Up Now.
Select Files and Folders or System State > click Next.
Review the settings on the confirmation page > click Back Up Now.
When the backup is complete, you will see the Job Completed status in the Jobs panel.
Powerful Windows Server backup solution -- Vinchin Backup & Recovery
In addition to Azure, Vinchin Backup & Recovery offers a powerful backup solution for Windows Server environments with high-speed data protection and flexible recovery options. This software integrates seamlessly with Windows Server, making it a powerful option for protecting your systems and data in a variety of scenarios. Vinchin provides organizations with a comprehensive backup solution that can efficiently and easily back up multiple Windows Servers and workstations. With extensive support for multiple Windows operating systems, it ensures complete protection of all Windows devices in your organization.
Vinchin supports the following Windows operating system versions:
· Windows Server 2003/2003 R2
· Windows Server 2008/2008 R2
· Windows Server 2012/2012 R2
· Windows Server 2016
· Windows Server 2019
· Windows Server 2022
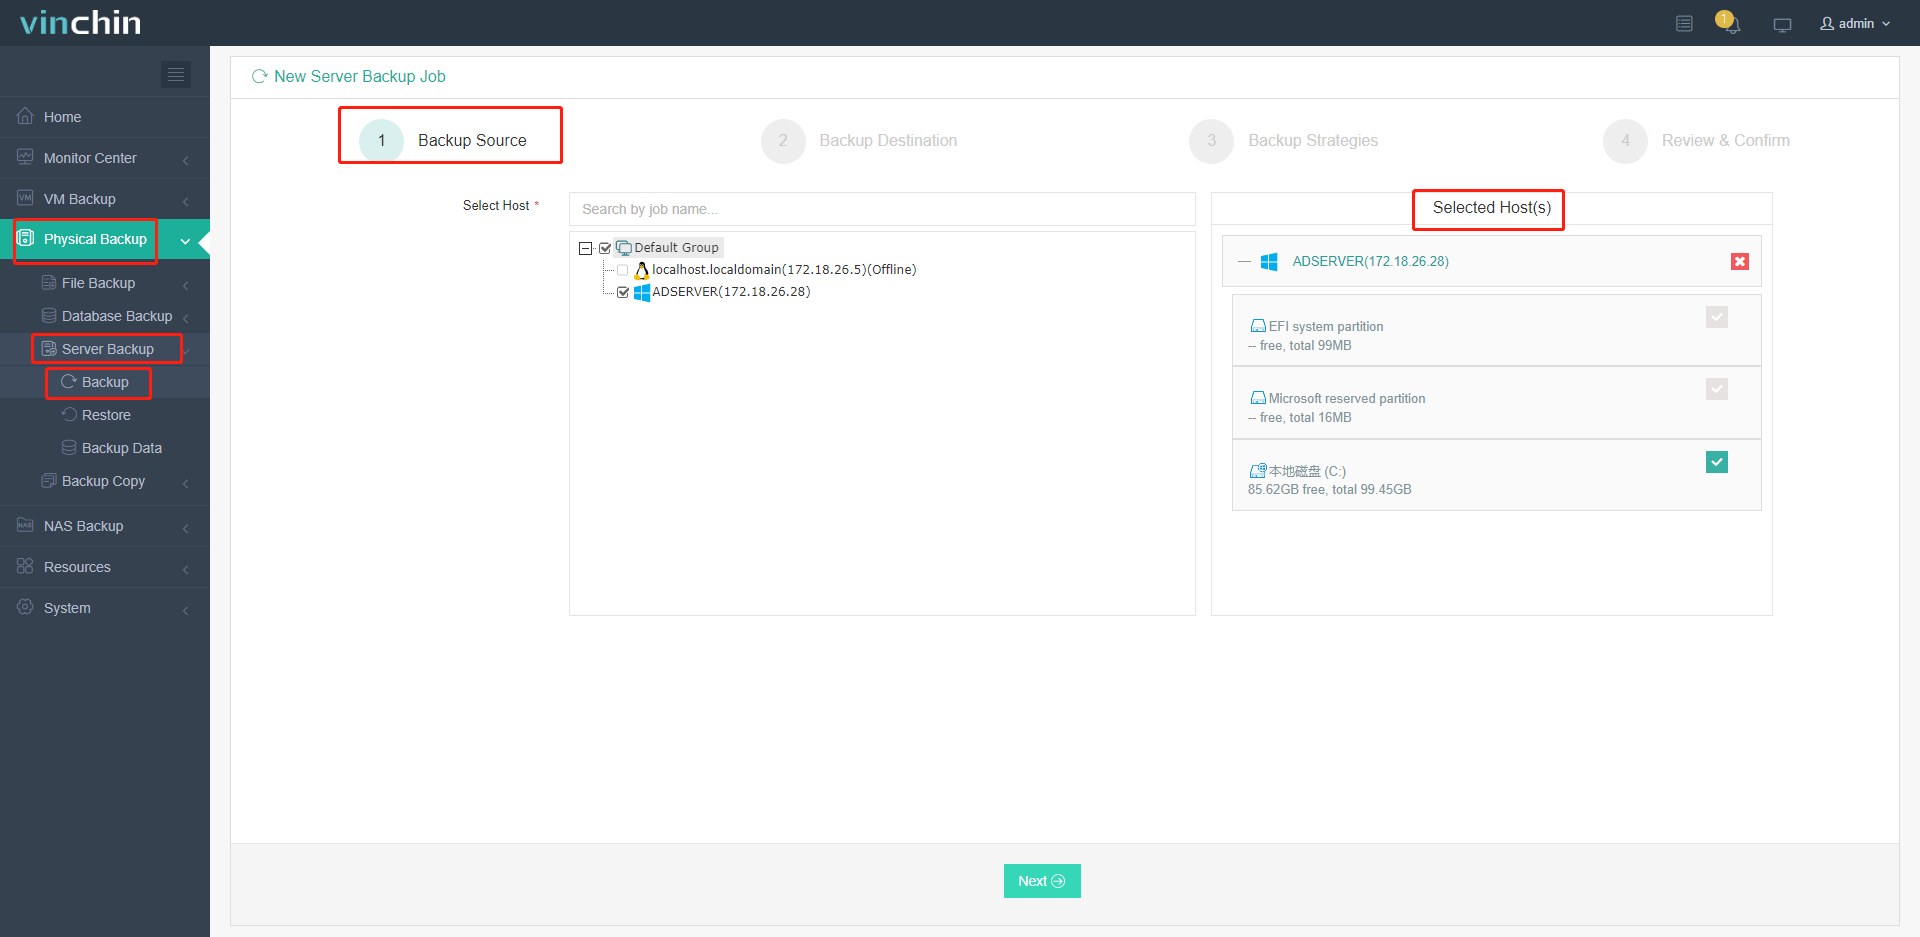
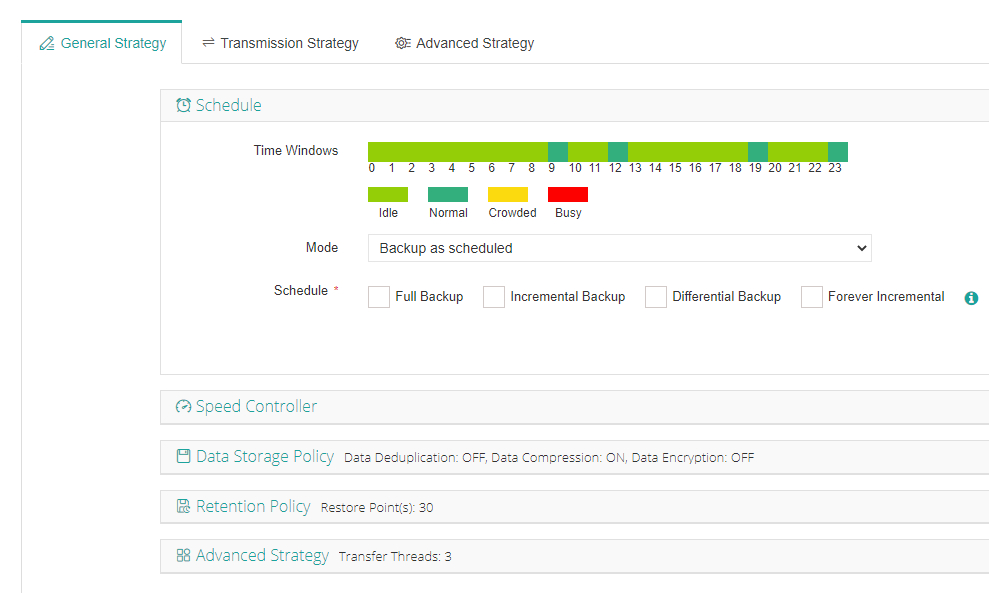
Vinchin Backup & Recovery's operation is very simple, just a few simple steps.
1. Just select the Windows Server

2.Then select backup destination

3.Select strategies

4.Finally submit the job
Vinchin also offers a free 60-day trial so that users can experience its functionality in a real-world environment. If you would like more detailed information or have any questions, please feel free to contact Vinchin directly or contact one of our local partners.
Azure backup Windows Server FAQs
Q1: Can I back up multiple servers using a single vault?
A1: Yes, you can back up multiple servers to a single Recovery Services vault. However, it's recommended to keep the number of servers per vault manageable for better performance and management.
Q2: Do I need to configure a storage account for Azure Backup?
A3: No, Azure Backup uses the Recovery Services vault to store backups. When you create a vault, Azure automatically provisions the necessary storage.
Conclusion
In modern IT environments, Azure provides a reliable cloud backup solution that prevents data loss and corruption, ensures data security and resiliency. While Vinchin Backup & Recovery fully protects Windows Server data with efficient and flexible backup and recovery options that ensure business continuity and data integrity.
Share on:


