-
Way 1: Export VM from VMware to XenServer using the OVF format
-
Way 2: Convert VMware VMDK to XVA format using XenConvert
-
Way 3: Convert VMware VMs to XenServer with Conversion Manager
-
Way 4: Use Vinchin Backup & Recovery to migrate VMware VMs to XenServer
-
VMware to XenServer FAQs
-
Conclusion
Migrating from one virtualization platform to another has become a common requirement in modern virtualized environments. For those considering exporting their virtual machine environments from VMware to Citrix XenServer, choosing the right migration method is critical. This guide will provide an in-depth look at four possible migration methods to help users understand and select the best migration option for their needs.
Way 1: Export VM from VMware to XenServer using the OVF format
Export OVF packages from VMware
1. In vSphere Client, choose the VM > Template > Export OVF Template
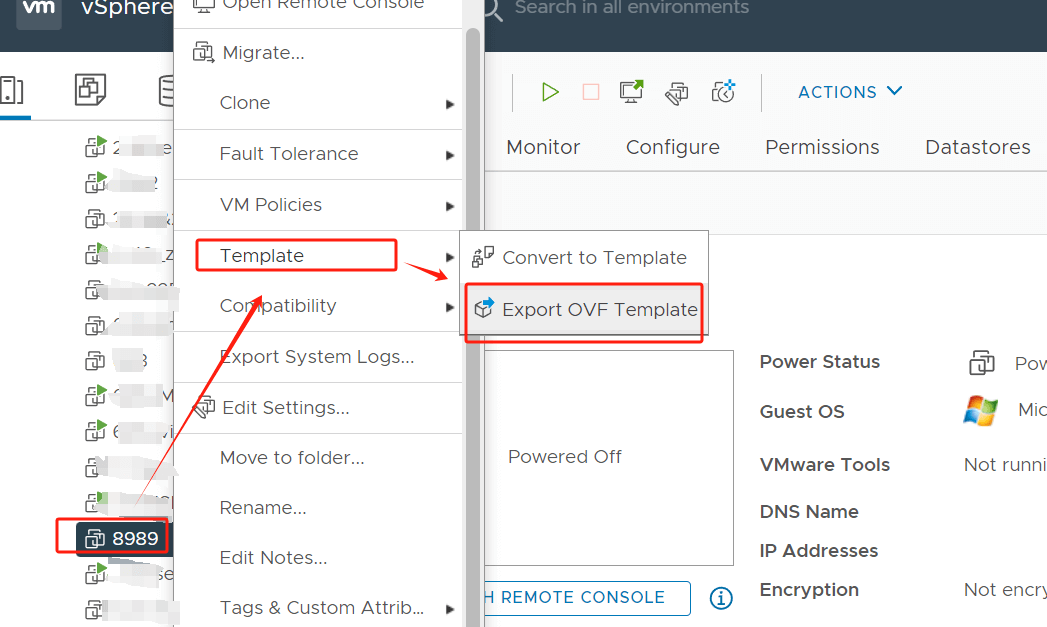
2. You can see that the export file has been generated

Import OVF to XenCenter
3. In XenCenter, connect to a new server
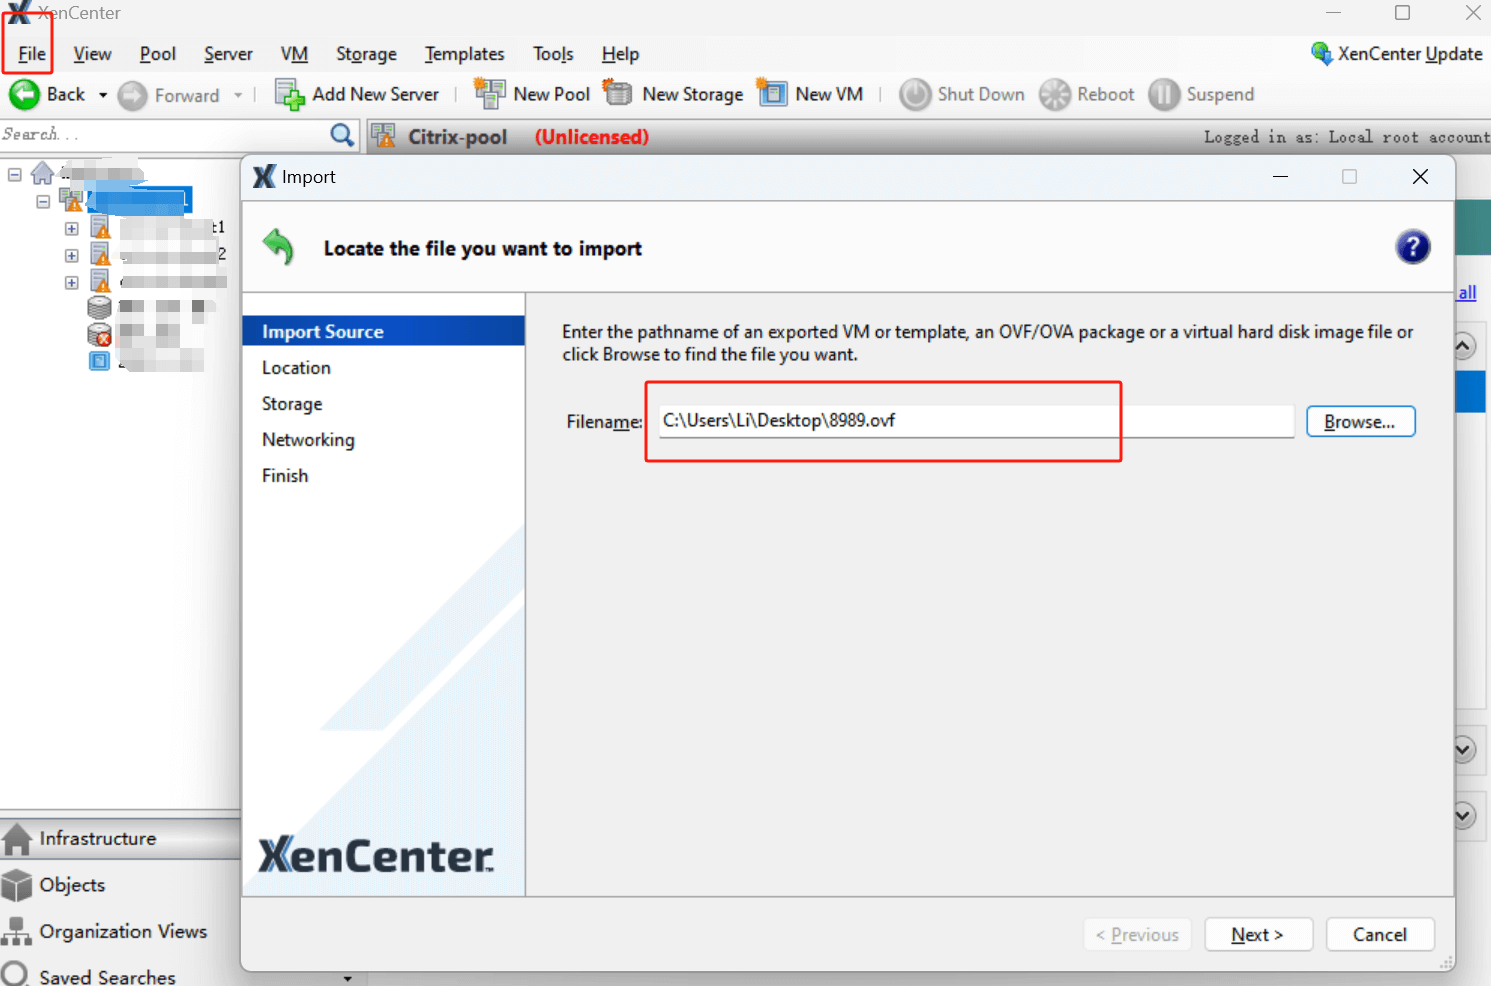
4. Hit File > Import > choose the VM8989.OVF > follow the prompts to complete the import process defining Location, Storage, Network > hit Import
Way 2: Convert VMware VMDK to XVA format using XenConvert
Note: XenConvert converts virtual disks in VMDK format one at a time. It copies additional drive data and partitions to an external location and deletes them.
1. Open XenConvertor, select the conversion method as From VMware Virtual Hard Disk (VMDK) to Xen Virtual Appliance (XVA) format file, and click Next.
2. Browse and select the VMDK file exported from VMware.
3. Specify the destination file storage path.
4. Confirm the information and click Convert, then wait for the task to complete to 100%. When finished, you can see a VHD file and an OVA file in the destination directory.
Import to XenServer
Same steps as in way 1, but of course you can also use the command line
1) Copy the required files to an installed share accessible by the XenServer host;
2) Run the following command:
#xe vm-import filename=<path and name of the ova.xml file> sr-uuid=<UUID of the SR to which you want to install the imported VMs>
Way 3: Convert VMware VMs to XenServer with Conversion Manager
The Citrix Hypervisor Conversion Manager helps you migrate VMware to XenServer (Citrix Hypervisor) in bulk.
Prerequisites:
Credentials for the Citrix Hypervisor pool/standalone host, and source VMware server;
Shut down the source VMware VMs (configured with a network and storage controller and with less than 2 TiB virtual disks);
The target Citrix pool/host is connected to the storage repository containing enough space and has the networks the converted VMs use.
1. In XenCenter, navigate to Pool> Conversion Manager to open the window.
2. Click New Conversion to start the wizard. Input the VMware server credentials and click Next.
3. On the Virtual Machines page, select the VMs to be converted and click Next.
4. On the Storage page, specify the storage repository for the conversion.
5. On the Networking page, choose the Citrix Hypervisor network to map for VMware networks, choose to keep the virtual MAC address or not, and click Next.
6. Review all the information. Click Previous to change and Finish to start the process.
Way 4: Use Vinchin Backup & Recovery to migrate VMware VMs to XenServer
Vinchin Backup & Recovery is a professional data protection solution designed to help organizations achieve reliable backups and fast V2V migrations in VM environments. Vinchi supports various virtualization platforms, VMware, Proxmox, Hyper-V, XenServer, XCP-ng, oVirt, RHV, etc. In addition, Vinchin offers an intuitive and user-friendly management interface, as well as powerful data protection and disaster recovery features. Whether it's a hardware failure, data loss, or unforeseen catastrophe, Vinchin enables users to quickly recover their VM environments and ensure the continuity of stable business operations.
When converting VMware VMs to XenServer, there is no need to perform complex conversion tasks. Users can effortlessly select VM backups and restore them to the new host, simplifying the migration experience.
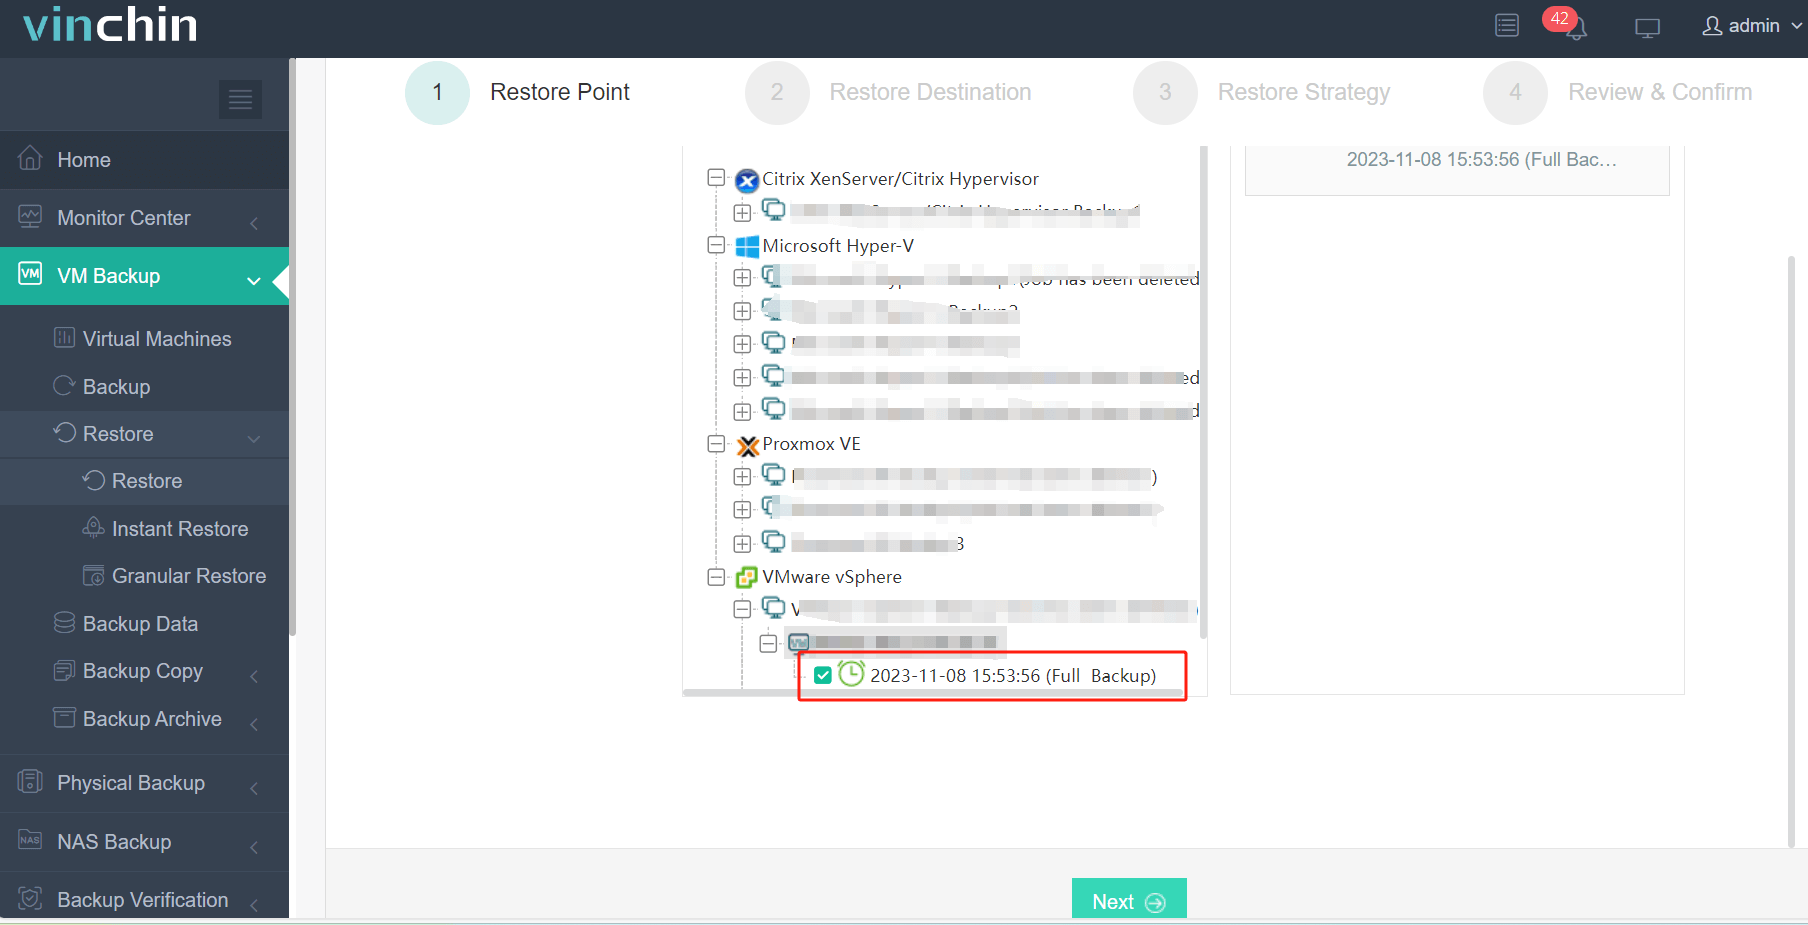
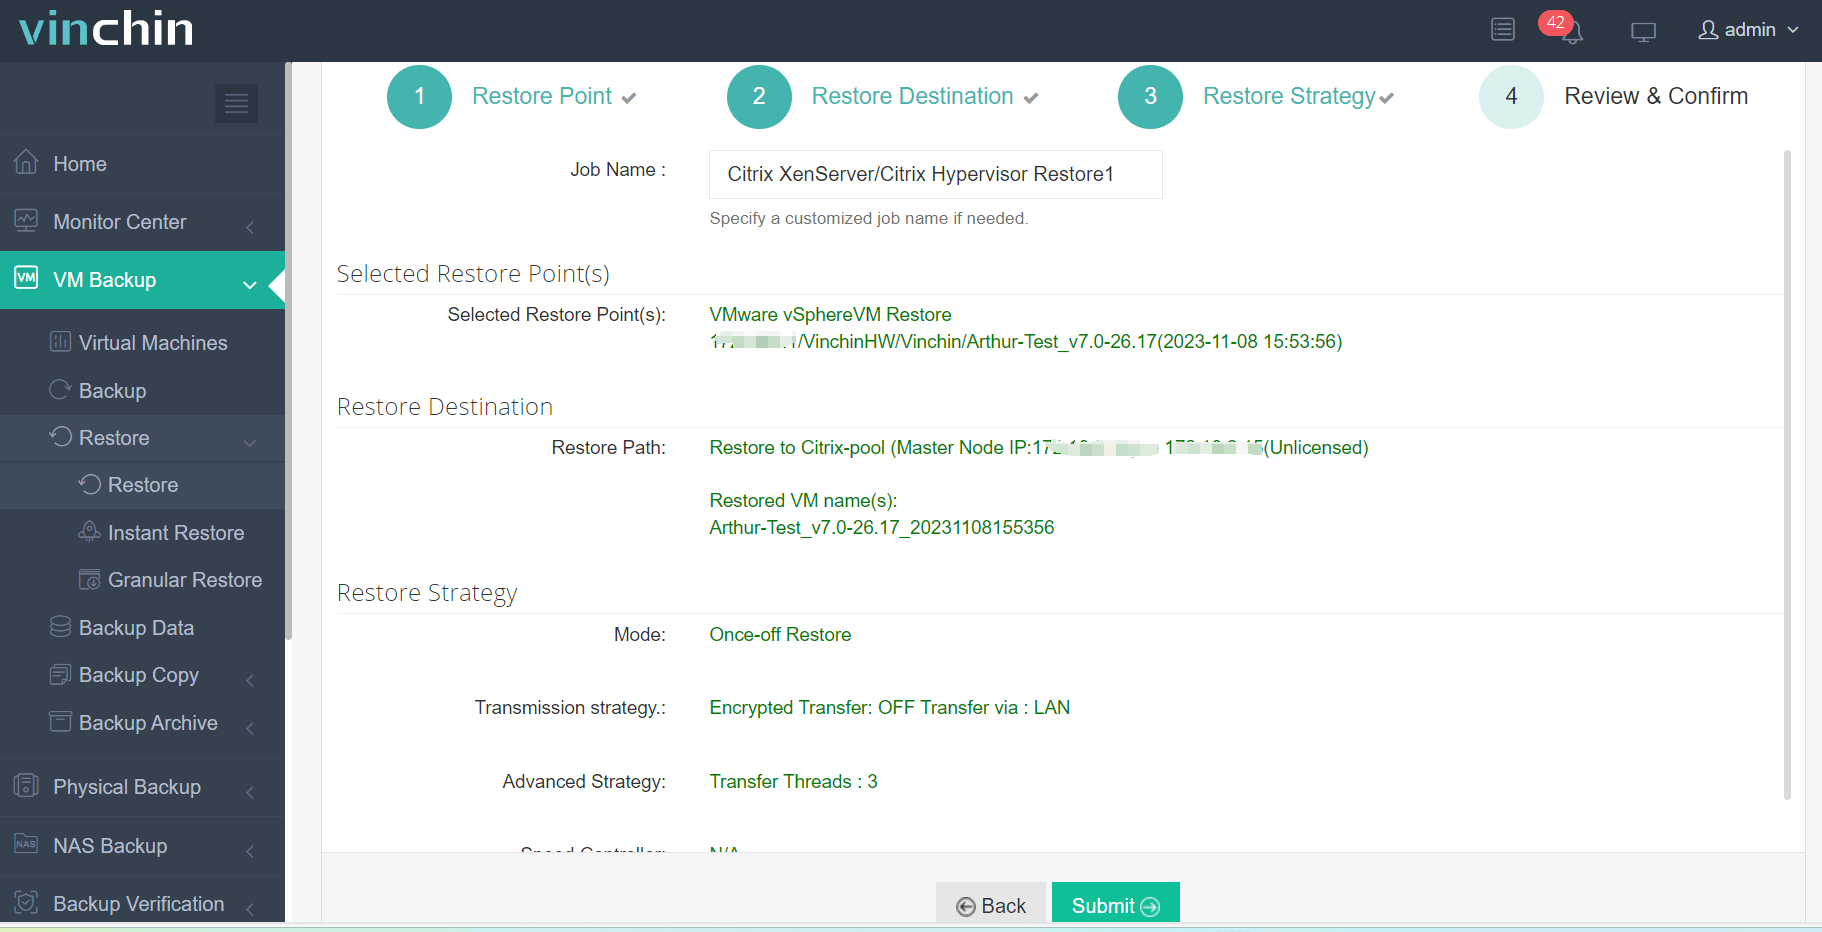
1. Just select the backup of VMware VM
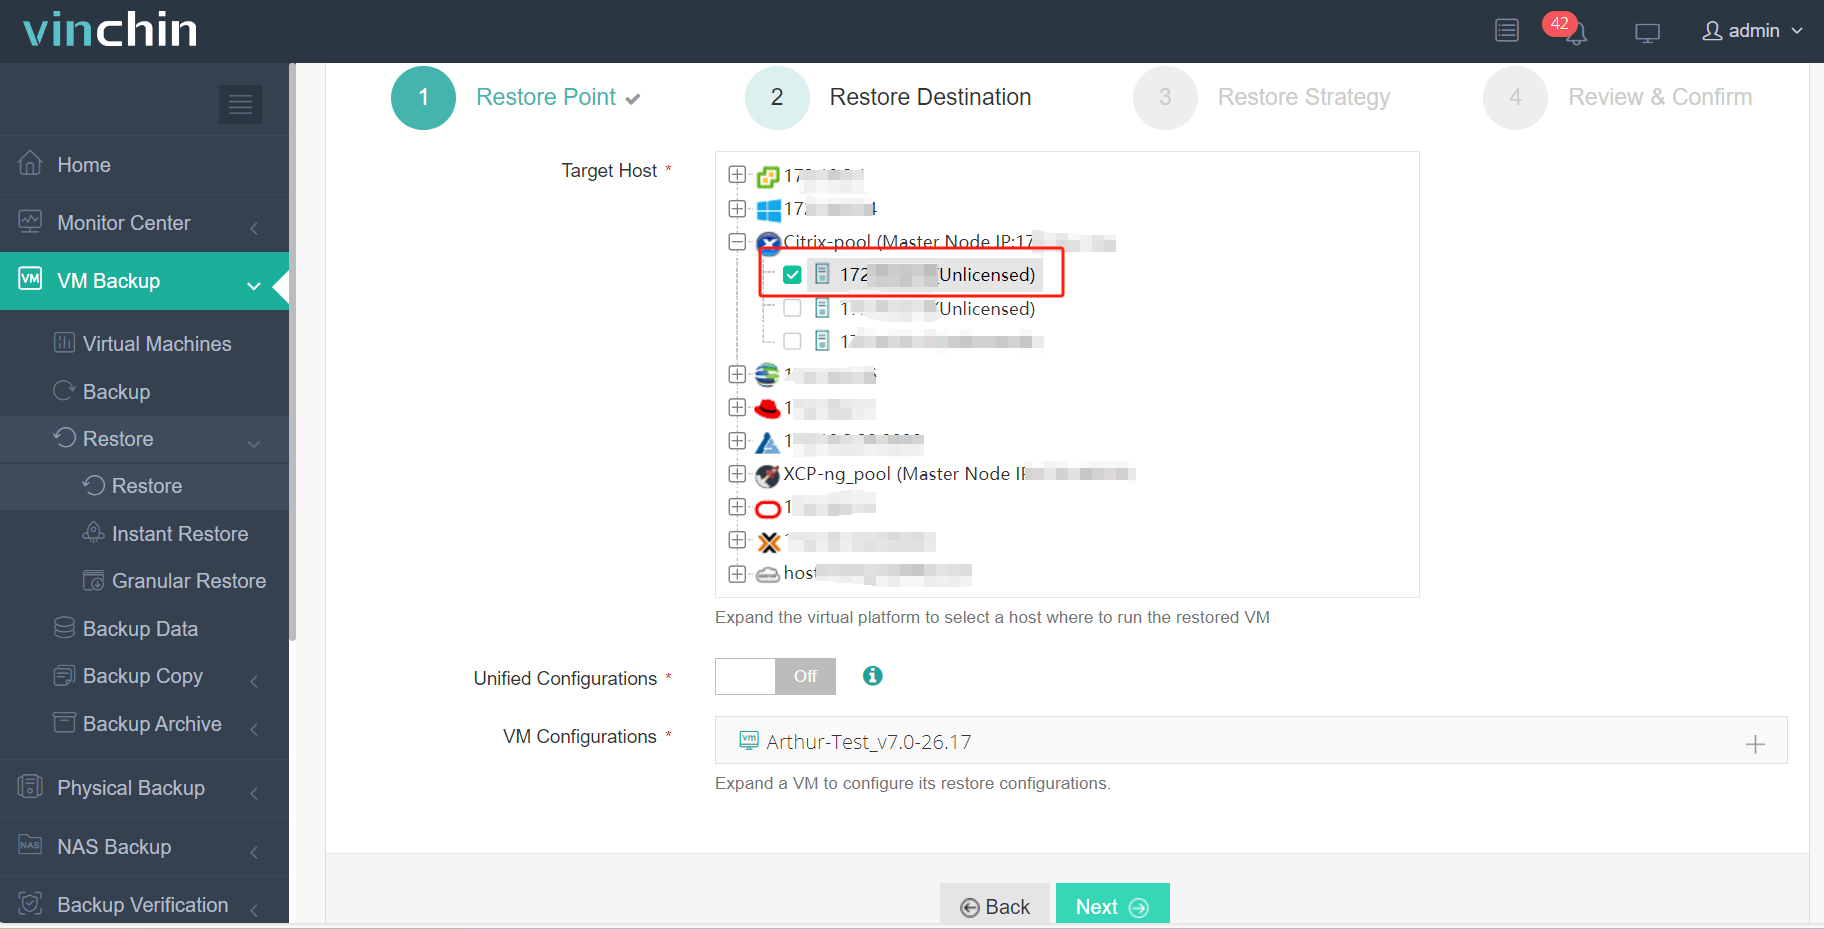
2. Select the Xenserver host as the target host
3. Select Once-off Restore
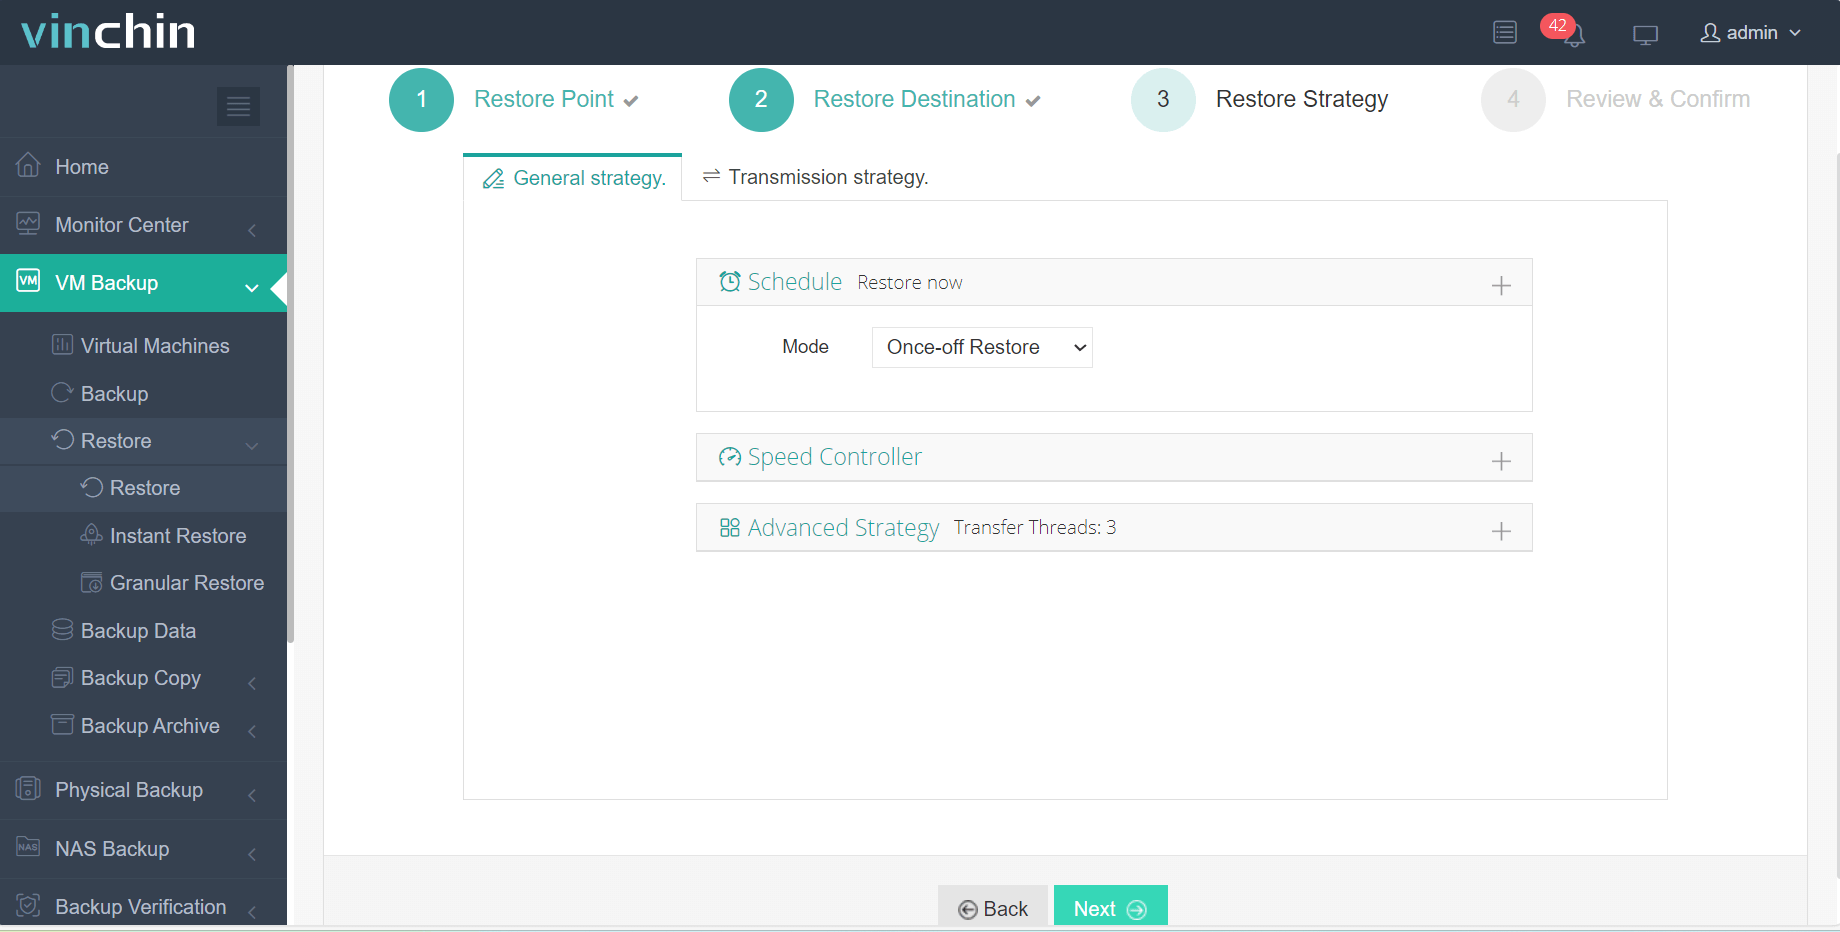
4. Submit the job
With a free trial period of up to 60 days, users can fully experience its features. For further information, please contact Vinchin directly or one of our local partners.
VMware to XenServer FAQs
A1: What are the factors to consider during migration?
Q1: The storage, network, configuration and performance requirements of the VMs need to be considered. In addition, the cost and time of data migration need to be considered.
Q2: Can you migrate from VMware to Proxmox?
A2: Migration from VMware to Proxmox can be accomplished by backing up your VMware virtual machines and then converting the backup files to a format supported by Proxmox. Once the backup files are ready, you can import them in Proxmox and create new virtual machines.
Conclusion
Migrating VMware VMs to Citrix XenServer offers flexibility and efficiency. Through four methods - OVF export, VMDK conversion, Conversion Manager, and Vinchin Backup & Recovery - users can seamlessly transition, ensuring data integrity and business continuity in their virtualized environments.
Share on:


