After installing the MySQL database, users can perform various operations such as creating databases and tables at the command prompt. However, this method is cumbersome and requires professional SQL knowledge. The PHP official team has developed a graphical management tool similar to SQL Server called phpMyAdmin. This tool can run on various versions of PHP and MySQL. With phpMyAdmin, users can fully manage databases, including creating, copying, and deleting data. phpMyAdmin provides a graphical interface for beginners, eliminating the need to operate MySQL databases via command prompts, significantly improving development efficiency.
What is phpMyAdmin?
phpMyAdmin is a MySQL database management tool based on PHP and structured in a web-based manner on a website host. It allows administrators to manage MySQL databases through a web interface. This web interface serves as a convenient way to input complex SQL syntax, making it especially useful for importing and exporting large amounts of data. phpMyAdmin provides web developers with a graphical database interface similar to Access and SQL Server. Through this management tool, users can perform various MySQL operations such as creating databases, tables, and generating MySQL database script files. One major advantage of phpMyAdmin is that, like other PHP programs, it runs on a web server. However, users can access the generated HTML pages from anywhere, enabling remote management of MySQL databases. This facilitates the creation, modification, and deletion of databases and tables. Additionally, phpMyAdmin can generate commonly used PHP syntax, ensuring the correctness of SQL syntax when developing web pages.
How to Use phpMyAdmin?
1. Access the server through a browser (e.g., “http://localhost/phpmyadmin”).
2. Click on the Database Management option in the left menu to enter the Login to phpMyAdmin link.
3. Select your preferred language, enter root as the username along with the corresponding password, then log into the system.
Changing the root password
1. After logging into phpMyAdmin, go to the default page > General Settings > and click Change Password.
2. Modify the password > Save > Log out.
3. Refresh the browser, and you can now log in with the new password.
Adding a database
1. After logging into phpMyAdmin, click New in the left menu to enter the database creation page.
2. Enter the database name > Click Create, and a new database will be successfully created.
3. By default, the root user has full permissions on the newly created database.
Adding a database user
Database users are separate from databases, forming a “many-to-many” relationship. Through associations, a user can be granted permissions for a specific database.
1. After logging into phpMyAdmin, select the database where you want to add a new user from the left menu.
2. Click Privileges in the top menu, find Add User Account, and enter the username, host address, and password. Then associate the corresponding database and configure permissions.
3. Click Go to complete the user addition and database association.
Note: You can also manage users and permissions by clicking Accounts in the top menu after logging into phpMyAdmin.
How to Backup a Database via phpMyAdmin?
Regardless of whether you are using a Cpanel host or a DirectAdmin (DA) host, phpMyAdmin can be used to back up databases. Before starting, ensure you can access the database via Cpanel or DA, as their phpMyAdmin interfaces differ. The instructions below are divided accordingly.
Backup Database via phpMyAdmin on Cpanel
1. Access phpMyAdmin:
Log into Cpanel, locate the Databases module, and click on phpMyAdmin to enter.
2. Explore phpMyAdmin Interface:
The interface is divided into two sections: the left side displays all databases under the current Cpanel account, and the right side contains basic operations and MySQL information.
3. Select the Database to Backup:
Click the target database (e.g., “wp30”), then view its tables.
Select all tables and click Export.
Change the Save as file compression format from None to zip.
Click Go, download the file, and the backup is complete.
Backup Database via phpMyAdmin on DirectAdmin
1. Access phpMyAdmin:
Log into the DA control panel and find MySQL Management.
Under Create Database, locate and click phpMyAdmin.
A login prompt will appear; enter the login credentials.
The login information is stored in the “wp-config.php” file. If your DA host has multiple domains, navigate to the “domains” directory in the file manager to find the relevant “wp-config.php” file.
2. Explore phpMyAdmin Interface:
A key difference from Cpanel is that DA displays fewer databases in the left panel.
If DA is hosting multiple domains, such as “aaa.com” and “bbb.com”, to back up “bbb.com”:
Log into DA, click “bbb.com” to enter the control panel.
Locate and click MySQL Management, then phpMyAdmin.
A login prompt will appear—enter the corresponding credentials.
If login details are unknown, find them in “wp-config.php” under “domains/bbb.com/public_html/”.
3. Proceed with Backup:
Once logged in, the backup process is the same as in Cpanel.
How to Restore a MySQL Backup Using phpMyAdmin?
1. Access phpMyAdmin
2. Select the Database to Restore
In the left navigation tree, click on the database into which you want to import the backup. You will then see a list of existing tables within that database or a screen indicating that no tables exist. This depends on your setup.
3. Select the SQL File to Import
Now, we need to import the database backup file into phpMyAdmin. To do this, follow these steps:
A row of tabs will appear at the top of the screen. Click on the Import tab.
On the next screen, a button labeled Choose File or Browse will appear. Click on it.
In the dialog box, locate the database backup file stored on your computer, then click Open. You should see the file name displayed next to the Choose File button.
Ensure that SQL is selected in the Format dropdown menu.
Click the Go button.
4. Verify the Successful Restoration
After completion, you should see a message similar to:
"Import has been successfully finished. 30 queries executed. (db_backup.sql)"
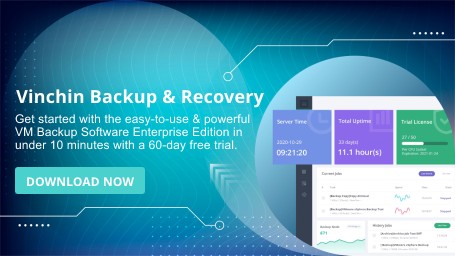
Protect Database with Vinchin Backup & Recovery
Vinchin Backup & Recovery offers comprehensive protection for databases, providing dual assurance for virtual environments. It supports Oracle DB, MySQL, SQL Server, PostgreSQL, Postgres Pro, and MariaDB with robust backup and restore capabilities. The solution integrates all features in a single web-based console, streamlining backup management and simplifying complex IT infrastructure management. Users can implement full, differential, incremental, and transaction log backup strategies, reducing storage usage by nearly 70% without impacting production CPU resources.
To create database backup jobs, please go to Physical Backup > Database Backup > Backup page:
1. Select the databases which need to be backed up.

2. Select a backup node on which you want the backup data to be processed and stored.

3. Configure backup strategies according to your needs.

4. Review and confirm the settings.

Click the button below to try Vinchin's 60-day free trial to experience an efficient and reliable data backup and recovery solution!
Conclusion
phpMyAdmin provides a powerful and user-friendly interface for managing MySQL databases, making it an essential tool for both beginners and experienced developers. With its web-based accessibility, users can efficiently create, modify, and manage databases without relying on complex SQL commands. Whether performing routine database operations, managing users, or backing up and restoring data, phpMyAdmin simplifies MySQL administration and enhances productivity.