-
An Overview of Hyper-V Storage Migration
-
Way 1: Perform Hyper-V Storage Migration with Hyper-V Manager
-
Way 2: Perform Hyper-V Storage Migration with Windows Failover Cluster
-
Way 3: Perform Hyper-V Storage Migration with PowerShell
-
Way 4: Perform Hyper-V Storage Migration with System Center Virtual Machine Manager (SCVMM)
-
Conclusion
Data migration is a common practice among businesses in large-scale or multi-hypervisor environments for loading and resource balance. Hyper-V provides 4 different migration types for organizations for specific purposes, including quick migration, live migration, shared-nothing live migration, and storage migration.
An Overview of Hyper-V Storage Migration
Hyper-V Storage Migration is a migration technology that moves the storage of a running virtual machine to another Hyper-V host within a cluster without downtime by Microsoft. It can move the following data independently: VHD and VHDX files, configuration files, .bin, .vsx, VM checkpoints, second-level paging files, VM virtual hard disks, VM ISO images, etc.

Introduced in Windows Server 2012, Hyper-V Storage Migration works by transferring VHD and VM configuration files, and the rest data to a new location, reading those data at the source VM, and then writing them at both systems. The disk copy is synced with the target storage. The virtual machine will be switched to the new Hyper-V storage after the copy is finished, while data on the source storage will be erased.
Hyper-V administrators usually need to migrate their storage when it suffers from low space, I/O operations problems, load unbalance, or needs repair, upgrade, and consolidation into a cluster.
There are 4 ways to migrate Hyper-V storage on the fly:
1. Hyper-V Manager
2. Windows Failover Cluster
3. PowerShell
4. System Center Virtual Machine Manager (SCVMM)
Way 1: Perform Hyper-V Storage Migration with Hyper-V Manager
1. On the Hyper-V Manager, right-click the source VM and choose Move… to open the wizard. Click Next on the Before You Begin page.
2. On the Choose Move Type page, select Move the virtual machine’s storage.
3. On the Choose Move Options page, choose from all data migration to a single location, or different locations, or only the virtual hard disk migration (here we choose it as an example).
4. On the Select Items to Move page, select the specific source virtual hard disks to move or Select All.
5. Browse for a new location for the virtual hard disk on the next page.
6. On the Summary page, review all the choices and click Finish to start.
7. After the process, right-click the VM name > Settings > Hard Drive to verify the disk has been transferred to the chosen folder.
Way 2: Perform Hyper-V Storage Migration with Windows Failover Cluster
1. In the Failover Cluster Manager, right-click a VM > Move > Virtual Machine Storage to open the window.
2. Choose the source files to move, drag and drop them to the bottom window, which will be sitting in the Cluster Shared Volume. You can the entire VM and enable Add Share to the file share location.
3. Click Start. We can see the migration progress in the Hyper-V Manager.
Way 3: Perform Hyper-V Storage Migration with PowerShell
1. In the Windows Server, go to Settings> Hard Drive> Virtual hard disk to locate the source.
2. Start PowerShell as an administrator and run the commands to move the running VM’s storage.
Move-VMStorage 'Windows Server xxxx' -DestinationStoragePath C:Virtual Hard Disks
3. Migrate configuration files of a VM to one place.
Move-VMStorage -Name xxxx - VirtualMachinePath C:LocalVMs
4. Migrate checkpoints of a VM to one place.
Move-VMStorage -Name xxxx - SnapshotFilePath C:LocalVMs
5. Migrate VM’s smart paging files.
Move-VMStorage -Name xxxx - SmartPagingFilePath C:LocalVMs
6. Migrate an array of hash tables that describe the locations of individual VHD/X files. Use @{some content} for just a single VHDX file.
@(
@{'SourceFilePath' = 'xxxx.vhdx'; 'DestinationFilePath' = 'C:xxxx.vhdx'},
@{'SourceFilePath' = 'xxxx2.vhdx'; 'DestinationFilePath' = 'C:xxxx2.vhdx'}
)
7. Verify the result in the Hyper-V Manager.
Way 4: Perform Hyper-V Storage Migration with System Center Virtual Machine Manager (SCVMM)
1. In the manager, right-click the VM and select Migrate Storage to start the wizard.
2. Choose to migrate the VM(s) or the VHDs.
Click Browse from the Storage Location for VM configuration to migrate configuration files.
You can also select Allow VHDs to be placed individually for multiple virtual disks to be placed in different storage.
Click Browse in the Disks section to choose the storage for disks.
Click Explore directory at the bottom to create folders for organizing files and disks.
3. In the Summary page, click Move to start the migration.
4. Open the VM to see its properties and disk location for verification.
How to migrate Hyper-V VM with Vinchin Backup & Recovery?
Whenever you take risky operations like Hyper-V Storage Migration, back up your VM data in case of data loss during the process.
Vinchin Backup & Recovery is not only a backup solution for virtual machine, but also an advanced VM migration solution, supporting VMware vSphere, Hyper-V, Proxmox, XenServer, XCP-ng, oVirt, OLVM, RHV, OpenStack, etc. By adding both virtualized platforms into the backup system, you can perform easy agentless VM migration with a user-friendly web console.
There is the built-in conversion engine in the backup system, you just need to select the VM you need to move it to another virtualized platform.
For instance, if you would like to migrate VM from Hyper-V to VMware:
1. Just select the backup of the target Hyper-V VM

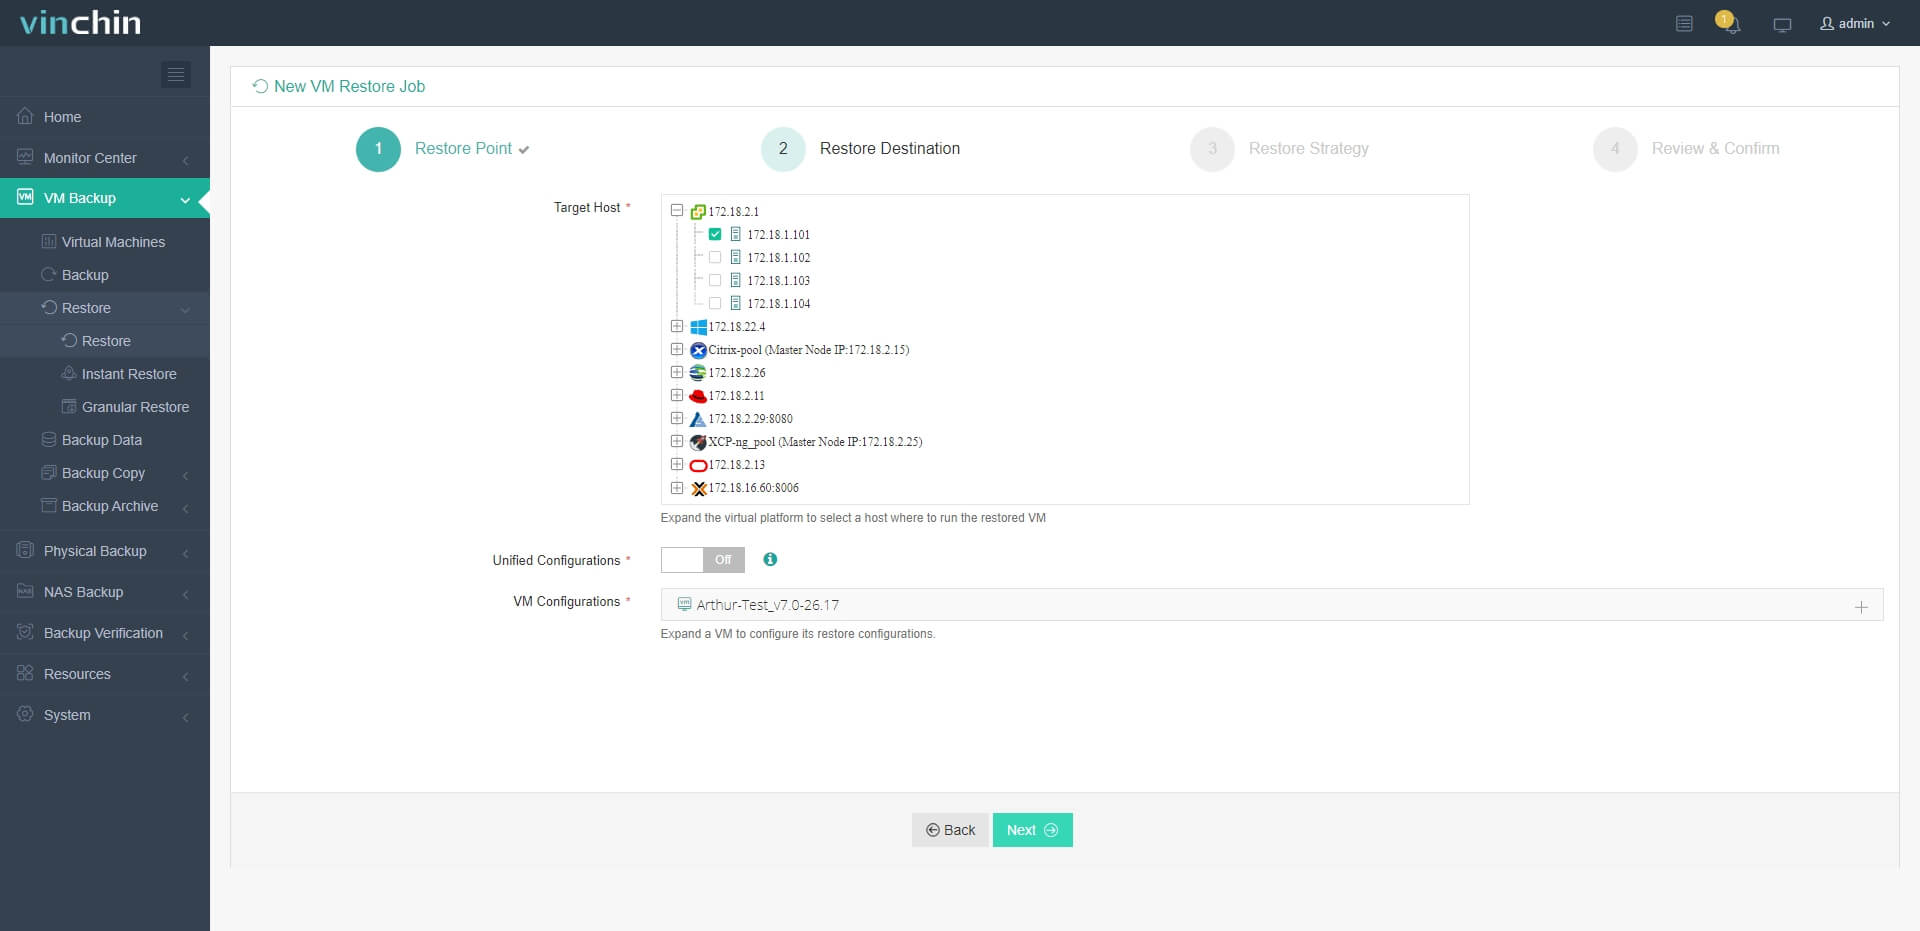
2. Select a VMware host as target host

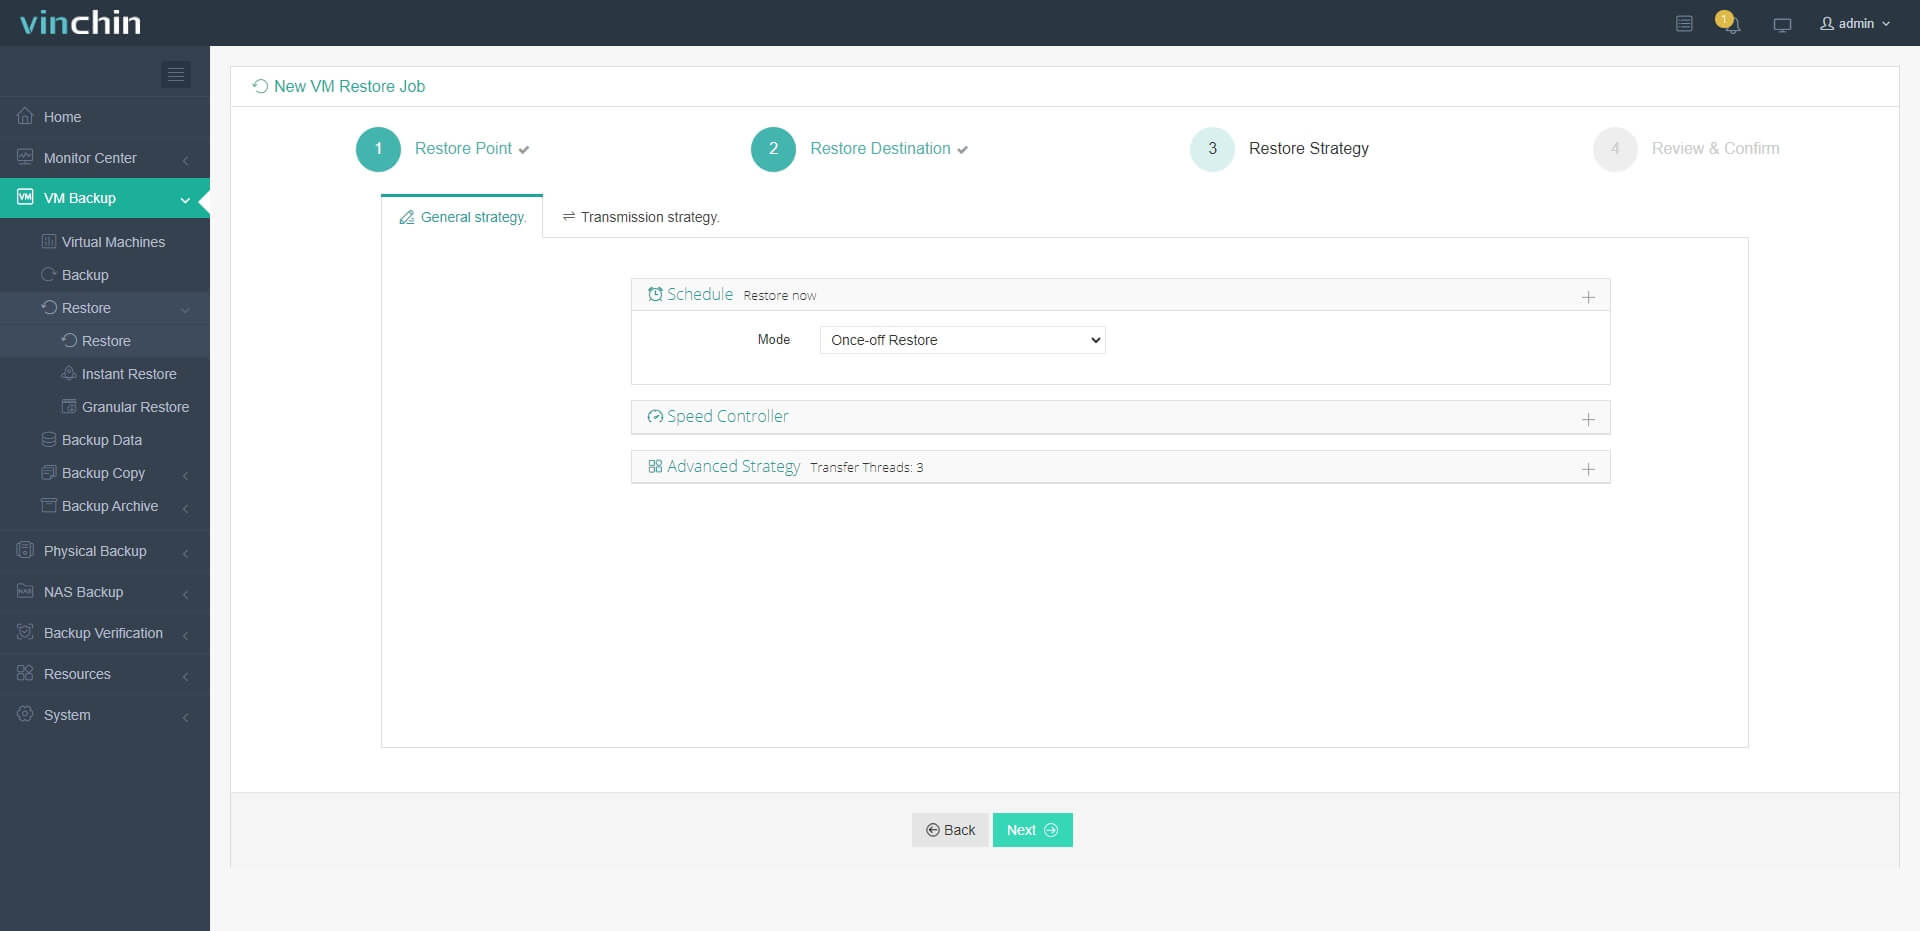
3. Simply set up restore strategies or directly skip this step

4. Just submit the job and then the Hyper-V VM will be quickly restored on the VMware host

Vinchin Backup & Recovery has been selected by thousands of companies and you can also start a 60-day full-featured free trial here. Also, contact us, leave your requirements, and then you will receive your tailored solution. We have established partnerships with reputable companies all over the world so if you would like to do a local business, you can select a local partner here.
Conclusion
The storage of Hyper-V virtual machines can have their files automatically moved to the same or a different host in Hyper-V, which significantly reduces downtime. 4 methods for Hyper-V Storage Migration are covered in this article.
Vinchin Backup & Recovery will protect your Hyper-V virtual machines and also let you easily migrate them so don't miss out on the free trial.
Share on:


