VMware vCenter Server provides a centralized platform to manage vSphere environments across hybrid clouds, enabling IT administrators to easily and automatically administer the virtual environment.
Some large-scale virtual infrastructures run multiple vCenter Servers at the same time to meet business needs. Problems arise from workload balance, resource distribution, and different purposes and SLAs (Service Level Agreements) of virtual machines.
To solve these problems, one needs to move VMs cross vCenter. Basically, there are 3 ways for cross vCenter migration: vSphere vMotion, Advanced Cross vCenter vMotion, and a manual way.
Prerequisites:
Version: 6.0 or above for both source and target hosts (same version).
License: Enterprise Plus license for cross-vCenter server.
With vSphere Web Client: instances must be in the Enhanced Linked Mode and the same vCenter single sign-on (SSO) domain, but not the case with SDK/API/PowerCLI. The former two require two vCenter instances in different SSO domains, while the latter enables federated and non-federated cross-vCenter Server vMotion from v6.5.
Instances are in different SSO: v7.0 Update 1c or later versions; vSphere Enterprise Plus license for powered-on VMs, and vSphere Standard license for powered-off VMs migration.
vCenter Server instances should be synced with one another for the vCenter SSO token authentication. And it has to be connected to shared VM storage for only compute resources migration.
Way 1: vSphere vMotion
1. Log in to the vSphere Client, right-click the source VM and choose Migrate.
2. Choose the first option to migrate only VM compute if the VM's datastore is accessible from both ends. If not, select Change both compute resources and storage.
3. Expand the target vCenter and choose the migration destination, storage, and network (if you receive a warning about different networks cross datacenters, change the VLAN after the migration).
4. In the Summary pane, click Finish.
Way 2: Advanced Cross vCenter vMotion
1. Start vSphere Client, go to Home> Hosts and Clusters> select the host or cluster with source VMs included.
2. Right-click the VM, choose Migrate, and choose Cross vCenter Server export for migration type. Click Next.
3. Choose the target vCenter Server instance, and choose either Saved vCenter Servers (input the source instance credentials for a valid user login session to connect) or New vCenter Server.
4. Hit Yes in the Security Alter window, and click Next.
5. Choose the target compute resources for the VM and click Next.
Note: Instead of choosing the cluster, pick a specific host if DRS isn't enabled for the cluster.
6. In the Compatibility pane, fix the problem or choose another host/cluster if there’s a compatibility issue.
7. Choose the target storage: choose virtual disk format, datastore location, and VM storage policy.
8. Choose the destination folder and networks.
9. On the Ready to complete page, check settings and click Finish.
10. Choose the target host/cluster to Import VMs.
Way 3: Export OVF Templates and Employ
Create a source VM clone and move it to target vCenter if two different vCenters (ESXi) cannot communicate with each other.
1. Log in to the vSphere Client, in the File menu, right-click the target VM (powered off) to Export> Export OVF Template.
2. Connect to the target vCenter with the vSphere Client.
3. Choose Deploy OVF Template… from the File menu and choose the saved file.
Backup VMware VMs Beforehand
Always backup VMs before any risky operations like VM migration cross vCenter to avoid data loss since backup is easier and faster to retrieve data than configuring a new VM and attaching previous data.
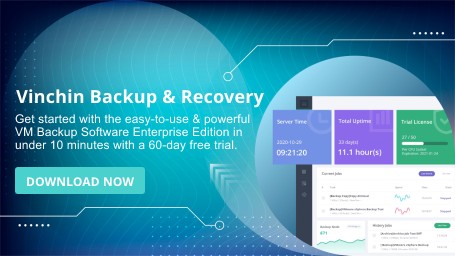
Vinchin Backup & Recovery is a dedicated virtual machine backup solution that automates scheduled backup with multiple backup types available for 12 virtualizations such as VMware, Citrix Hypervisor (XenServer), XCP-ng, Hyper-V, oVirt, RHV, Oracle OLVM, and more, NAS, 6 databases, and physical servers.

The data solution is compatible with various VMware versions from VMware vCenter 4.x to 7.0, and offers specific backup technologies like CBT and HotAdd for VMware backup.
With Vinchin Backup & Recovery, you can:
Backup VM smartly: liberate labor by scheduling your VM backup with worry-free mail notifications.
Choose from multiple strategies: select from CBT-enabled (forever) incremental backup, full, and differential backup via HotAdd/SAN transmission after reducing 50% of data size for efficient backup.
Cross-platform V2V migration: move easily VMware to another 10+ hosts and vice versa without any command lines or migration agents in 4 steps.
Instant recovery: restore corrupted VMs in seconds from the backup datastore straightforwardly for minimum RTO.
Anti-malware data protection: rest assured that all kinds of backups, VMs, databases, data archives, or the backup server are secured perfectly in the solution with backup storage protection, double data encryption, and offsite backup copies.
60-day free trial: there is a full-featured free trial of the Enterprise version now for exploration.
Conclusion
You can use tools provided by VMware to migrate VMs across vCenter for management or resource balance. They are very user-friendly and you just need to pay attention to their requisites.
Remember to backup first before VM migration. Use Vinchin Backup & Recovery to back up VMs or migrate them across 10+ platforms without restrictions.