-
How to migrate a Windows physical server to Proxmox?
-
Recommended Vinchin for post migration data security
-
Physical to virtual Proxmox FAQs
-
Conclusion
In today's world of evolving IT infrastructures, there is a growing need for virtualization in the enterprise. However, for some legacy systems or customers wary of virtualization, the physical-to-virtual (P2V) migration process can seem complex and challenging. Especially when some of the classic P2V tools, such as VMware Converter, are being phased out, it is important to find an efficient, reliable and compatible migration method.
In this article, we will introduce a simple and practical P2V migration solution to migrate physical servers to virtual environments by using Microsoft Sysinternals' Disk2vhd tool combined with the powerful virtualization support provided by Proxmox. This solution is not only completely free, but also efficient and flexible for migrating from physical devices to modern virtualized environments based on Proxmox.
How to migrate a Windows physical server to Proxmox?
Create VHDX Files with Disk2vhd
1. Download the Disk2vhd utility
2. Open Disk2vhd and select disk level (not partition level) for image creation to avoid generating multiple messy VHD files.
3. Save the generated VHDX file to the local storage of the physical machine.
Convert VHDX to QCOW2 format
Transfer VHDX files to the Proxmox server, the recommended path is /var/lib/vz/harddrives/
Use the following command to convert VHDX files to QCOW2 format
qemu-img convert -O qcow2 /var/lib/vz/harddrives/XXXX.vhdx /var/lib/vz/images/XXX/vm-XXX-disk-X.qcow2
Add converted disks to a VM on Proxmox
1. Create a new VM in the Proxmox web interface and configure basic information.
2. Associate the converted QCOW2 files to the VM
3. Go to the VM's configuration file (usually located at /etc/pve/qemu-server/VMID.conf) and add disk entries:
scsi0: local:XXX/vm-XXX-disk-X.qcow2
Or add the disk via the Proxmox GUI, selecting an existing QCOW2 file
Preparing VMs for Optimal Performance
Step 1: Add an empty 1GB disk and select the VirtIO controller for the VirtIO driver installation.
Step 2: Mount the converted disk as an IDE to the virtual machine.
Step 3: Boot the virtual machine, boot from the IDE disk, and install the VirtIO driver.
Step 4: Change the disk controller from IDE to VirtIO and remove the previously empty disk.
Verification and Optimization
Start the VM and check if it is able to run properly.
Verify that the performance is as expected and refer to the VirtIO driver related configuration guide if further optimization is required.
Recommended Vinchin for post migration data security
P2V migration is only the first step in virtualization, but it is also critical to ensure data security and stability of the virtual machines after migration. Vinchin Backup & Recovery is recommended as a reliable tool for post-migration data protection.
Vinchin provides a wide range of virtualization platforms and is compatible with more than 10 major virtualization technologies, including Proxmox, VMware, Hyper-V, XenServer, XCP-ng and OLVM. It enables centralized protection of multiple types of virtual machines through a unified management platform, which is particularly suited to the complex data management needs of hybrid cloud environments.
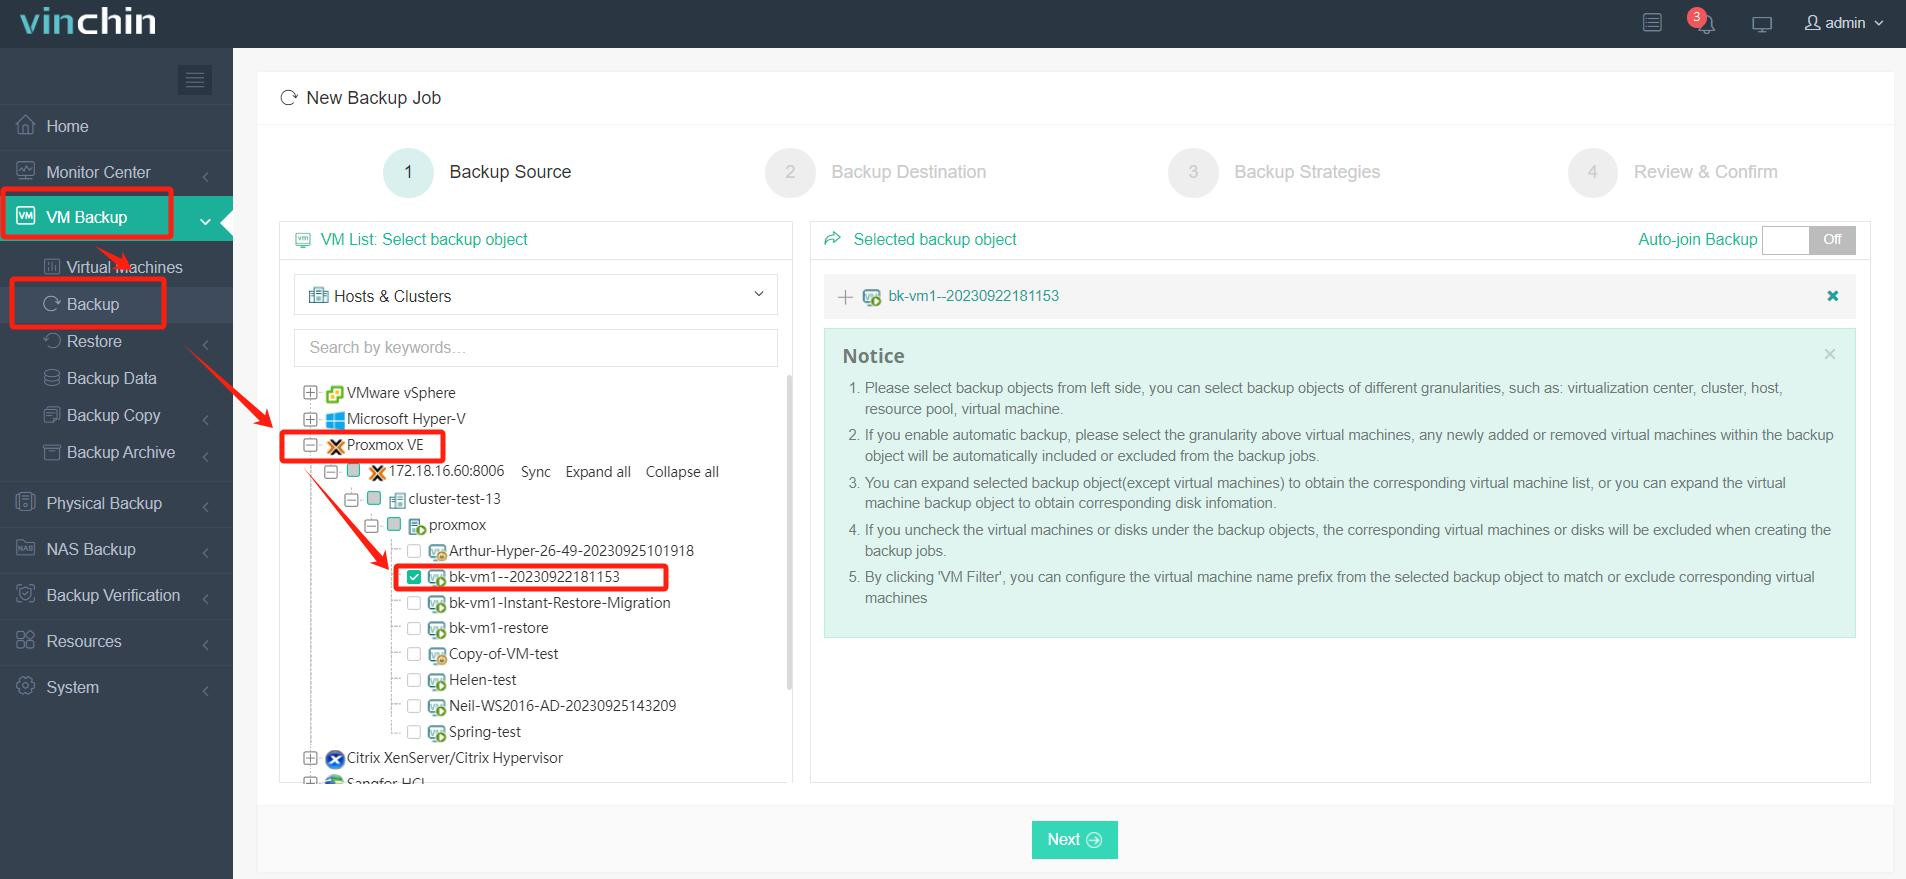
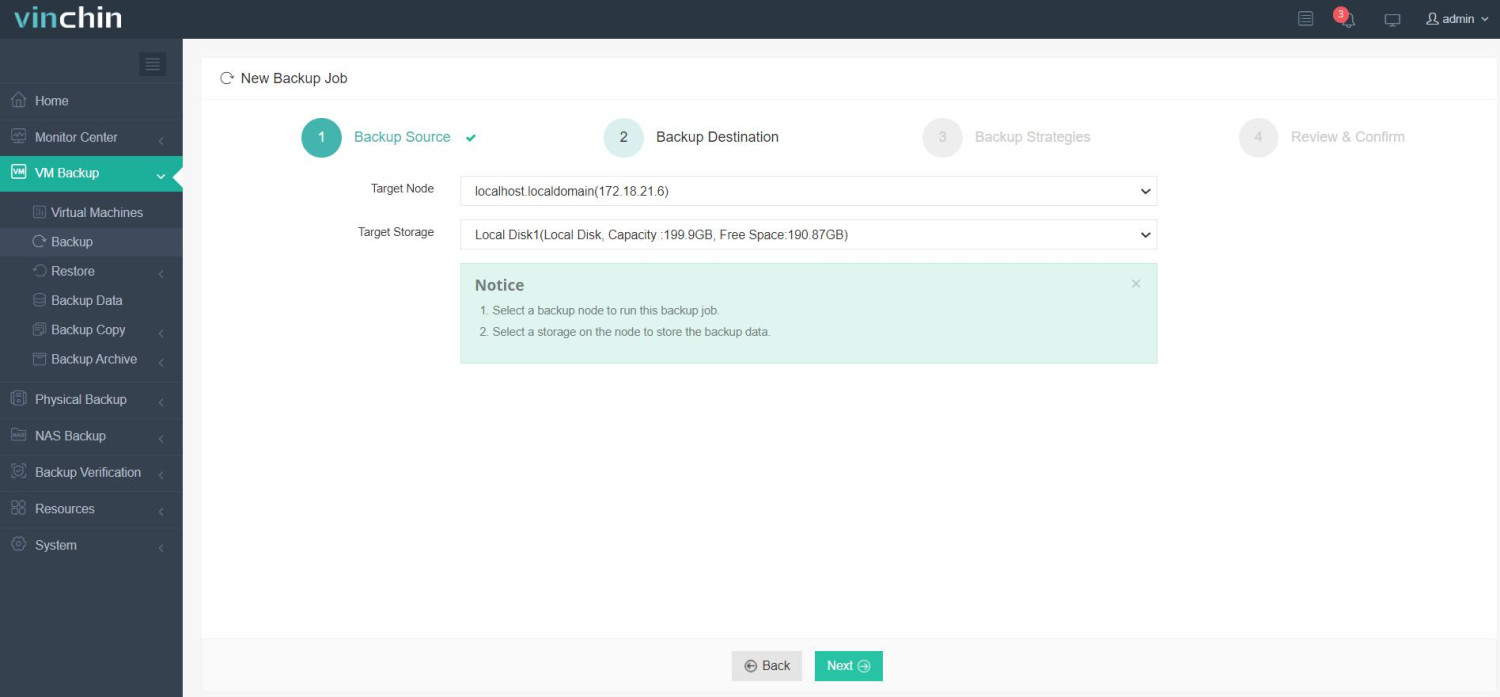
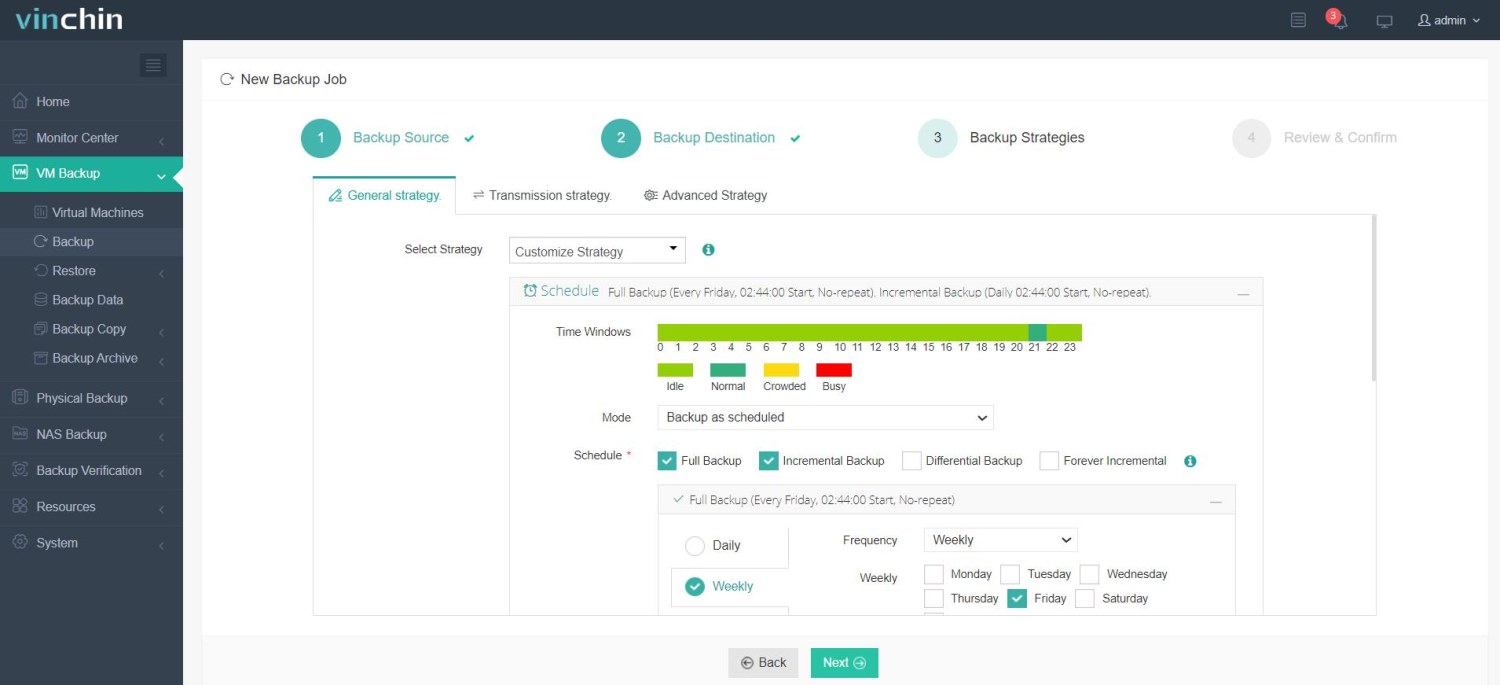
Vinchin Backup & Recovery's operation is very simple, just a few simple steps.
1.Just select VMs on the host
2.Then select backup destination
3.Select strategies
4.Finally submit the job
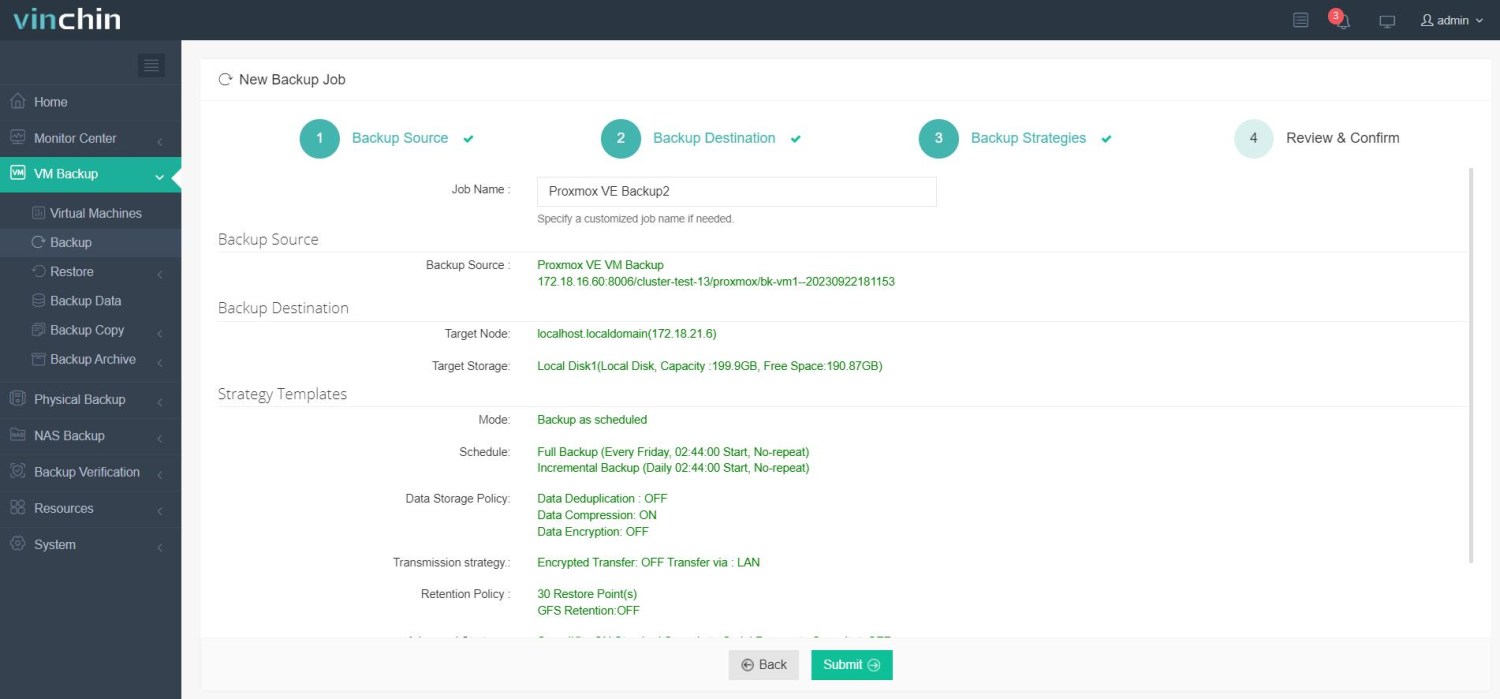
Vinchin offers users a free 60-day trial to help you gain an in-depth understanding of its capabilities in a real-world environment. For more information, please contact Vinchin directly.
Physical to virtual Proxmox FAQs
Q1: Can I convert a running physical server to a virtual machine?
A1: Yes, some tools support live P2V conversion, where the physical server remains operational during the conversion process. However, this can be more complex and may require additional resources and planning.
Q2: Can I revert the changes if something goes wrong during P2V conversion?
A2: Yes, if you have a backup of the physical server, you can restore it to its original state. It's always a good practice to have a reliable backup before performing any major changes.
Conclusion
In a rapidly evolving IT landscape, P2V migration bridges traditional systems and modern virtualization. By leveraging free tools like Disk2vhd and Proxmox, businesses can simplify this transition while ensuring post-migration security with Vinchin Backup & Recovery.
Share on:


