-
What storage types does XVA support?
-
How to import XVA to Proxmox?
-
How to easily migrate from Xen to Proxmox?
-
Proxmox XVA importing FAQs
-
Conclusion
With the popularity of virtualization technology, Proxmox becomes one of the preferred tools for managing virtualized environments. And importing XVA files to Proxmox is a key task for restoring previously backed up virtual machines to the Proxmox environment. In this article, you will learn how to use Proxmox to import XVA file in order to recreate virtual machine instances in a Proxmox environment.
What storage types does XVA support?
XVA files, exported from XenServer, contain complete virtual machine images, including disk data, configuration settings, and additional metadata. Before importing XVA files to Proxmox, ensure you have storage options that support Proxmox XVA imports. Here are several common storage types compatible with importing XVA files:
NFS Storage: NFS storage is a common network file system that can be mounted on Proxmox VE nodes and supports Proxmox XVA import.
iSCSI Storage: iSCSI storage is a network-based storage protocol that can also be mounted on Proxmox VE nodes and supports importing XVA files.
GlusterFS Storage: GlusterFS is a distributed file system that can be added as storage to Proxmox VE. It supports importing XVA files to Proxmox and has high availability and redundancy features.
Ceph Storage: Ceph is a distributed storage system that can be added as storage to Proxmox VE. It supports Proxmox import XVA files and has high scalability and reliability.
How to import XVA to Proxmox?
Step1. Upload XVA File Using SCP
First, log in to Proxmox via WinSCP and and drag the XVA file to a storage location on the Proxmox node(e.g., Proxmox NFS storage).
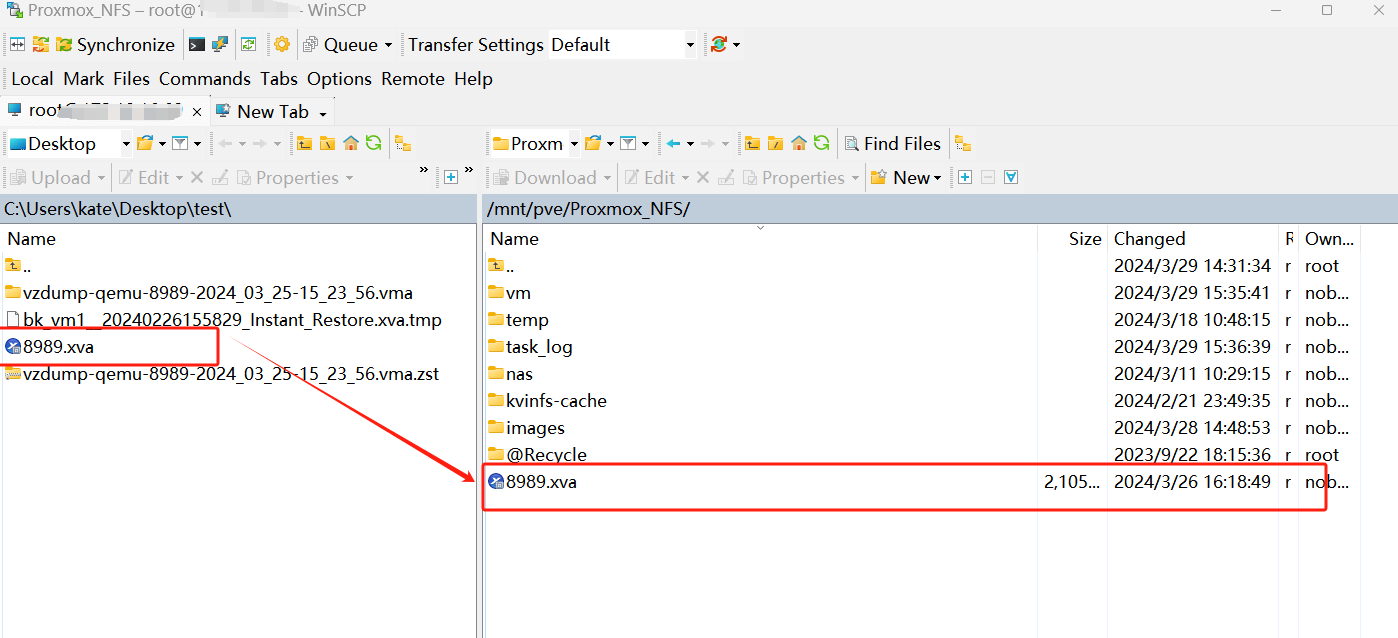
Step2. Confirm the File Transfer to the Mount Point of the Target Storage
Use the ls command to confirm whether the file has been transferred to the mount point of the target storage.
Assuming you have transferred the XVA file to the mount point of Proxmox NFS storage:
ls /mnt/pve/Proxmox_NFS

You can see that the file has been successfully transferred to NFS storage.
Step3. Import the VMs
Use the following command to import an XVA file into a VM in the Proxmox.
qm importdisk <vmid> <source> <storage>
qm importdisk 104 /mnt/pve/Proxmox_NFS/8989.xva Proxmox_NFS

Step4. Start the virtual machine
Start the imported virtual machine using the following command. You will be able to see the virtual machine successfully starting, indicating that the XVA has been successfully added to Proxmox.
qm start <vmid>
qm start 104

How to easily migrate from Xen to Proxmox?
After successfully adding XVA to Proxmox and restoring VMs with Proxmox, backup is a crucial task to ensure the safety of VMs and data. In addition to the backup function provided by Proxmox itself, you can also consider using a professional backup solution, such as Vinchin Backup & Recovery.
Vinchin Backup & Recovery is a backup software designed for virtualized environments, which is compatible with Proxmox and provides a comprehensive virtual machine backup solution. It supports backup solutions designed for VMware, Proxmox, Hyper-V, XenServer, XCP-ng, oVirt, RHV and other virtual machines.
When it comes to migrate Xen VM to Proxmox, the process is simplified. Users can effortlessly select the VM backup and restore it onto the new host, streamlining the migration experience.
1. Just select the backup of Xenserver VM
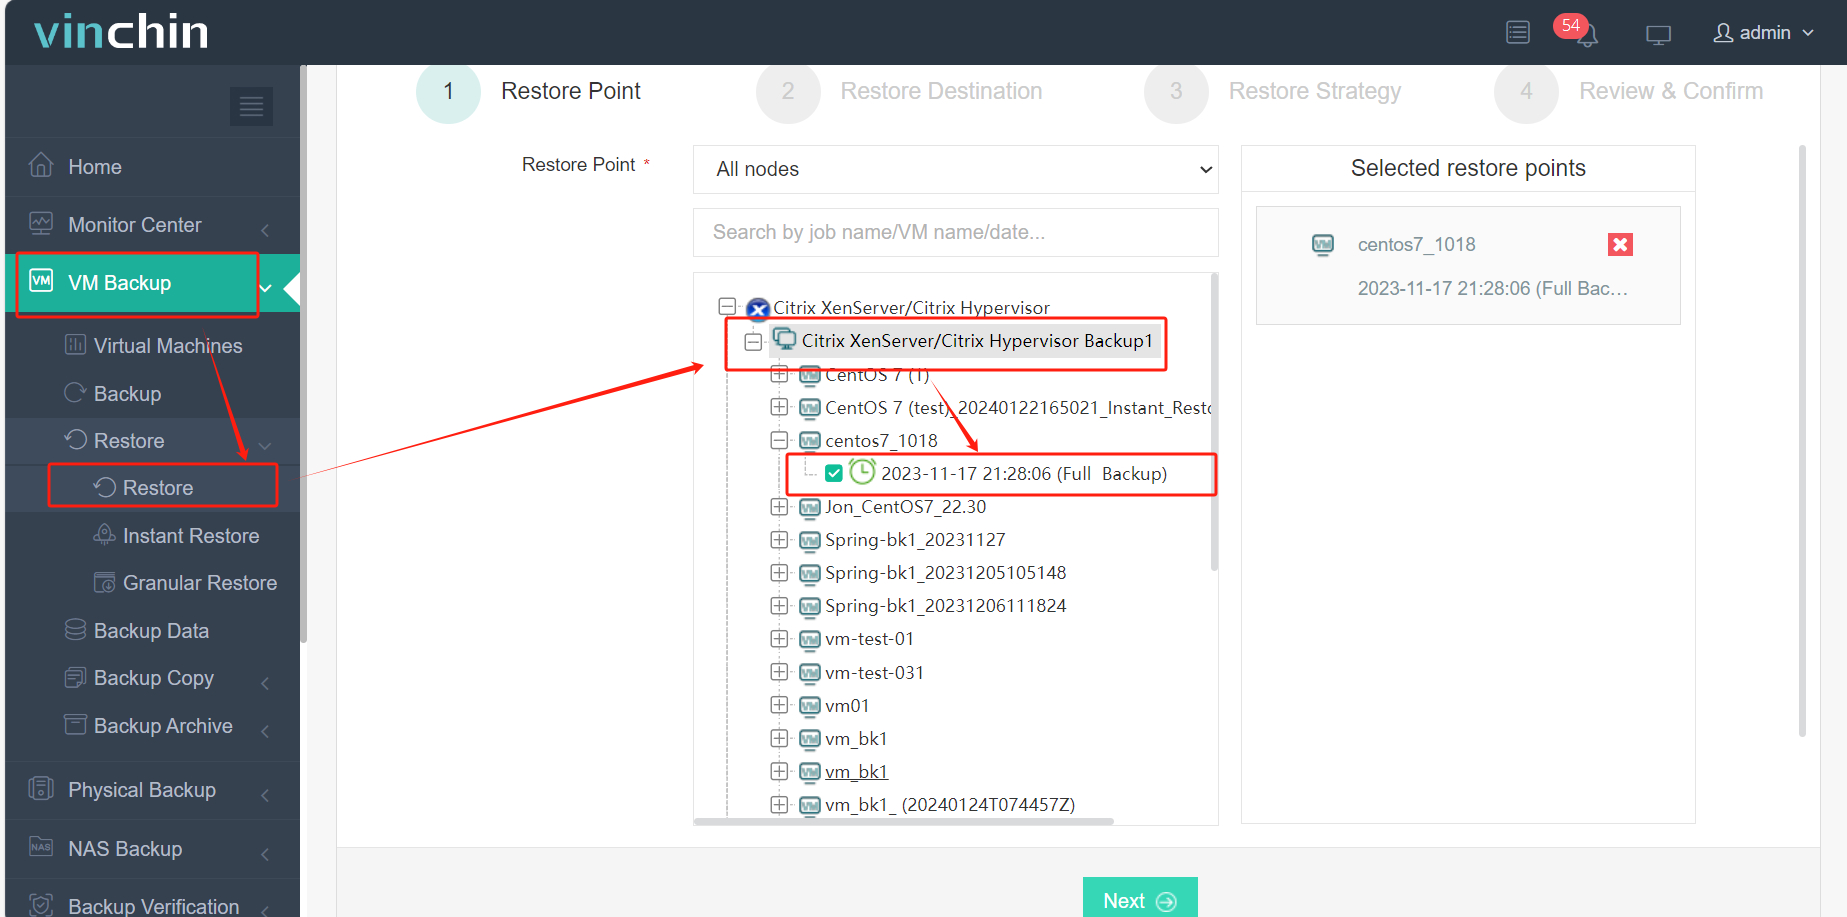
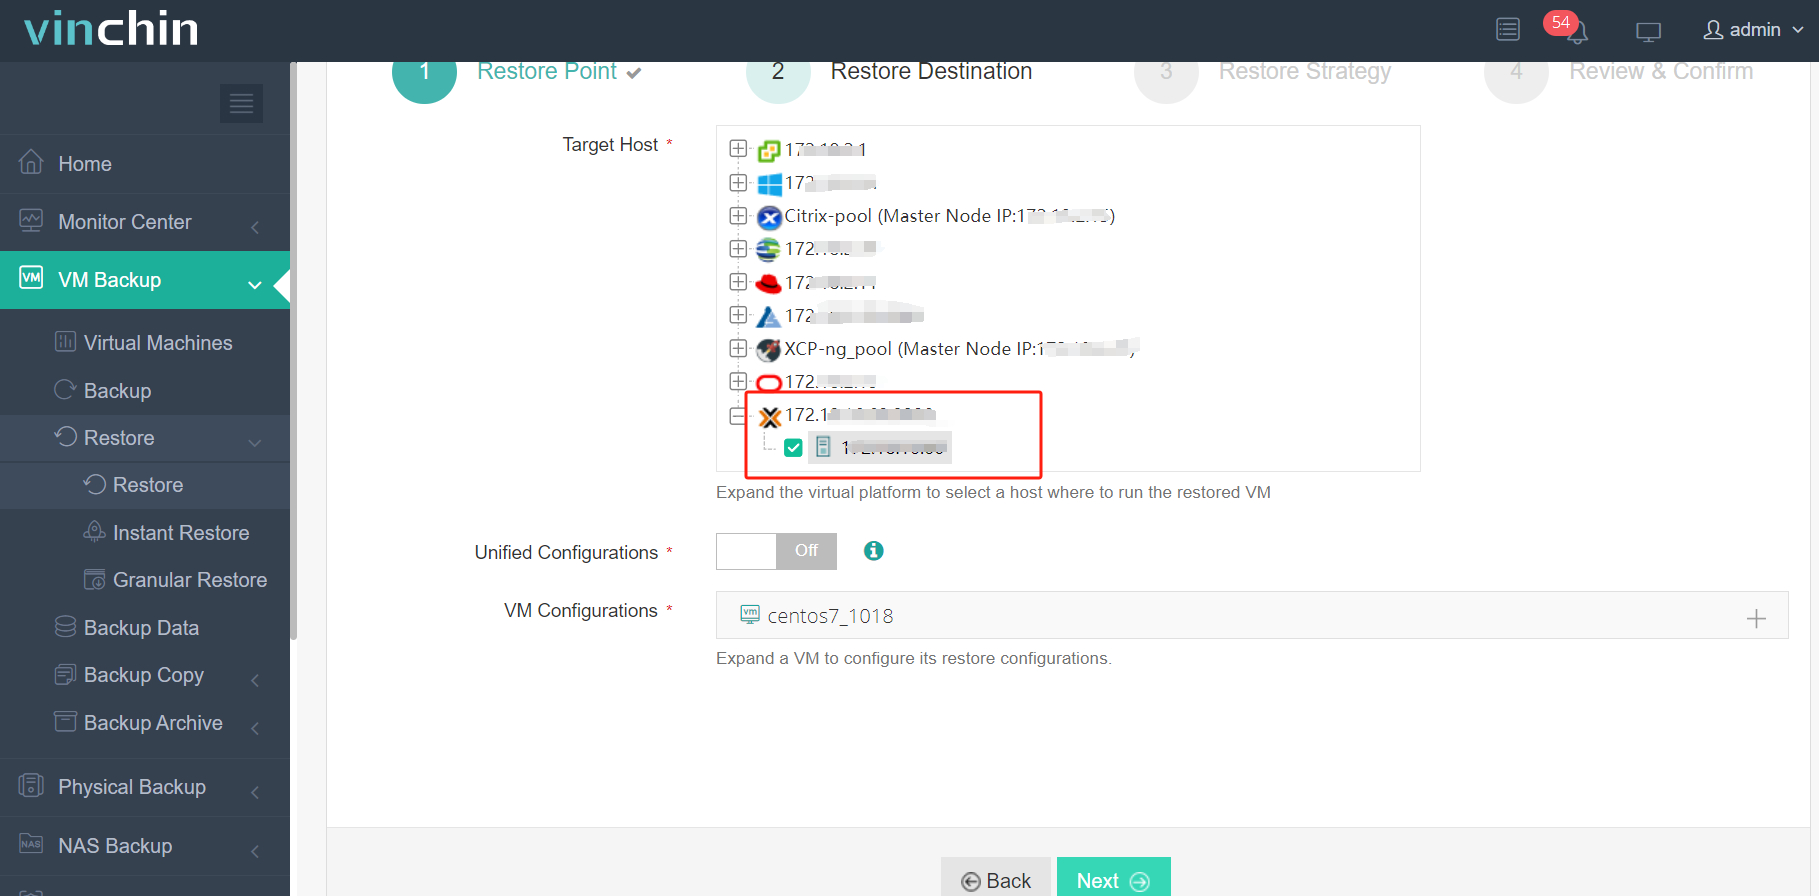
2. Select the Proxmox host as the target host
3. Select Once-off Restore
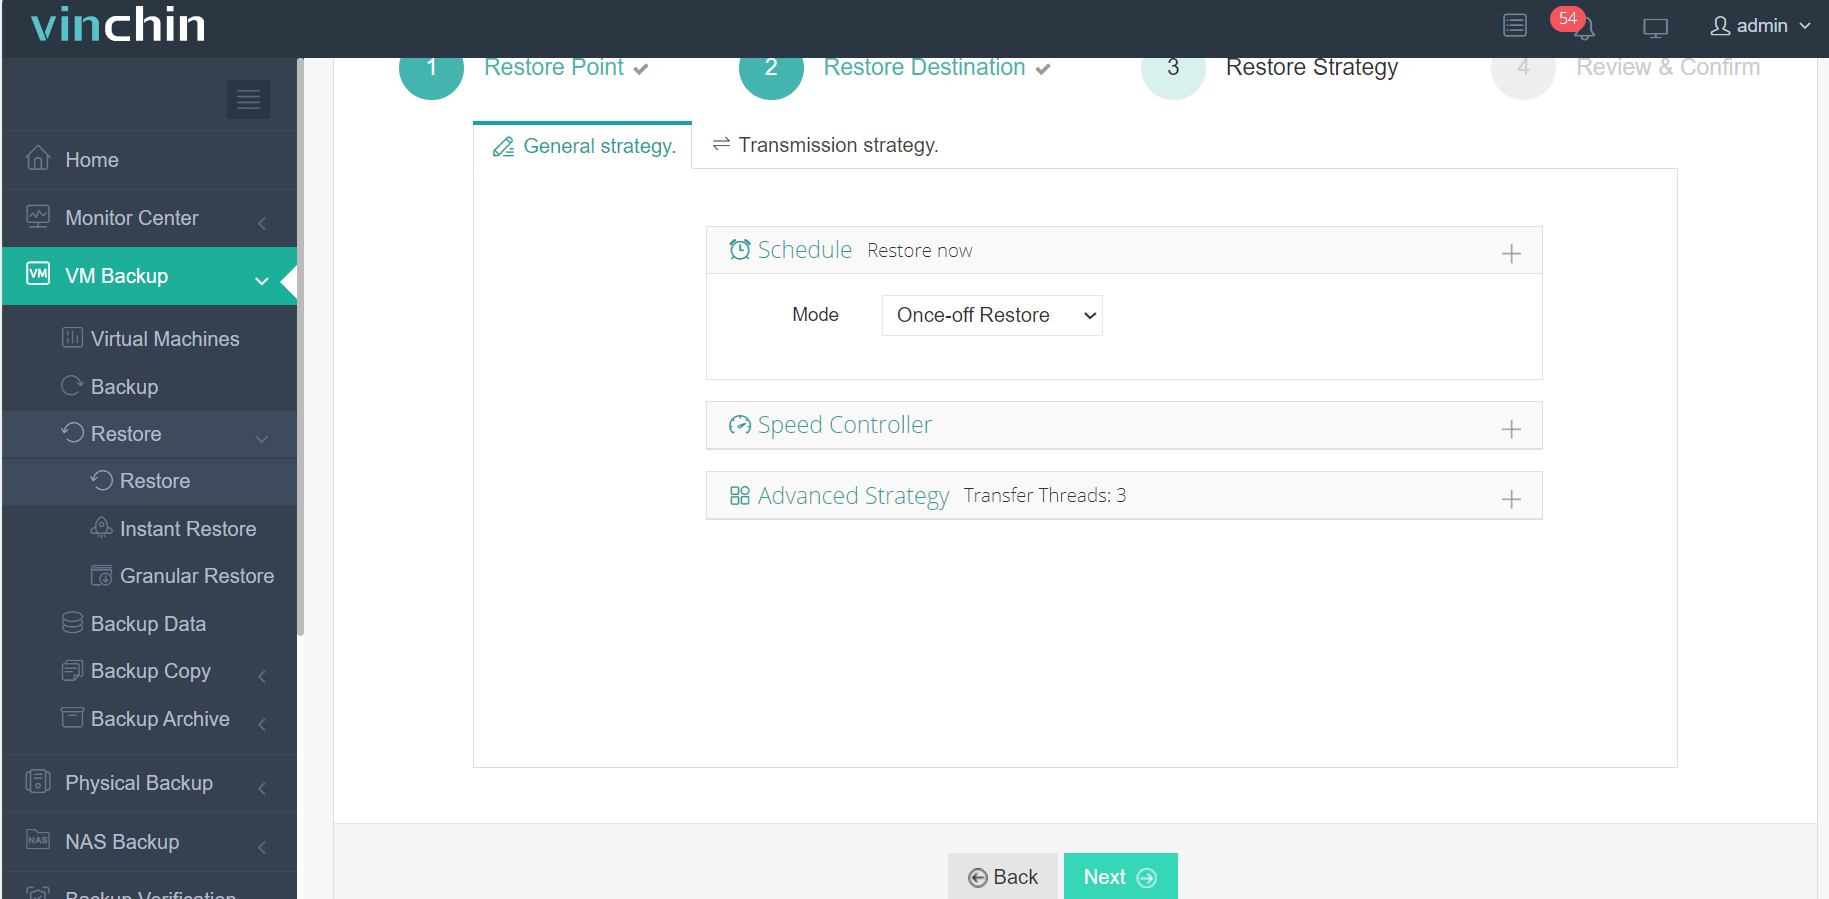
4. Submit the job
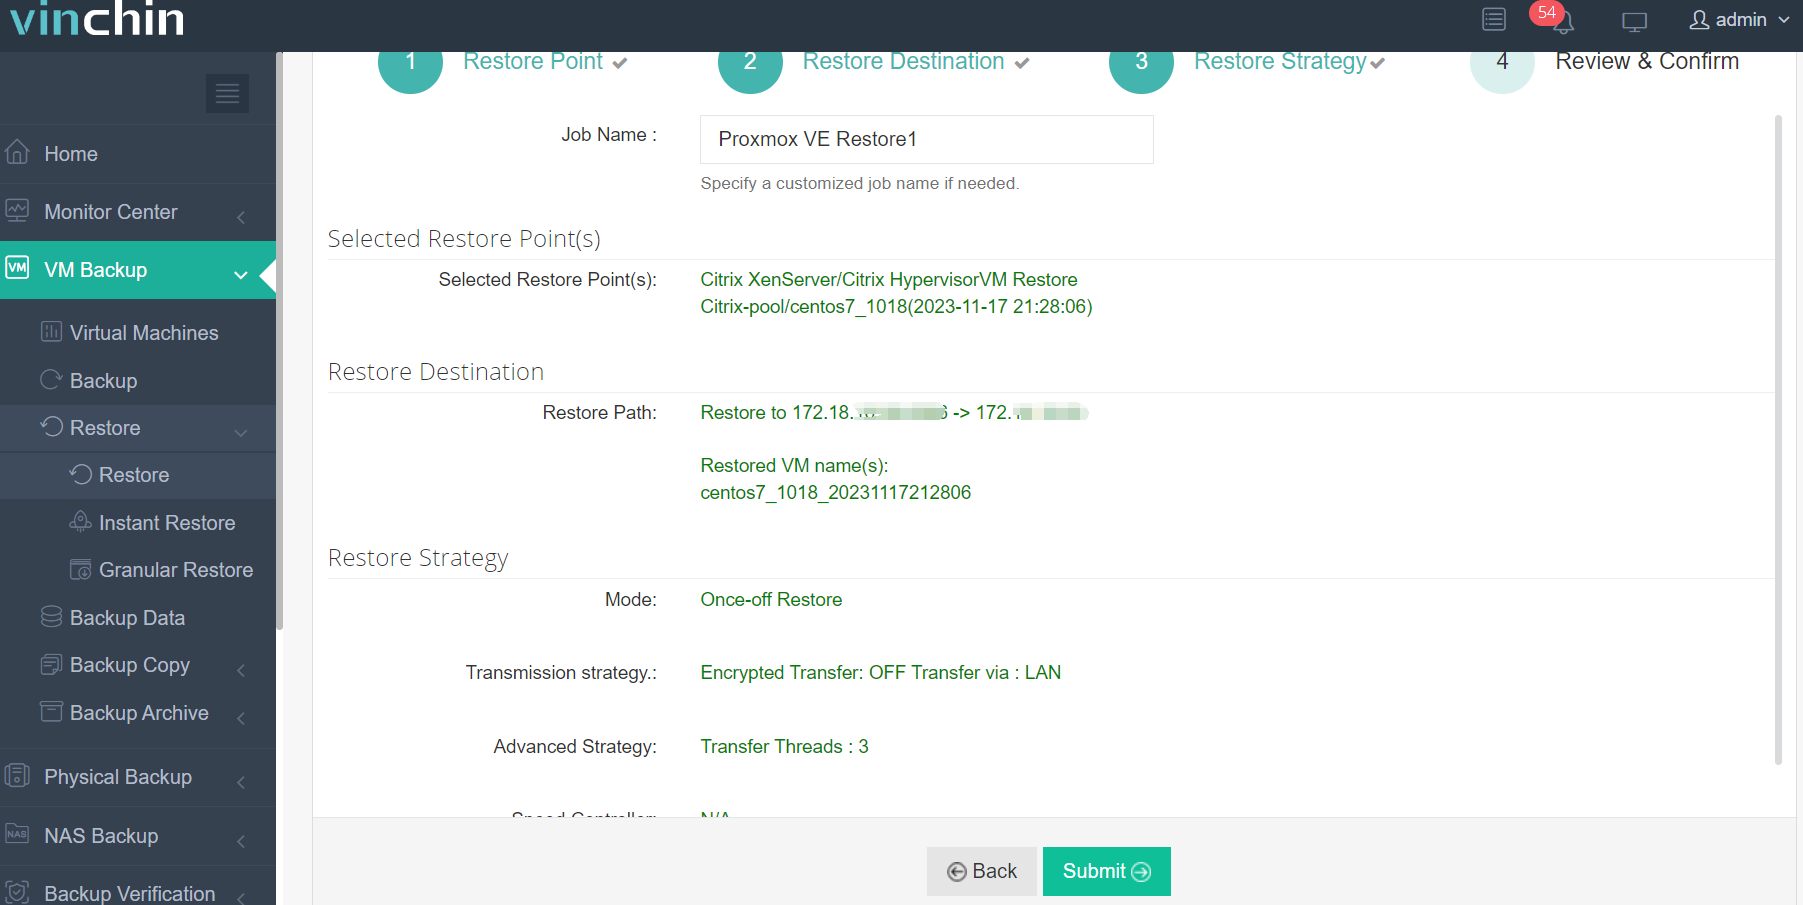
Vinchin offers V2V migration capabilities for seamless migration between virtualization platforms. With a free trial period of up to 60 days, users can fully experience its features. For further information, please contact Vinchin directly or one of our local partners.
Proxmox XVA importing FAQs
Q1: Can you convert an XVA file to another format before importing it into Proxmox?
A1: Yes, you can use tools to convert XVA files to other formats, such as qcow2, and then import them into Proxmox, if needed.
Q2: Can you import multiple XVA files simultaneously into Proxmox?
A2: Yes, you can import multiple XVA files simultaneously by running multiple instances of the qm import disk command or by scripting the import process to handle multiple files sequentially.
Conclusion
In summary, Proxmox's capability to import XVA files is essential for seamlessly restoring virtual machines within its environment. By following a straightforward process of uploading, confirming, and importing the XVA file, users can efficiently recreate VM instances, ensuring smooth operation and data integrity.
Share on:


