-
How to configure VLANs for Hyper-V Virtual Switches?
-
How to configure VLANs for Hyper-V VMs?
-
Secure Hyper-V VMs with Vinchin Backup & Recovery
-
Hyper-V VLAN FAQs
-
Conclusion
In a Hyper-V environment, VLANs (Virtual Local Area Networks) are used to create multiple logical networks within the same physical network, enabling network isolation and improving management flexibility. Hyper-V's VLAN feature allows you to assign VLAN IDs to VMs, enabling them to communicate with other devices in the same VLAN while isolating them from devices in different VLANs. This configuration improves network security and manageability, ensuring that virtual machines operate independently on the same physical network without interfering with each other.
How to configure VLANs for Hyper-V Virtual Switches?
Hyper-V Virtual Switches are virtual switches used to connect VMs to the physical network and other virtual machines in a Hyper-V environment. They manage network communication between VMs and VM connectivity to external networks. By configuring VLANs on virtual switches, you can provide VLAN identification and isolation for virtual machines, ensuring that network traffic is properly isolated and managed in the virtual environment.
1. Select a Virtual Switch
Click Virtual Switch Manager > select the switch you want to configure

2. Configure VLAN identification
In Virtual Switch Properties, check Enable virtual LAN identification for management operating system > set a unique VLAN identifier (e.g., 2) for network communication. When finished, click OK to save your changes.

How to configure VLANs for Hyper-V VMs?
1. Select the Virtual Machine
Right-click the VM > Settings

2. Check Network Adapter Connections
Click Network Adapter to ensure that the network adapter is connected to the correct virtual switch.
3. Enable and Configure Hyper-V VLAN Tagging
Check Enable virtual LAN identification > enter the same VLAN ID (e.g., 2) as before.
In this way, all network traffic transmitted through the physical network adapters connected to this virtual switch will be tagged using this VLAN ID.
4. Finally, click OK to save the settings.

Secure Hyper-V VMs with Vinchin Backup & Recovery
After properly configuring VLANs in a Hyper-V environment, the next critical step is to ensure that virtual machines are securely backed up and protected. This is where Vinchin Backup & Recovery comes in. Vinchin provides backup solutions specifically designed for a wide range of virtualization platforms, including Hyper-V, VMware, Proxmox, XenServer, XCP-ng, oVirt, RHV, and etc. to help you efficiently protect your VMs and their assets.
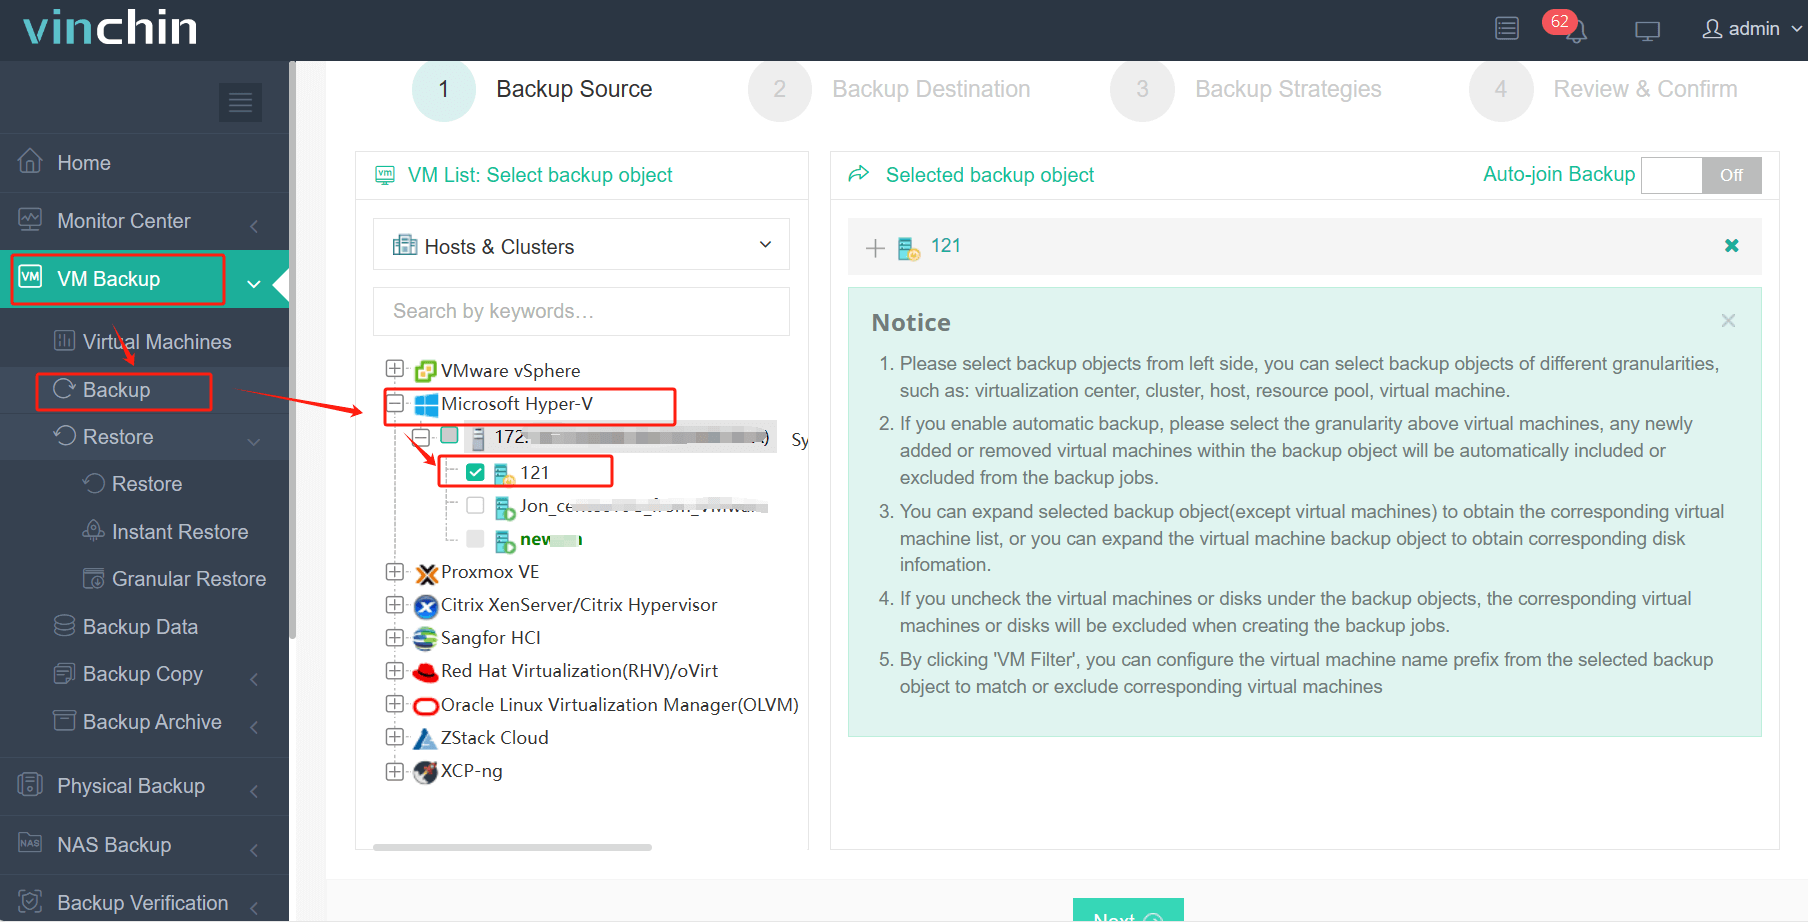
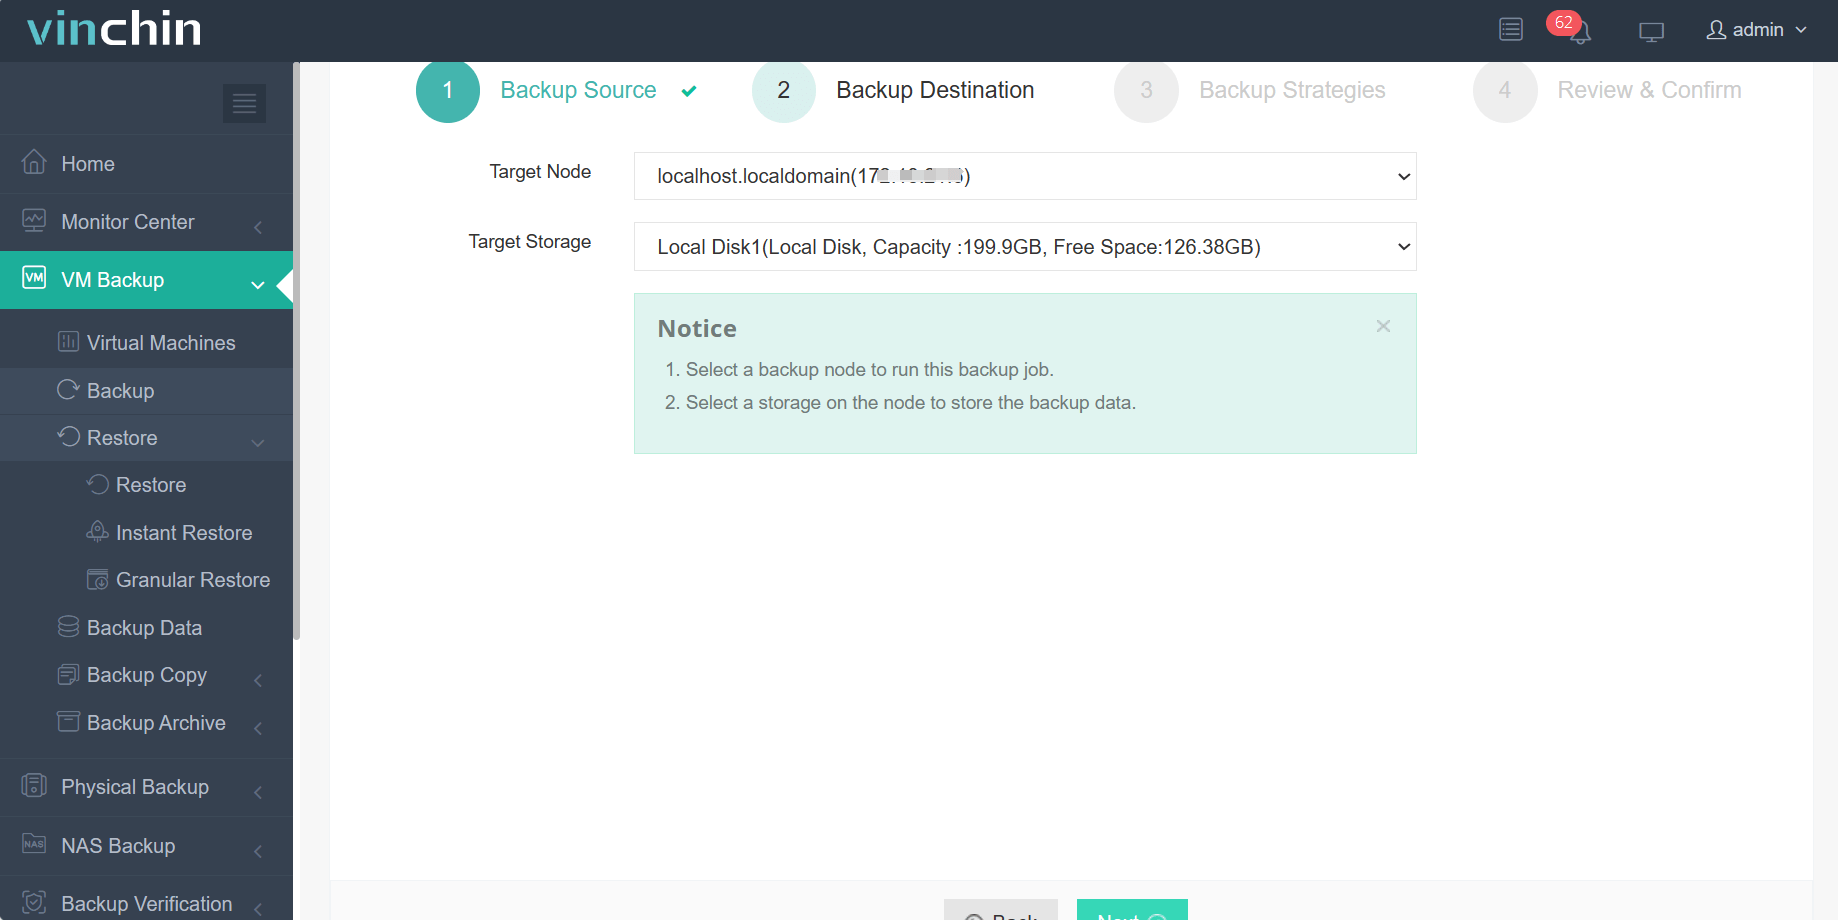
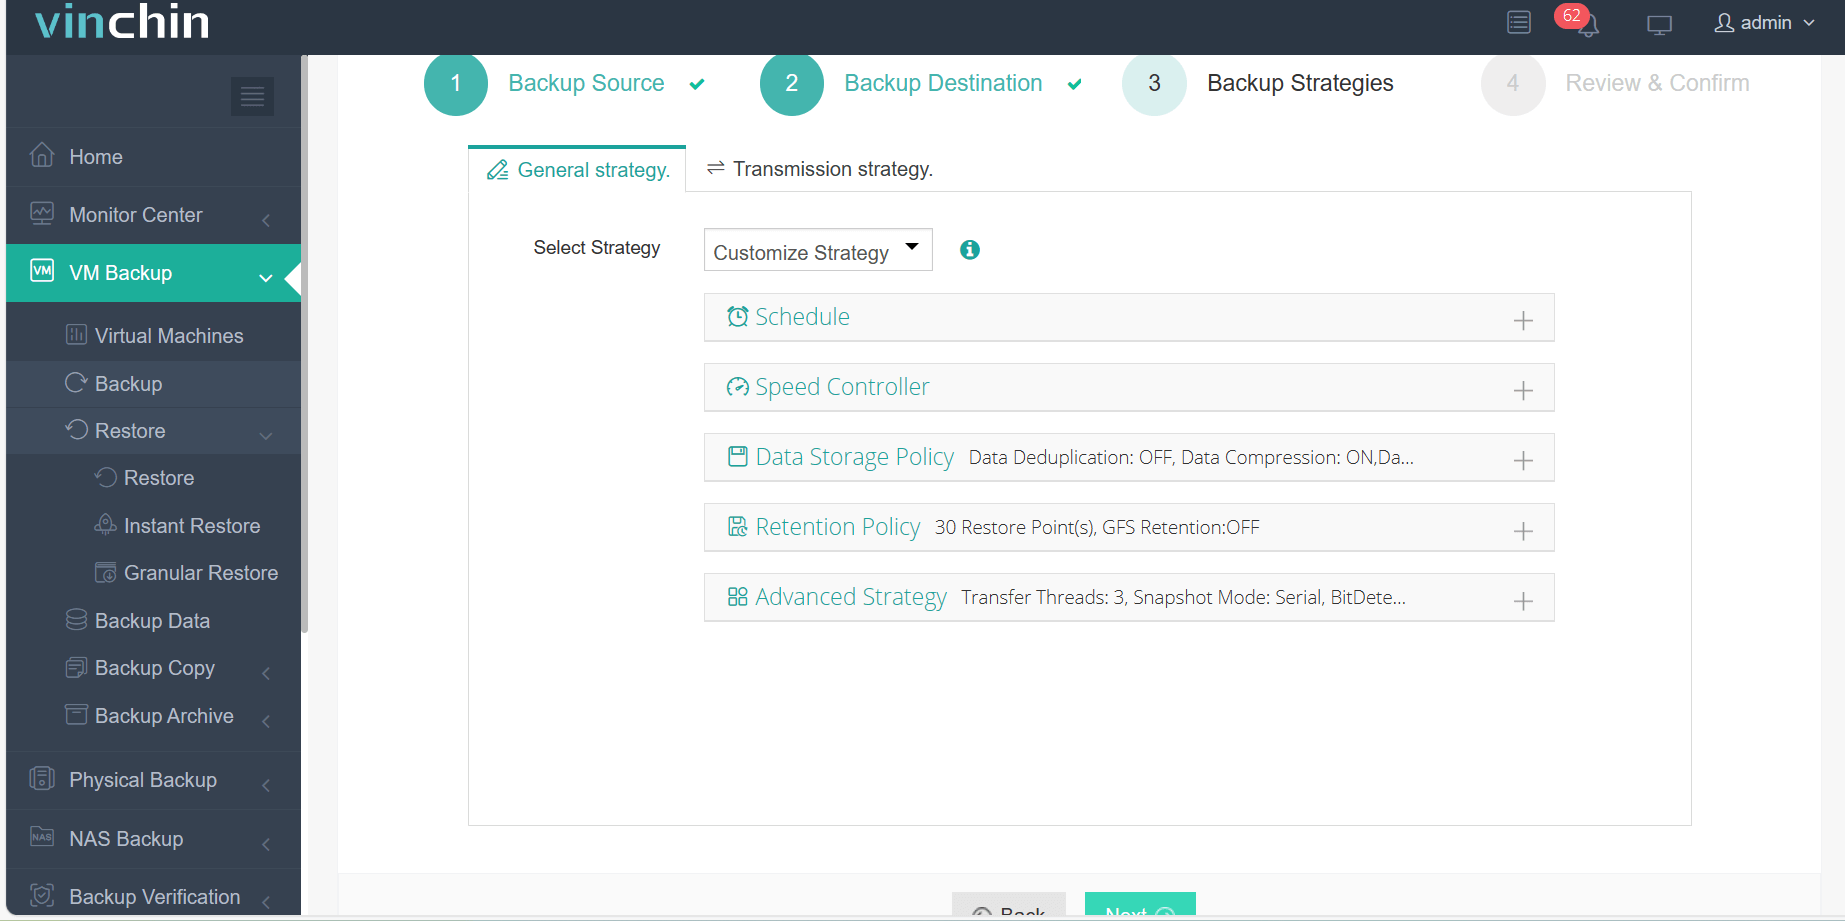
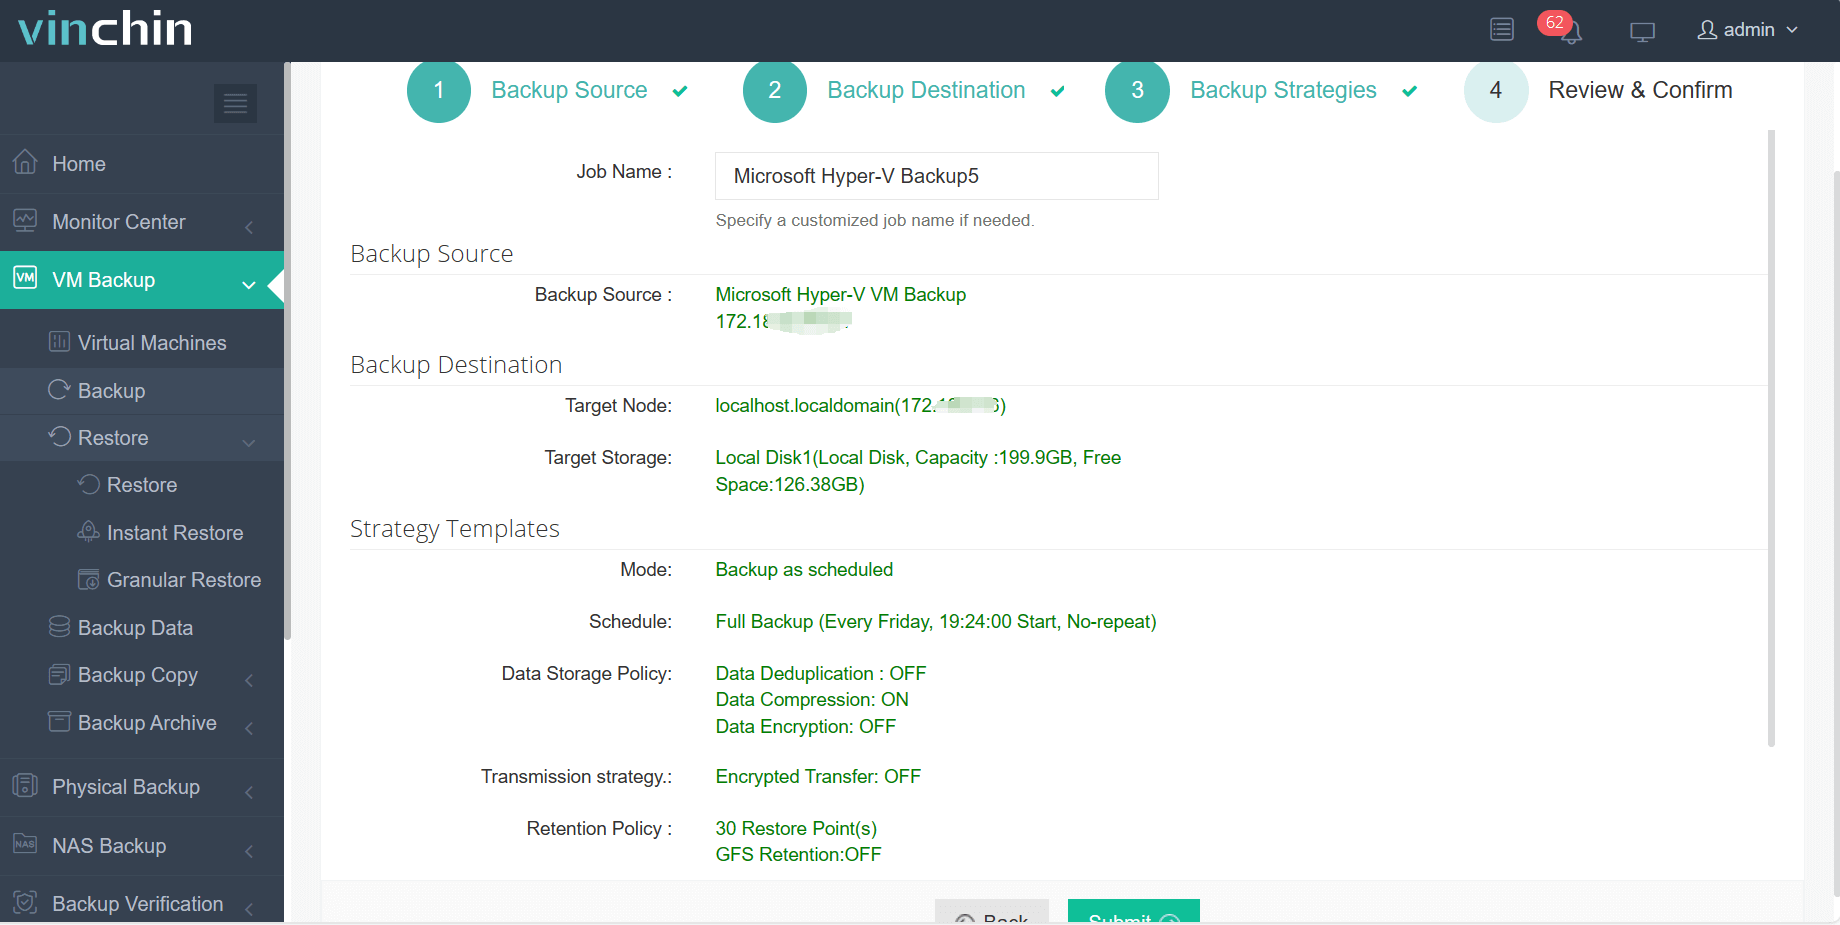
Vinchin Backup & Recovery's operation is very simple, just a few simple steps.
1.Just select VMs on the host

2.Then select backup destination

3.Select strategies

4.Finally submit the job

Vinchin offers a 60-day free trial for users to experience its functionality in a real-world environment. For more information or to start your trial, please contact Vinchin directly or reach out to our local partners.
Hyper-V VLAN FAQs
Q1: Can I use multiple VLANs on a single virtual switch?
A1: Yes, you can configure a single virtual switch to handle multiple VLANs by enabling VLAN ID tagging and specifying different VLAN IDs for each VM or port group.
Q2: What happens if I forget to configure VLAN tagging on a virtual switch?
A2: If VLAN tagging is not configured correctly, VMs might not be able to communicate properly with the intended VLAN segments, leading to connectivity issues.
Conclusion
Proper Hyper-V VLAN configuration enhances network security and management in a Hyper-V environment. To further protect your virtual machines, Vinchin Backup & Recovery provides a simple yet powerful solution, ensuring comprehensive VM backup and protection with just a few clicks.
Share on:


