-
1. What is SSH?
-
2. What is a Host Key?
-
3. Why Does "Host Key Verification Failed" Occur?
-
4. How to Fix the "Host Key Verification Failed" Issue?
-
Backup Proxmox VM with Vinchin solution
-
Proxmox “host key verification failed” FAQs
-
Conclusion
Today, we will delve into a common issue encountered when using SSH connections: "Host key verification failed." This error often confuses beginners, but the solution is actually quite simple. In this article, we will explain the cause of the error in detail and provide clear step-by-step solutions to ensure that you can successfully connect to a remote host! Whether you're a beginner or an experienced developer, this article will offer you practical solutions!
1. What is SSH?
SSH (Secure Shell) is a secure protocol used to access remote computers over an insecure network. It allows users to log in remotely and execute commands through an encrypted connection.
2. What is a Host Key?
Every SSH server has a unique host key used to verify the server's identity. When you connect to a new SSH server for the first time, SSH saves this host key on your local machine.
3. Why Does "Host Key Verification Failed" Occur?
When you try to connect to an SSH server and encounter the "Host key verification failed" error, it may be due to the following reasons:
The host key has changed: If the target host's key has changed (for example, after the operating system is reinstalled), SSH will detect this change and refuse the connection.
The remote host's IP address has been hijacked: If an attacker impersonates the host you are trying to connect to, SSH will block the connection through its host key verification mechanism.
Corruption of the local “known_hosts” file: Your “~/.ssh/known_hosts” file may contain incorrect or outdated key information.
4. How to Fix the "Host Key Verification Failed" Issue?
Next, we will go through the steps to solve this issue.
4.1 Check the Error Message
First, when you see the "Host key verification failed" error message, look at the specific error details. It will usually tell you which host's key verification failed.
4.2 Check the “known_hosts” File
SSH stores known host keys in the “~/.ssh/known_hosts” file. Use the following command to view the file:
cat ~/.ssh/known_hosts
4.3 Remove the Old Host Key
If you are sure that the host key you want to reconnect to has changed, you can delete the corresponding entry in the “known_hosts” file. Use the following command to edit the file:
nano ~/.ssh/known_hosts
Find the line corresponding to the host and delete it, then save the file.
You can also directly remove the specific host key with the following command:
ssh-keygen -R <hostname_or_IP>
Replace “<hostname_or_IP>” with the actual hostname or IP address.
4.4 Reconnect
After removing the old host key, try reconnecting via SSH:
ssh user@hostname
If everything is normal, SSH will prompt you to accept the new host key. Type "yes" to continue.
4.5 Verify Security
Before accepting the new key, ensure that the host you are connecting to is trustworthy. You can confirm the host's key through other means (e.g., phone, email, etc.).
Backup Proxmox VM with Vinchin solution
Vinchin Backup & Recovery offers a comprehensive suite of advanced features to safeguard Proxmox VE environments, ensuring data security and integrity through adherence to the 3-2-1 backup rule.
Its capabilities include automated VM backups, agentless backup and LAN-Free options, as well as offsite copy for robust disaster recovery. Instant recovery and efficient data reduction techniques, alongside cloud archiving options, further enhance data management. Additionally, the solution incorporates data encryption and ransomware protection mechanisms for an extra layer of security. It also facilitates seamless V2V migration between supported virtual platforms, ensuring flexibility and ease of data transfer.
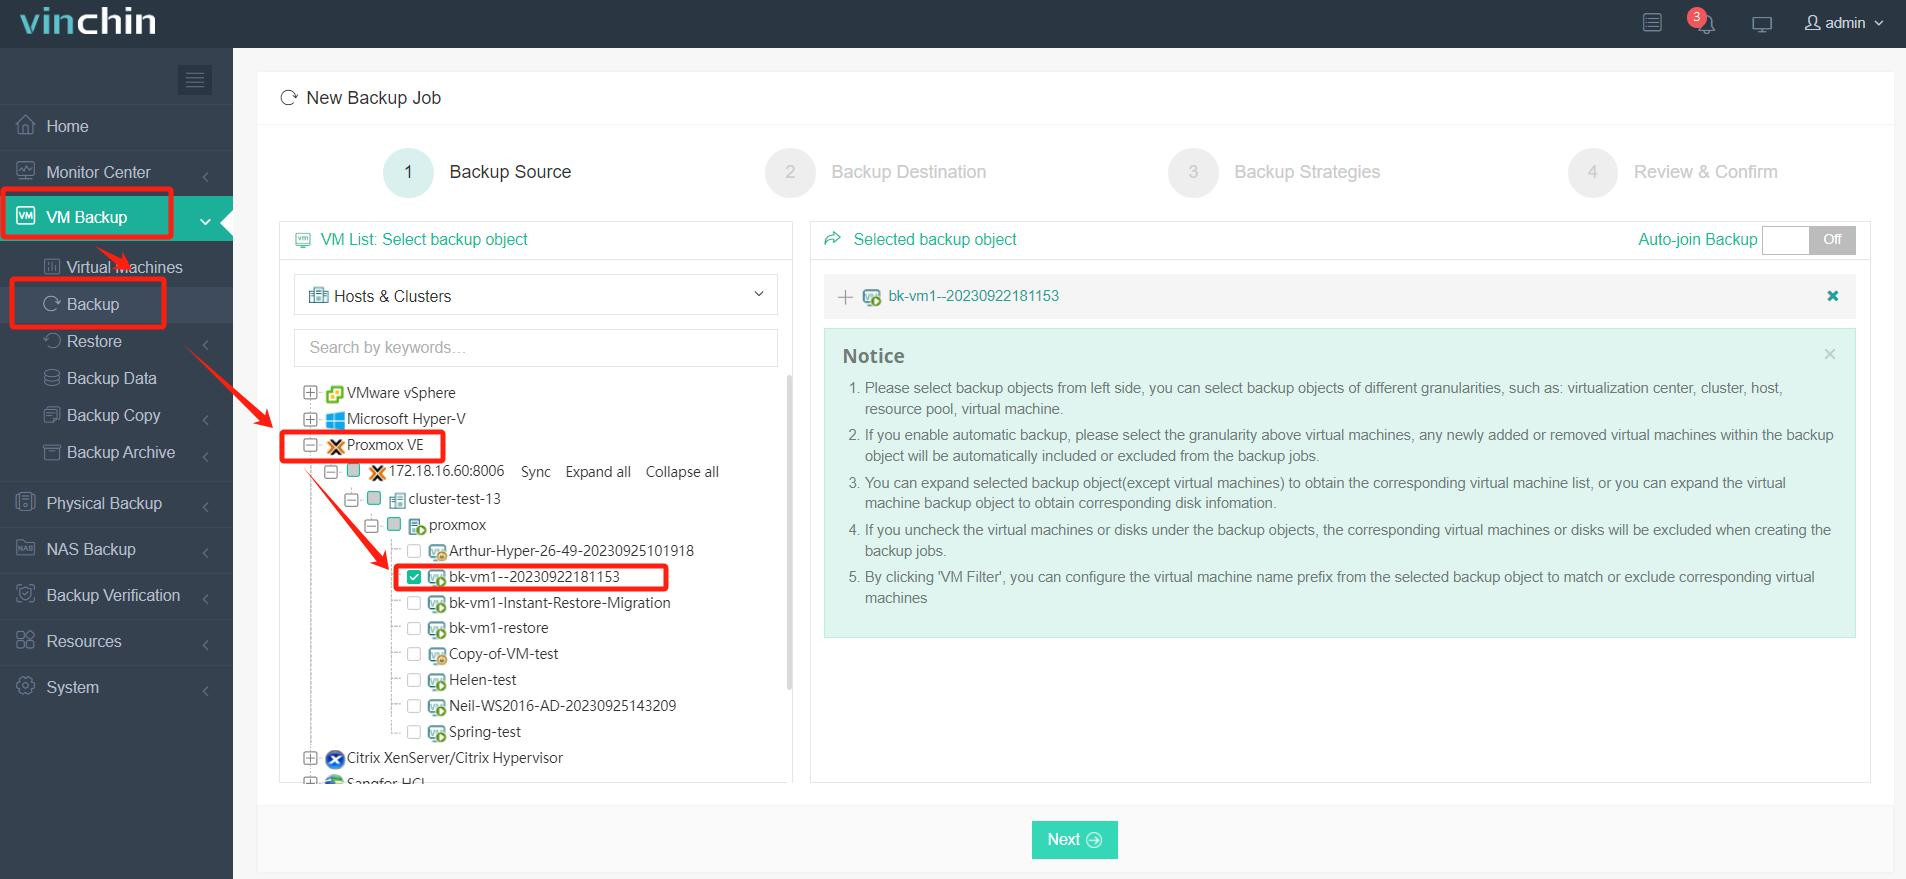
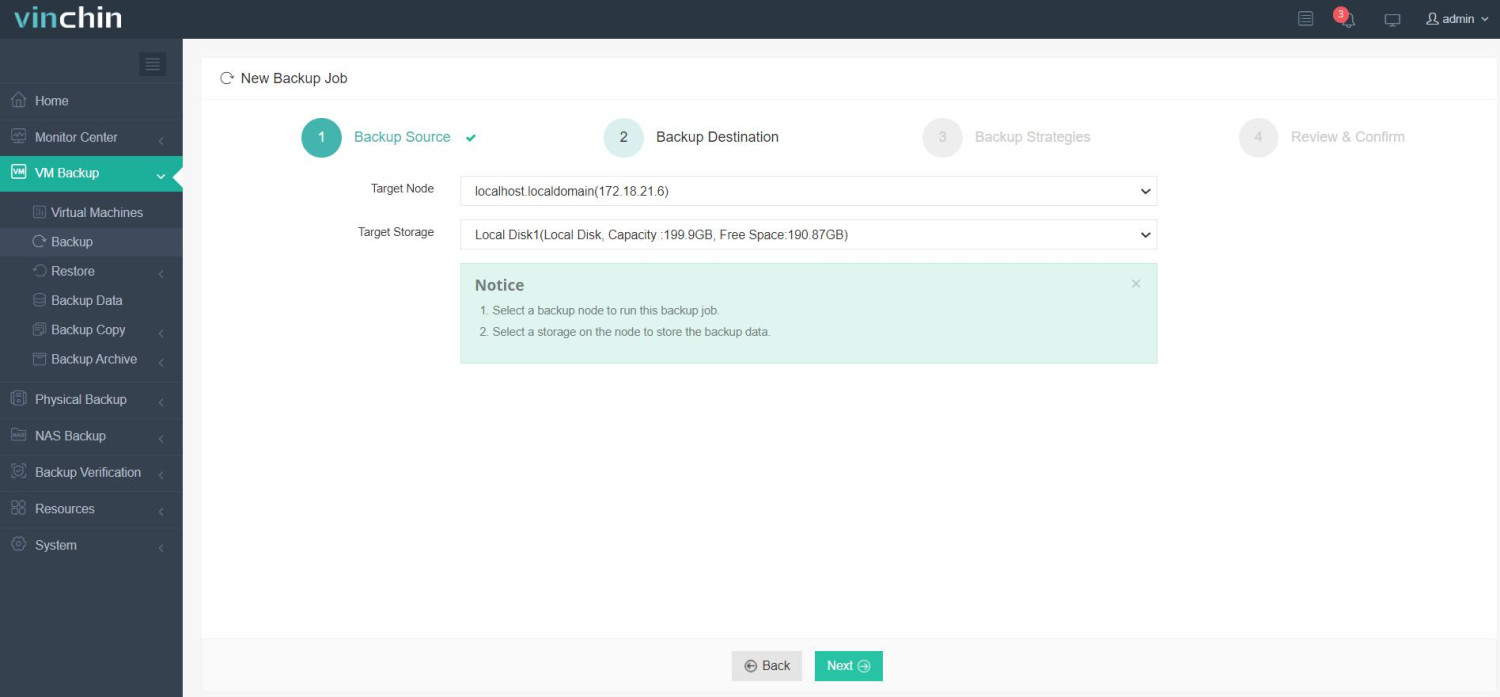
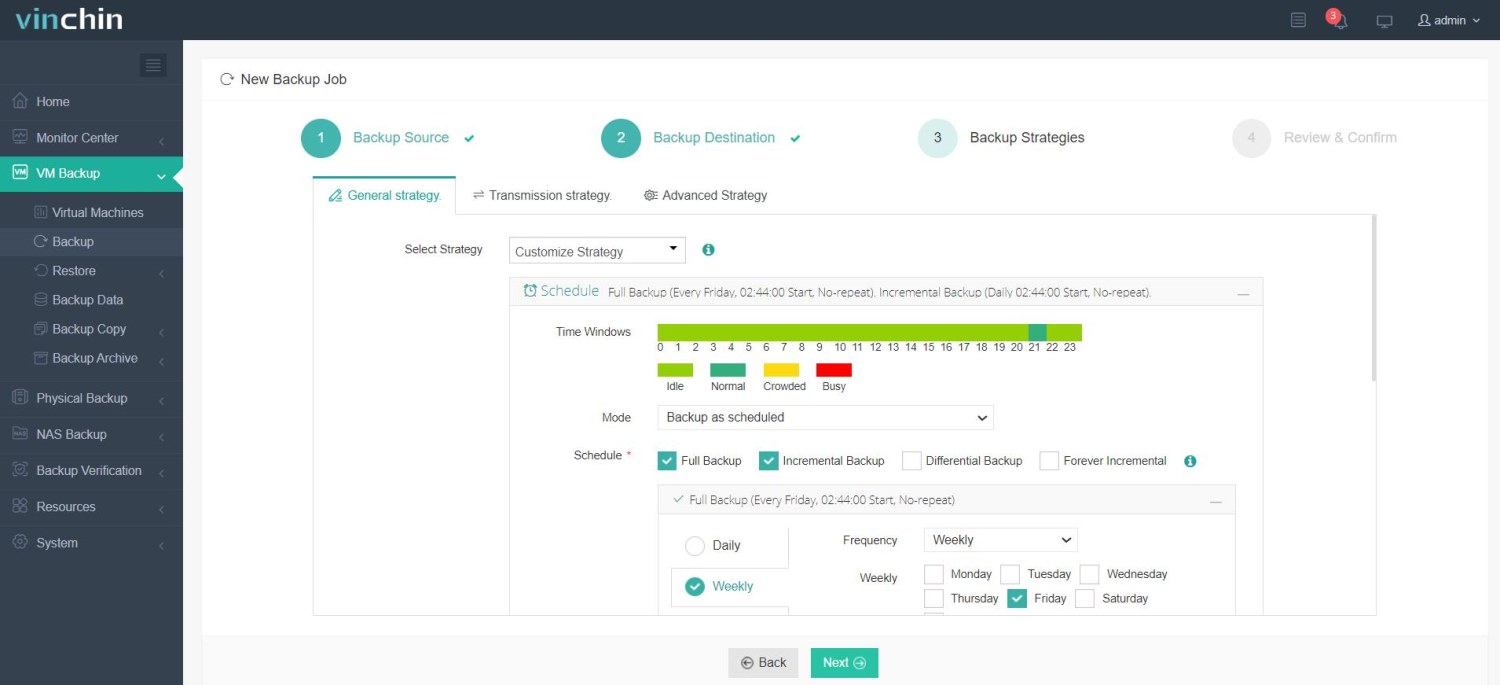
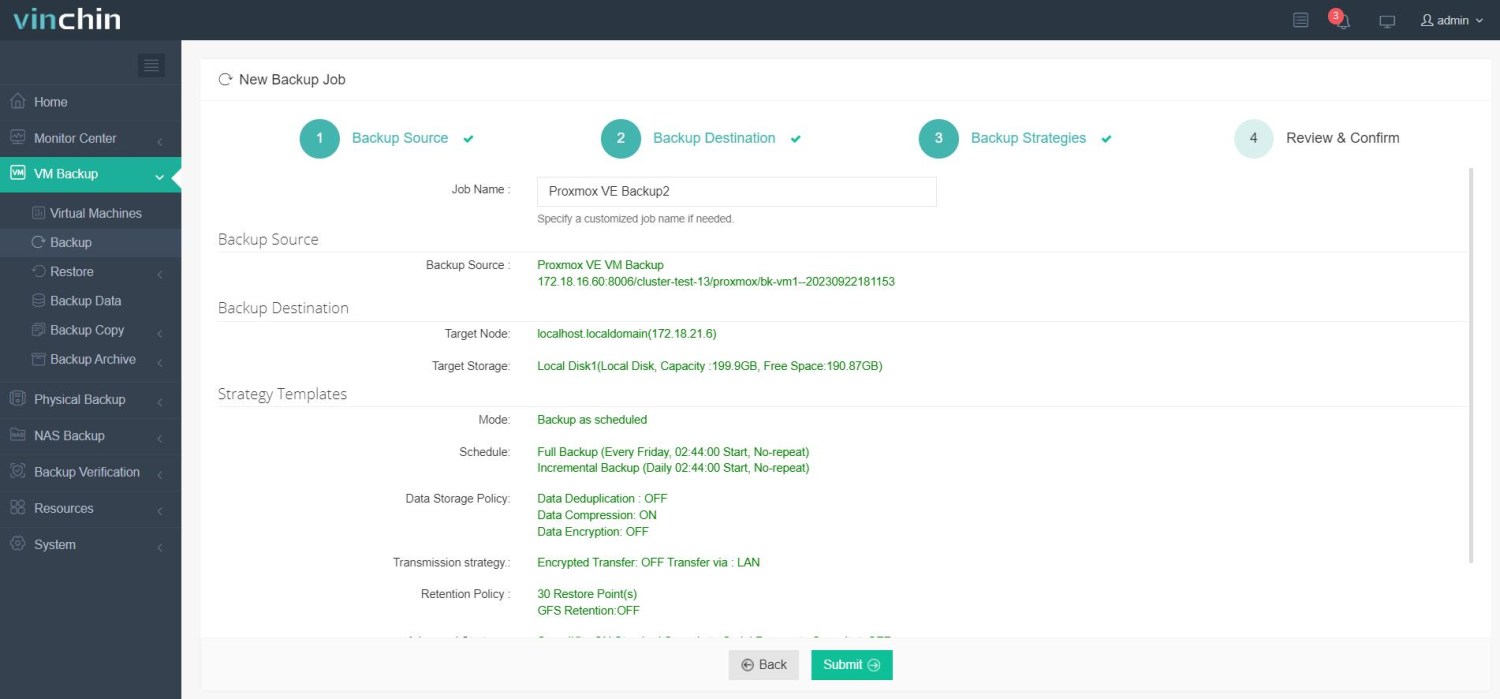
It only takes 4 steps for you to backup Proxmox VE VMs:
1. Select the backup object.

2. Select backup destination.

3. Configure backup strategies.

4. Review and submit the job.

Thousands of companies globally have already adopted Vinchin Backup & Recovery for their data protection needs. You can begin exploring its extensive capabilities with a comprehensive 60-day trial, fully equipped with all features. Contact us with the details of your Proxmox VE setup, and you will receive a customized solution that fits seamlessly with your IT landscape.
Proxmox “host key verification failed” FAQs
1. What should I do if I suspect a man-in-the-middle attack?
If you suspect an attack, do not accept the new SSH key immediately. Instead, verify the server's identity by contacting the administrator or checking through a trusted channel. Always compare the fingerprints manually before proceeding.
2. What happens if I delete the old host key from the known_hosts file?
If you delete the old host key, the next time you connect to the server via SSH, you will be prompted to accept the new key. If you are confident that the server is legitimate and the key change is intentional, you can accept and store the new key.
Conclusion
This article provides a detailed explanation of the causes and solutions for the "Host key verification failed" issue encountered when using SSH. By reviewing the error message, removing old keys, and reconnecting, you should be able to solve this problem successfully.
Share on:


