-
How does Hyper-V export VM list?
-
Reliable Hyper-V backup with Vinchin
-
Export VM list in Hyper-V FAQs
-
Conclusion
In modern IT environments, virtualization technology has become a core tool for improving hardware resource utilization and management efficiency. Hyper-V, as Microsoft’s virtualization solution, is widely used by businesses and organizations to efficiently manage and deploy virtual machines. For system administrators, understanding and tracking the status, resource usage, and configuration details of virtual machines is key to ensuring smooth operation in a virtualized environment.
With PowerShell, automating virtual machine management tasks, including retrieving detailed VM lists, becomes straightforward. Exporting virtual machine information to a CSV file is an incredibly convenient method, allowing administrators to easily view basic VM details while supporting subsequent data analysis and auditing tasks. Whether preparing for reports, conducting capacity planning, or troubleshooting, exporting a VM list is an essential operation.
This guide will walk you through the steps of exporting a list of all virtual machines in Hyper-V using PowerShell and saving it as a CSV file. These simple steps will help you efficiently collect VM information, providing convenient support for your daily operations and management tasks.
How does Hyper-V export VM list?
Step 1: View all virtual machines
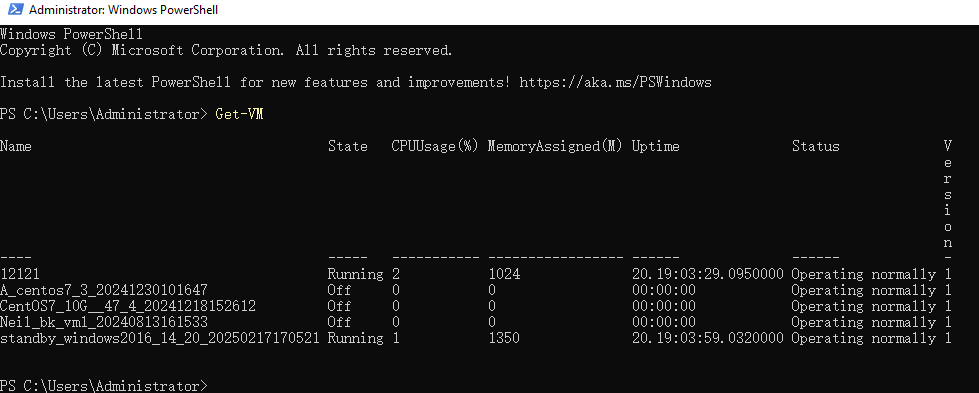
First, run Hyper-V (Windows 10/11 Professional, Windows Server) locally, you can open PowerShell and run the following command directly to view the list of virtual machines:
Get-VM
Step 2: Export Virtual Machine Information to a CSV File
If you want to export virtual machine information to a CSV file, you can run the following command:
This will export the virtual machine's Name, State, CPUUsage, MemoryAssigned, Uptime, and Version to a CSV file located at C:\VM_List.csv.
The `-NoTypeInformation` parameter ensures that the output CSV file does not include any additional type information.
Get-VM | Select-Object Name, State, CPUUsage, MemoryAssigned, Uptime, Version | Export-Csv -Path "C:\VM_List.csv" -NoTypeInformation
![]()
Step 3: Open the Exported CSV File
You can open the exported CSV file using the following methods:
Directly with Excel or another CSV-compatible tool: Open the C:\VM_List.csv file, and you can view all the virtual machine information.
Alternatively, open the file in PowerShell using the following command:
Invoke-Item "C:\VM_List.csv"
This command will open the file and automatically launch the default CSV viewer (usually Excel or Notepad).

Optional Optimization
If you want to optimize the output, such as converting MemoryAssigned to MB and displaying Uptime in hours, you can use the following command:
Get-VM | Select-Object Name, State, CPUUsage,
    @{Name="MemoryAssigned_MB"; Expression={($_.MemoryAssigned/1MB)}},
    @{Name="Uptime_Hours"; Expression={($_.Uptime).TotalHours}},
Version | Export-Csv -Path "C:\VM_List.csv" -NoTypeInformation
MemoryAssigned_MB: Displays the memory allocation in MB.
Uptime_Hours: Converts the virtual machine's uptime into hours, making it easier to read.

Reliable Hyper-V backup with Vinchin
Once you have a complete list of virtual machines, the next logical step is to consider how to protect these valuable virtual assets. Exporting VM information is just the beginning of the management process; more importantly, it's essential to establish a reliable backup mechanism for these virtual machines to ensure business continuity and data security. Vinchin Backup & Recovery provides powerful Hyper-V backup and recovery features, specifically designed for virtualized environments, safeguarding your critical virtual machine data. Through agentless incremental backups, Vinchin can back up data directly from the Hyper-V hypervisor, without needing to install agents on each virtual machine. This significantly simplifies deployment and reduces resource consumption in the production environment.
The unique BitDetector technology further optimizes backup efficiency by intelligently removing unnecessary data (such as swap files and unallocated space), ensuring that only valuable data is backed up, saving storage space and freeing up room for more new data.
Vinchin also offers backup data encryption and protection during the data transfer process, ensuring that your backup data is always secure and reliable both during storage and transmission, providing double protection for high recoverability.
With these innovative features, Vinchin Backup & Recovery provides an efficient, secure, and scalable backup solution for your Hyper-V environment, helping you optimize storage and resource usage while ensuring data safety.
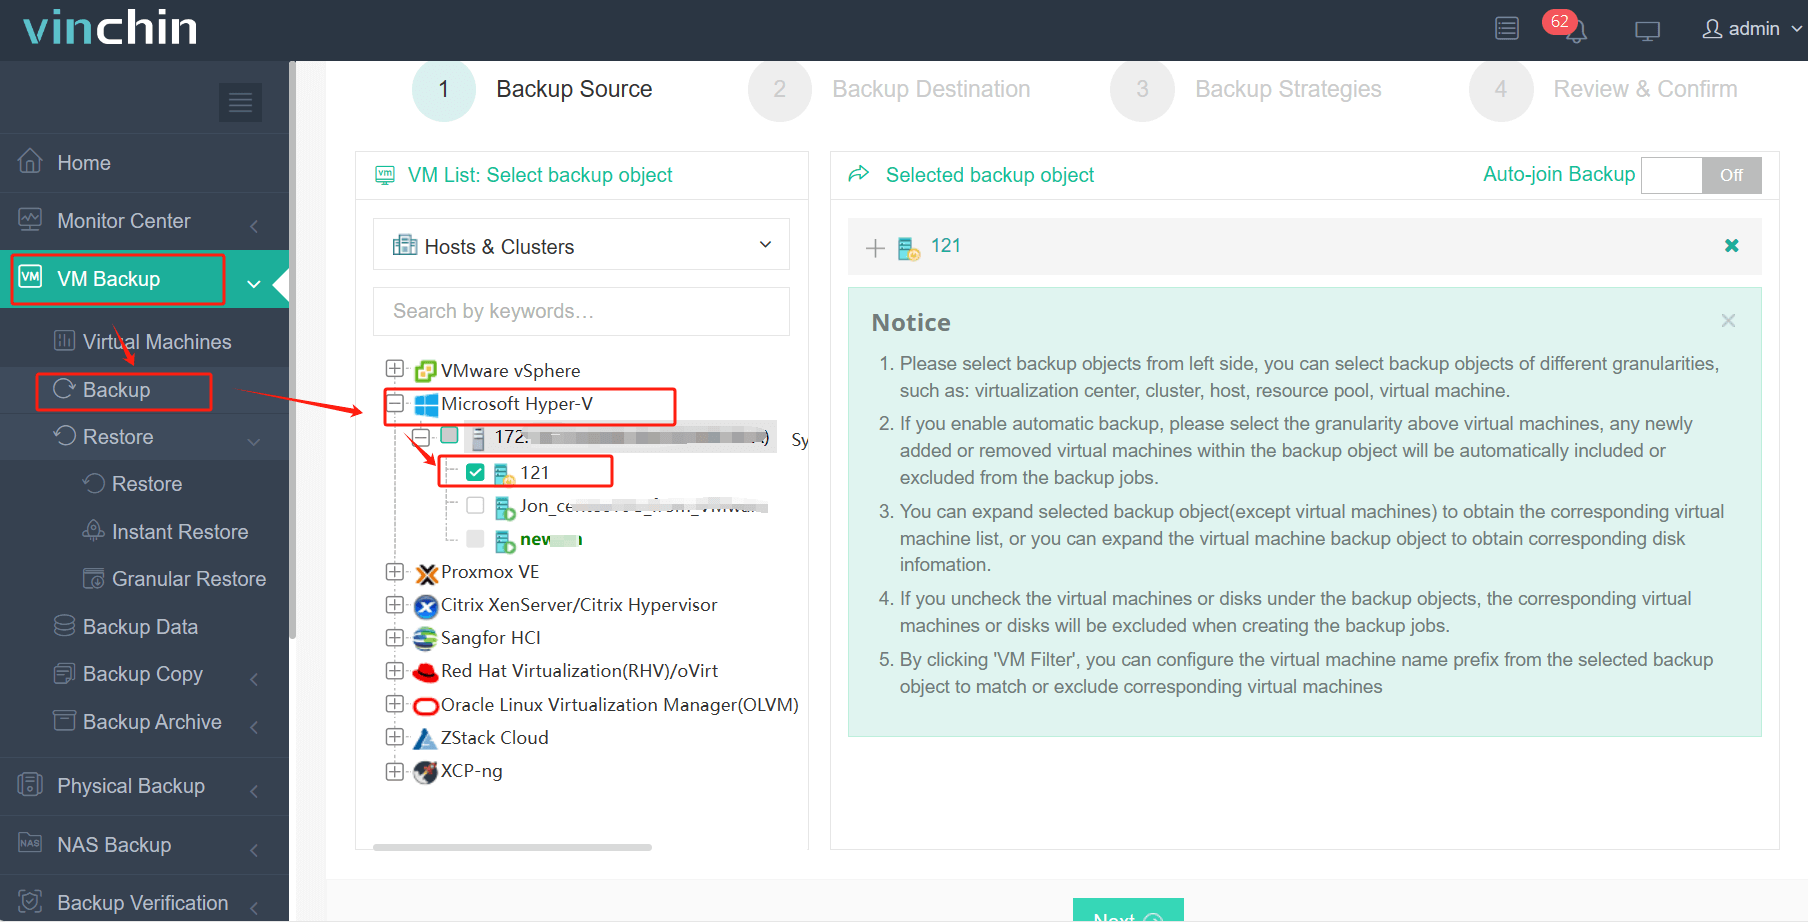
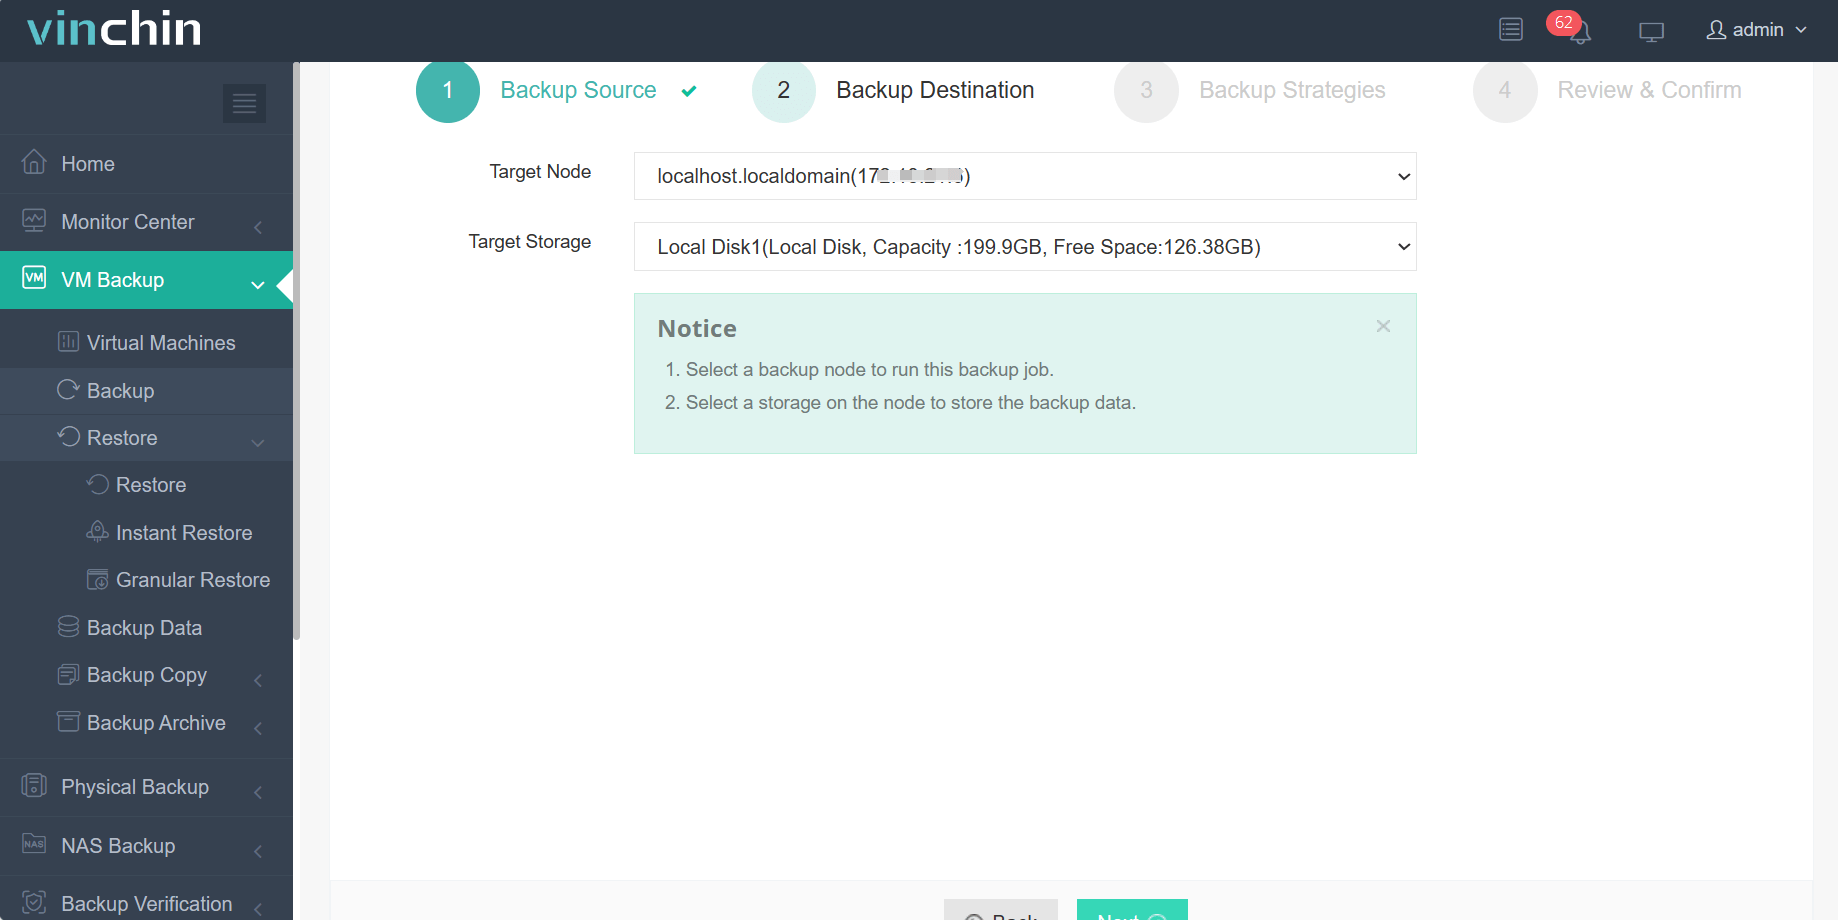
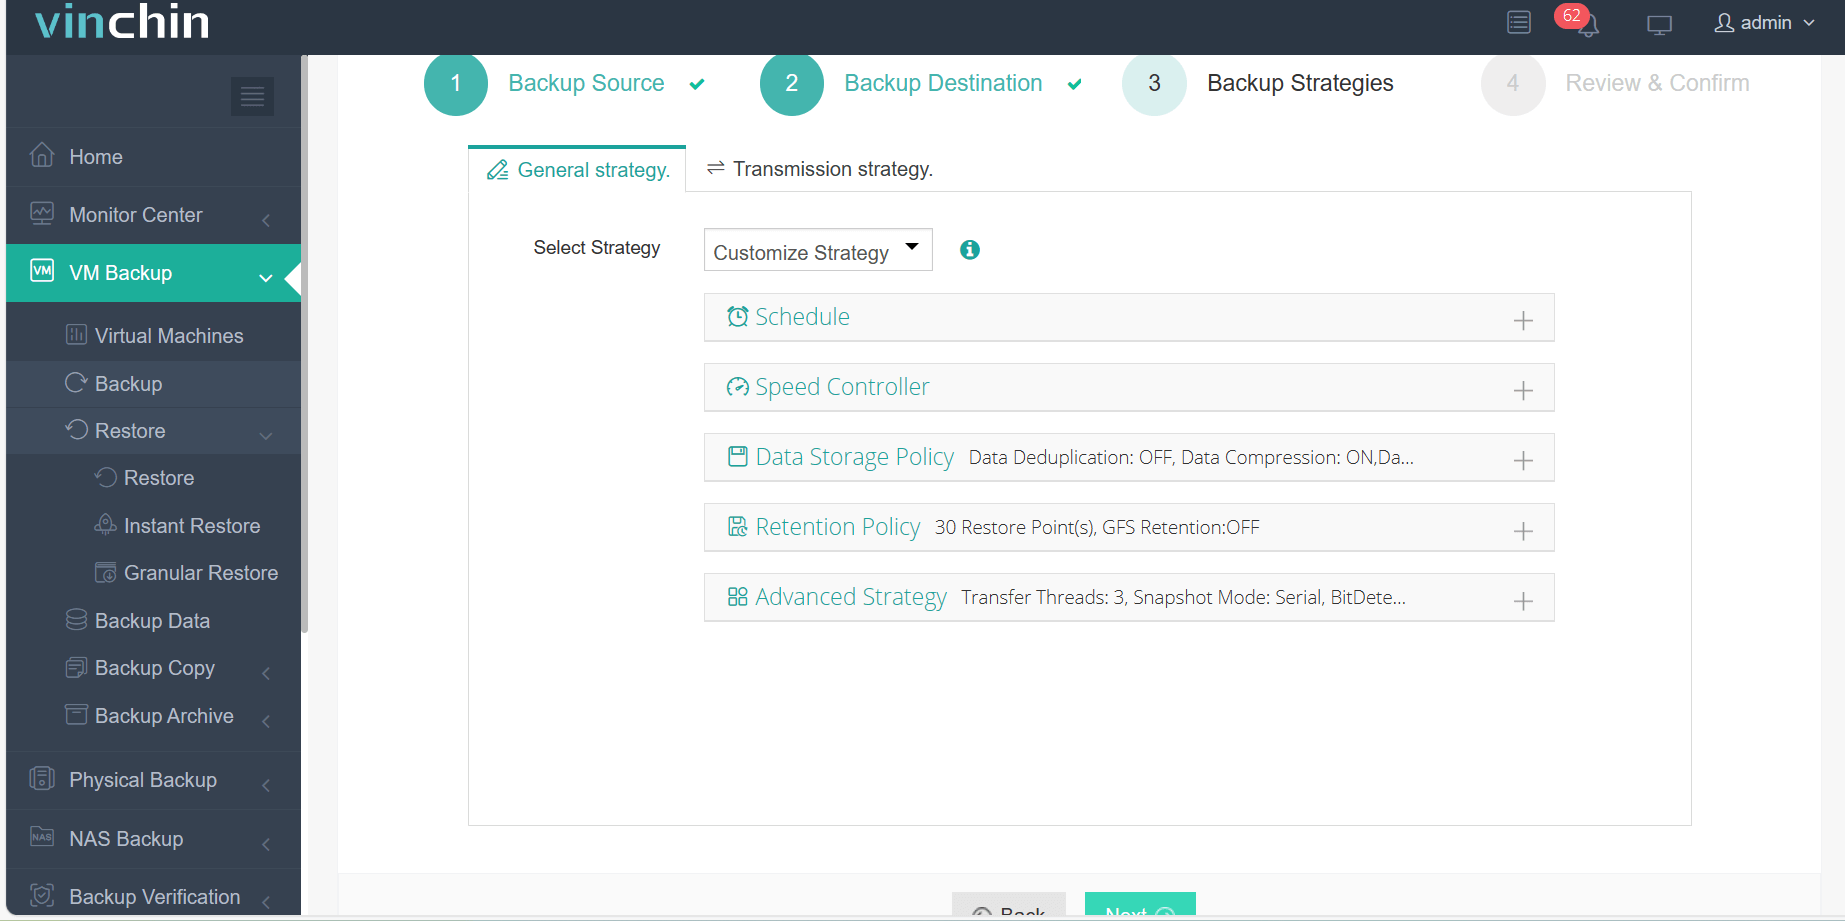
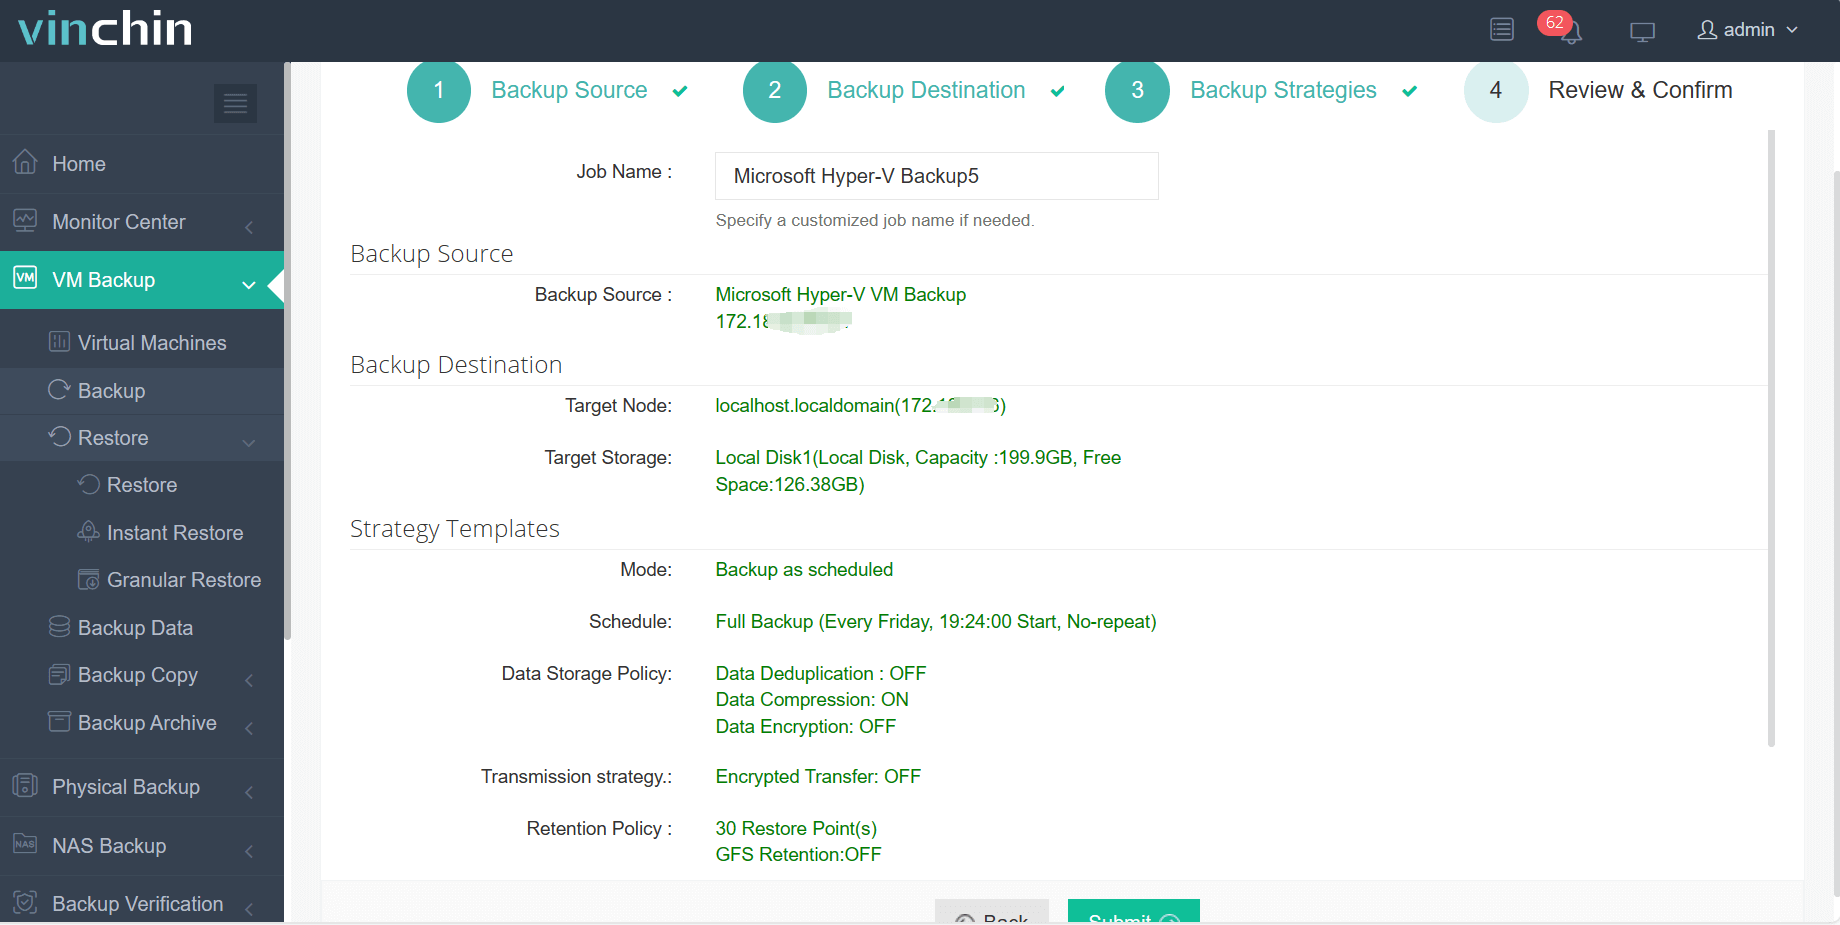
Vinchin Backup & Recovery's operation is very simple, just a few simple steps.
1.Just select VMs on the host
2.Then select backup destination
3.Select strategies
4.Finally submit the job
Vinchin offers a free 60-day trial for users to experience the functionality in a real-world environment. For more information, please contact Vinchin directly or reach out to our local partners.
Export VM list in Hyper-V FAQs
Q1: Can I schedule regular exports of my VM list?
A1: Yes, create a PowerShell script with the export command and schedule it with Task Scheduler.
Q2: What file formats can I export to?
A2: Common formats include: CSV (most common, with Export-Csv), JSON (ConvertTo-Json), XML (Export-Clixml), Text (Out-File)
Conclusion
In conclusion, exporting virtual machine data using PowerShell simplifies Hyper-V management. Coupled with Vinchin Backup & Recovery, businesses can ensure data security, optimize storage, and streamline operations, offering reliable protection for virtualized environments with efficient, agentless backups.
Share on:


