-
1. tar Command: directory-level backup
-
2. dump command: file system level backup
-
3. dd command: disk-level backup
-
Modern enterprise-class backup solution - Vinchin Backup & Recovery
-
Conclusion
-
RHEL backup and restore FAQs
In an enterprise environment, it is critical to ensure the security of data on Red Hat Linux servers. Common RHEL backup methods include directory-level, file-system-level and disk-level backups. Different tools have their own advantages and disadvantages and are suitable for different business needs. Whether it is through a simple file packing or a full disk image backup, choosing the right solution wisely can improve the efficiency and reliability of data recovery. This guide will introduce several common Red Hat backup and restore tools to help administrators protect and manage system data more efficiently.
1. tar Command: directory-level backup
Suitable for: Backing up specific directories and their files
Pros: Lightweight, versatile, works with most Linux distributions
Cons: Cannot back up filesystems outside of mount points, not suitable for large-scale data recovery
Backup Command
To back up all contents of a specific directory and exclude unwanted directories or files, you can use the following command:
tar -cjvpf backup_filename directory_to_backup --exclude=excluded_directory_or_file
-c: Create a new backup file.
-j: Compress the backup file using bzip2 (more efficient than zip).
-v: Display a list of files during the backup process.
-p: Preserve the original attributes of files and directories.
-f: Specify the filename for the backup result.
Example:
   tar -cjvpf /media/backup/78/78_`date +'%Y%m%d'`_root.tar.bz2 / \
  --exclude='/sys' --exclude='/proc' --exclude='/media' --exclude='/mnt' \
  --exclude='/tmp' --exclude='lost+found' \
  1> /media/backup/78/78_`date +'%Y%m%d'`_bk_lst.log \
  2> /media/backup/78/78_`date +'%Y%m%d'`_bk_err.log
⚠️Note: This command backs up all contents of the root directory /, but excludes the following directories:
· Virtual file system mount directories, such as /sys, /proc.
· Explicitly unnecessary directories, such as /tmp, lost+found.
· Media mount directories (e.g., /media, /mnt). If these directories are not mounted, they can be excluded.
· Directories or files determined by user applications to be unnecessary for backup (wildcards * can be used to exclude specific file types).
*_bk_lst.log file is used to record the list of files/directories backed up.
*_bk_err.log file is used to record the files/directories that encountered errors during the backup process.
Restore Command
To restore a backup file, use the following command:
tar -xjvpf <backup_file> -C <target_directory>
-x: Extract files from the backup archive.
-j: Decompress files using bzip2.
-v: Display the list of files being restored.
-p: Preserve file permissions and timestamps.
-f: Specify the backup file name.
-C: Specify the target directory for restoration.
Example:
tar -xjvpf /backup/root_20240212.tar.bz2 -C /
This command restores the backup file root_20240212.tar.bz2 to the root directory (/).
⚠️ Warning: The restore process will overwrite existing files in the target directory. After restoring the root filesystem, it is recommended to reboot the system to ensure all files are correctly loaded.
2. dump command: file system level backup
Suitable for: Backing up the whole filesystem, usually used for full backup of partitions or filesystems.
Advantages: Suitable for full backup of the whole filesystem, and supports incremental backup.
Cons: Only support Ext series file system (ext2/ext3/ext4), not applicable to XFS and Btrfs.
Backup Command
The df command lists all file systems and mounted directories:
df
Example:
Filesystem     1K-blocks     Used Available Use% Mounted on
/dev/sda2      138022764   8153372 122744968   7% /
/dev/sda1        101086    12445    83422  13% /boot
tmpfs           1037728        0   1037728   0% /dev/shm
/dev/sdb1      140000000   8000123  7% /backup
Backup the root filesystem to /backup/root.dump:
dump -0f /backup/root.dump /
Backup the /boot filesystem to /backup/boot.dump:
dump -0f /backup/boot.dump /boot
-0: Make a full backup, i.e. a backup with level 0.
-f: specify the backup file name, be careful not to put the backup file in the backup file system (to avoid self overwriting).
View the results of the backup:
restore -tf /backup/root.dump
Restore Command
The restore command is used to restore a file system or directory from a dump backup file.
Rebuild the root filesystem:
restore -rf /backup/root.dump
Rebuild the /boot filesystem:
restore -rf /backup/boot.dump
Extract individual files or directories:
To restore the /etc directory from the root filesystem backup:
restore -xf /backup/root.dump /etc
-r: Restores the entire file system.
-f: Specify the backup file.
-x: Extract the specified file or directory from the backup file.
3. dd command: disk-level backup
Suitable for: Creating full disk images or cloning disks.
Advantages: Copies the entire disk, including partition tables and boot records, making it ideal for disk cloning and recovery.
Cons: Does not support file-level backup; improper use may result in data loss.
The dd command is used to create a complete copy of a disk's content into a file, typically for disk imaging or cloning.
Backup Command
The following command backs up all contents of the second SCSI disk /dev/sdb to the file /media/backup/sda.disk:
dd if=/dev/sdb of=/media/backup/sda.disk
if=/dev/sdb: Specify the input source (i.e. the disc to be backed up), here is the 2nd SCSI hard disc of the system /dev/sdb.
of=/media/backup/sda.disk: Specify the output destination (i.e. the path where the backup file is saved), here is /media/backup/sda.disk.
This command copies the entire contents of the disc, including the operating system, partition table, file system, etc., to form an image file of the disc.
Restore Command
Restore the backed up disc image /media/backup/sda.disk to the system's 2nd SCSI hard disc /dev/sdb with the following command:
dd if=/media/backup/sda.disk of=/dev/sdb
if=/media/backup/sda.disk:Specify the input file (i.e. the disk image file for backup), in this case /media/backup/sda.disk.
of=/dev/sdb:Specify the output target (i.e. the disc to be recovered), in this case the system's 2nd SCSI hard disc /dev/sdb.
⚠️Note: This command copies the contents of the backup file completely to the destination disc, including all partitions and file systems. Make sure that the destination disc is free of important data during operation, because the recovery process will overwrite everything on the disc.
Modern enterprise-class backup solution - Vinchin Backup & Recovery
If you need more secure and efficient Red Hat backup solutions, Vinchin Backup & Recovery offers a comprehensive backup solution that supports Red Hat virtualization as well as other major virtualisation platforms. Vinchin is better suited to modern virtualised environments. And supports agentless backups, eliminating the need for an agent to be installed inside the VM, which improves system performance and reduces resource usage.
In addition, Vinchin's incremental backup and de-duplication features intelligently identify and store incremental data, significantly reducing storage space requirements and backup time. At the same time, Vinchin uses AES-256 encryption technology to ensure the security of backup data. Its real-time monitoring and reporting features automatically generate backup logs and alert notifications to help administrators track backup status in real-time, ensuring flawless data protection.
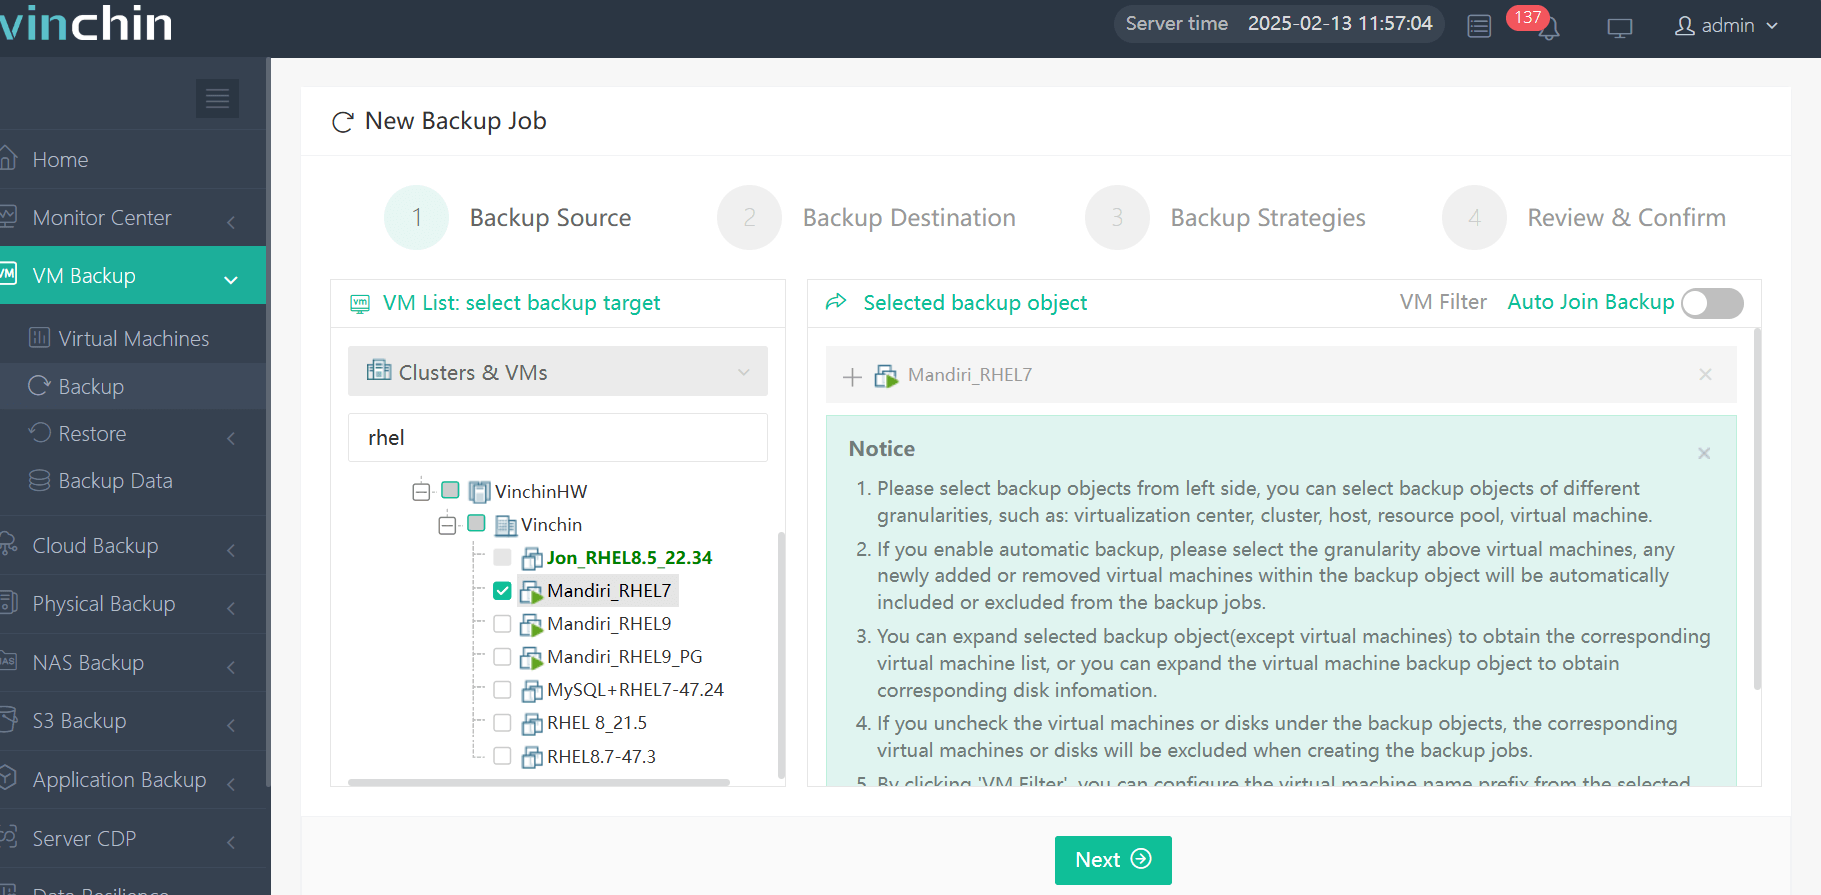
1.Just select VMs on the host

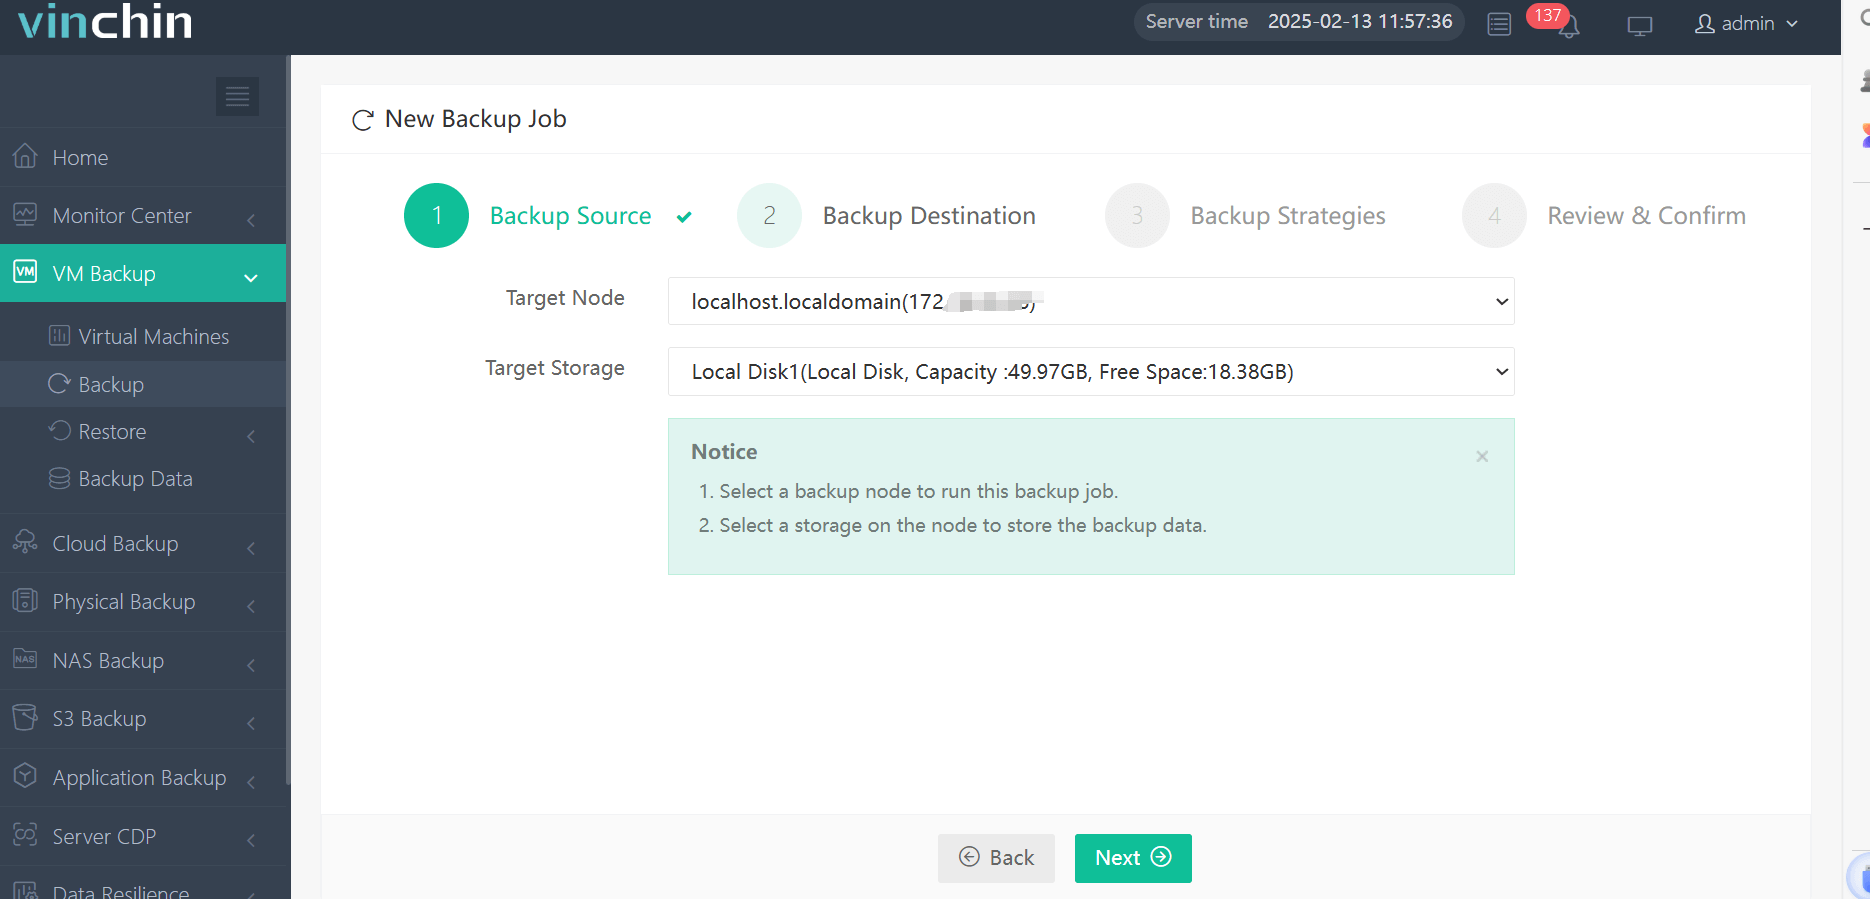
2.Then select backup destination

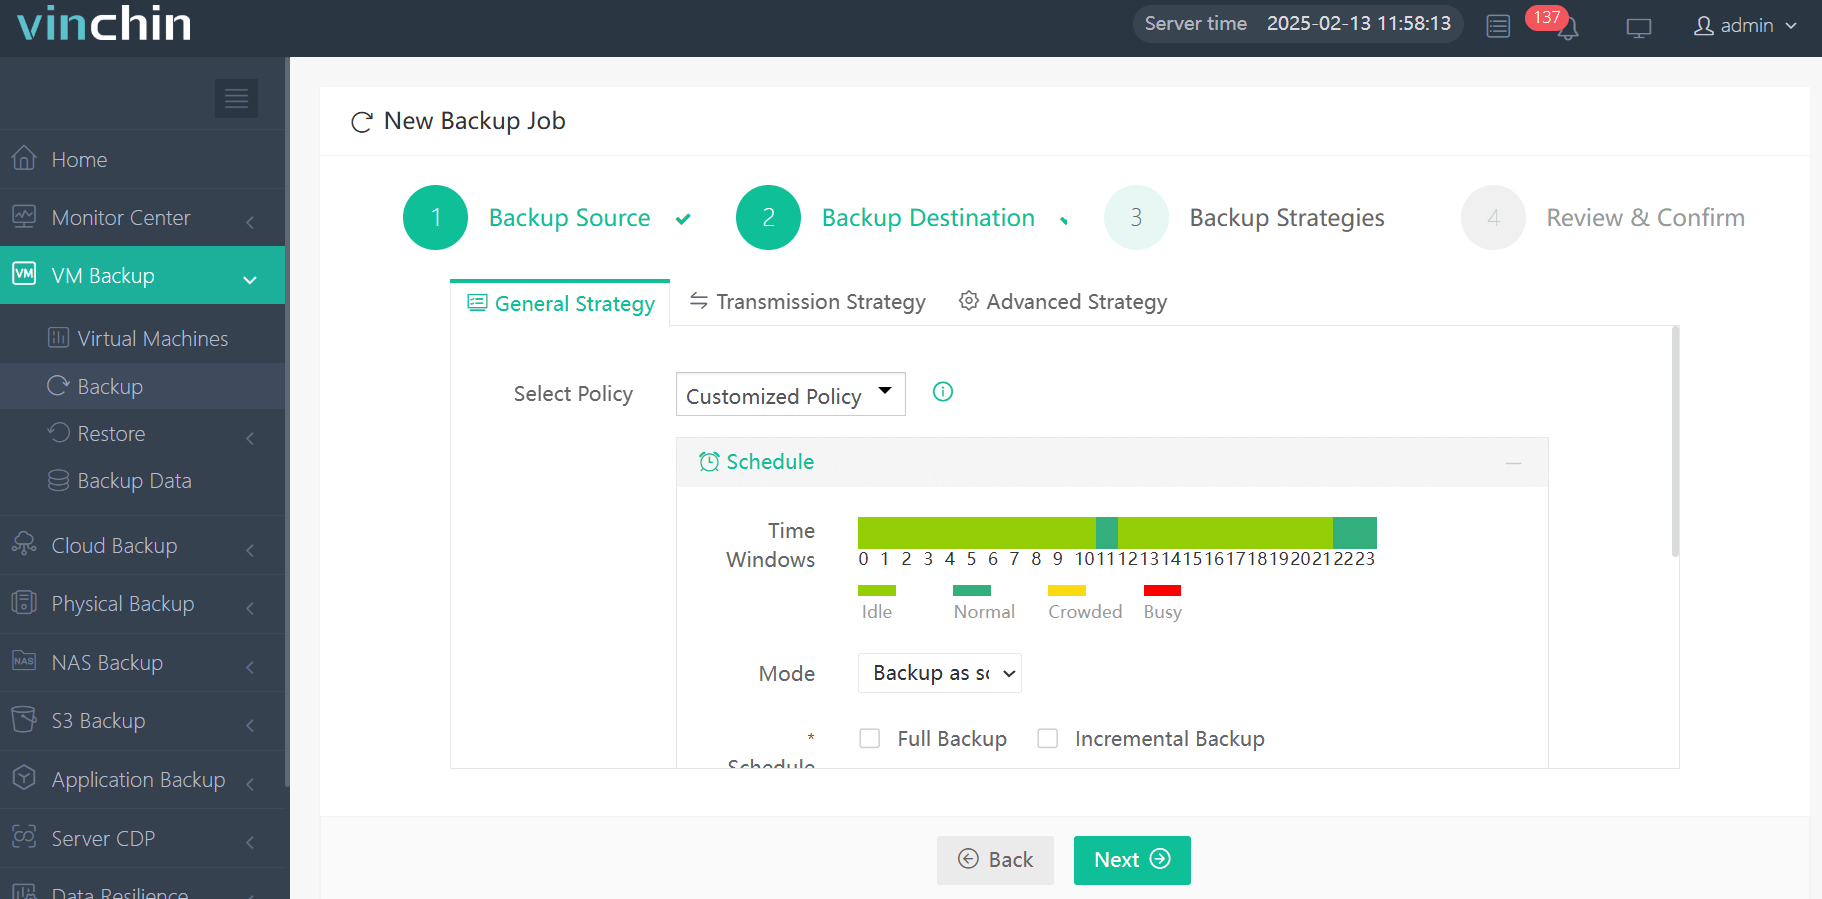
3.Select strategies

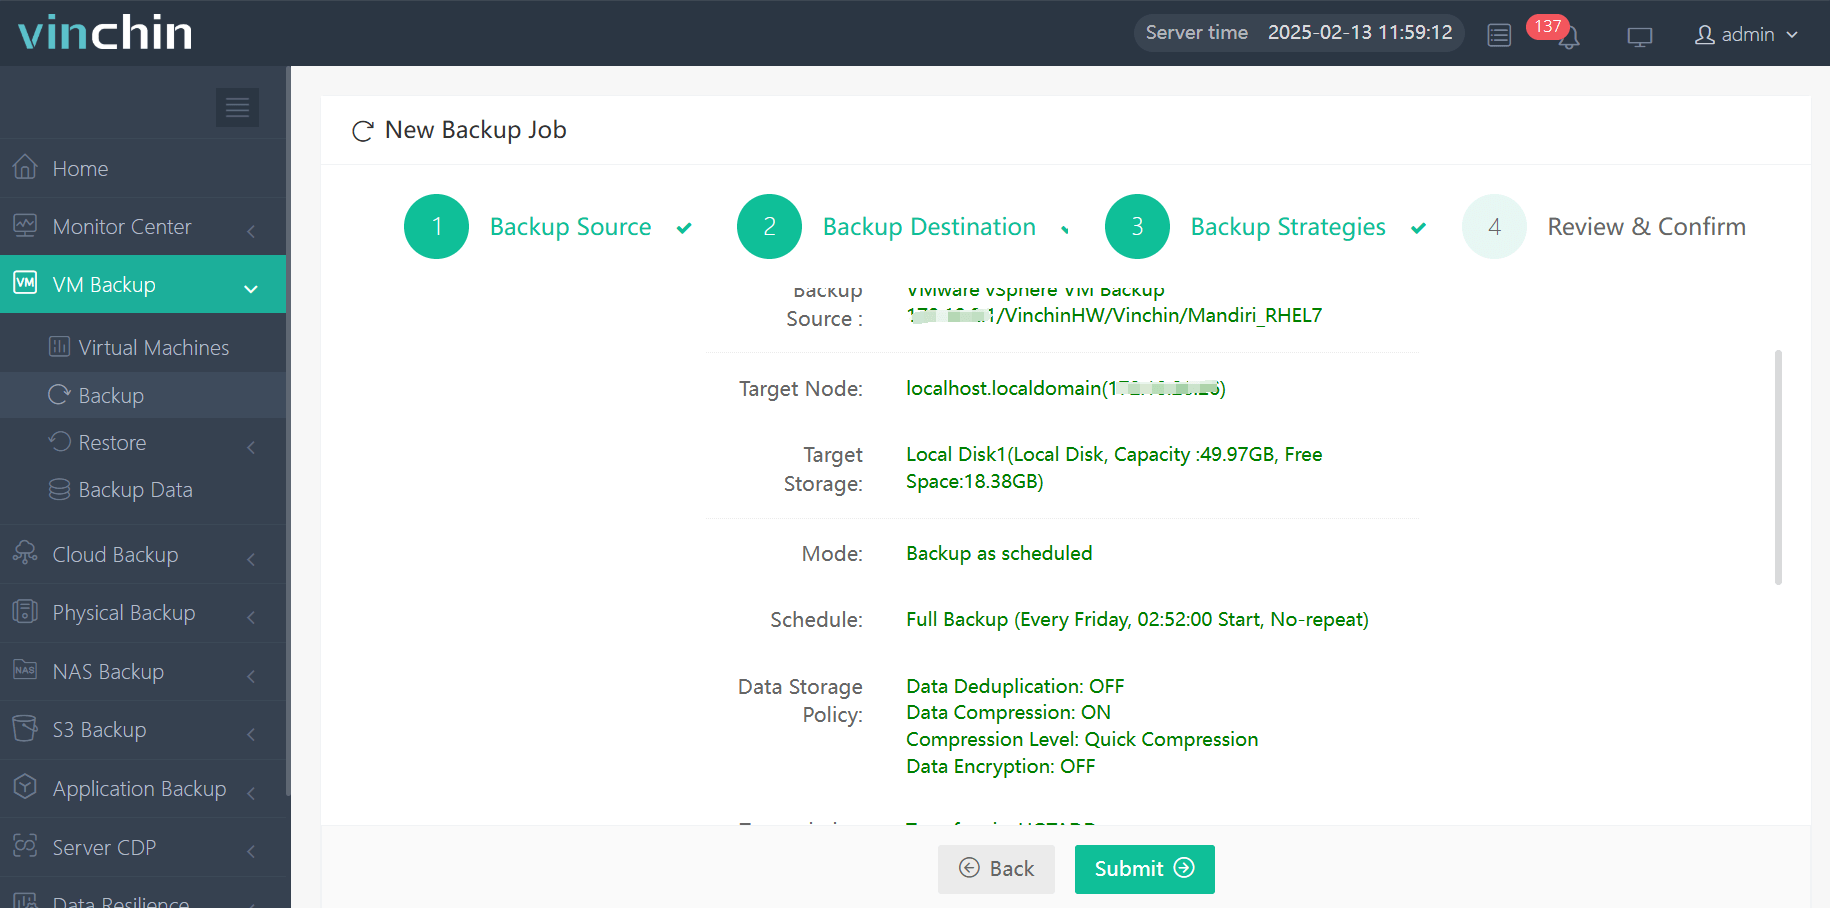
4.Finally submit the job

Vinchin offers 24/7 technical support to ensure business continuity. In addition, Vinchin offers a free 60-day trial to allow users to experience the power of its capabilities in a real-world environment. For more information, please contact Vinchin directly or your local partner.
Conclusion
Ensuring data security on Red Hat Linux servers requires selecting the right Red Hat backup method. While traditional tools like tar, dump, and dd provide reliable options, modern solutions like Vinchin Backup & Recovery offer enhanced efficiency, security, and automation for enterprise-level protection and disaster recovery.
RHEL backup and restore FAQs
Q1: Do I need to perform regular backups?
A1: It is highly recommended to perform regular backups and adjust the backup frequency according to the importance of the data. You can set up a cron job to automate the backup task.
Q2: Can I backup to cloud storage?
A2: Yes, you can send backups to cloud storage services such as Amazon S3, Google Cloud Storage, etc. This not only provides an extra layer of security, but also ensures that the backup data is accessible even if the local storage is corrupted.
Share on:


