-
Backup Amazon EC2 Instance
-
Restore Amazon EC2 Instance
You will learn how to easily backup and restore Amazon EC2 instance with Vinchin Backup & Recovery here. With a comprehensive suite of built-in advanced backup and restore features, Vinchin provides the most user-friendly, fully functional, and cost-optimized cloud data protection solution, ensuring the security of your mission-critical business data in the cloud.
To backup Amazon EC2 instance agentlessly, you need to add the host first.
Just click Resources > Infrastructure > Cloud Platform. Click Add.
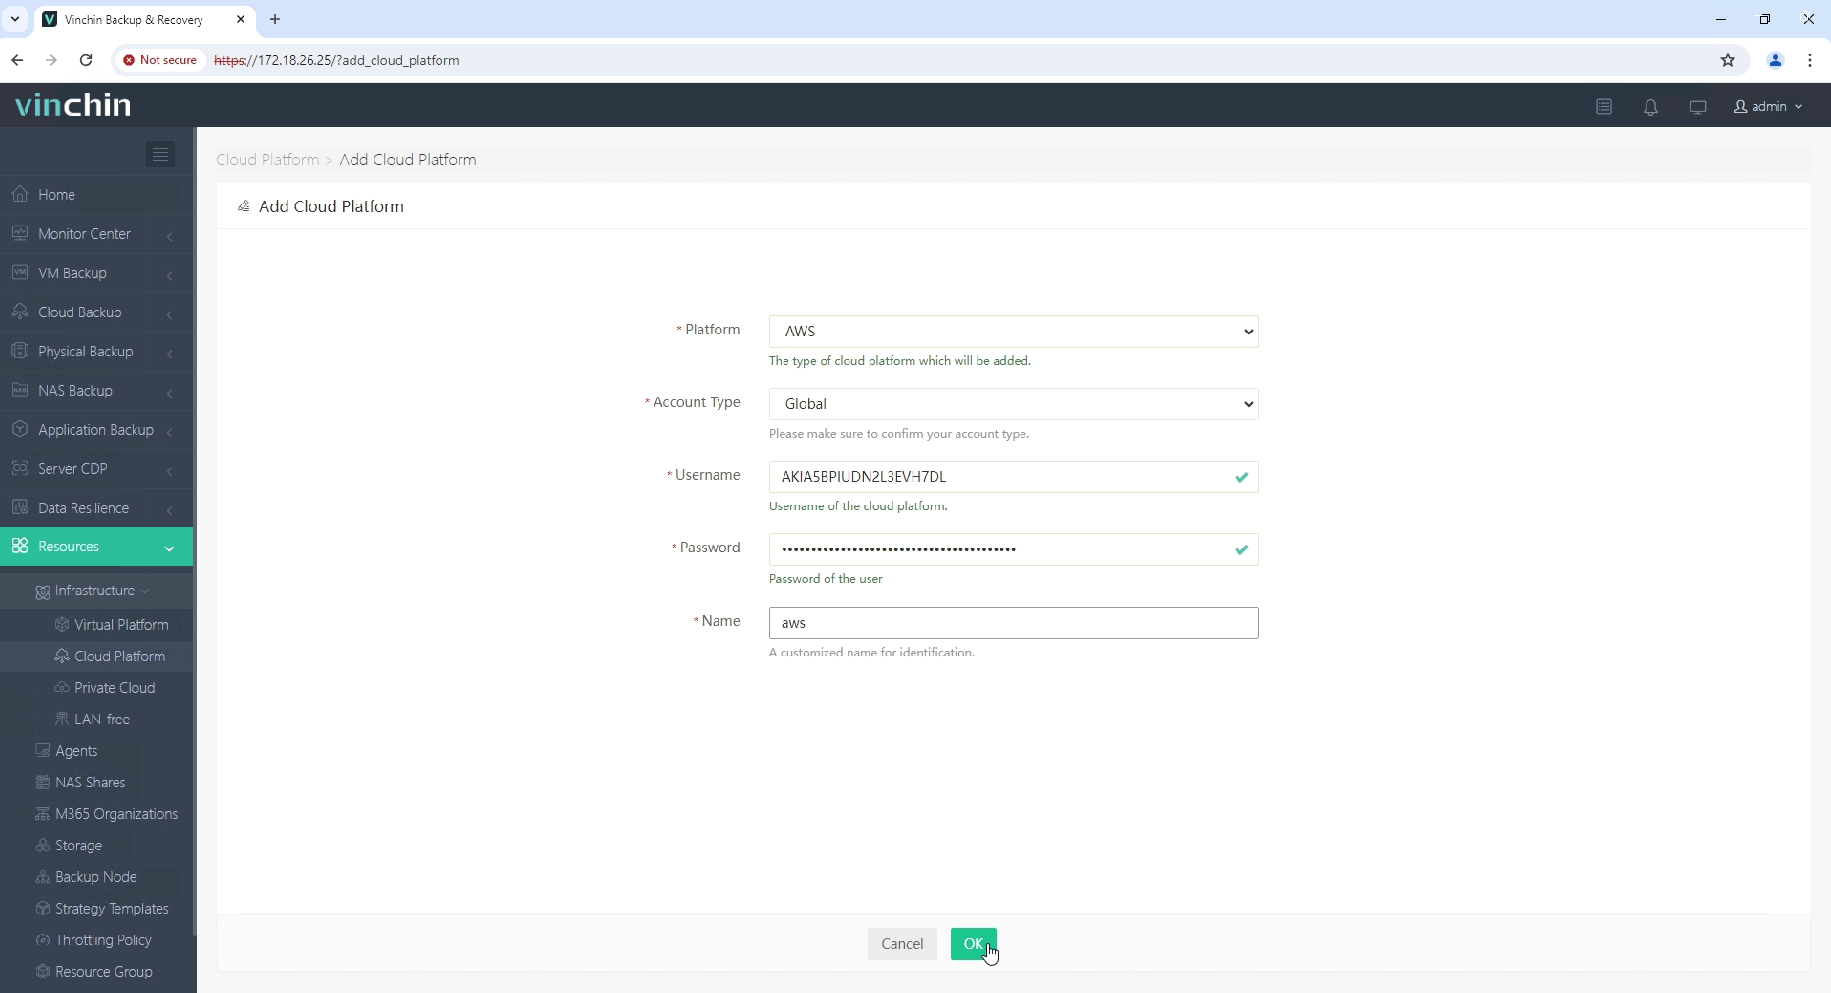
Field with credentials of AWS IAM, and then click License to finish configuration.
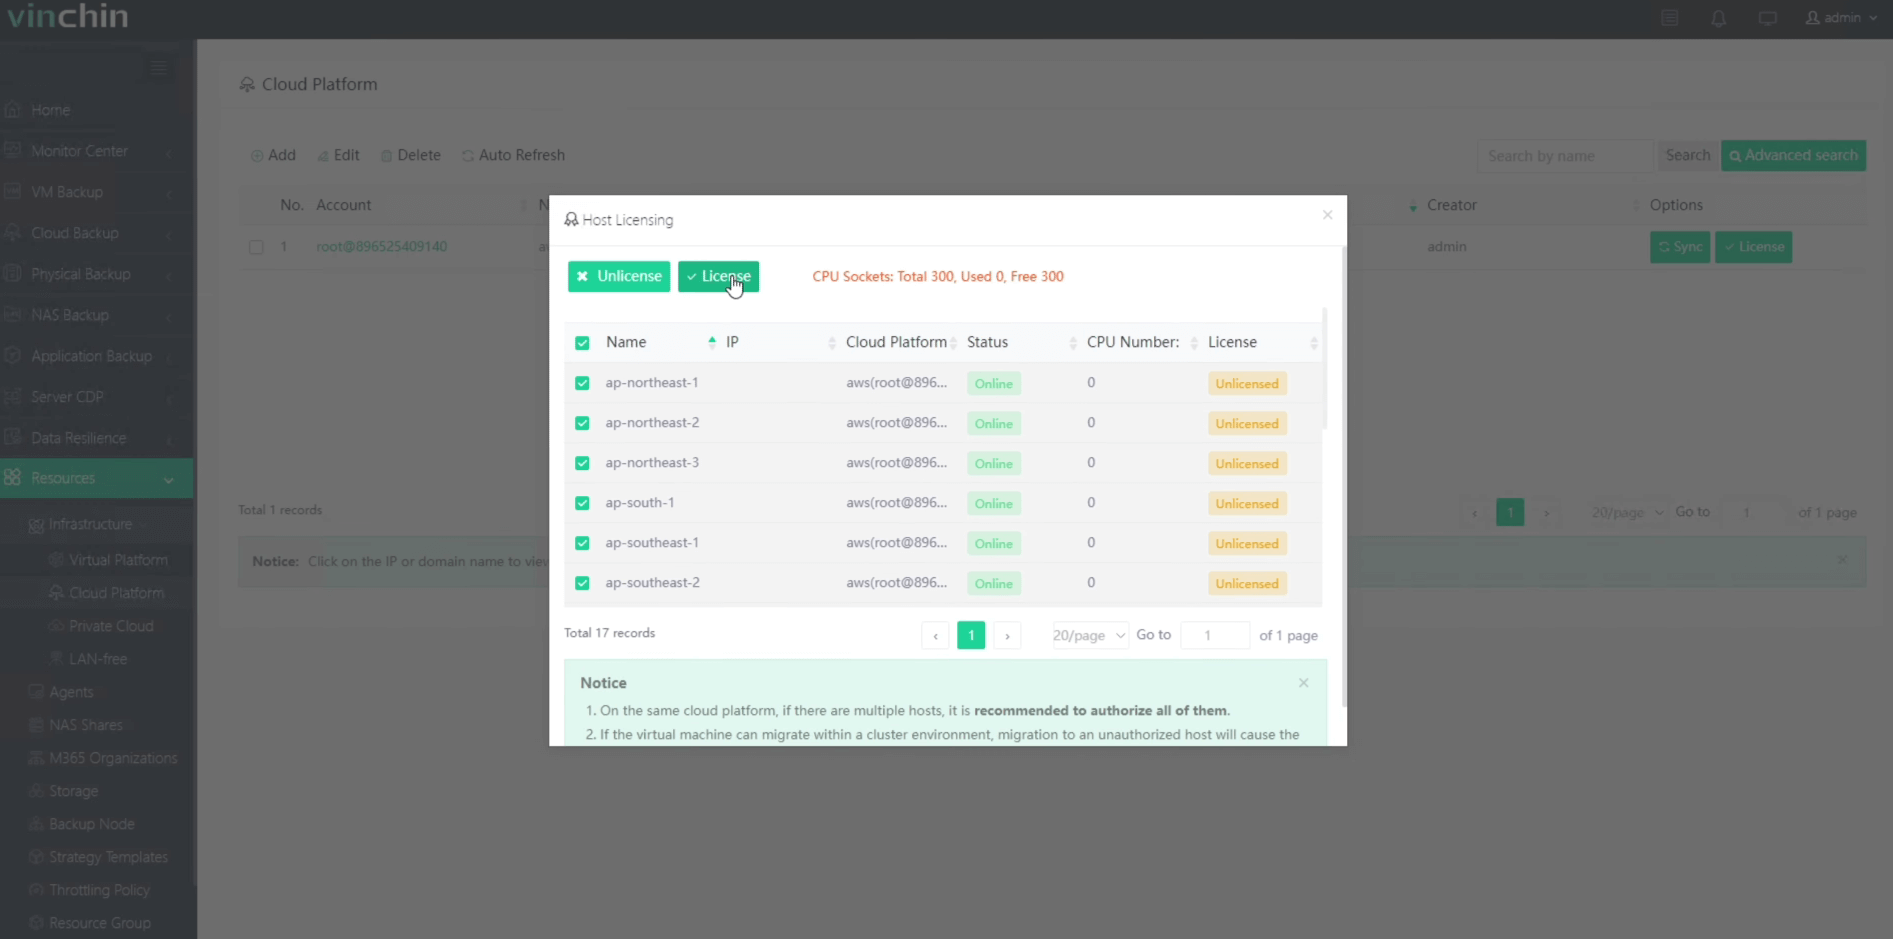
Now you can create backup jobs for EC2 instance.
Backup Amazon EC2 Instance
Go to Cloud Backup > Backup page.
Step 1. Select Backup Source
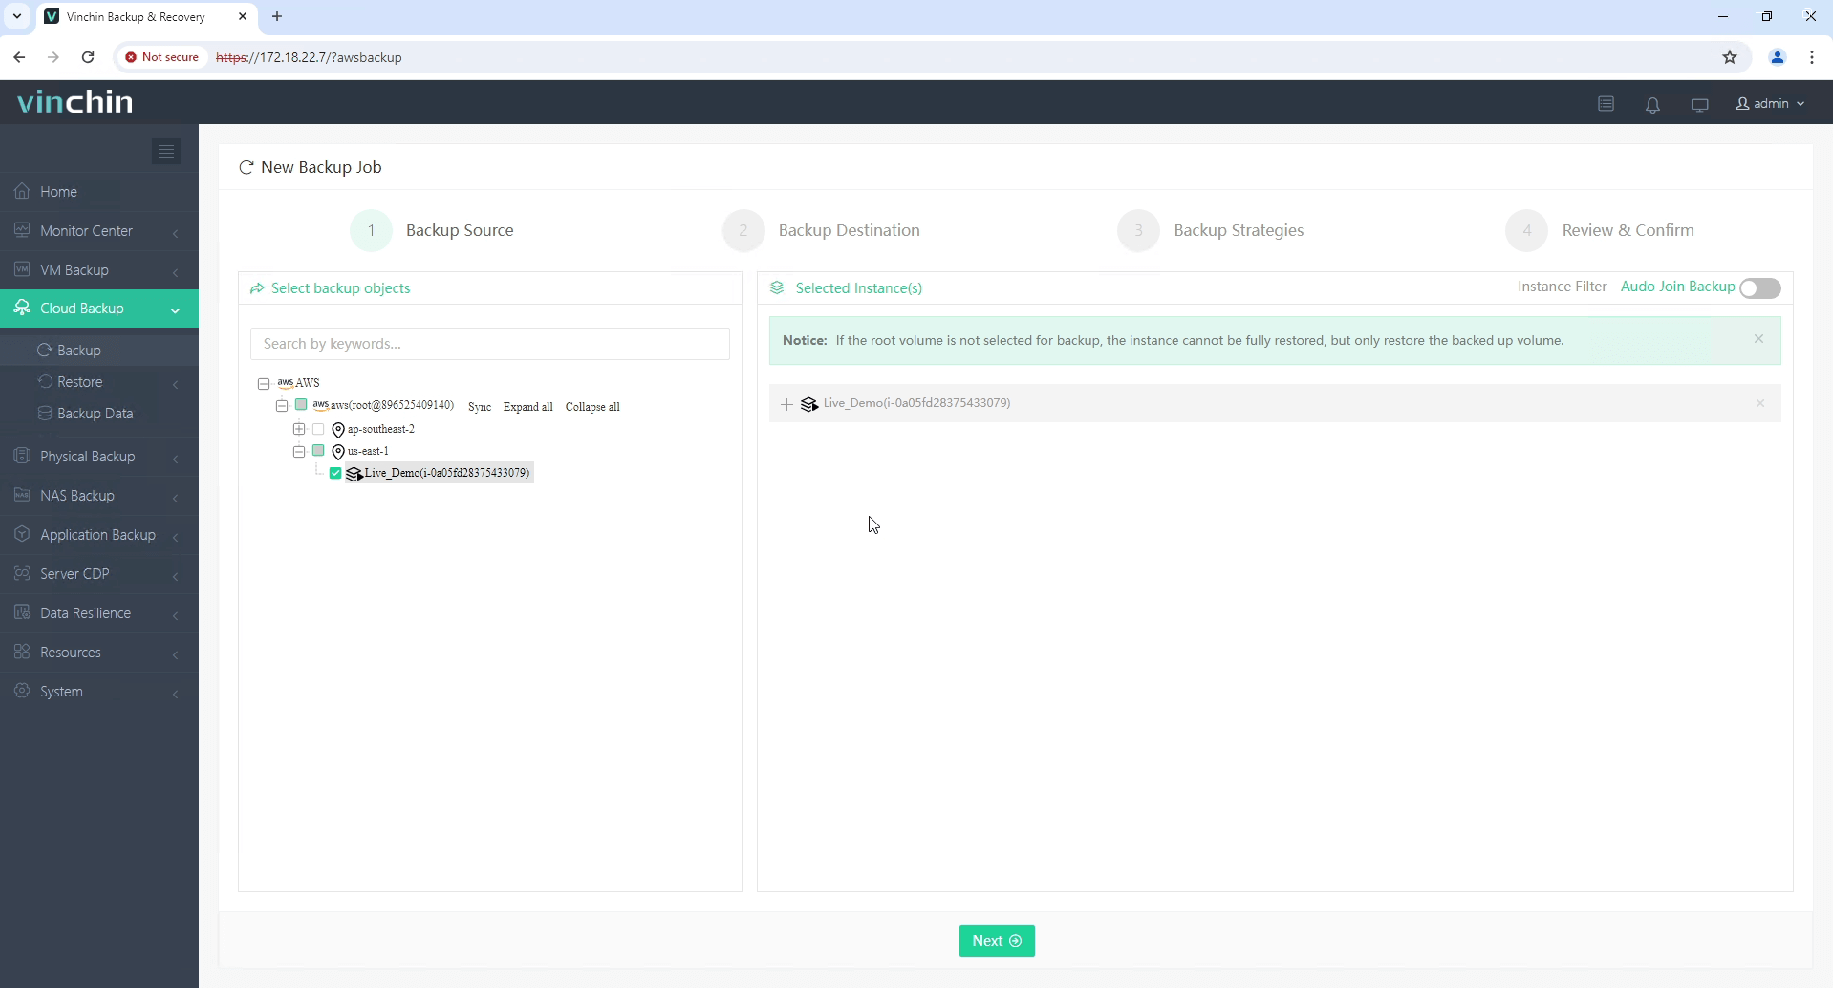
Here you can click a EC2 instance to backup. For multiple instances on the host, you can select a group of instances to backup to add them to the list on the right. After adding the instances which you want to backup, click Next.
Step 2. Select Backup Destination
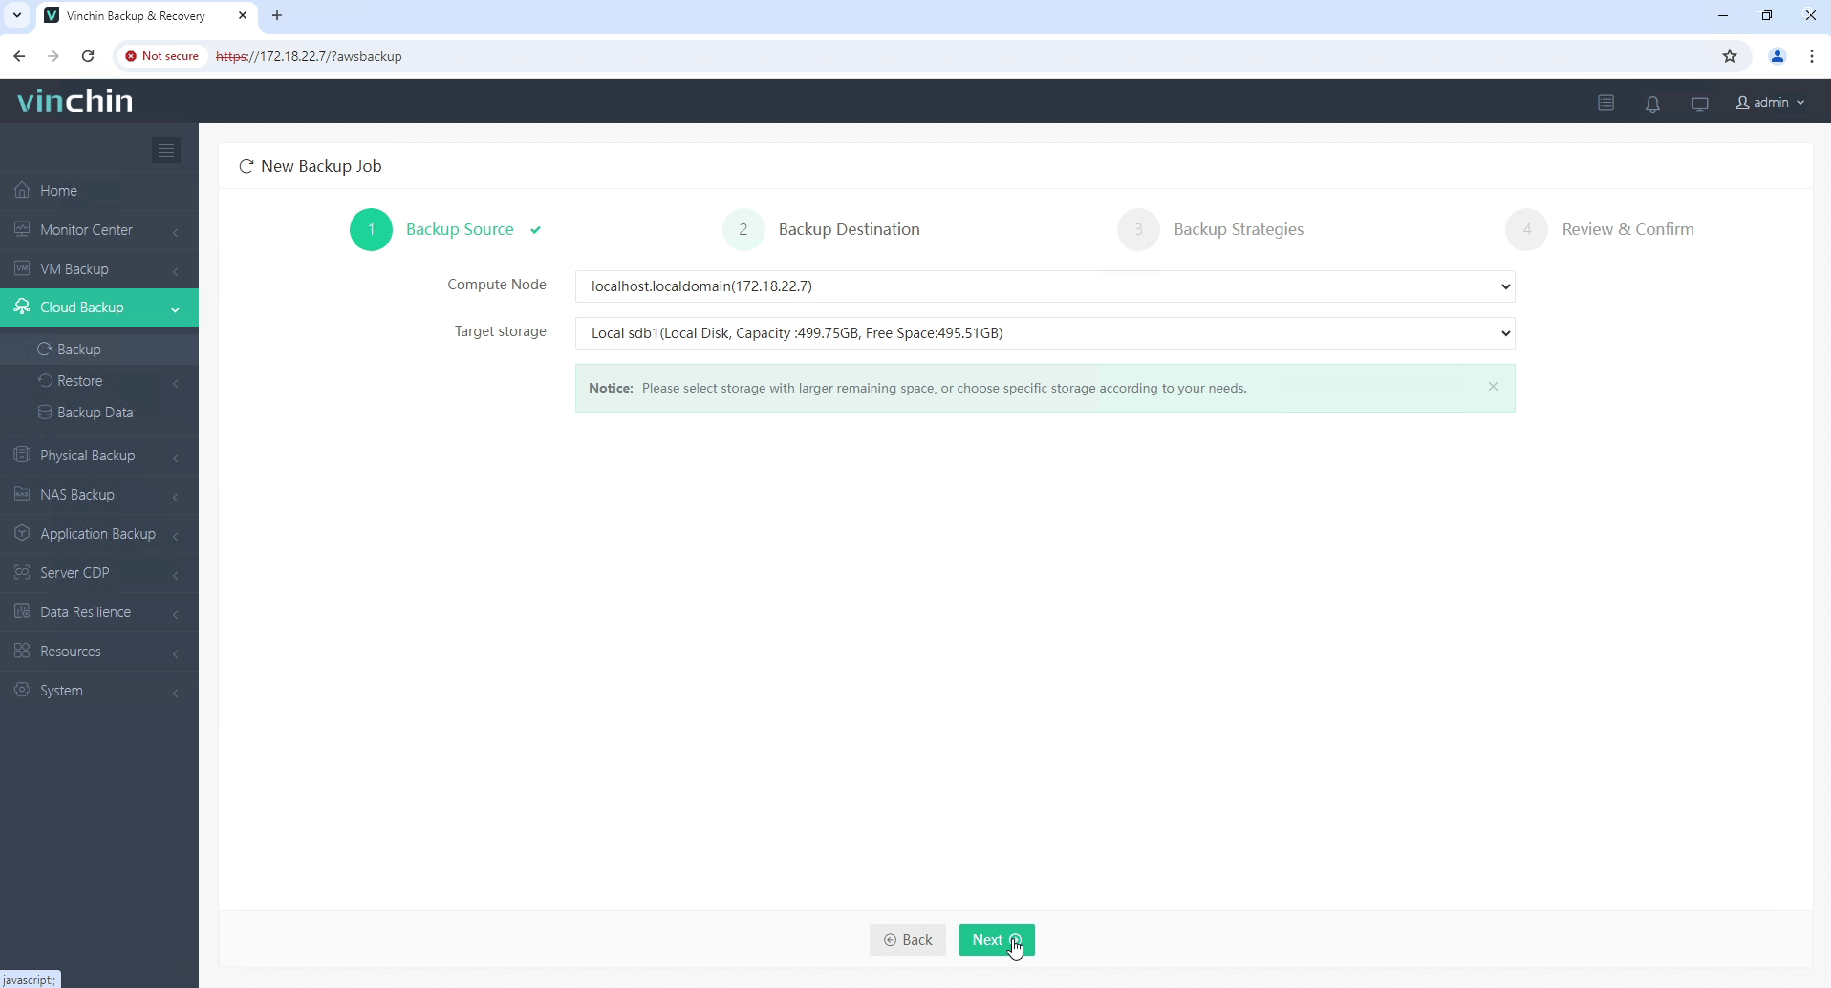
Select a Compute Node to run this backup job and then select the Target Storage for the EC2 instance backup. Click Next.
Step 3. Select Backup Strategies
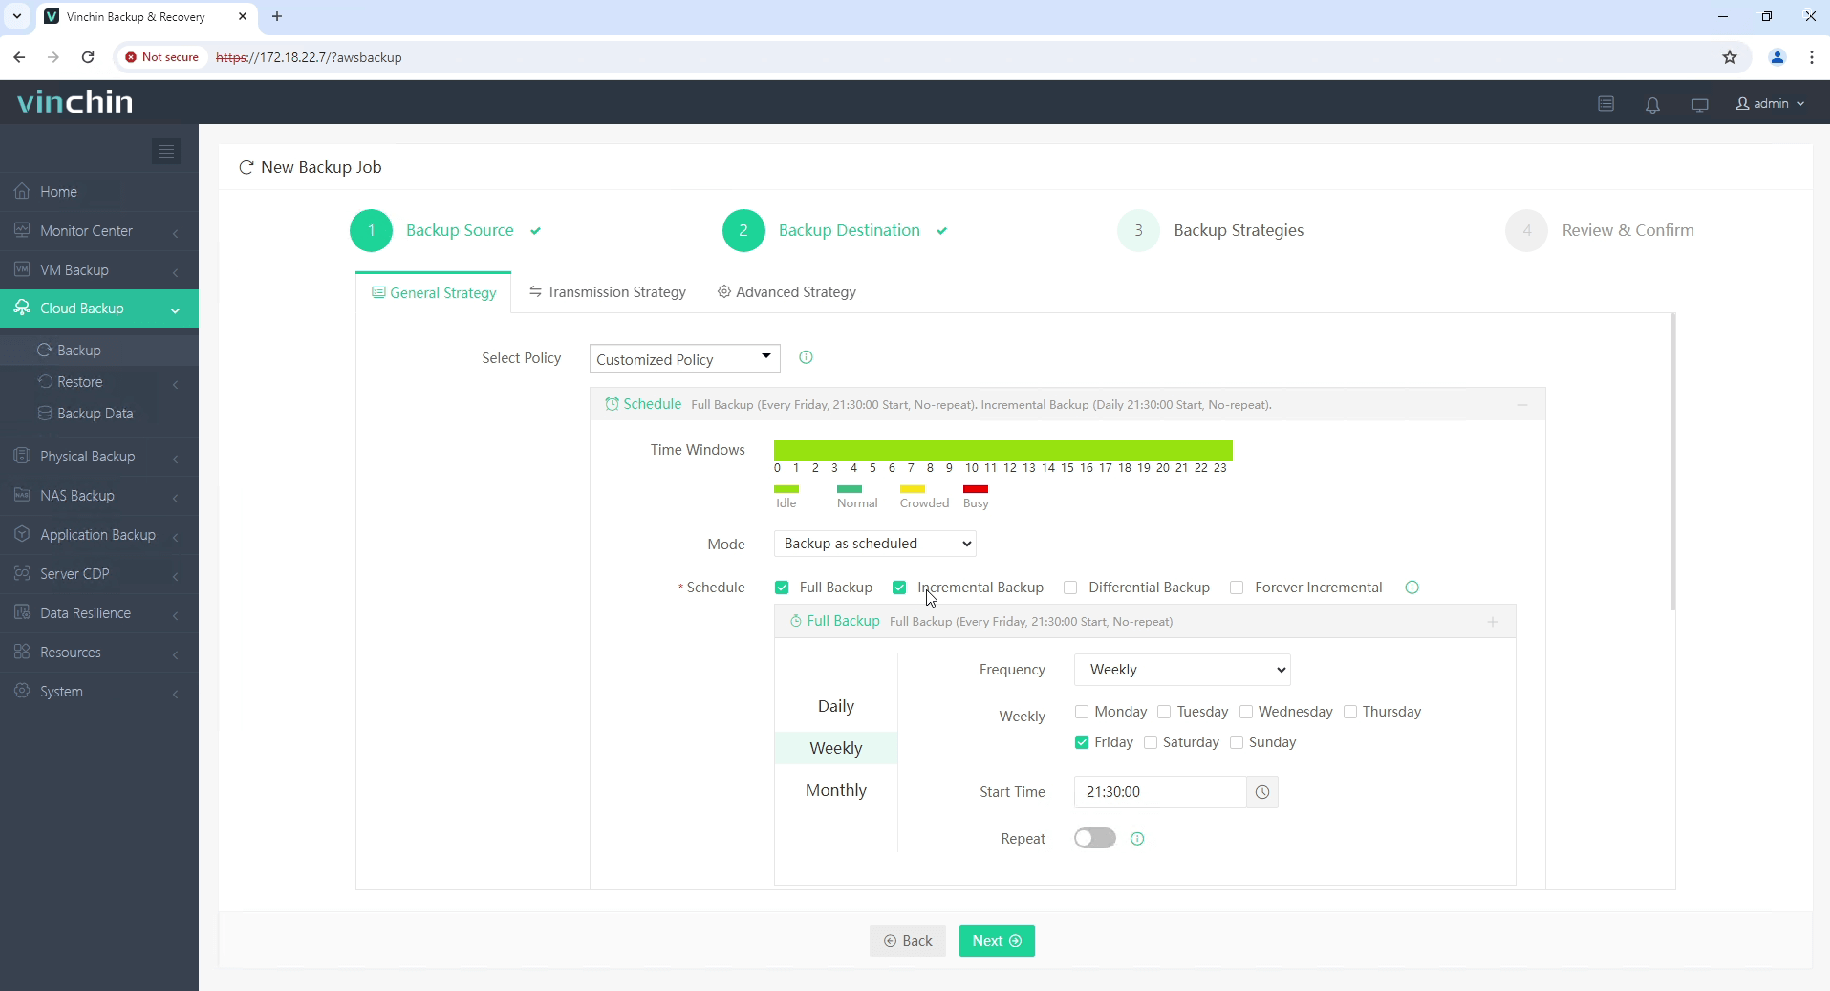
In Schedule, you can choose Backup as scheduled or Once-off backup. Backup as scheduled will automatically backup the selected instances at a specific time, and Once-off backup will backup the instances only once.
For scheduled backups, you can choose a daily, weekly or monthly schedule. You can also choose incremental or differential combinations of backups.
You can also set up throttling policy to control system resource usage during backup.
In Data Storage Policy, you can enable Data Deduplication and Data Compression to reduce the size of backup files. You can set up compression level according to your needs.
In Retention Policy, Vinchin allows you to retain backup files by the Number of Restore Points or the Number of Days.
Also, you can activate the advanced GFS Retention for your instance backups to apply long-term retention policy of some specific full restore points.
BitDetector is Vinchin’s unique technology. Enabling BitDetector will help reduce the size of backup files by excluding swap files and unpartitioned spaces.
In Transmission Strategy, you can set up transmission strategy, select the proxy instance type according to your needs.
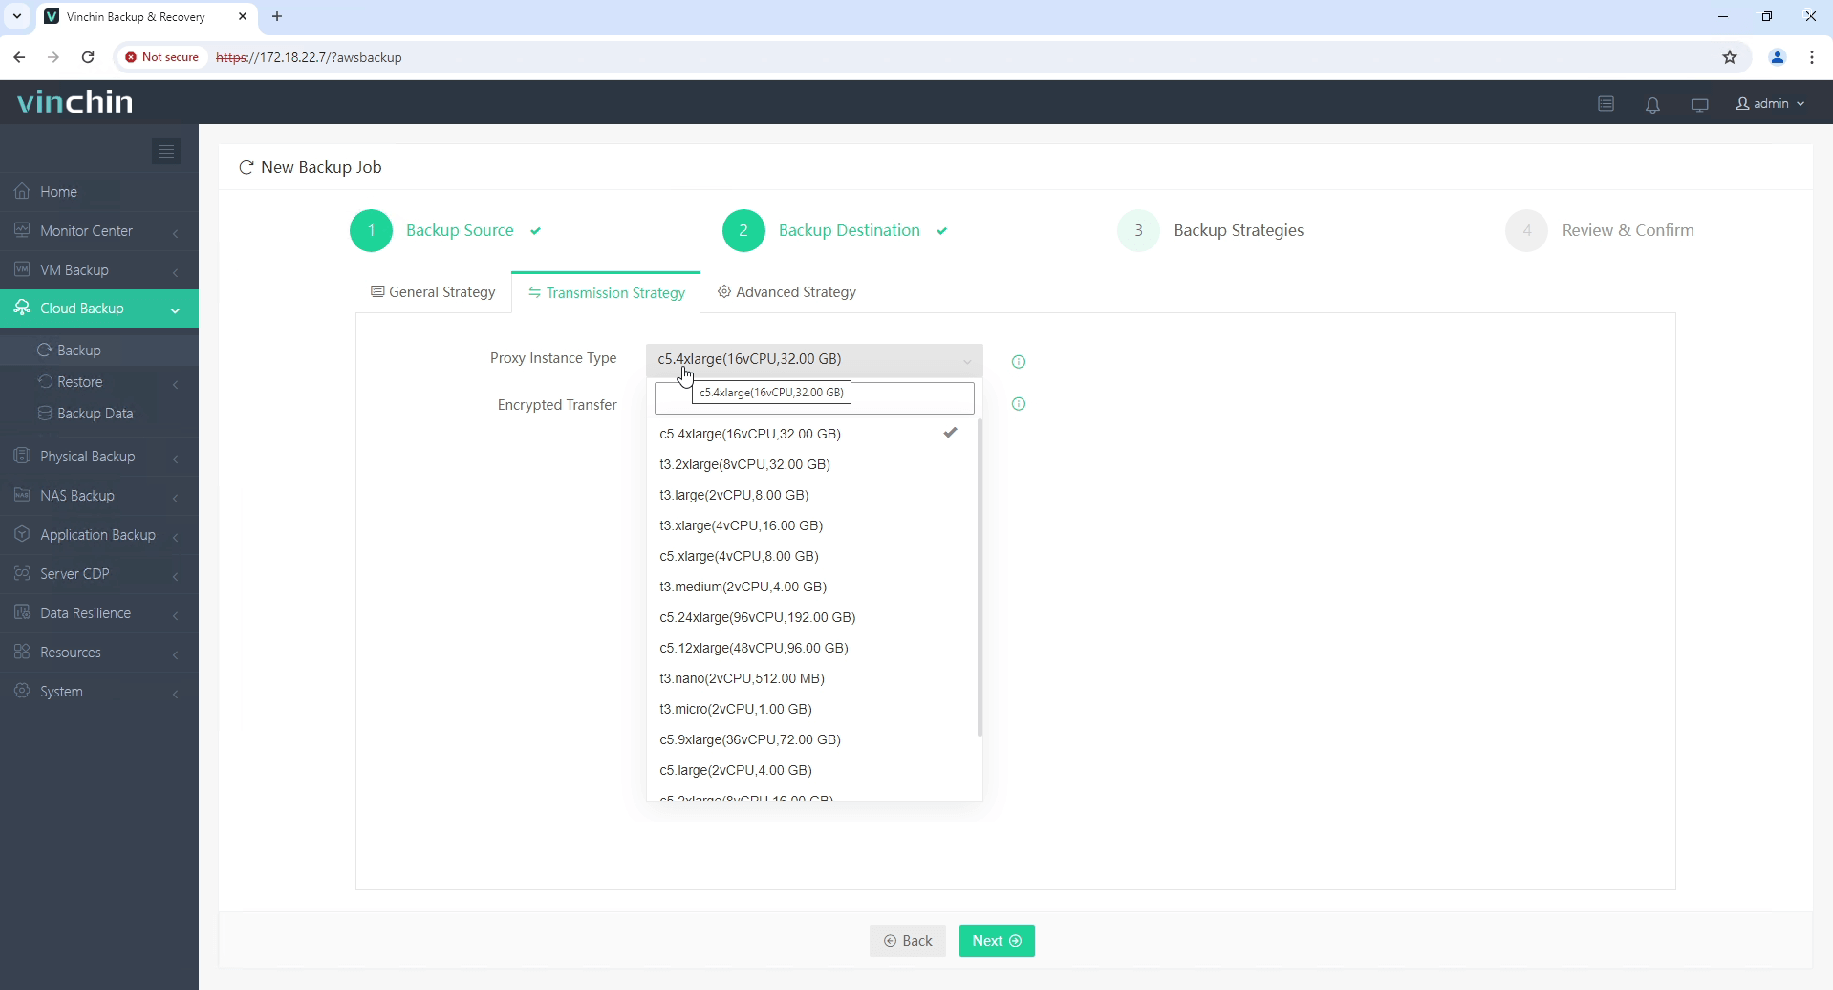
After configuring all the backup strategies, click Next.
Step 4. Review and submit the job
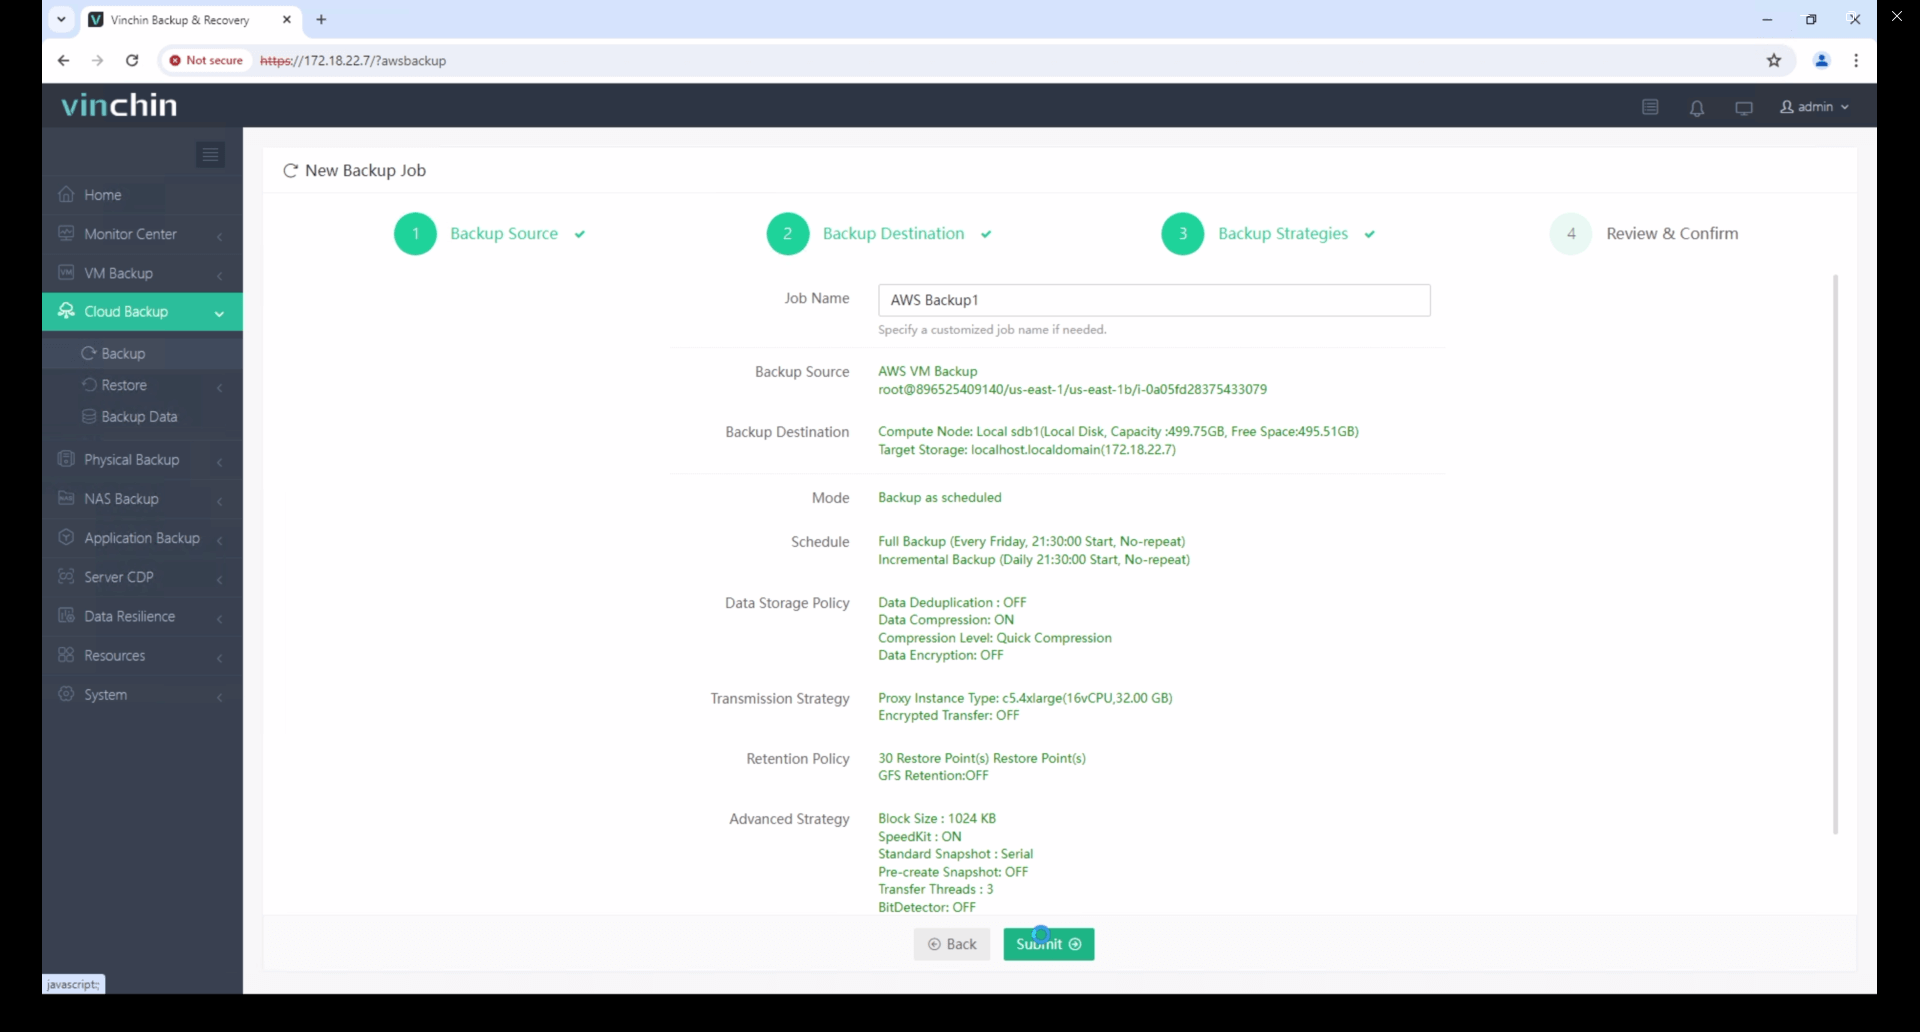
You will be redirected to the Jobs page of Monitor Center. The created backup job will be listed here and you can start job manually, then click job name to monitor the job in real time.
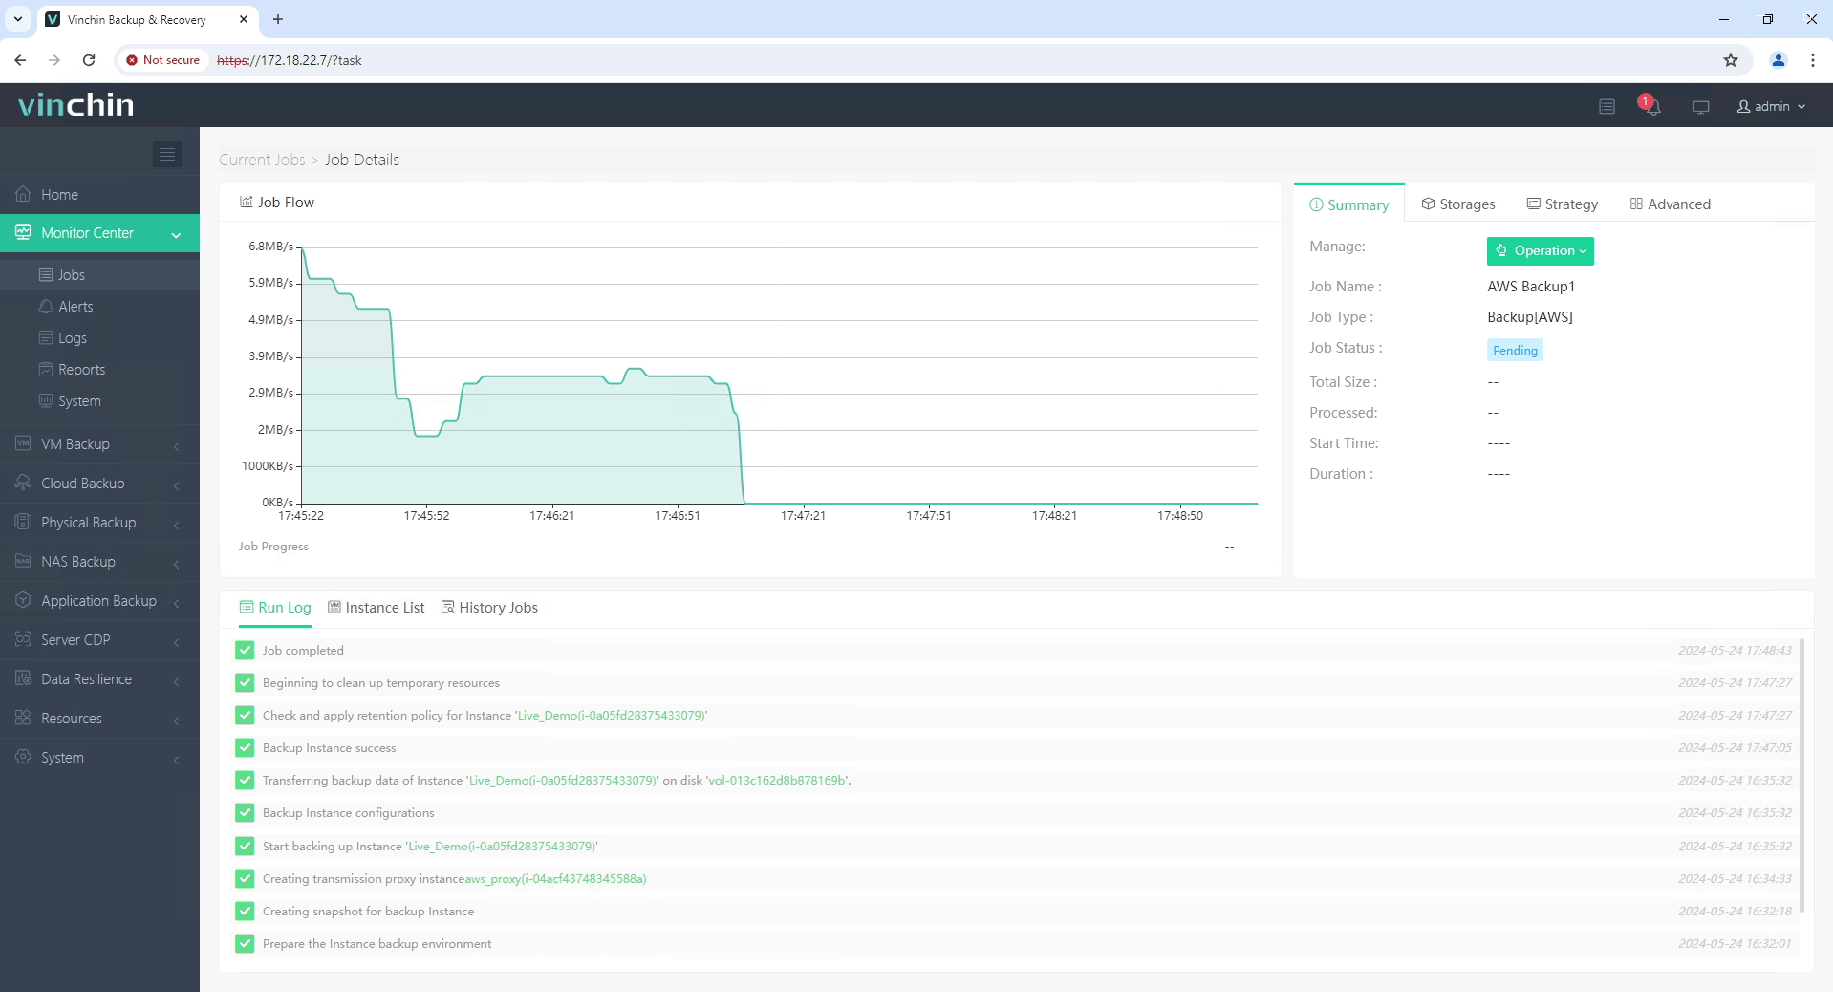
Here, you can see the EC2 instance has been successfully backed up.
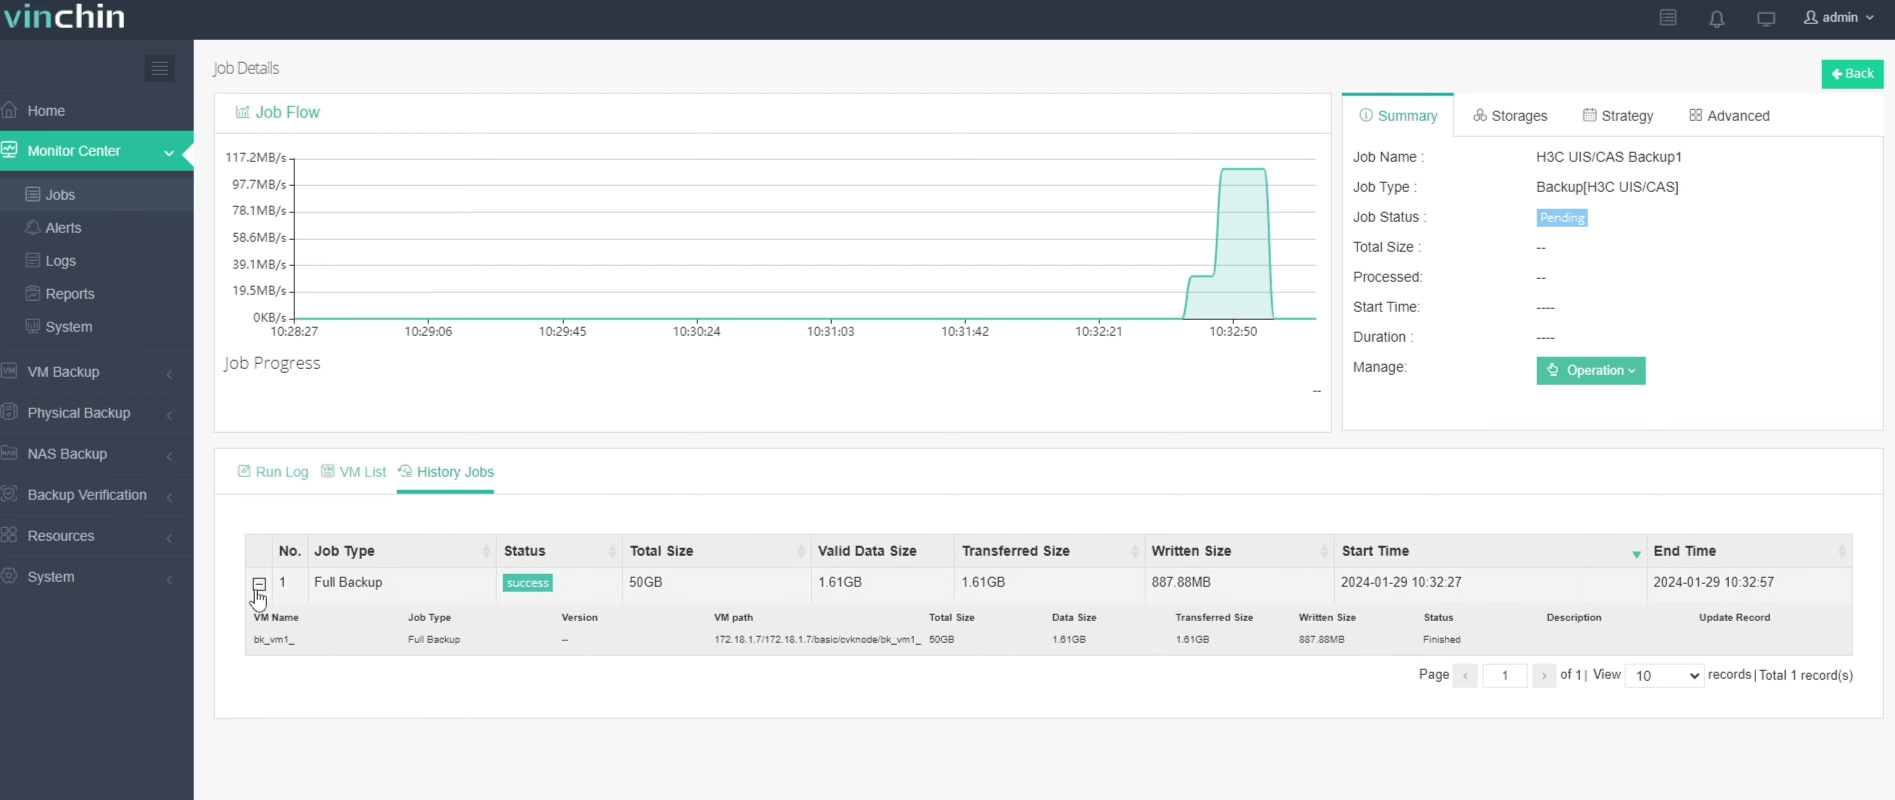
Restore Amazon EC2 Instance
When you need to restore the instance, go to Cloud Backup > Restore page
Step 1. Select Restore Point
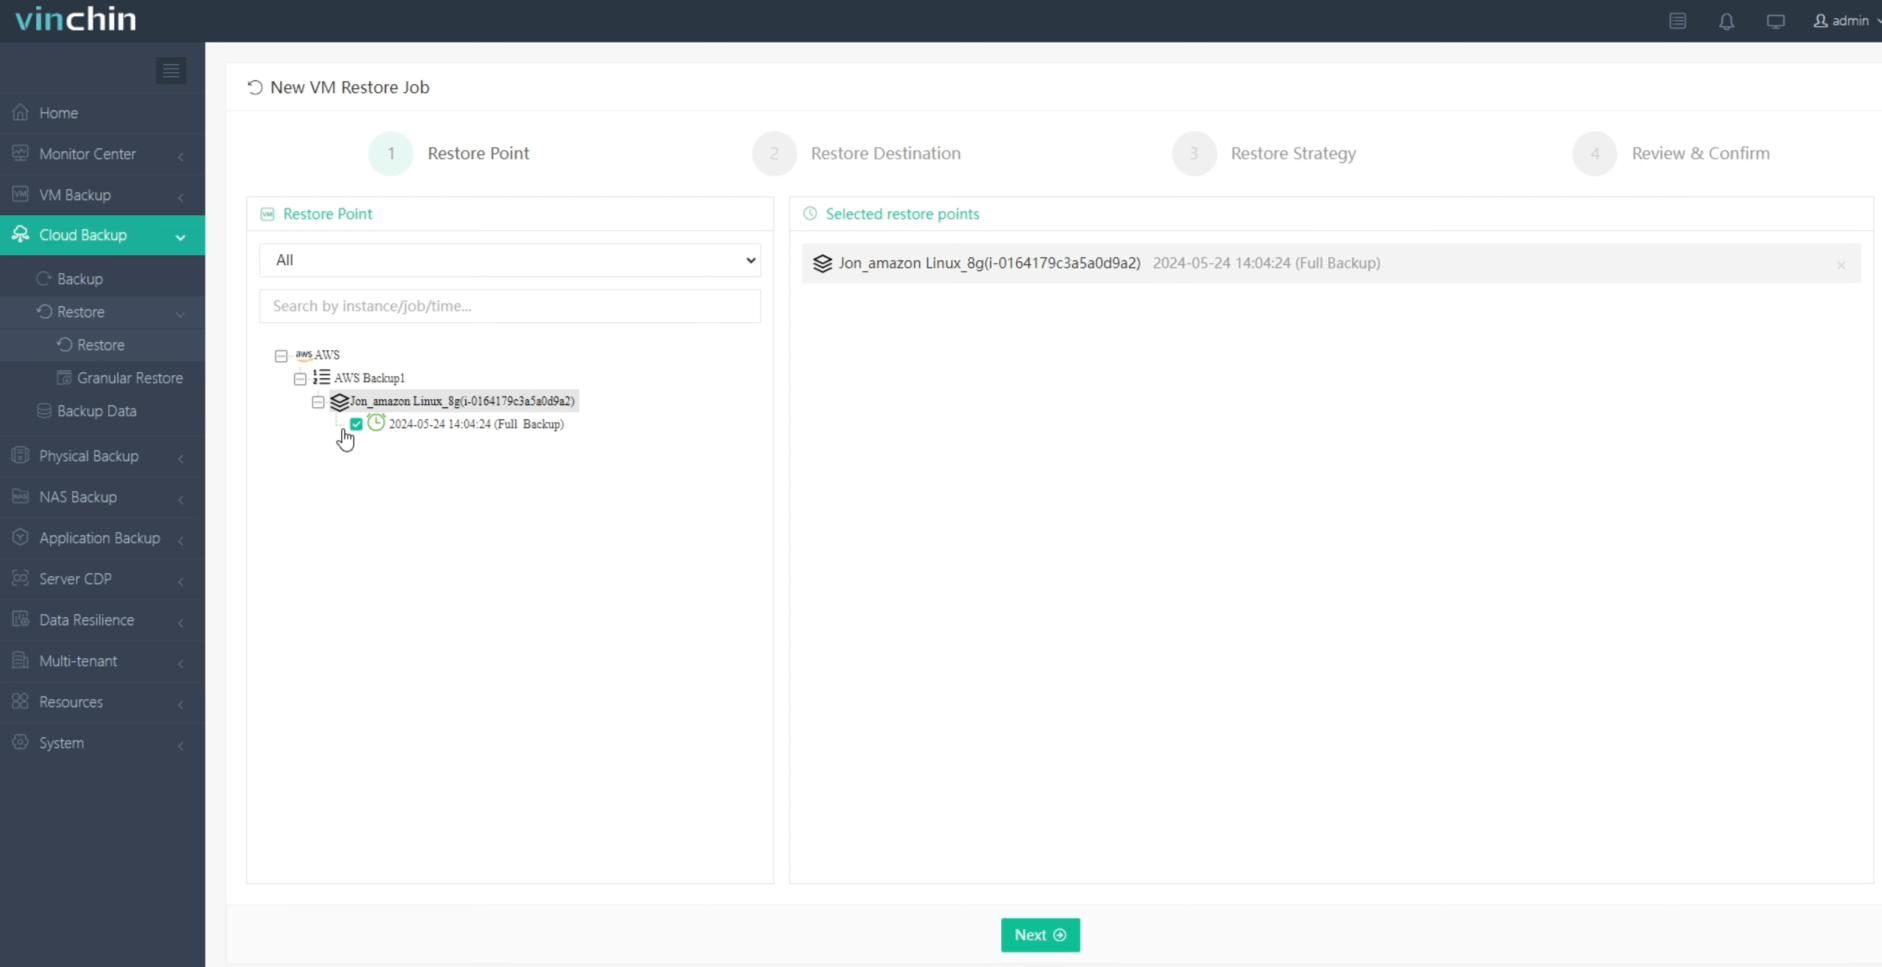
In the list, you can see all the available restore points. Just select the AWS restore point you want to restore, and click Next.
Step 2. Select Restore Destination
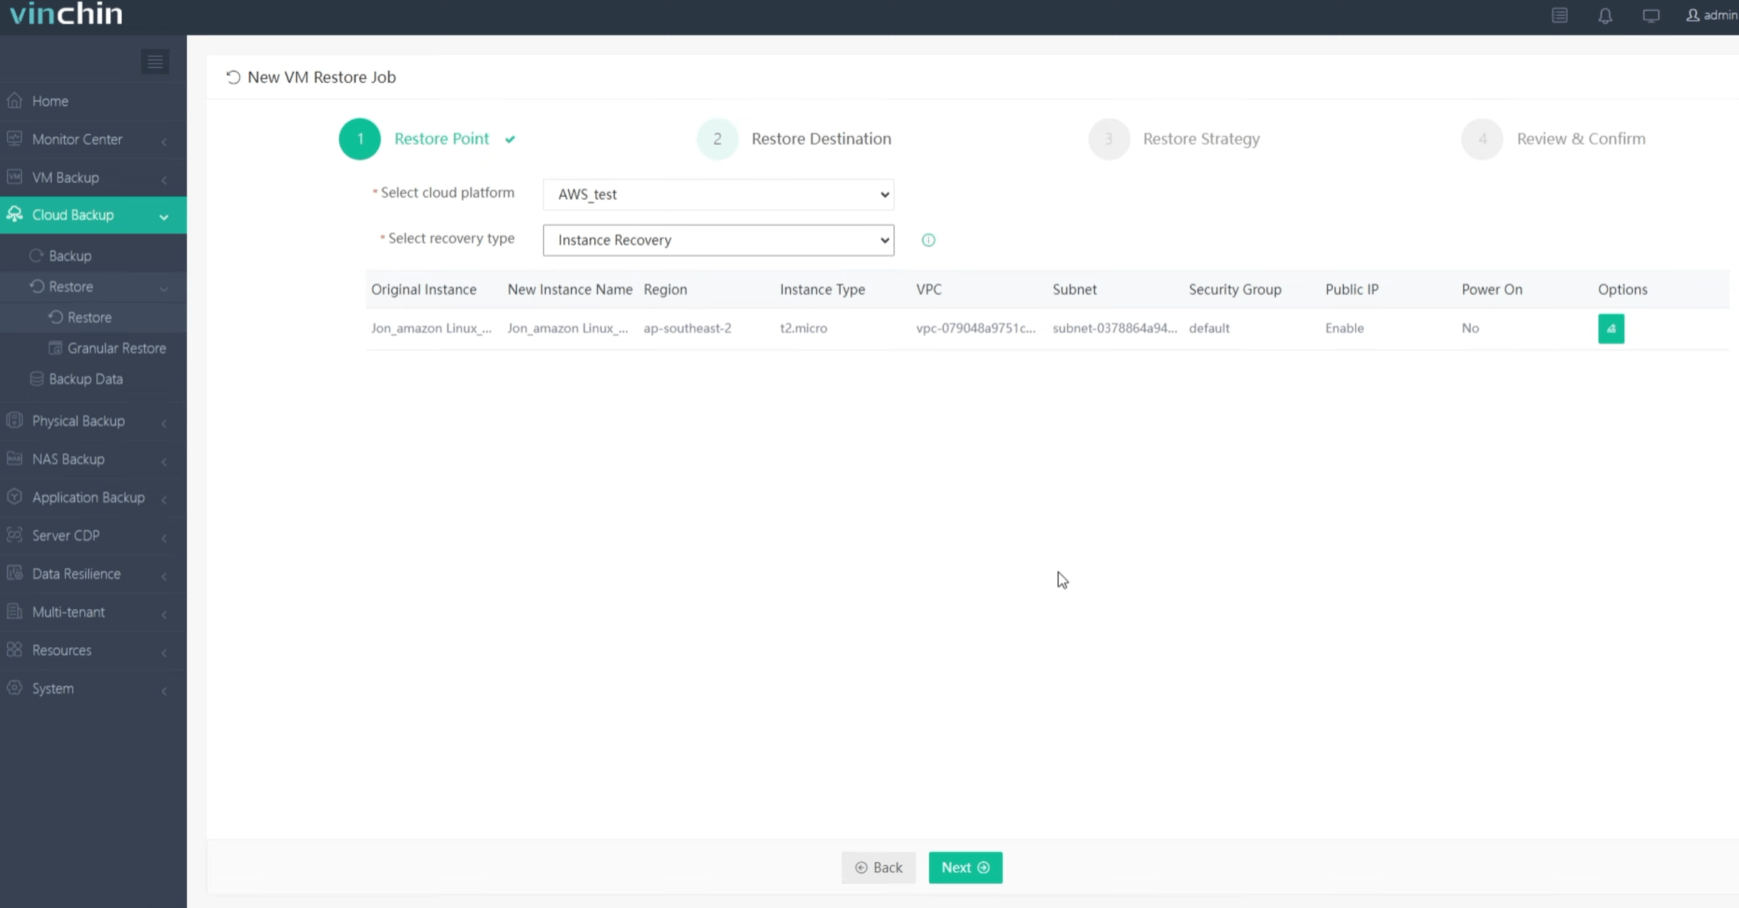
Select a cloud platform where to run the restored instance. You can also select Instance Recovery or Volume Recovery. Then click Next.
Step 3. Select Restore Strategies
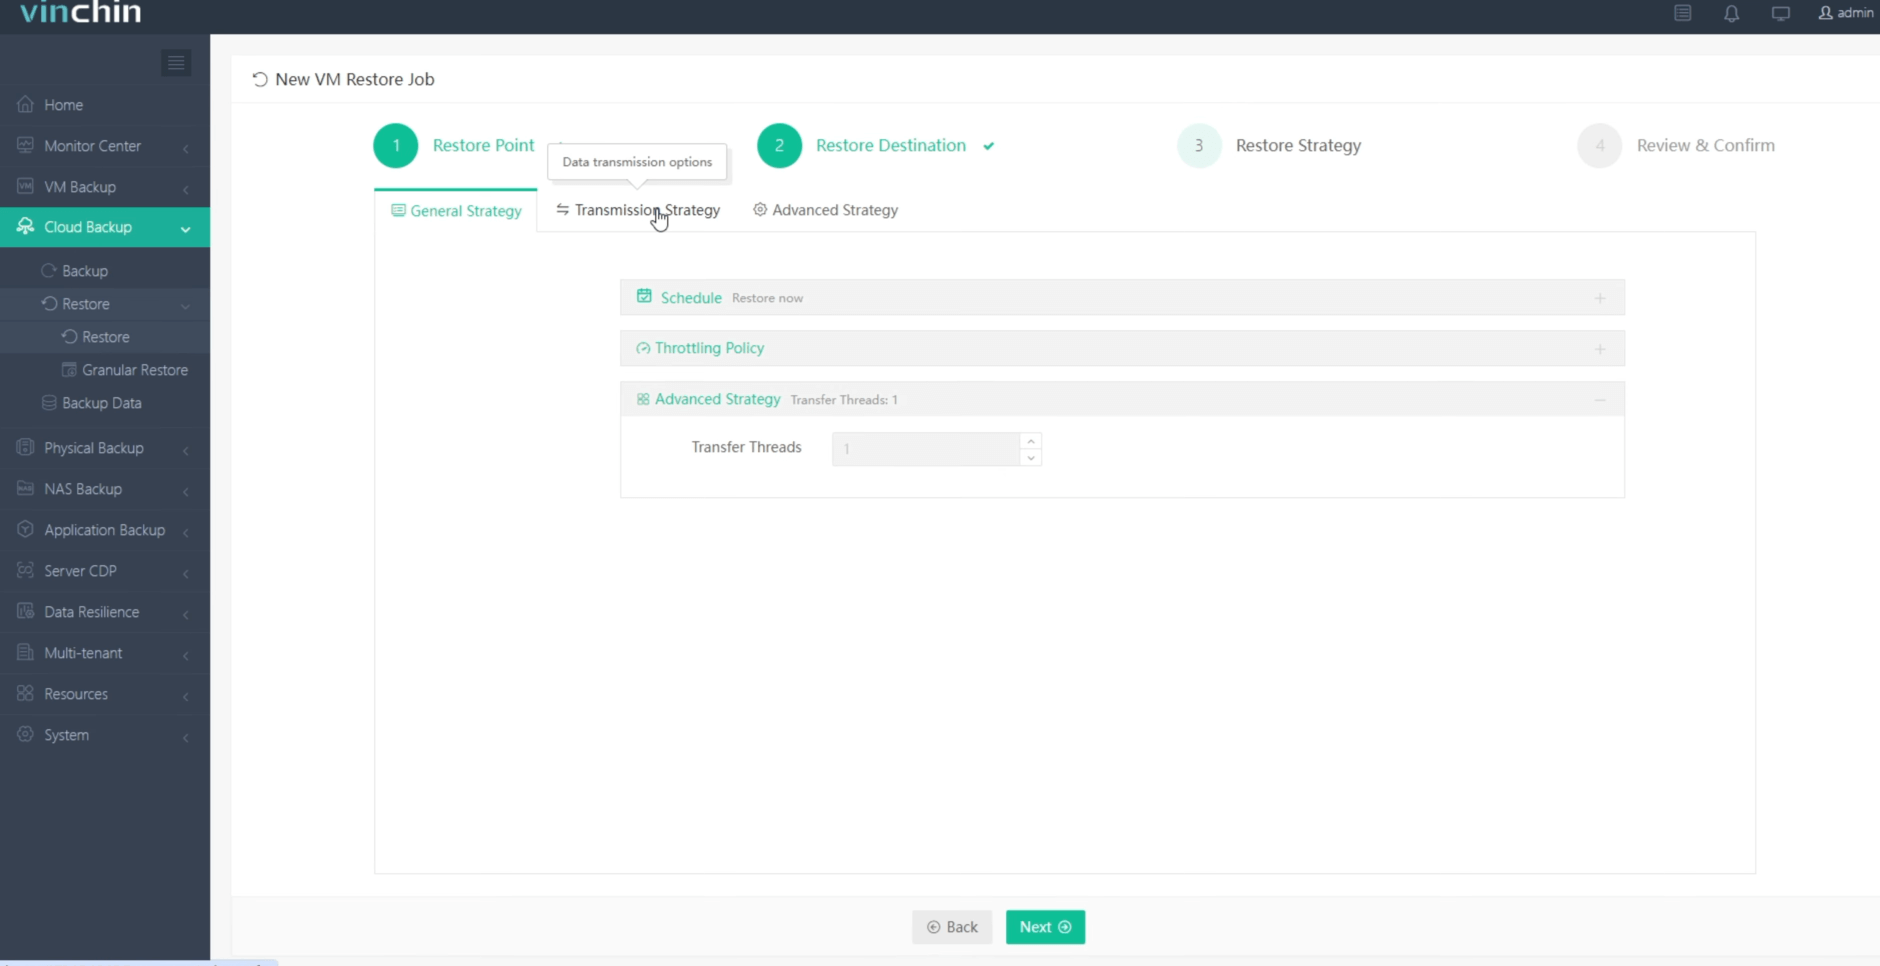
In Schedule, you can choose Restore as Scheduled or Once-off Restore. Restore as scheduled will automatically restore the instance at a specific time, and Once-off Restore will restore the instance only once. You can choose transmission strategy as well.
After configuring all recovery policies, click Next.
Step 4. Review and submit the job.
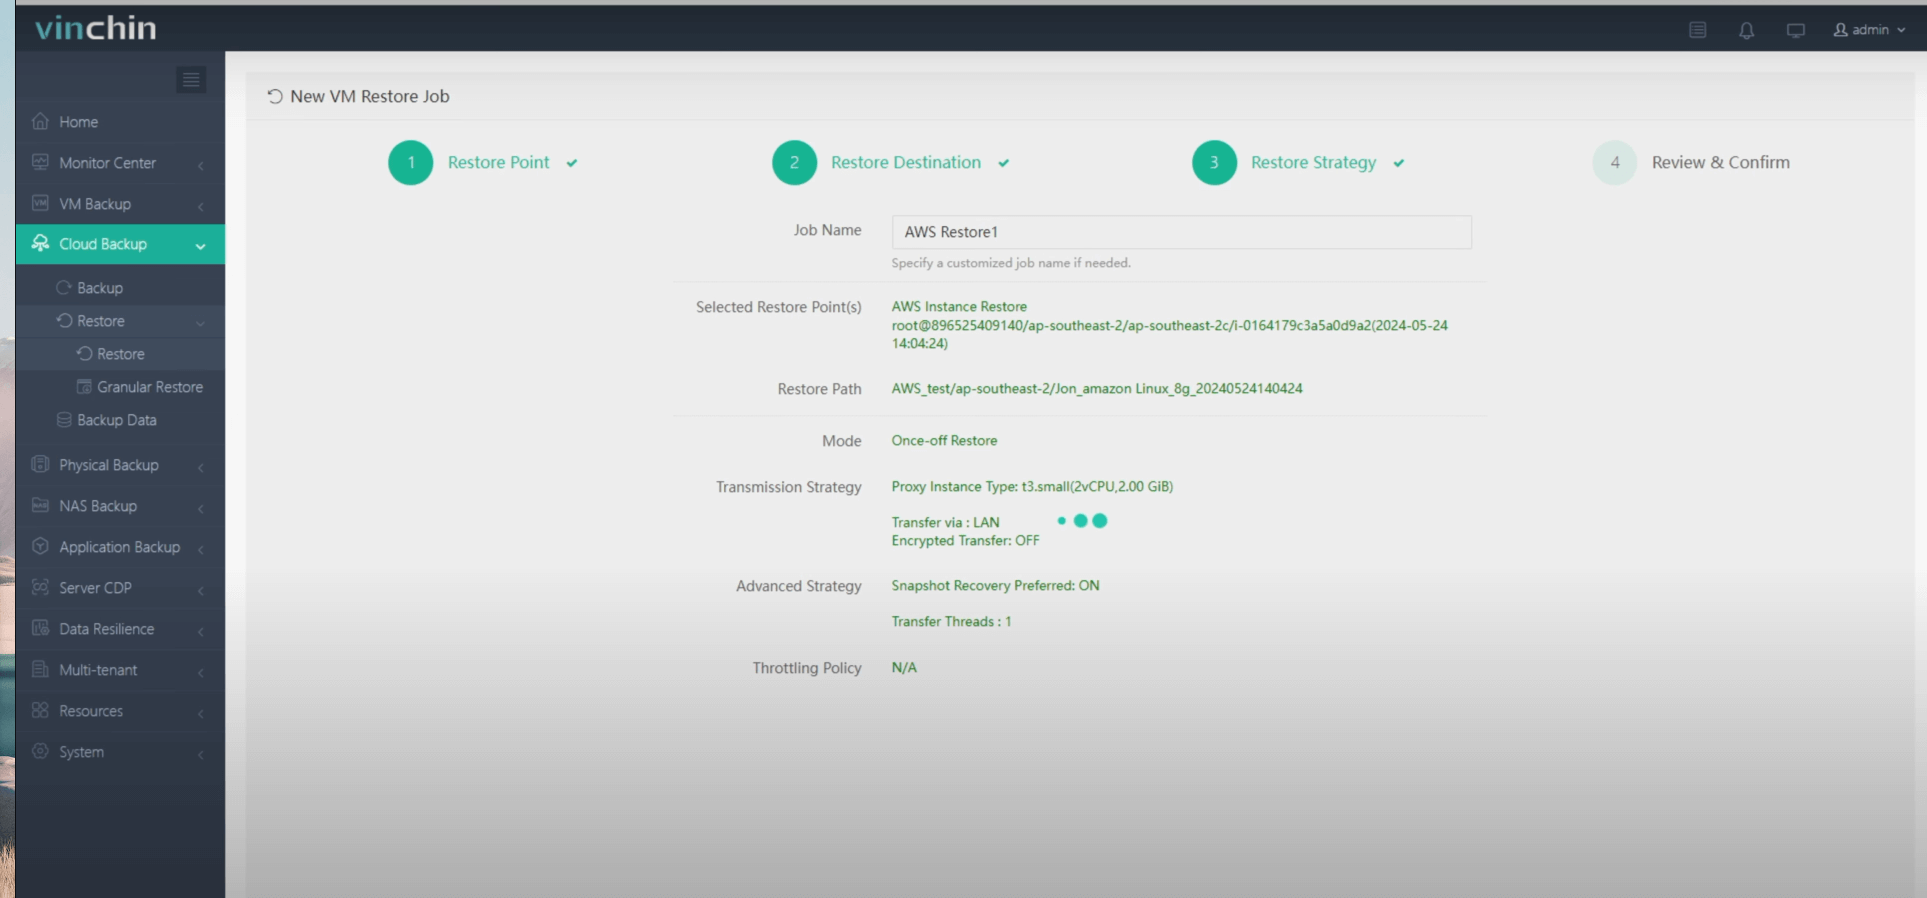
Once the job is created, you’ll be redirected to the job list page and the restore job will run now.
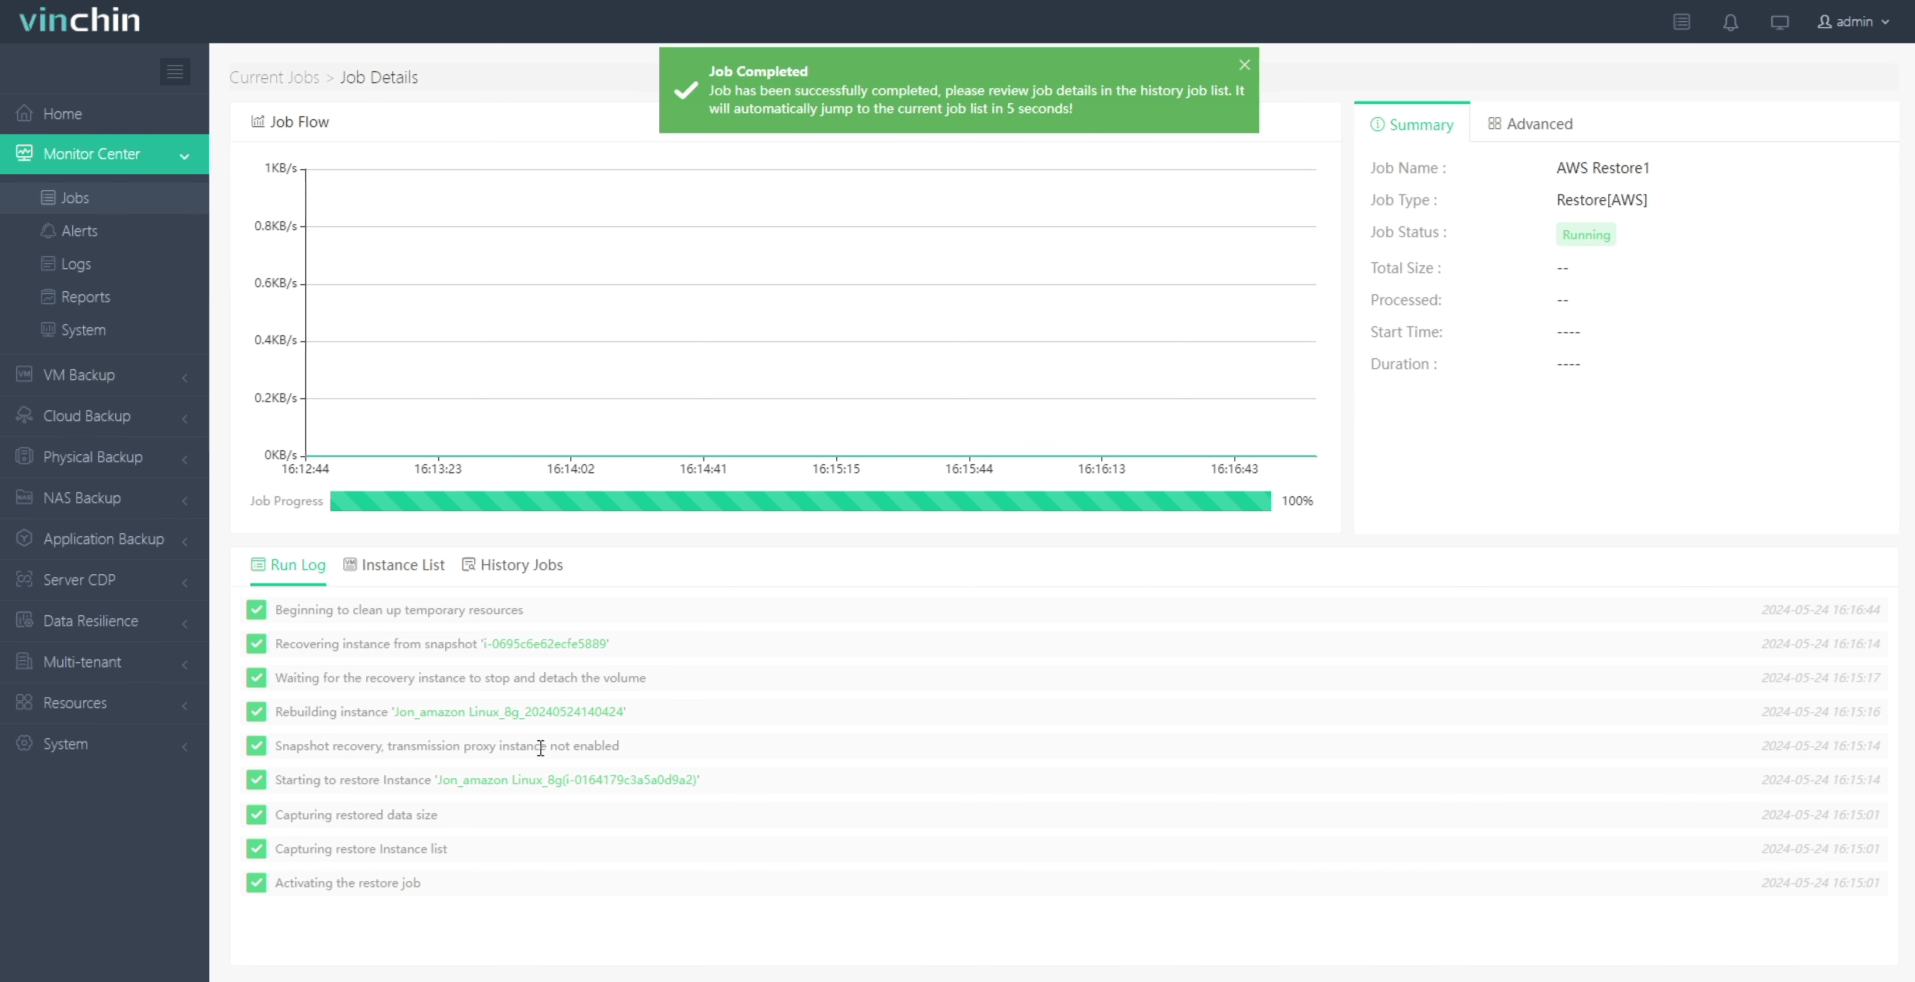
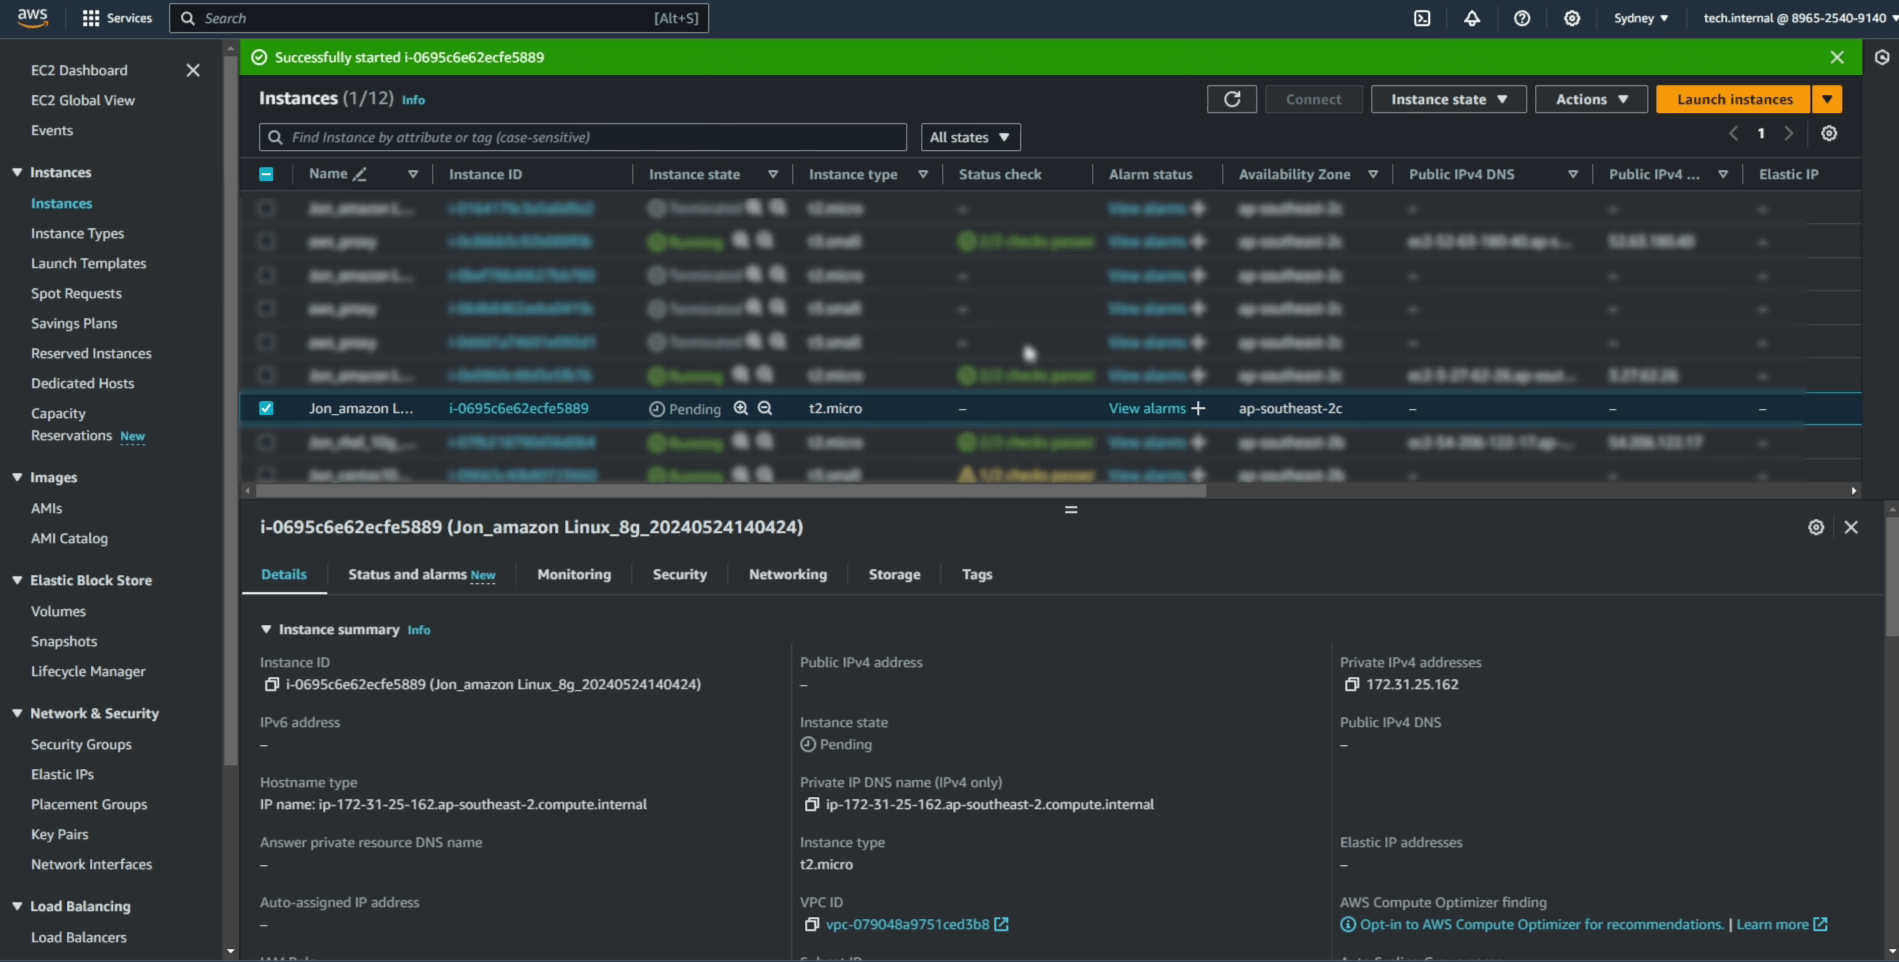
Here, you can see the instance has been successfully restored.
Vinchin offers a 60-day free trial for users to experience the functionality in a real-world environment. For more information, please contact Vinchin directly or contact our local partners. Get the journey started today!
Share on:


