-
1. Restore network card access
-
2. Connect via SSH and Check the data
-
3. Restore the storage
-
4. Restore VPS
-
Fully protect your XenServer environment
-
XenServer FAQs
-
Conclusion
XenServer is an enterprise-class, cloud-proven virtualization platform that delivers all of the critical features needed for any server and datacenter virtualization scenario. It is built on the powerful Xen Project hypervisor, which is an open-source type-1 or bare-metal hypervisor.
However, while using XenServer, you may encounter various issues, such as a data center power outage that results in the loss of the XenServer’s network card. After restoring the network connection, you might face the problem of all virtual machines (VPS) being lost. This article documents the data recovery process for such situations, and hope it can be helpful to you.
1. Restore network card access
Connect to the KVM, and you will need to install the Java environment.
Use the following command to search for the network card. If you can’t find it, you may need to contact the data center staff.
xe pif-scan
After finding the network card, you will also need to configure the IP and other information of your host machine. Test to ensure you can ping successfully, or if it’s a non-KVM, ensure you can connect via SSH. Once that’s done, you can proceed with SSH operations.
2. Connect via SSH and Check the data
Once the network card has been successfully activated and you can connect remotely via SSH, you can exit KVM to avoid any lag.
After connecting with XenCenter, if you find that the SR and VPS are not displaying correctly, first check via SSH to see if the data is still there.
Start by listing the volumes:
pvscan
PV /dev/sda3   VG VG_XenStorage-c9aa6b53-8d71-6fc0-8148-2b28cf9bf57b   lvm2 [1.81 TB / 1.26 TB free]
Total: 1 [1.81 TB] / in use: 1 [1.81 TB] / in no VG: 0 [0   ]
600GB has been used, it seems that the original data is still there.
3. Restore the storage
(1)Note down the UUID “c9aa6b53-8d71-6fc0-8148-2b28cf9bf57b” and create the storage with this UUID.
xe sr-introduce uuid=c9aa6b53-8d71-6fc0-8148-2b28cf9bf57b type=lvm name-label=”Local storage” content-type=user
(2)Find the SCSI ID of the data storage device or partition for the SR:
ls -l /dev/disk/by-id/
total 0
lrwxrwxrwx 1 root root  9 Nov 22 14:31 scsi-SAdaptec_bootos_A46A2A2C -> ../../sda
lrwxrwxrwx 1 root root 10 Nov 22 14:31 scsi-SAdaptec_bootos_A46A2A2C-part1 -> ../../sda1
lrwxrwxrwx 1 root root 10 Nov 22 14:31 scsi-SAdaptec_bootos_A46A2A2C-part2 -> ../../sda2
lrwxrwxrwx 1 root root 10 Nov 22 14:31 scsi-SAdaptec_bootos_A46A2A2C-part3 -> ../../sda3
(3)List the server's UUID:
xe host-list
uuid ( RO)                : dbe8e2d9-817d-429a-be77-235a7e58d234
name-label ( RW): xenserver-mdqhgghe
name-description ( RW): Default install of XenServer
(4)Detect the PDB UUID by the SCSI ID, host ID, SR UUID:
xe pbd-create sr-uuid=c9aa6b53-8d71-6fc0-8148-2b28cf9bf57b device-config:device=/dev/disk/by-id/scsi-SAdaptec_bootos_A46A2A2C-part3 host-uuid=dbe8e2d9-817d-429a-be77-235a7e58d234
(5)Get the PBD uuid:
0d65a15e-75a0-dc81-8bb5-79df3e6d96db
(6)Restore this storage:
xe pbd-plug uuid=0d65a15e-75a0-dc81-8bb5-79df3e6d96db
(7)Here we also create an ISO drive, which will be used to install the system later:
mkdir -p /iso_storage
xe sr-create name-label=iso_storage type=iso device-config:location=/iso_storage device-config:legacy_mode=true content-type=iso
(8) Restart the XAPI:
service xapi restart
Or restart the Xen tools interface:
xe-toolstack-restart
4. Restore VPS
Now, we can view the storage through XenCenter. In the storage, you can see all the VHD of your previous VPS. If you're unlucky, you might see that there are no identifiable numbers.
There are three methods to deal with this:
Method 1. Create a new VPS yourself, and mount each hard disk back one by one to retrieve the data. This method takes a long time, especially if you have many VPS; it could take several days. Plus, if you provide VPS services, you will need to contact your customers to recover their corresponding data.
Method 2. If you have a backup of the state.db file, you can use this document to find out the hard disk UUID of each VPS. Although it's very time-consuming, at least it can speed up the recovery process.
Method 3. There’s another recovery method that uses the hard disk UUIDs recorded in the xensystem for each VPS. By using this method, the recovery time is short. In tests, it took only 15 minutes to fully recover 17 VPS.
(1) Restore VPS with state.db file
Let’s go into detail about Method 2.
For example, I want to find the UUIDs of two hard disks for VPS2747, which were originally named: Disk2474s and Disk2474c.
First, open the state.db document and search for "Disk2474s". Look for "vdi-uuid" where there will be a string of numbers and letters like "c077b15c-091c-4eb3-b8e3-44d7e0da2e3f". This string is the UUID we need. Use the command to find the hard disk "Disk2474s":
xe vdi-param-set uuid=c077b15c-091c-4eb3-b8e3-44d7e0da2e3f name-label=Disk2474s
Follow the same steps to find the UUID for "Disk2474c" and reset its name with the command:
xe vdi-param-set uuid=f119187c-6ab2-4017-a3f1-e87f6b8b322e name-label=Disk2474c
After this, we will be able to see in XenCenter that the name of the disk is now displayed.
Repeat the steps above to complete the labeling of the virtual hard disks.
If you don't have the resources for the methods above, then you would have to manually label each hard disk and then proceed slowly as per Method 1.
(2) Restore VPS access
The next step is to restore VPS access. We will handle Windows Server 2003 and Linux systems separately.
For Windows Server 2003, the process is relatively simple. Create a new VM through XenCenter, select the system version, then delete the default disk and load our corresponding system hard drive directly. After that, you can start the machine.
For Linux systems, it can be more complicated. I tried to follow the method above for the 2003 system and encountered the following issue. When I tried to start the VPS I had created using the command:
xe vm-start uuid=79ffe4cb-06ee-211c-4a36-e3d89cf46dc7
It wouldn't boot and gave me an error message:
Error code: INVALID_SOURCE Error parameters: cdrom repo /dev/xvda,
At this point, I created several XenSystem templates and installed a Linux system through the XenSystem backend. After I replaced its disk, it was able to boot.
But if we had directly created our Linux system using XenCenter or command line from the start, we might not have encountered the `Error code: INVALID_SOURCE Error parameters: cdrom repo /dev/xvda`.
Afterward, I opened a bunch of Linux system VPS in the backend and replaced their disks with our previous disks. Then, I adjusted the users' financial parameters, IP display, and other details. With that, everything was completed.
Fully protect your XenServer environment
Such recovery processes can be complex and may require additional troubleshooting depending on the specific circumstances and configurations. It is always recommended to have a robust backup and disaster recovery plan in place to minimize the risk of data loss and to facilitate recovery in such events.
Vinchin Backup & Recovery is a robust backup and disaster recovery solution that supports multiple virtualization platforms, including XenServer/Citrix Hypervisor, VMware, Hyper-V, Red Hat Virtualization, Proxmox, and others, offering agentless, incremental, and full VM backups. It enhances data protection with features like deduplication, compression, V2V migration, instant VM restore, granular file-level recovery, encryption and ransomware protection.
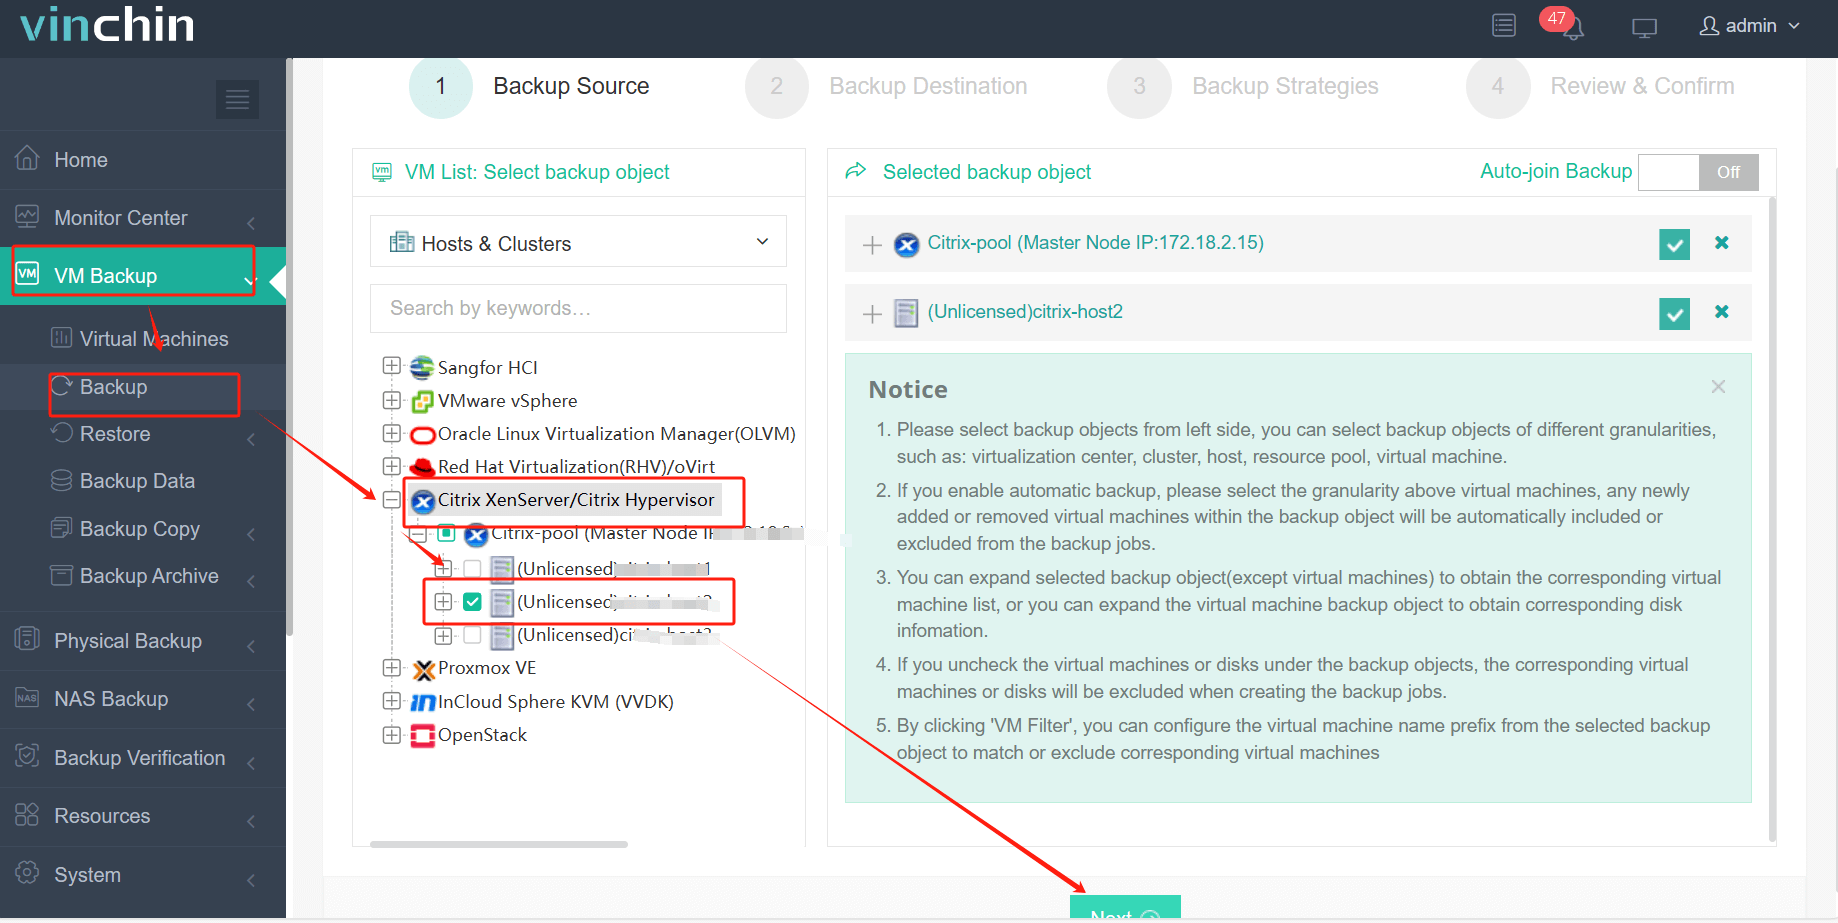
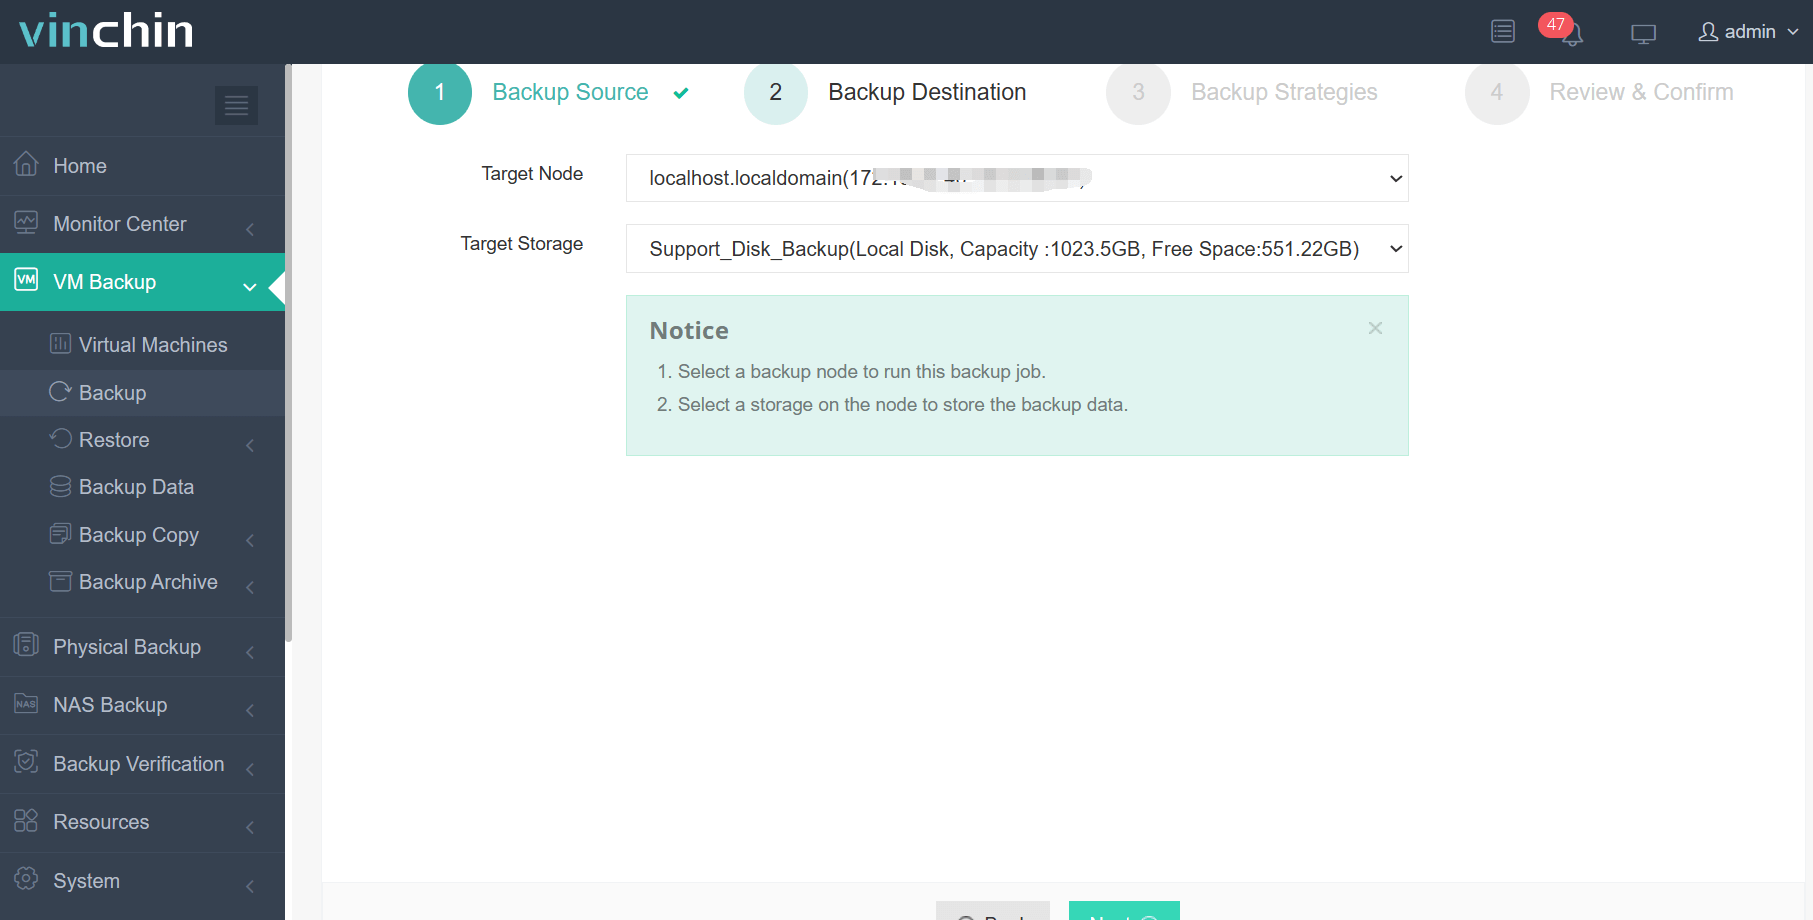
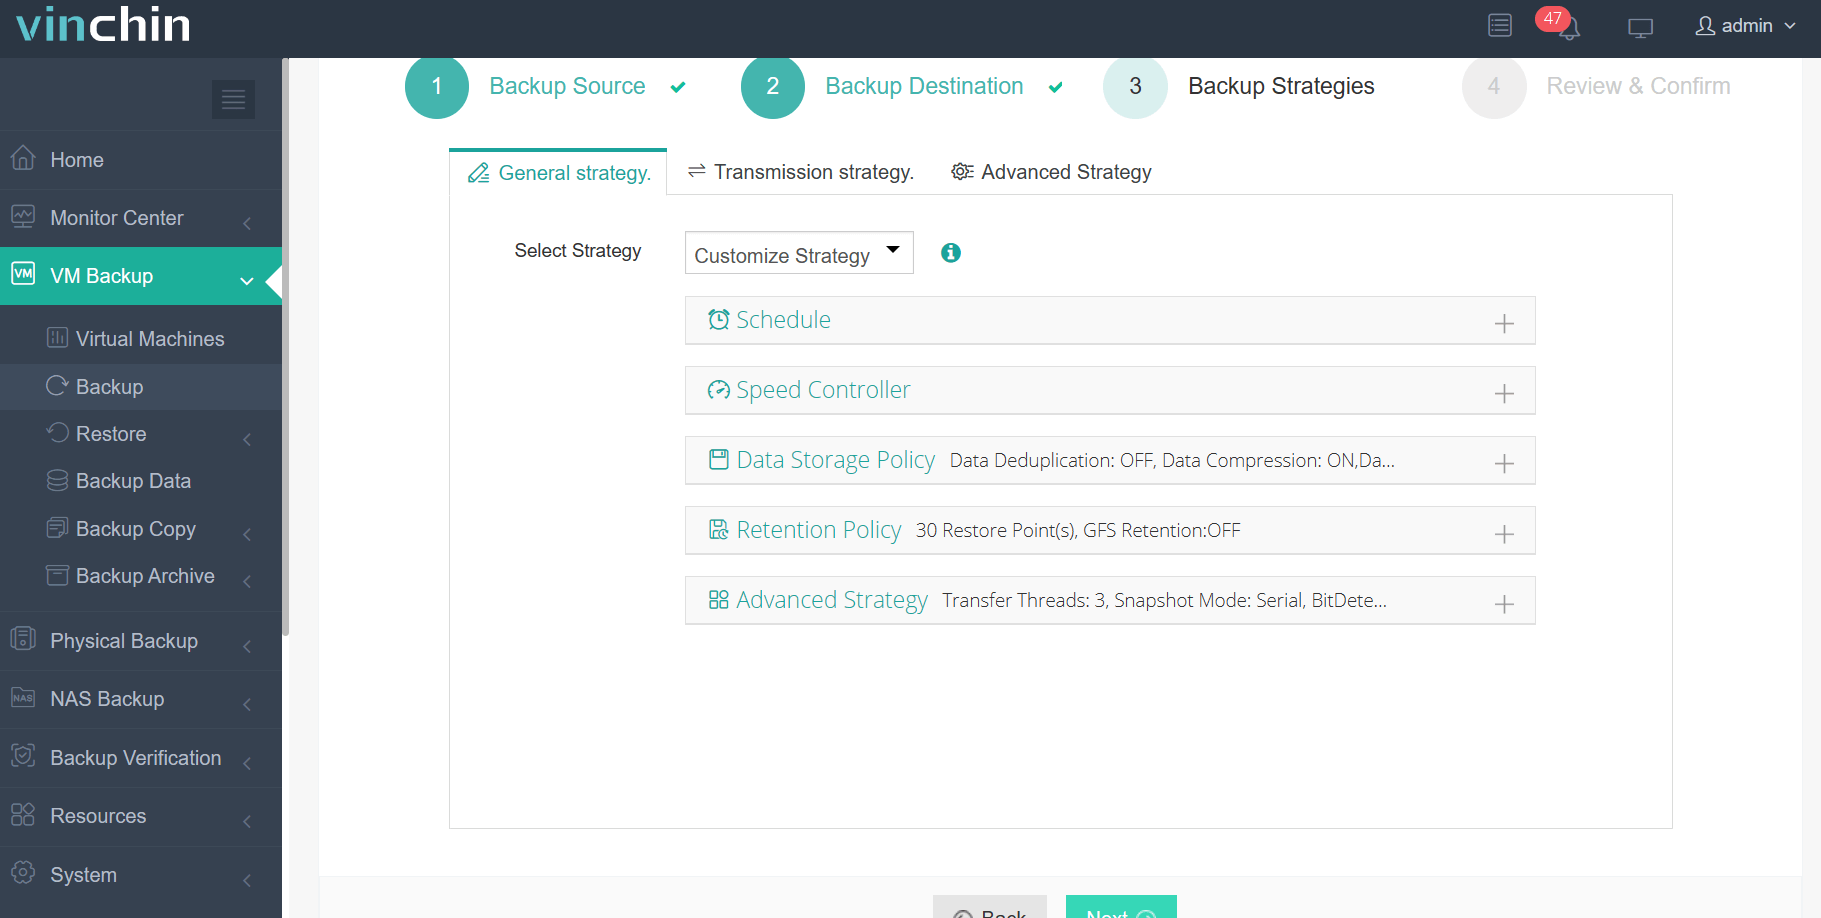
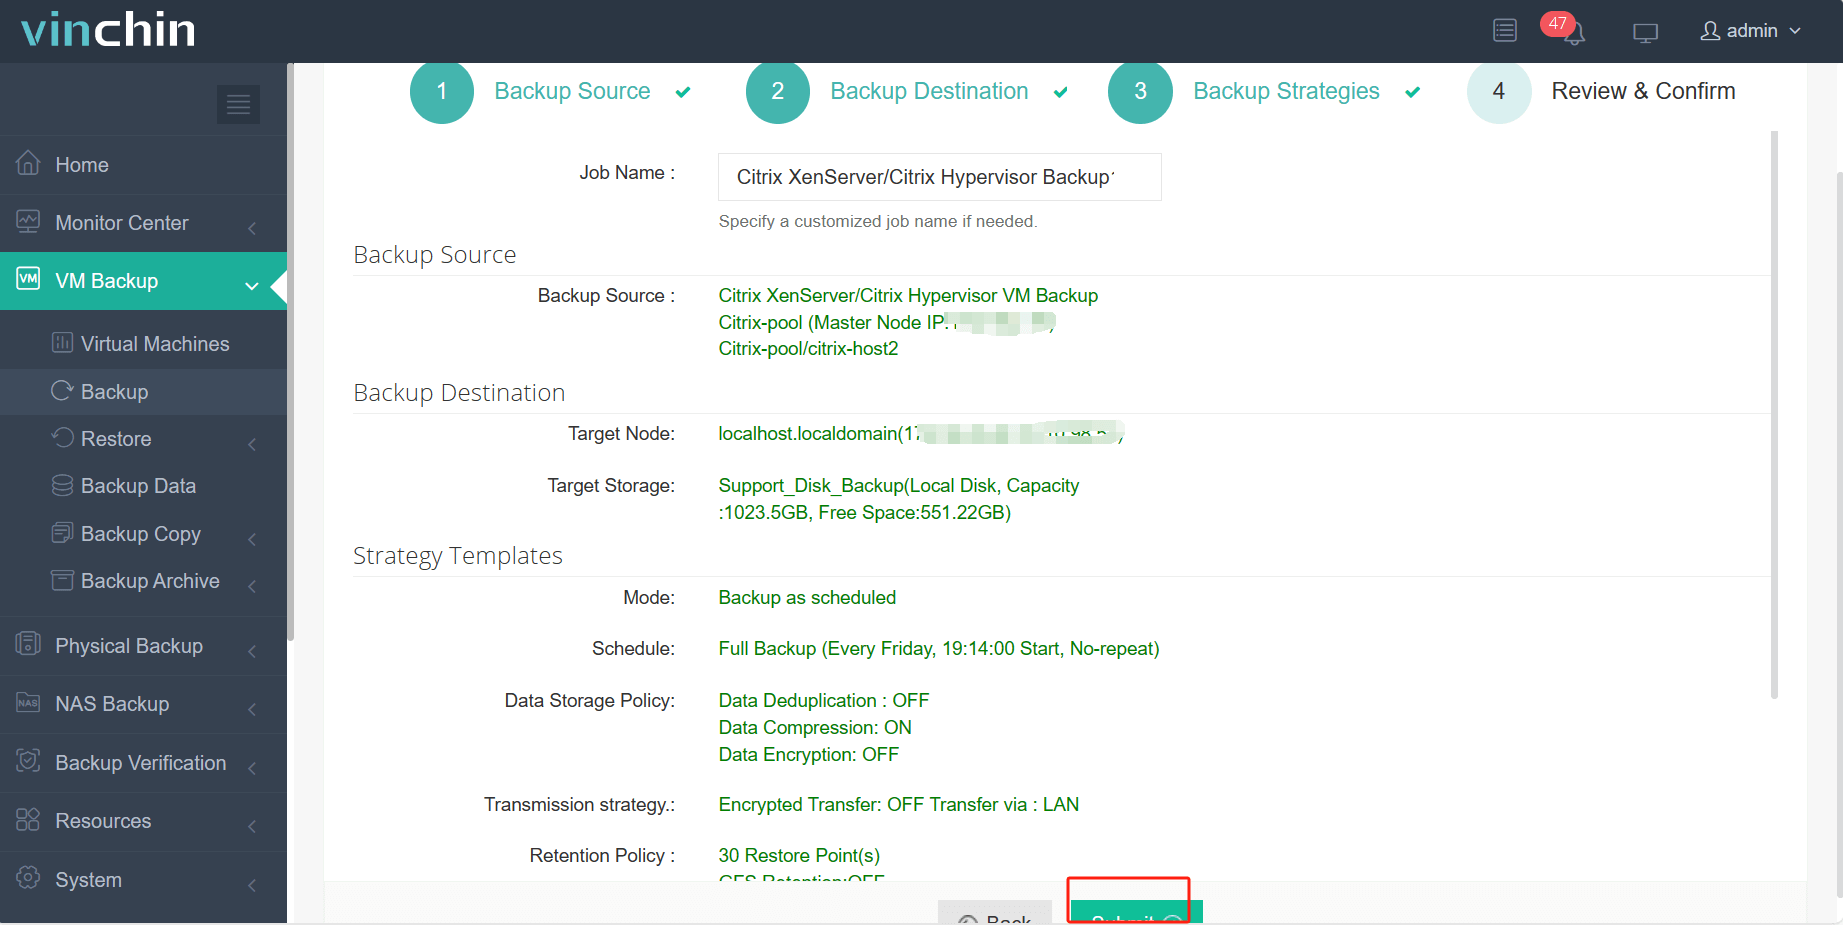
The centralized web console facilitates easy setup and management of backup jobs, scheduling, and monitoring, while also enabling robust disaster recovery. To backup XenServer VMs, just following these 4 steps:
1. Select the backup object.
2. Select backup destination.
3. Selecting backup strategies.
4. Review and submit the job.
Vinchin Backup & Recovery has been selected by thousands of companies and you can also start to use this powerful system with a 60-day full-featured trial! Also, contact us and leave your needs, and then you will receive a solution according to your IT environment.
XenServer FAQs
1. Q: How can I check the status of the network interfaces on a XenServer host?
A: You can use the xe pif-list command to list physical interfaces and their properties or xl network-list to view network interfaces from the Xen command line.
2. Q: What happens to the virtual machines if their NICs are not recovered after an outage?
A: Virtual machines will lose network connectivity, which can affect their operation depending on their role. You may need to manually reconnect the virtual network interfaces once the NIC is recovered.
Conclusion
Recovering from a data center power outage that results in the loss of network card access on XenServer can be a complex and time-consuming process. However, by following a systematic approach, it is possible to restore both the network card access and the virtual machines that were seemingly lost.
Also, don’t forget to backup your critical data with Vinchin Backup & Recovery!
Share on:


